
Processing
Likes
Comments
Share


@AsNoriu
Follow
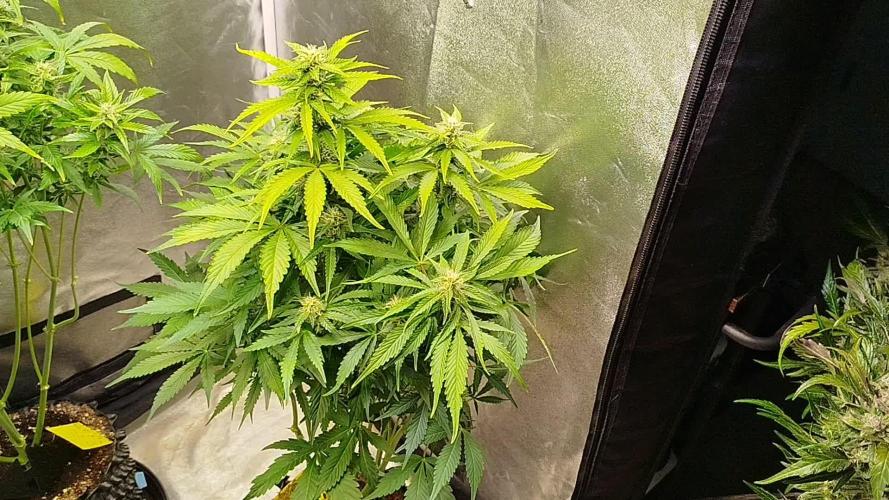
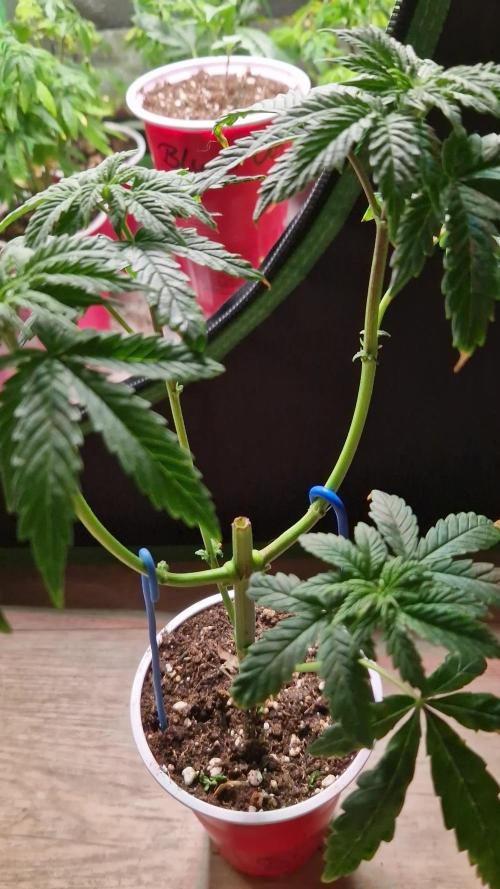
Day 141 of life and 56 of flower. This girl had hard times and i think to make it even harder.
From now on i will raise my ph to 7.0 for rest of her life. Hope to keep her for two more weeks and stab her on the last day before 3 night sleep and chop later.
She has a bit amber, hope i still have time , i keep an eye on her every day.
Thats all plans left, want to split stemp and put wood stick in that wound.
I know it would be smarter to make with next diary and compare with unmade, but ... I want to try this out , first date will be short, later i will increase time to a week before chop if it works like i think and many people tell..
Happy growing !
Day 142. All is good !
Day 145. Girl is fine, green fading slowly. But ..
She is skunk, she stinks like skunk, while smoke you feel it a lot plus a small aftertaste, maybe its strawberries, but cant tell for now.
Anyway - i like her, just her real genetic name is a mystery a bit ;)
While she was flowering, on week 3 you could smell strawberries, but now i am lost in that taste ...
Bag seed, you never know what it will be ...
Watered today still with 6.5, thinking to give her last two waterings and chop her next thursday or so ...


Likes
10
Share


@BR1CK_SANCHEZ
Follow
The girls are doin pretty good this week. Finished off L.S.T. earlier in the week. Applied first re-amendment of nutes, not including the compost tea from last week. Turned the light almost all the way up. Hoping to flatten out the canopy with a trellis net. There doesn't seem to be deficiencies on the new growth, and they're going full steam ahead so I'm happy about that.

Processing
Likes
34
Share


@Ashbash
Follow
Still no major problems so im very happy. Theyre all continuing to fatten up and i took the first microscope shots this week and they look amazing. much more dense than any of my previous.
Gorilla is behind still, guess i got a slow phenotype but its still moving along at its own pace.
Starting to see amber on the others so i reckon its right at the start of the possible harvest window. I have taken off a couple of small low down popcorn buds to see how they are. I am just very impatient haha.
Hopefully it continues well for the next 2 weeks!
Likes
7
Share


@hanzSour
Follow
After a slow start, the lady has developed great.
Gelonede from Zamnesia grows small and bushy, can be trained and tied down very well.
After 42 days of rearing, it bloomed for 58 days. The sticky, dark green flowers smell of lemon ice tea.

Likes
9
Share


@DeepRootsGrowTrees
Follow
KICKASS AUTO by KANNABIA
Week #8 May 21st-28th
Week # Flower
This week she continues to fill in her where it counts her bud sites are getting thick and her trichomes are like sugar dust and she getting a nice little arouma about her. She's got evenly spaced bud sites that run down the stem she's in a AC INFINTY 3 gallon cloth pot feeding her nuts twice a week until run off then water every other day. Thank you for stopping by!! Stay Growing!!
Kannabia.com Kickass Auto

Likes
2
Share

@GreenEldritchGardens
Follow
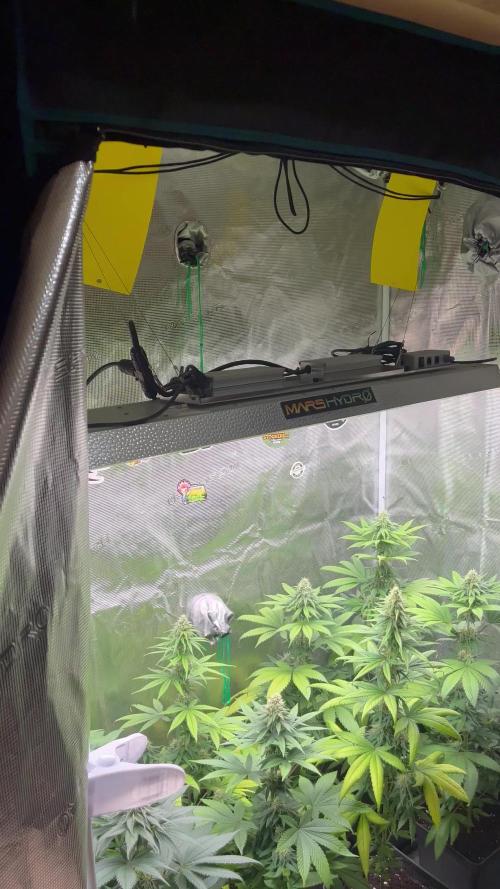
Very tight space for her in the tent right now, but she is going slowly well (since the beginning). A week or so more and she will have more space and will be defoliated more.


Likes
4
Share

@eldruida_lamota
Follow
Vamos familia, actualizamos la cuarta semana de floración de estas Terp & Tonic de Seedstockers.
La temperatura que estuvo entre los 24-26 grados y humedad dentro de los rangos correctos.
En cuanto a las plantas las veo verde claro, con carencias debido a viajes y dejadez mis, estiraron bien y ensancharon bastante también.
Se nota que los nutrientes de la marca Agrobeta hacen sus funciones.
Las flores empezaron a formarse, por el momento todo correcto, os dejé también alguna novedad y un cambio en la sala, el nuevo TSW2000, que dará que hablar estos proyectos.
- os dejo por aquí un CÓDIGO: Eldruida
Descuento para la tienda de MARS HYDRO.
https://www.mars-hydro.com
Hasta aquí todo, Buenos humos 💨💨💨

Likes
33
Share


@SAC87
Follow
Germ day 1: I started 7 Fast Buds seeds today. Dropped them directly in pure sunshine #4 mix with a pinch of mychorrizae around the seed. Gave them a thorough spray of Voodoo Juice and 6.5 ph water. I had great success with the last round of Fast Buds I ran and have seen some great here on GD. I can’t see why this would be any different.
Happy Growing 🌱
There’s a couple pics of a just for fun outdoor Fast Buds Amnesia Haze. It was made from an Amnesia Haze plant I grew past summer and was pollinated by agricultural Hemp. This one is pollinated as well, but a big beast nonetheless. Shows how big these Fast Buds plants can get. 👍🏻👍🏻
Aug 18: Bubblegum, skunk and Russian broke ground, should be standing tall today.
Aug 20: 100% success in germination.
Likes
3
Share

@grimm420
Follow
Damn, this plant is different from all the other FB autos I grew, smells nice, buds look like they will be stupid frosty. Gave it another bit of flower girl, and only r.o water for the rest of the grow!
Likes
18
Share


@berlinbeginner
Follow
Ladies doing fine.
Worm castings are magic. SD2 is getting greener. I topdressed all the plants with worm castings

Likes
7
Share


@HegauHillsFarmers_M11
Follow
Tag 49 - Beginn der 8 Woche.
Sie hat sich in der letzten Woche super entwickelt, wahrscheinlich war das Licht einfach bisschen zu nah dran.
Die Blüten entwickeln sich gut und produzieren eine dicke Eisschicht.
Allerdings bekommen die Blätter einen gelblichen Stich, was für mich noch etwas zu früh ist. Entweder könnte sie allgemein etwas mehr Nährstoffe gebrauchen oder es war etwas zu viel Calcium. Ich werde das die nächsten Tage beobachten und wohlmöglich den Dünger anpassen.
Beschnitten oder entlaubt wurde nichts mehr.
Gedüngt wurde an Tag 44 der letzten Woche.
Nährstofflösung:
1 ml/l - Sensi Cal-Mag Xtra Advanced Nutrients.
1 ml/l - Big Bud Advanced Nutrients
1 ml/l - Bud Candy Advanced Nutrients.
1 ml/l - B-52 Advanced Nutrients.
2 ml/l - pH Perfect Sensi Bloom Part A.
2 ml/l - pH Perfect Sensi Bloom Part B.
Likes
11
Share

@birdmountain
Follow
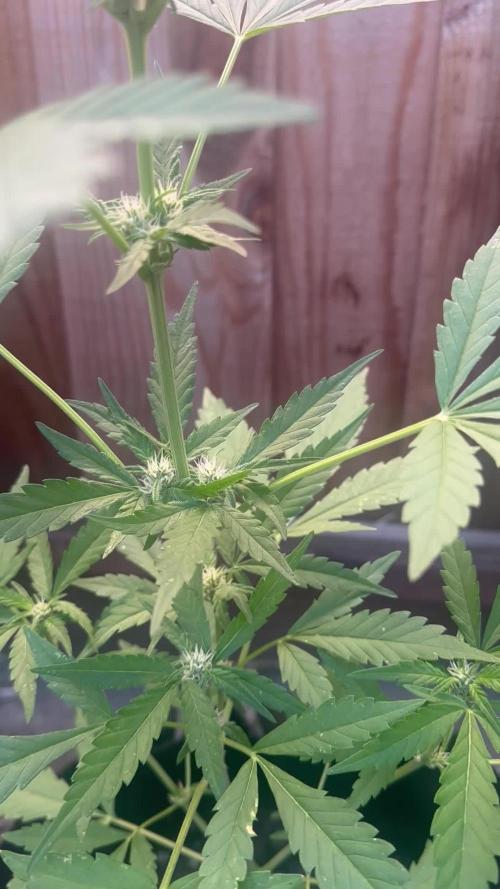
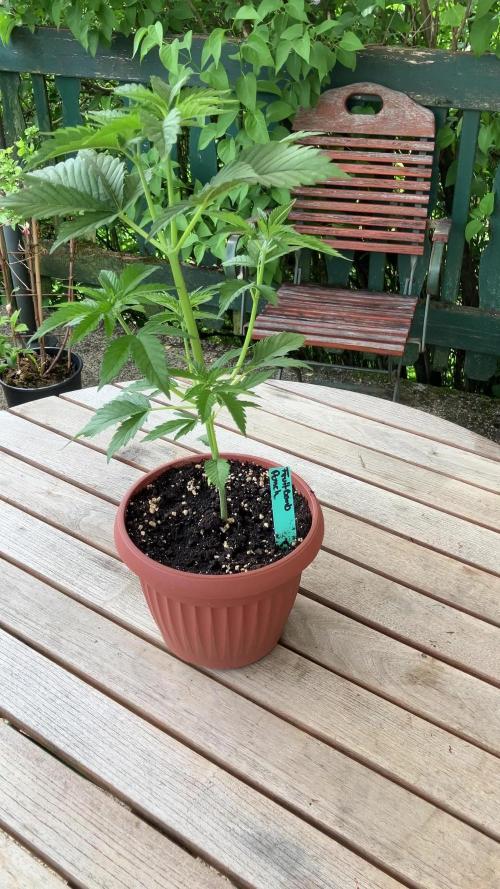
Sie entwickelt sich sehr gut. Vom Topping hat sie sich erholt und ist insgesamt kräftiger geworden. Kommende Woche nach den Eisheiligen wird sie noch einmal verpflanzt in ihren endgültigen Topf. Sie zeigt sehr breite, indicalastige Blätter, meist verändert sich das in der Blütezeit. Ansonsten ist sie gesund und zeigt keine Mangelerscheinungen, wird allerdings kommende Woche vor dem Umpflanzen mit einer Portiopn Vinasse und Seetang auf das Umpopfen vorbereitet werden.


Likes
13
Share


@tiasmaaa
Follow
so I think I overwatered a little bit at the beginning and it was super small pots. So at least they have good roots system so I transplanted into the final 8l pots.
I did the mix with the substrate with the Startrex, Mycotrex, and the Organic Tabs (1.5 tabs per plant for me). And I watered with a little bit of orgatrex and bactrex after transplanting.

Likes
125
Share


@Hydro_Hiebs
Follow
😈 Purple Devil Auto finished wonderfully. I chopped her down this morning. She is a beautiful site to see with her deep purple flowers and fat trichome heads. She's smelling sweet and citrusy. Definitely has that lemon smell going on kinda like my purple lemonade did back in the day. This plant right here is the reason why I love growing so much. There are so many colors, smells, shapes, tastes, the list goes on. It always keeps it exciting! I will update the harvest and smoke report as soon as she is done drying and curing 👊🏻😎💨
I'm very happy with the results from the Aircube active oxygen hydroponic system from Grow Ace. I emptied the reservoir every other week alternating from filtered tap water PH at 6.5 to a Mild kelp and molasses solution aka Trinity from Roots Organic. I mixed in Bio bloom from Greenhouse Feedings at the beginning of flower. The Bio bloom, Trinity, and Aircube together did all the work for me. I didn't do anything but change the reservoir out every other week! Super easy and highly effective hydroponic system here! 💦
If you want more information on my Aircube check out my link to there website where you can see more details! Save a little 💰 by using my discount code: HYDROHIGH5
👇
https://bit.ly/3ZspNEr

Likes
31
Share

@TrickzGrowz
Follow
Servus Moin!
Das Training scheint zu wirken. Es muss nur noch der eine Trieb aufholen und dann ist die Lady eigentlich bereit für die Blüte.
Likes
2
Share


@qindaloft_2
Follow
So insomnia won out N I finally got round to topping the plant to try a style of mainlining. Ive lolly-popped the bottom and left 3 nodes untill topping the main stalk. I then topped all lowers aswell. Lets see how she heals,as her stalk was hollow😫Fingers crossed N see how she bounces back with the CO2 from the Enhancer N Shogun Fretlisers.
Likes
14
Share


@SunshineBud
Follow
This week went fairly well, but I became concerned with some leaves appearing crispyfried along the edges and some looking deficient.
I finally started cutting my girls and I have to say, I felt ashamed at wounding my babes but hopefully it'll go the right way, guess we'll see!!!
I also flushed my plants with ph Balanced water this week and going to only provide this to water/feed them for another few days for fear of nutrient burn and simply following the feed schedule for my nutrients.
Also, I took some pics for the Christmas contest for Crop King Seeds lol hope you like them more than my Paw did!
I want to send a big shout out to my Dad who is giving me advice based upon his UNCA Biology BS experiences... Thanks Paw!!!
I also want to say thank you for all the likes and interest in my grow, much love yall! See you next week!!!
What follows below is the transcribed daily notes from the images above!
12/9 Plants looking good, I fed/watered w/Sunday's Ph 6.2 6tsp/ga Big Bloom & 3 tsp ga Grow Big. Next time I'll flush. I don't know if my runoff ph is bad or good because the plants are eating leaving acidic runoff
12/10 Plant 1 looks so Good, might be time for LST soon
12/11 Plants all showing Improvement/Growth Plant 3 still slowest but she's still growing. Under grow lights I think I see fringe yellow tips. Still on track to flush w/Plain H2o next watering.
12/12 Flushing w/ PH Balanced H2O no noots. Plant 1 has a leaf turning yellow on half so went with ph balanced water w/no nuets to flush all. 3 Growing ok but still a little off looking
12/13 Moved inlet vent to point up and clip on fan to blow on girls. Plants look great after a day of plain H2O.
12/14 Plant one having a small bit of leaf burn on widest leaves and a weird dying on lower leaf. They looked bad under light so I pruned em. Turned up humidifier to 65% been running low.
12/15 Topped Plant 2 Rinsed all w/PH Balanced H2O. Nervous I took too much from #2 But my thinking was I went easy on 1 yesterday so go aggressive on 2 to view effects.
12/16 Trimmed 2 crispy leaves off Plant 1 used Bonsai paste to cover wounds, Plant 2 stem looks narrow@ base wider up top. Trimmed 2 sucker leaves (1st leaves) from Plant 4 Rinsed all w/ PH Balanced H2O
Thats it! Thanks yall, see ya next week!
