
Likes
Comments
Share


@GERGrowDesigns
Follow
Welcome to Flower week 3 of Zamnesia Kalini Asia
I'm excited to share my grow journey with you from my
Zamnesia Project . It's going to be an incredible ride, full of learning, growing, and connecting with fellow growers from all around the world!
For this Project , I’ve chosen the Feminized Photo Strain Kalini Asia :
Here’s what I’m working with:
• 🌱 Tent: 120x60x80
• 🧑🌾 Breeder Company: Zamnesia
• 💧 Humidity Range: 50
• ⏳ Flowering Time: 7-8weeks
• Strain Info: 22%THC
• 🌡️ Temperature: 26
• 🍵 Pot Size: 16
• Nutrient Brand: Narcos
• ⚡ Lights : 600W x 2
I would truly appreciate every bit of feedback, help, questions, or discussions – and of course, your likes and interactions mean the world to me as I try to stand out in this exciting competition!
Let’s grow together – and don’t forget to stop by again to see the latest updates!
Happy growing!
Stay lifted and stay curious!
Peace & Buds!

Likes
2
Share


@frostynuggs
Follow
smellls amazing an its got a great taste i will be defitanly do it agin

Likes
2
Share


@Bluemels
Follow
Tag 63: Die Green Gelato entwickelt sich wie im Bilderbuch. Sie hat sich nicht zu sehr gestreckt. Ich muss wohl kaum was weg nehmen außer unten ein paar helle Blätter 😁
Tag 67: Hatte heute die Erleuchtung! Ich gieße ausschließlich mit Britta gefiltert Wasser, was wohl auch schon das ein oder andere Mal zu Kalzium und Magnesium Mangel geführt hat. Was sich aber erst bei Cookies Gelato (grow 32) so deutlich gezeigt hat. Ich stelle nun langsam auf Leitungswasser um.

Likes
7
Share


@GrowInBavaria
Follow
16.12.2026-BT44-17.12.2026-BT45
Es wurde weiterhin nach Schema gegossen. Hier einmal die aktuellen Ein- und Ausgangswerte von pH und EC:
Zoap Rose:
Eingang pH/EC: 6,8 / 0,7
Ausgang pH/EC: 6,2 / 1,4
Apples & Oranges:
Eingang pH/EC: 6,7 / 1,0
Ausgang pH/EC: 6,1 / 2,1
Clementine Slush:
Eingang pH/EC: 6,9 / 0,7
Ausgang pH/EC: 6,1 / 1,6
Mir scheint es, als wäre vor allem Apples & Oranges aktuell sehr stark gesättigt. Die Trichome wirken bereits überwiegend milchig bis leicht bernsteinfarben, weshalb es gut möglich ist, dass diese Pflanze in naher Zukunft geerntet wird.
Zusätzlich darf ich demnächst die DryRocket testen, worauf ich mich sehr freue. Ein Teil der Ernte wird mit der DryRocket getrocknet, ein anderer Teil zum Vergleich mit DryFerm Bags.
Kurzinfos zur DryRocket:
DryRocket ist ein app-gesteuerter Trockner für Cannabis-Blüten, der speziell für Homegrower entwickelt wurde. Das Gerät regelt die Luftfeuchtigkeit automatisch auf Basis des VPD-Werts, wobei die vorhandene Umgebungstemperatur als Referenz dient. So wird eine gleichmäßige und schonende Trocknung ermöglicht, Temperaturschwankungen werden automatisch berücksichtigt und ein manuelles Nachjustieren ist nicht nötig. Dadurch bleiben mehr Aroma und Wirkstoffe erhalten, während das Risiko von Schimmel deutlich reduziert wird.
Der Trocknungsprozess läuft in einem geschlossenen System, dauert in der Regel etwa 8–12 Tage und fasst bis zu 1 kg frisches Pflanzenmaterial. Die Steuerung erfolgt bequem per Smartphone. Zusätzlich kommt ein spezielles Trocknungsgranulat („RocketFuel“) zur optimalen Feuchtigkeitsregulierung zum Einsatz. Für beste Ergebnisse sollte die Umgebungstemperatur im Growraum möglichst zwischen 15 und 22 °C liegen.
Für weitere Informationen könnt ihr gerne hier vorbeischauen:
👉 https://dryrocket.com/

Processing
Likes
17
Share


@UncleRemus
Follow
Nothing to report this week. Plants are growing on in the greenhouse as I wait for some extra supplies before setting them up inside. I hve to do this before they outgrow their pots but that still gives me a little while.
There is one Frankenstein seedling that seems to have no ‘center’ is the only way I can describe it really! I should probably pinch it out but I’m curious to see what will happen?! Anyone ever had this before? I have been growing a few years now and never saw this!


Likes
10
Share

@BIG-JAY-AL
Follow
DAY 1
Water 5x1L EC 0,0 PH 6,4
Visual:
Curling and burn has not worsened.
Still a bit Dark. Pistils starting to Brown.
Comment:
Gave her pure RO water today Only pH in it.
Will start giving CalMag from tomorrow and continue with that untill final 5-7 days.

Likes
27
Share


@D33jW
Follow
🚀 Let's fly to another weeK 🚀
🌸 Dozi ZoZi – Breed Bros 🌸
WE jump in to DAY85 / FLOWER 55 / WEEK 12
I just realized there's only a week left.
It will be ready exactly as the Breed Bros claims in 62 days.
Now just water to the end and I hope there will be a happy ending.
THX for watching and see you next week 👊

Likes
15
Share


@CanadianFillmore
Follow
While I was very happy with the grow at harvest time, I am a bit disappointed with only 190 grams total dry weight from these two plants. The buds are nice, dense and packed with tricomes, the smoke is smooth and the high is clear.

Likes
18
Share


@Zeno63
Follow
Der Grow ist nun durch , bin mit dem gesamten Verlauf sehr zufrieden. Es gab nie Probleme, alles lief nach Plan.
Es wurde kein großes Entlauben, noch Topping oder sonstiges gemacht, lediglich die großen Blätter wurden entfernt.
Gesamtgenommen , würde ich es wieder so machen, es war einfach ein ruhiger entspannter Grow.
Die Lampe von Greenception, der Dünger von Biotabs, und auch der Blumat, funktionierten super in einer Symbiose zusammen.
Auch wenn das Ergebnis nicht riesig ist, ist es wie in der Vorwoche bereits erwähnt für mich absolut in Ordnung. Da ich nicht viel benötige und es mehr ein Hobby ist .
Die gesamte Lichtleistung habe ich durch 3 geteilt, es sind schließlich 3 Pflanzen im Zelt, damit man ein korrektes Ergebnis erhält.
Ich danke für die Free Seeds @SuperSativaSeedsClub, und kann Sie bedenkenlos weiterempfehlen.
Rauch und Endergebnis werde ich selbstverständlich nachliefern.
Das Nassgewicht beträgt 145gramm
-------------------------------------------------------------------------------------------------------------------------------------------------------------------------------------------------
The grow is now finished, and I am very satisfied with the entire process. There were never any problems; everything went according to plan. No major defoliation, topping, or other interventions were done; only the large leaves were removed. Overall, I would do it the same way again, as it was simply a calm and relaxed grow.
The lamp from Greenception, the fertilizer from Biotabs, and the Blumat system worked perfectly together in symbiosis.
Even though the result isn't huge, as I mentioned last week, it's absolutely fine for me. I don't need much, and it's more of a hobby.
I divided the total light output by 3, as there are 3 plants in the tent, to get an accurate result.
I thank SuperSativaSeedsClub for the free seeds and can recommend them without hesitation. I will, of course, provide updates on the smoke and final results.
The wet weight is 145 grams.
Die letzte Woche lief ebenfalls alles glatt. Habe das Wasser runter gedreht, und die Pflanze von ihren Resten zehren lassen .
Bin sehr zufrieden, und bedanke mich bei SSSC für die gesponserten Samen.

Likes
10
Share


@Stanp
Follow
This week starts with smelly Blue Cheese Automatic. It’s growing great. Week 9
The Fruit spirit is getting bushier and looks healthy. Week 10
3G is growing slowly but surely. Looks great! Week 6th
Processing
Likes
1
Share


@Luv2Grow
Follow
Day 62 - Into week 9 and back from my little vacation and the wife did good with the girls while I was gone. The girls didn’t need water today but when she dries out, I will be giving her a feeding of nutes. I did a bit of defoliating today and some more leaf tucking. She’s grew up a ton since I left and the buds are looking gorgeous. She’s definitely putting out an awesome smell right now.
Day 63 - The end of week 9 and she’s coming along nicely. Just took her out to make sure she was good on water and to tuck some leaves again. She’ll be getting a feeding of nutes tomorrow.
Likes
Comments
Share


@eldruida_lamota
Follow
Que pasa familia, vamos con la tercera semana de vida de estas GG4 feminizadas de MSNL.
Vamos al lío ,se trasplantaron en macetas de 7 litros definitivamente.
El ph se controla en 6.0 , la temperatura la tenemos entre 24/20 grados y la humedad ronda el 50%.
El ciclo de crecimiento puse 16h de luz, el foco está al 50% de potencia.
De momento van creciendo a buen ritmo y tienen un buen color, estaban muy bien enraizadas al realizarle el trasplante se notaba la abundancia radicular.
- os dejo por aquí un CÓDIGO: Eldruida
Descuento para la tienda de MARS HYDRO.
https://www.mars-hydro.com
Hasta aquí todo, Buenos humos 💨💨💨


Likes
44
Share


@Aedaone
Follow
The temperatures, humidity, and watering volume(if measured) in grow conditions are all averaged for the week. The pH is soil pH. Any watering done by me is well water which is 7.6 pH and 50° F. Any listed nutrients are ml/gallon of soil.
Day 1 we had sunshine and clear skies until the afternoon. We had clouds roll in and about 4:00 P.M. a severe thunderstorm hit. There was high wind, heavy rain, and grape sized hail. Fortunately the hail lasted only a few minutes.
Day 2 we have clear skies and sunshine. The temperature is mid 70's.
Day 3 we had rain and thunderstorms through the previous night and into the morning. We had sunshine, clear skies, and temperatures in the upper 70's. That was followed by severe thunderstorms, rain, and a touch of hail from 4p.m. to 6p.m. These were topped and had thr bottom nodes removed.
Day 4 we had relief from the rain. Temperatures were in the mid to upper 70's and lots of sunshine. We have a few days of sunshine in the forecast 🙏
Day 5 we had lots of sunshine and clear skies. Highs in the upper 70's and 49% humidity. We needed the dryness. 🙏.
Day 6 we had clear skies and sunshine. Temperatures were in the mid to upper 70's.
Day 7 we had partly cloudy skies and temps in the middle 70's.
This week was a success. The plants doubled in height and thankfully didn't have any serious damage from the hail.

Likes
1
Share


@Bones_1986
Follow
Day 43
Lowered grow dose
Increased bloom & top max
Replaced rhino skin with big bud
buds are stacking nicely, pistils are exploding, and frost is coming in.
All 3 plants showing slight stress which I believe is from the strong 600w HPS light. Nothing of concern, however not a lot I can do as light is already as full height, however Will Increase air flow more upward.
Day 44
Frost has arrived. Bud sites really started to fill out now. Drinking 3L every 1.5 days. Last feed was no grow as wanna cut back on N, and a 50% feed of other nutrients to reduce nute burn. Very happy with progress so far.
Day 46
Increased bloom dose, and cut back on all other nutes. Very happy so far.
Likes
18
Share


@shawzy88
Follow
Final push and flush.
She just had a drink of Phd water and I expect one more on Wednesday before lights out Thursday and Friday.
She’s looking amazing!
(Wednesday)
Lights out! Harvest on Friday night


Likes
40
Share


@MadeInGermany
Follow
Info:
Unfortunately, I had to find out that my account is used for fake pages in social media.
I am only active here on growdiaries.
I am not on facebook instagram twitter etc All accounts except this one are fake.
Flowering day 29
since time change
to 12/12 h.
Hey guys :-)
Once again a nice week has passed in which the lady has developed super :-).
The buds start to grow and are now getting more pk.
This week it was poured 3 times with 1.2 l each (nutrients see table above).
Fresh osmosis water was filled in canisters for the next 2 weeks.
Everything was cleaned and the plant was checked for health :-).
I wish you a lot of fun with the update and stay healthy 👍
You can buy this Nutrients at :
https://greenbuzzliquids.com/en/shop/
With the discount code: Made_in_Germany you get a discount of 15% on all products from an order value of 100 euros.
You can buy this Strain at :
www.Zamnesia.com
Type:
Runtz
☝️🏼
Genetics:
Zkittlez x Gelato
👍
Vega lamp: 2 x Todogrow Led
Quantum Board 100 W
💡
Bloom Lamp : 2 x Todogrow Led
Cxb 3590 COB 3500 K 205 W
Soil :
Canna Coco Professional +
☝️🏼
Nutrients :
Green Buzz Liquids :
Organic Grow Liquid
Organic Bloom Liquid
Organic more PK
More Roots
Fast Buds
Humic Acid Plus
Growzyme Big Fruits
Clean Fruits
Cal / Mag
Organic Ph - Pulver
☝️🏼🌱
Water: Osmosis water mixed with normal water (24 hours stale that the chlorine evaporates) to 0.2 EC. Add Cal / Mag to 0.4 Ec Ph with Organic Ph - to 5.8
Likes
6
Share

@Brotanical
Follow
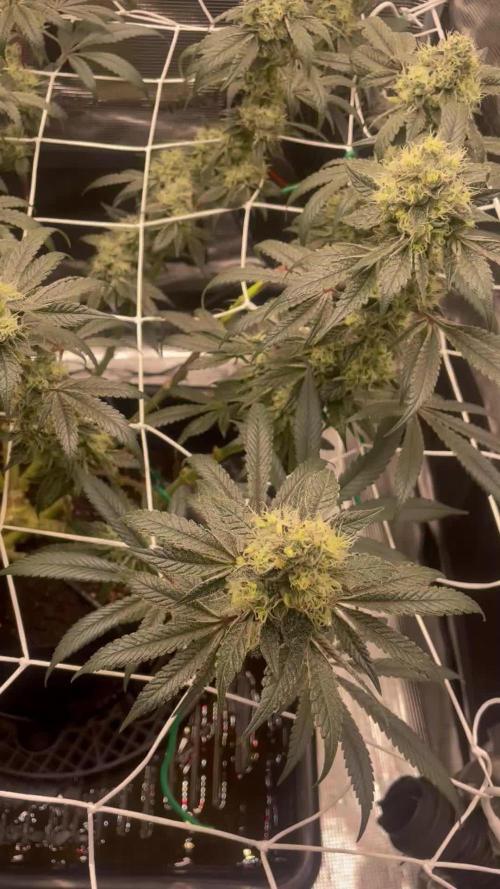
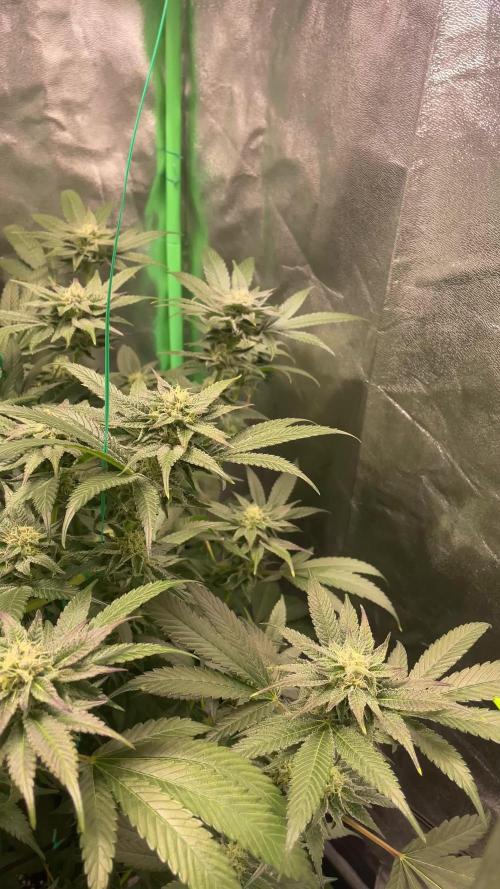
Starting Week 10, which marks the beginning of the 7th week of flowering. The buds are stacking nicely and the trichome production is ramping up. Tomorrow, I’m planning a defoliation to improve airflow and light penetration. I’ll also be tucking and organizing the canopy to keep everything tucked neatly within the 70x70 space.

Likes
5
Share


@DemonDabsSolventless
Follow
🚨🚨🚨🚨🚨
Week III
🚨🚨🚨🚨🚨
A WEEK OF A LOT OF PATIENCE, PLANTS STOPPED AND I TRIED TO MODIFY THE WIDE ASPECT OF LIGHT TO UNLOCK THEM, AS I HAD ALREADY SCHEDULED LET'S PULL ON TO 6 WEEKS OF VEGETATION AND WAIT FOR BETTER DEVELOPMENTS
📝📝📝📝📝
Notes
📝📝📝📝📝
CHANGE IN THE WATERING JOURNEY, LEAVING 1 WATERING DAY FOR 2 DRY WATERING FOR EVERY DAY NO, BEING 1 WATERING WITH NUTRIENTS AND ANOTHER WATER ONLY.
📝📝📝📝📝
Processing
Likes
4
Share


@Grow_of_Leisch
Follow
-Bagseed from Breeder (Friend)-
•Cherry Cream
Genetics:
•Ice Cream Man (mother)
x
•Cherry Wine (CBD) (father)
Ratio 1:1