


Likes
Comments
Share

@Lahuertacannabica
Follow
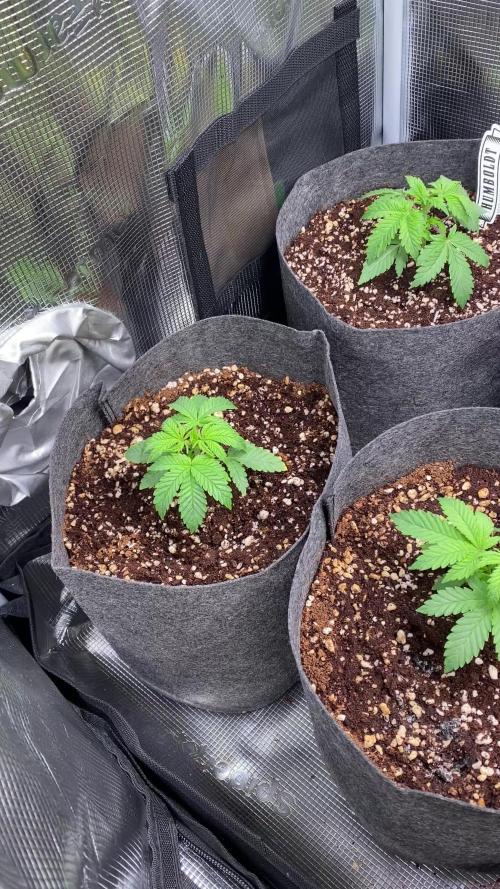
🌱 Semana 3 desde germinación – Ajustes clave.
Entramos en la semana 3 desde germinación y esta semana hemos hecho varios cambios importantes para empezar a empujar el crecimiento.
🔹 Riego y fertilización.
Esta semana hemos aumentado la cantidad de fertilizantes, subiendo la EC del riego hasta 0.8.
Además, hemos cambiado la estrategia de riego:
Riegos más cortos y continuos
Objetivo: subir la EC del suelo, que estaba bastante baja
📉 EC suelo inicio semana: 0.5
📈 EC suelo final semana 3: 1.2
Este control ha sido posible gracias al sensor 3-en-1 del kit GGS AC5 de Spider Farmer, que nos está facilitando muchísimo el ajuste fino del cultivo.
🔹 Próximos riegos.
A partir de ahora, en los siguientes riegos añadiremos Atazyme de Atami a la tabla, para mejorar la actividad radicular y ayudar a asimilar mejor los nutrientes.
🔹 Iluminación y clima.
Hemos subido la potencia del LED Spider Farmer SF2000 301H EVO al 75%, lo que ha provocado Un ligero aumento de la temperatura ambiente
Mejor intensidad lumínica para esta fase de crecimiento
Por ahora las plantas están respondiendo bien a los cambios, con un verde sano y crecimiento constante. Seguimos ajustando poco a poco, sin prisas pero sin pausas 💪🌿

Likes
54
Share


@MarsHydroLED
Follow
new grow started by @polasekplants 😁
This time there are blue dream, girl scout cookies, forbidden fruit, and white kush seeds started in a peat moss soil with about 60% already pop.
Mars hydro tsw2000 is set at 25% power and at 36in above the seedings.
Likes
92
Share


@DogDoctorOfficial
Follow
Week 4 Veg Report - TrolMaster Chronicles 🌱
What a week it’s been in the garden! We finally transplanted the Papaya Zoap into its final Autopot, and let me tell you, this plant is something special. Though her roots weren’t quite where I wanted them to be yet, the move was needed to help her catch up with the rest of the crew. She’s already looking fantastic in her new home, and I have no doubt she’s about to explode with growth in the coming days. Sometimes, you just have to trust the process, and I’m feeling like this is one of those moments. It’s almost as if the room itself is taking on a life of its own. 🌿
In fact, I’m starting to believe that what we’re building here is something greater than ourselves—there’s this energy in the room, a feeling of everything coming together perfectly. I can’t wait to see how this journey unfolds!
Dialing in the VPD with TrolMaster’s Tech
Now, let’s talk VPD (Vapor Pressure Deficit) and how I’ve been keeping everything in check with the Tend-X and the incredible (DSH-2U) Humidity Station. VPD is crucial to plant health—it’s all about finding that perfect balance between humidity and temperature to optimize transpiration and nutrient uptake. The (DSH-2U) Humidity Station, connected directly to my humidifier, has been an absolute game-changer in this regard. With its real-time data and automation, it allows me to monitor and adjust the RH with pinpoint accuracy.
Simple yet brilliant, the (DSH-2U) Humidity Station is keeping my room at the sweet spot I need. Whether I’m tweaking the settings from my phone while I’m out and about or just fine-tuning things while relaxing at home, this machine does it all. It’s like having an extra pair of hands in the grow room—and when you’re managing something as complex as VPD, that’s invaluable!
And yes, the TM+ Pro App—let’s not forget how awesome it is. I’m adjusting my grow room from the couch, the car, or even the bathroom 😜. I’ve said it before, but this app is making growing easier than ever.
Feeding the Girls: The Perfect Blend 🌱
We’ve upped the game by adding CaMg-Boost at 0.25 ml/L to the feeding schedule. Along with the 1 ml/L of the all-in-one liquid, this brings the TDS up to 320 ppm, with a pH of 5.99 and solution temperature of 24.8°C. In the soil, readings are around 415 ppm, with temperatures hovering around 25°C The plants are absolutely thriving, and I can already see the difference this new feed is making.
I can’t help but have a bit of fun with this process—it feels like I’m spoiling them with the best of the best. And they’re rewarding me with beautiful growth and vibrant green color. You know how it is, with the right care and attention, these plants are truly becoming a masterpiece in the making. 🌱
Shoutouts 💚
Big shoutout to TrolMaster and ThinkGrow LED for the phenomenal gear that’s making this grow smoother than ever. Also, massive thanks to Aptus Holland for their top-notch nutrition, and of course, to the community here on GrowDiaries—you guys keep the energy alive! 🌱
Last but definitely not least, shoutout to all the seed banks supporting this journey. You’ve been a huge part of this process, and I couldn’t do it without you!
Remember, for exclusive behind-the-scenes content and updates in real time, head over to my Instagram and YouTube channels @DogDoctorOfficial. We’ve got tons of epic content lined up, and you won’t want to miss it!
P.S.
Let’s talk about the new Model One LED Bars—these beauties are not only powerful but super efficient. I’ve been able to dim them down, save on electricity costs, and still maintain an incredible PAR and spectrum. It’s all about fine-tuning the balance of power and performance, and these lights make it easy to get the best results while being eco-friendly. Whether you’re running them full throttle or dialing it back, you’re still getting optimal growth conditions for your plants. That’s the kind of innovation that takes your grow to the next level. 💡
Growers Love to all 🌿💚


Likes
14
Share


@Rock_n_Roll_Randy
Follow
ALL THE PHOTOPERIODS ARE IN THE 8X8 NOW. DID SOME MAJOR DEFOLIATION BECAUSE THEY ARE TOO BIG NOW. THEY ARE SWITCHED TO FLOWER AND THE STRIVE NUTRIENTS IS INSANE.. BEST FERTILIZER PRODUCTS EVER MADE. I USED IT 4 TIMES IN 13 DAYS AT FULL STRENGTH AND THERE IS NO NUTRIENT BURN AT ALL AND THEY EXPLODED. AND I HAD A FEW THAT WERE TURNING YELLOW, I THOUGHT IT WAS ROOTBOUND OR CALMAG DEFICIENCY BUT THE STRIVE NUTRIENTS BROUGHT THEM BACK AND THEY ARE SUPER HEALTHY AGAIN....
ATTENTION GROWERS:::::: YOU MUST TRY STRIVE NUTRIENTS. BY FAR THE BEST FERTILIZER PRODUCTS EVER.. I PROMISE YOU THAT AND IF YOU USE IT YOU WILL NEVER USE ANYTHING ELSE
FOR EVERYTHING MARS HYDRO VISIT:
www.mars-hydro.com
www.marshydroled.ca
PROMO CODE: rocknroll
VISIT THE ALIEXPRESS STORE:
@marshydro_aliexpress
Instagram: @marshydropenny
https://youtube.com/channel/UChU5ZWwNi-DvnO3oWVU3ceA
(NEW) STRIVE NUTRIENTS 💪
Thanks for taking the time to read and check out my diary🤜🤛
FC-E6500 LED GROW LIGHT:
FC-E6500 grow light with 3978pcs OSRAM BridgeLux Diodes & Moso Driver, market-leading PPF 2.7 µmol/J, Max 2.5g yield/watt with 30% higher Average PPE, more cost-effective when compared to same style type lights. Only consumes 650W, perfectly cover 5x5ft (personal), 4x4ft (commercial) grow space. Innovative Precise Uniform Lighting-Built-in removable bars interval & dimmability enable the exact & dynamic PPFD control over each of the plant growing stages, FC-E6500 detachable bars deliverSuperior Heat Dissipation: Real Aluminum heatsink together with 6 slim profile passive cooled bars (THINNER & LARGER surface) and detachable Meanwell Driver, create less heat. save 50% hydro than other old grow lights! Driver can be mounted remotely on the side of a grow tent/rack or on an adjacent wall to remove heat from grow space. Full Spectrum UV IR LED: With Yield Max spectrum (660nm Osram enhanced Deep Red,2800k-5000k,730-740nm IR,380-410nm UV LEDs), Average PPFD the FC-E6500 LED grow lamp enables cultivators to produce BIG FAT Dense Buds, perfect for full-cycle hydroponic, soil, grow tent/grow room.
Dimmable Commercial Grow Light: Cost-efficient, easy dimming & daisy chain With a max up to 20 lights, IP65 Waterproof, master light easily controls the rest. Perfect for commercial & home horticulture.
FC4800 LED GROW LIGHT:
GET THE MAX FROM MARS👍: Welcome one of the newest members of the Mars Hydro family🤜🤛🤘. The Mars Hydro FC 4800 480W LED Grow Light can accommodate up to a 4' x 4' area for flowering. It has OVER 2000 LED chips consisting of the best selling Samsung LM301B diodes which has a Luminous Efficacy of: 220 lm/W
0.2 W, 3 V mid power,
Osram 660nm Diodes, Infrared light and UV LIGHT👍. It boasts the incredible efficiency of 2.8 µmol/J, maximum 2.5gram yield per watt with 30% higher Average PPFD. This High-intensity spectrum is beneficial for plants at all stages - from veg to bloom, and creates Big dense Buds👍. achieve 50% higher yields & quality compared with the old lights! Only consumes 480W for 4x4ft personal grows, and 3x3ft for commerical grow. It comes with a dimmer and daisy chain function with a maximum of up to 15 lights, the master light controls the rest👍. Wide 6-bar design offers even & wide canopy coverage and can maximizes your grow space. slim 180° FOLDABLE DESIGN... YES I SAID FOLDABLE🤘🤣 , making it compact and easy to install, it's IP65 WATERPROOF and will give you no worries while growing in a humid environment and makes it a flexible high performance commercial grow light for enormous SUPER FROSTY yields.😛😛😛. MARS GETS EM FROSTY BOYS👍
AWESOME HEAT DISSIPATION: The Low energy consumption FC4800 growing light has 6 passive-cooled bars and an aluminum heat-sink a removable driver you can upgrade later or have it outside your tent. with zero noise you can save up to 50% in your electricity bill compared to HID's or HPS lights!
It also has a removable driver so you can upgrade it in the future or have it outside your grow space for better heat control in your growroom👍
UPGRADED FULL SPECTRUM: Yield Max Spectrum with enhanced red (Top-Bin Samsung 3000k-5000knm, Osram 660nm Deep Red), speed up blooming & fruiting, perfectly suited for full-cycle growing. The FC4800 LED grow lamp was born for Big Buds, perfect for commercial, grow tent, grow room, hydroponics, and all soil grows.👍
THE BEST SAMSUNG DIODES: THE FC4800 has Top Bin genuine Samsung Osram Diodes, combined with remarkable 2.8 µmol/J Efficacy, 30% higher Average PPFD, 50% less energy consumption, to maximize your yields. They give you a TRUSTED 3 years warranty 100% Satisfactory guaranteed!!!
TSW2000 LED GROW LIGHT:
INCREASE YIELD AND CROP QUALITY WITH MARS HYDRO LED GROW LIGHTS: NEWEST SMD LED technology provides the highest PAR/LUMEN output (1122umol@18") and can make you get 30% higher yield compared to OLD blurple led lights. Max 2.5g yield per wattage and achieve maximum quality and quantity, much better than traditional HPS grow systems
LOW ENERGY CONSUMPTION LED GROW LIGHT: Consuming only 300W true output with 684 LEDS! It saves up to 50% energy than other led grow lights. Perfect for 3.5x3.5ft bloom stage, 4x4ft veg stage. Over 90% light energy can be absorbed by plants, it will have higher intensity in a MARS HYDRO grow tent with diamond design mylar, or by crossing over using multiple TSW2000
HIGH EFFICIENCY FULL SPECTRUM INDOOR GROW: 3000K 5000K and IR 660nm 760nm RED, makes it close to natural light, highly engineered to provide improved growing performance for plants at all stages of growing, rapid plant response from seed to flower; Uniform and wide-beam light distribution for your plant's optimal growth
8x8 1680D GROW TENT
The MARS HYDRO 8x8 Grow Tent interior is made of a unique diamond design mylar which is highly reflective. (Other companies mylar and reflective rate is as low as 50%, and it won't provide efficient light. They use thick 1680D oxford canvas, and being double stitched, it is tear proof and perfect for locking in the light. Their grow tent keeps 100% of the light inside the tent and helps your plants absorb more light. EXTRA-THICK material means No light leaks or rips at all.👍
Strong Stable metal corner adapters and poles are the trustful supporters of the tent. It's very sturdy, neither rusting or paint flaking off. quick and easy tool-free setup. They use heavy-duty metal zippers, with double layer black lining, by far the best on the market which creates a light-proof seal.
The Easy observation windows are made by double layers of cloth. Observe the growing conditions of your plants without opening the tent and avoid disturbing your plants. The observation windows also serves to dissipate heat and ventilate the air.
The tent includes 2 removable waterproof floor trays to hold soil and water. The removable tray can be taken out to wash easily.
They guarantee the grow tents are easy to install even if you've never done something like this before. Clear Instructions and no tools needed! They also offer 30-day unconditional refunds for quality problems. Just contact their friendly 24 hours customer service 👍
Processing
Likes
9
Share


@MG2009
Follow
04/03/2020
Day 28 of flowering first pistils are fading and tons of new pistils popping up everywhere! Whew!
Got a couple nice pics this week, getting a faint scent of tangie and berries Mmmm!
Leaves are getting pretty frosty
Likes
9
Share


@Lazuli
Follow
I think she needs 2 more weeks, she drinks slower and starts to fade on her own theres still nitrogen in the feeding
Likes
6
Share


@Growbody
Follow
Tag 88: Die Epsilon F1 Automatic von Royal Queen Seeds hat den besten Zeitpunkt zur Ernte erreicht. Blütetag in der Erntezeit. Das verspricht den höchsten Ölgehalt und damit die höchstmögliche Aromaausbeute. Die Buds sind klebrig und sehr hart. Ich versuche die Schöne langsam zu trocknen, ich schalte nur abends für ein paar Stunden den Venti an. Das Nassgewicht ist mit einer Küchenwaage gemessen und nur grob über den Daumen ernst zu nehmen. Schliesslich zählt das Trockene. 🥦 😀
Likes
3
Share

@DogDoctorOfficial
Follow
🚂 Cash Express – Pheno B
Week 5 | Every Plant Has Its Own Clock
Welcome back to another chapter of the 8×8 Adventure!
One of the things I love most about running multiple phenotypes side by side is that they constantly remind me that plants don’t read our schedules—they write their own.
This project follows several phenotypes from the same seed line, all grown under identical environmental conditions using the 12/12 From Seed method. Rather than deciding when flowering begins by changing the light cycle, every plant receives 12 hours of light from the day she germinates, allowing each individual to determine when she’s biologically ready to begin reproduction.
Cash Express Pheno B has reached that exciting milestone.
While she took a little longer than her sister to get there, this week she officially earned her place in Flower Week 1.
Different pace.
Same destination.
⸻
🌼 Welcome to Flower Week One
This week brought the first unmistakable signs that vegetative growth is now giving way to flowering.
Fresh white pistils are beginning to emerge from the developing tops, signalling that this beautiful lady has officially entered her reproductive stage.
Those tiny white hairs are the first building blocks of what will eventually become dense, resin-covered flowers.
Although the transition is still in its early days, it’s amazing how quickly the plant changes once she makes that decision.
Stretch has begun.
The internodes are opening slightly.
New growth is becoming more focused around future bud sites.
The adventure has truly entered a new chapter.
⸻
🌱 Hand Feeding Every Step of the Way
Unlike her sister, this phenotype is not growing on the AutoPot system.
She continues to be hand-fed, allowing me complete control over each irrigation and giving me the opportunity to monitor her response closely throughout this important transition.
Each watering becomes another chance to observe the plant, inspect leaf posture, evaluate the substrate, and adjust nutrition only when necessary.
It’s a slower approach than automation, but one that provides a very personal connection with the plant.
Sometimes it’s nice letting technology do the work.
Sometimes it’s equally rewarding getting your hands dirty.
This lady definitely belongs in the second category.
⸻
🍽️ Nutrition
This week’s feeding schedule included:
• Terra Grow – 1.8 ml/L
• Terra Bloom – 1.9 ml/L
• Pure Zym – 1 ml/L
• Sugar Royal – 1 ml/L
• Power Roots – 1 ml/L
• Power Buds – 1 ml/L
Alongside the standard pH adjustments using Lemon Kick and pH Plus when required.
As flowering begins, the nutrition program gradually shifts from supporting vegetative growth toward encouraging flower initiation while still providing enough nitrogen to support the ongoing stretch.
The balance during these first weeks is incredibly important.
Too much bloom nutrition too early can slow development.
Too little can delay flower formation.
This stage is all about finding that sweet spot.
⸻
🌡️ Room Conditions
The environment remained stable throughout the week.
• Day temperature averaged 31.1°C
• Night temperature settled around 25°C
• Relative humidity averaged 72%
• Nutrient solution remained close to 24.2°C
• Root zone stayed near 21°C
• Atmospheric CO₂ averaged 639 ppm
Humidity is intentionally kept a little higher during this early flowering transition.
At this stage the plants are still stretching rapidly, producing large amounts of fresh foliage and demanding plenty of water movement throughout the canopy.
As flowers continue developing over the coming weeks, humidity will gradually be reduced to create ideal conditions for dense, healthy bud formation.
⸻
📸 Studio Time
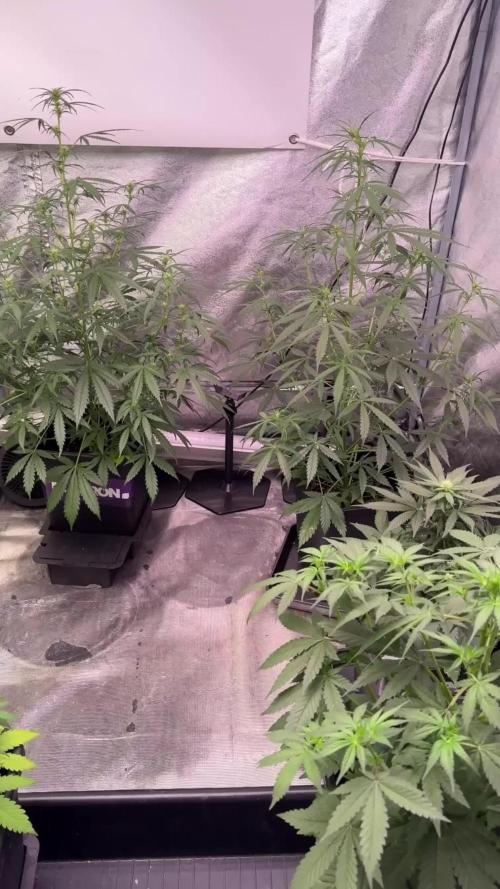
This week I decided to give Pheno B her own little modelling session.
The studio photographs from every angle—including bird’s-eye views, side profiles, and even under-canopy shots—allow us to document her architecture in detail before flowering really transforms her.
These photographs are much more than pretty pictures.
They’re a visual timeline.
Months from now we’ll be able to compare structure, node spacing, flower development and canopy evolution from the very beginning all the way to harvest.
It’s one of my favourite parts of keeping these diaries.
Every photograph captures a moment that will never exist again.
⸻
🔍 Looking Ahead
Next week should bring a noticeable acceleration in flower development.
I expect the pistils to multiply rapidly while the initial stretch continues, creating more defined bud sites throughout the canopy.
We’ll also continue monitoring her structure as flowering progresses, making only gentle adjustments if needed to maintain airflow and light penetration.
For now, patience is the best training technique.
Sometimes the hardest job a grower has…
…is simply allowing the plant to do what she already knows how to do.
⸻
💚 Thank You
A huge thank you to everyone following this journey.
Whether you’re here to learn, compare phenotypes, improve your own garden, or simply enjoy watching these ladies grow, I’m truly grateful that you’re part of this adventure.
Special thanks to:
💚 GrowDiaries for creating a place where growers from all over the world can share knowledge, successes and even mistakes.
Zamnesia for providing the genetics that make this phenotype hunt possible.
🌱 Plagron for the nutrition program supporting every stage of this grow.
💡 Future of Grow LED for delivering consistent, high-quality lighting throughout the entire flowering room.
🌿 TrolMaster for helping maintain a stable environment day and night.
And finally…
Thank you to every grower, follower, supporter, silent reader, critic, and friend who joins me on this journey. Your encouragement and conversations are what make these diaries so enjoyable to create.
I’ll see you all next week, where Cash Express Pheno B will continue settling into flower and, little by little, reveal the unique personality hidden inside her genetics.
Until then…
Growers Love and happy growing, everyone. 🌱🚂💚

Likes
9
Share


@stacksfarms
Follow
Trasplantamos de 3 a 5 litros de fibra de coco, instalamos el goteo Netadrip y pasamos a floracion


Likes
18
Share


@TitanRage420
Follow
Lots of new growth this week, plants are healthy and doing well, one is a female the others I can't see yet.. Did some more LST on the one plant...


Likes
12
Share


Likes
24
Share

@BunnyBud
Follow
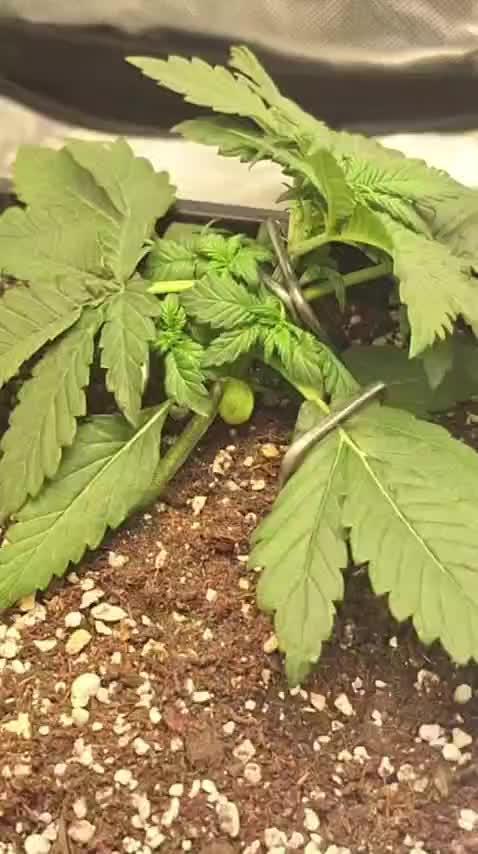
31 Aug. I start the third week of my autoflower. The plant is growing well, but I noticed small yellow spots on the leaf tips, which seem like a mild calcium deficiency. This is probably due to the fact that so far I have been giving water with a slightly low pH, around 6, while the ideal range would be 6.5–7.
At the beginning, to lower the ppm of the tap water (which was around 211 ppm), I mixed it with demineralized water. This brought the ppm down to about 109–140, making it harder for the plant to absorb the available calcium. Additionally, the soil I am using, Biobizz Light Mix, is lightly fertilized but does not contain enough calcium to correct this small initial deficiency.
For this week, I will not add any fertilizers. I simply want to raise the pH to 6.5 and use water with higher ppm, so the plant can better absorb the nutrients already present in the soil.
The lamp is positioned about 35–36 cm from the plant and so far there are no burn issues. Temperatures range between 25 and 30 °C depending on the day, while humidity in the room stays between 40–60%. The humidifier is always on because I keep the window open, but the dehumidifier is not being used, as it is not necessary at the moment.
I also have a new oscillating fan arriving to replace the current fixed one, and I’m waiting for a regulable extractor (90–145 m³/h), which will allow me to control the air perfectly during winter if needed.
This week my main goals are:
Increase the water ppm without overdoing it
Adjust the pH to 6.5
Keep observing the plant without adding any fertilizers
Everything else seems fine and growth is regular. With these corrections, I expect the new leaves to grow healthy and free of spots.
==UPDATE 31/08==
To control the calcium deficiency, I will administer an eggshell solution until I reach 300 ppm (I will boil some eggshells and administer the solution in tap water).
Likes
128
Share


@Tropicannibis_Todd
Follow
💩Holy Crap We Are Back At It And Loving It💩
Growmies we are at DAY 42 and she's just killing💀it👌
👉Added straws within the Tiny pot to help watering in week 4 👈
So I'm starting to see she needs watering every single day and now need nutrients 🙃
Lights being readjusted and chart updated .........👍rain water to be used entire growth👈
👉I used NutriNPK for nutrients for my grows and welcome anyone to give them a try .👈
👉 www.nutrinpk.com 👈
NutriNPK Cal MAG 14-0-14
NutriNPK Grow 28-14-14
NutriNPK Bloom 8-20-30
NutriNPK Bloom Booster 0-52-34
I GOT MULTIPLE DIARIES ON THE GO 😱 please check them out 😎
👉THANKS FOR TAKING THE TIME TO GO OVER MY DIARIES 👈
Likes
7
Share


@WeedleyScott
Follow
Ich habe die Lampe auf 80% Leistung gestellt und ende Woche zwei gegossen, die Pflanzen haben jetzt einen schönen schub gemacht und sind gut gewachsen. Die Blätter sind nun auch deutlich ausgeprägter.
Update Tag 5 (Week 3):
Ich habe die drei 10 Liter Stofftöpfe für die Pflanzen vorbereitet, dazu habe ich das Living Soil mit einer 10% Mischung angesetzt. Das Living Soil muss jetzt Dunkel und feucht bis zu 10 Tage stehen um sich um Topf gut zu verteilen.
Mischung:
6L BioBizz Light Mix
3L BioBizz CoCo Mix
1L Florganics
Paar Haferflocken
1.3 L Wasser
Zudem habe ich mir die Pfanzen angeschaut und diese getopped sowie kleine Blätter unten am Stiel entfernt und nur die großen Triebe stehen lassen und gegossen.

Likes
26
Share


@Targona
Follow
9/29/2022 - 49 days since my little girl sprouted from seeds🌱
The third week of flowering of my Bruce Lemon Diesel 🍋⛽🌻
Nutrients:
Jungle Indabox - I serve the same as last week
Advanced Nutrientiens - Bud Candy - carbohydrates for my plants 🍭🍭
Bud Stimulators 🌼🌼🌼:
Jungle Indabox Environ X
Advanced Nutrientiens - Big Bud remains unchanged
I no longer serve Bud Ignitor
ATAMI - ATA CALMAG - When growing under LED lights it is recommended to use Calmag and Atami is an excellent brand
Plants tolerate nutrients well, sometimes a small spot appears on the leaves, but this is not a nutrient burn
Training:
LST - Just a little training, I tied some twigs to the edge of the flower pot with string so that they don't shine on each other 🌞🌞
Defoliation: I mainly remove large leaves so they don't shade the flowers and I also cut off the lower leaves. The plant will thus have more power to put energy into the buds 🍃🌸🌸
General: The branches of the plant grow symmetrically, it has many blooms, the stems are strong and healthy, the leaves correspond to the age and stage of the plant, it responds well to nutrients 🌾🌾
Light: Really awesome Mars Hydro TS 1000 sponsor light 💡💡
Smell: The girls really smell, this one can smell sweetly sweet, slightly fruity, slightly diesel in the distance 🍇⛽🍬
Thank you for your opinions, smile and fun with my diary, you can follow me on Twitter 🐦: @ targona666
See you soon 😍
Likes
9
Share


@Kanabas
Follow
I love her <3 cant wait to harvest, i think i have to wait for 7 - 8 weeks more.
Likes
69
Share


@nonick123
Follow
Día 44 (15/07) Wow! No hay shock de trasplante! 😍💥😁
Todas las ramas se han estirado hacia arriba tras el ajuste de LST y se están formando nuevos nodos rápidamente
Esta combinación de nutrientes de Lurpe + substrato de PRO-MIX HP es una maravilla 😍
Día 45 (16/07) Ayer tuvimos ola de calor (37 ºC) y han aguantado muy bien!
A última hora de la tarde (cuando ya no había sol directo) les apliqué H2O en spray foliarmente para refrescar los estomas
Hoy parece que vuelven las temperaturas estándar para esta época del año: 29 - 30 ºC en las horas centrales del día
Riego con 1 litro de H20 pH 6,5
Día 46 (17/07) Pequeños ajustes de LST
Hay algunas ramas inferiores que no se han formado / estirado mucho
Lo más probable es que haga una buena limpieza este domingo, 7 días después del trasplante, para dejar solo los brotes por encima del 4º nudo
Día 47 (18/07) Riego con 0,5 litro de H20 pH 6,5
Este domingo (día 50) haré limpieza de partes bajas y tal vez también de nuevo topping en las 4-6 ramas principales 😁
Día 48 (19/07) Día de muchísimo calor con 37 ºC. A ver como lo llevan!
Riego con 0,5 litro de H20 pH 6,5
Día 49 (20/07) Para ayudarles a llevar mejor el calor de las horas centrales del día, coloca una malla de sombreo (70%) sobre el invernadero
Lo cierto es que se nota que baja mucho la temperatura debajo de la malla! Van a estar más fresquitas! 😍
Riego con 0,5 litro de H20 pH 6,5
Día 50 (21/07) Training session!
Hago limpieza del tercio inferior de la planta, de todas las ramas y nudos que no superan la línea del dosel marcada por el 4º nudo (1er topping)
También hago topping (2º) a todas las ramas principales
La idea es tener 12 ó 14 colas principales para que no se hagan muy altas
De paso saco unos cuantos clones de las ramas inferiores eliminadas 😁💥
Para superar el estrés, hago las siguientes aplicaciones y riego:
- Riego con 1 Litro de Té Vegetativo de Lurpe Solutions. Preparación: 24 horas con bomba de aire (oxigenación) con ingredientes:
Green Sunrise 8 ml/L + Insect Frass 16 ml/L + Hummus Lombriz 8 ml/L + Melaza 1 ml/L + Kelp Hidrolizado 0,25 g/L
- Aplicación foliar Kelp hidrolizado de Lurpe Solutions a 0,25 ml/l
💦Nutrients by Lurpe Solutions - www.lurpenaturalsolutions.com
🌱Substrate PRO-MIX HP BACILLUS + MYCORRHIZAE - www.pthorticulture.com/en/products/pro-mix-hp-biostimulant-plus-mycorrhizae


Likes
Comments
Share

@G_F_H_A
Follow
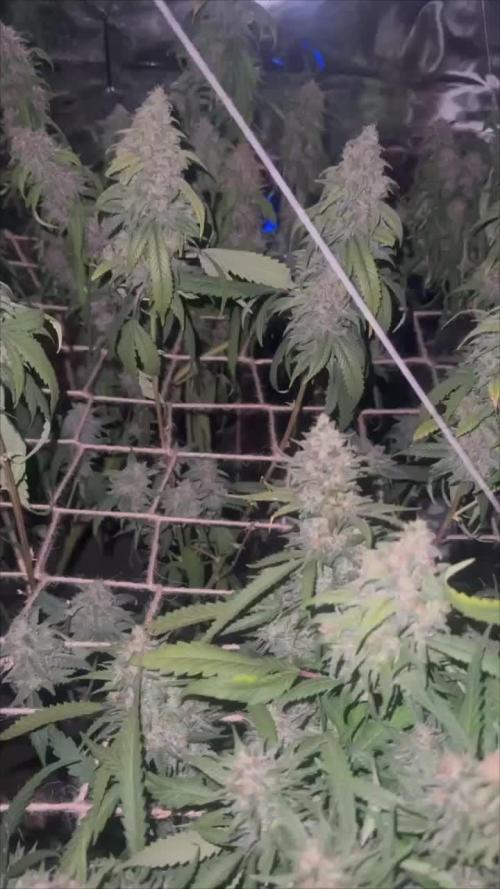
Они невообразимо красивие...
А запах неописуемо насыщенный, глубокий и острый