
Likes
Comments
Share


Likes
16
Share


@Marijuanaisland
Follow
Desculpe o atraso na atualização mais tive problemas para atualizar mais estou de volta ansioso para esta colheita

Likes
115
Share


@Coco4CocoPuffs
Follow
🍒 🍒 We are now 70 days from seed and we are 42 days in flower 🍒 🍒
Everything is going great 👍
so I've changed there feeding program now to there flower nutrients 👍
Ok 👍looks like it's full steam ahead 😋 There looking fire 🔥
🍒 🍒 🍒 🍒 🍒 🍒 🍒🍒 🍒 🍒 🍒 🍒 🍒 🍒🍒 🍒 🍒 🍒 🍒 🍒 🍒
Thanks for the support my friends 🙏

Likes
2
Share

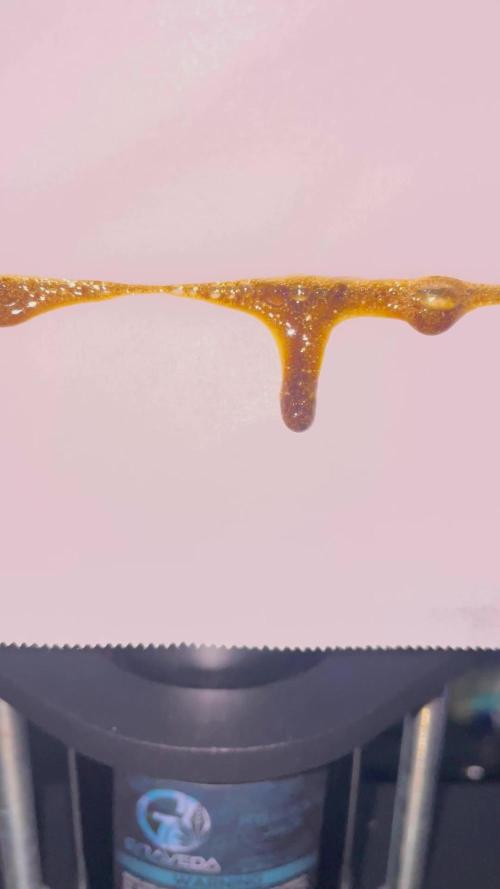
@Amboss
Follow
Only water
I gave her the last week only water
I decide that this girl would be for bubble hash

Likes
5
Share


@Zeaiache
Follow
En su Nuevo suelo y con los microbios ganaron vigorosidad, las hojas están frondosas, y sus tallos engordaron, la verdad siento que prometen mucho 😈

Likes
9
Share


@Smokey_J26
Follow
A nice bit of growth this week, one girl is shorter than the other 2, and slightly behind in terms of growth. Hoping to see a good spurt now with the first application of Evo 2.0 spray on day 25, abit more nutrients added and lights turned up to 400w. Onwards and upwards 🌱💯

Likes
1
Share


@Herbz_Unkraut
Follow
great strain! you can smell & taste the chocolope + you get the awesome yield from kosher kush incl. the great herbal scents of the kosher
be aware of the big stretch!


Likes
33
Share


@DWCbuds
Follow
Week 6 starting out with only red and white lights on. Noticed some heat stress on the top leaves so turned all the blue lights off (50%). I will try to get the lights higher if she keeps growing taller but it's noticeably cooler with just the blue lights off.
Day 44 - Strapped the lights to the very top of the tent. Should have set it up that way from the beginning 😅 All lights on now. Still 16/8.
Day 45 more defoliating
Week summary- she's growing quit well! Keeping nutrients around 250 ppm seems to be good at this stage. Feed her only once this week and just kept adding distilled water kept it at the level. Her growth showed a sign on the last day of slowing down(height). Hope to only flower from here on out.

Likes
15
Share

@Meisterwulle
Follow
Moin Leute,
hab vor paar Tagen mit der Ernte der beiden Pflanzen begonnen, war etwa 3 Stunden mit dem Trimmen der beiden Pflanzen beschäftigt. Von der Farbe sind keine großen Auffälligkeiten erkennbar, Standard orange, hell bis dunkelgrüne Buds dabei. Die Größe der Buds variiert von den beiden Pflanzen, die eine eher mit sehr langen aber eher dünneren Headbuds, die andere eher mit breiten und kürzeren Headbuds. Insgesamt kam jetzt circa 640g Nass auf die Waage zusammen (gewogen am darauffolgenden Tag), denke das wird schon eine ganz gute Ausbeute. Im Nachhinein hätte ich schon eine Woche früher ernten können: Die trichome sind schon an manchen Stellen sehr bernsteinfarben gewesen (siehe Bilder). Auch musste ich ein paar Stellen aufgrund von Schimmel wegschneiden (denke das lag daran, dass manche Triebe zu nah an der Zeltwand lagen und aufgrund des wechselhaften Klimas insgesamt). Insgesamt bin ich natürlich sehr zufrieden mit dem Grow, ich konnte einiges an Erfahrung sammeln und werde diese auch für weitere Grows nutzen.
Zurzeit trocknen die beiden im Zelt mit aufgehängtem Trockennetz bei etwa 23 grad und zwischen 55-60 RH. Denke in einer Woche werden diese schon bereit für die Gläser sein, und dann kann man schon mal ein wenig naschen ;)
Ich danke nochmals dem Sponsor Dutch Passion für die Gelegenheit, bei diesem Contest dabei gewesen zu sein. Ich bin mit dem Strain sehr zufrieden - es gab kaum Komplikationen, die Pflanzen waren relativ resistent und das Wachstum ziemlich schnell.
Ein endgültiges Review werde ich erst nach dem Tasting machen können (um ehrlich zu sein hatte ich mir schon vor ner Woche mal einen Trieb abgeknapst und schon probiert, ist aber natürlich nicht ganz repräsentativ für den Grow - war aber mega :P).
Weiter gehts für mich erst mal mit den zwei Stecklingen von den Pflanzen und der dritten Pflanze, die anfangs im Zelt war - diese ist draußen in die reveg gegangen und wird - nachdem die Pflanzen im Zelt trocken sind - zusammen mit den Stecklingen in die Blüte geschickt.
Auch möchte ich jedem nochmal danken der dieses Diary supported und mich auf diesem Weg unterstützt - ich bin sehr froh Teil dieser Community zu sein, der gegenseitige Austausch ist wirklich super und alle sind sehr freundlich :)
Ich wünsche euch ein schönes Wochenende und ich melde mich zum smoke review wieder.
LG Wulle 😻🏻.

Likes
36
Share


@SAC87
Follow
Day 84:
Well after flushing down to 50 ppm the Blue Dream is done. They’re sitting in the dark cool tent for a couple days. They smell so much. Intense blueberry, sweetness. They faded out quite nicely. Unfortunately the upper fans were ruined by lockout.
I will be happy to get these jarred up to keep the smell locked down. My carbon filter can’t keep up.
There will be more to come in the harvest entry.
Happy Growing 🌱
Likes
6
Share


@GoldenWeedGrower
Follow
Legend
Timestamp: 📅
EC - pH: ⚗️
Temp - Hum: 🌡️
Water: 🌊
Food: 🍗
pH Correction: 💧
Actions: 💼
Thoughts: 🧠
Events: 🚀
Media: 🎬
D: DAY, G: GERMINATION, V: VEGETATIVE, B: BLOOMING, R: RIPENING, D: DRYING, C: CURING
______________
📅 D36/V32 - 21/05/24
⚗️ EC: 1.0 pH: 6.0
🌡️ T: 20°C H: 70%
🌊
🍗
💧
💼 LST
🧠
🚀
🎬 1 TL in her new home and one TL of LST job
______________
📅 D37/V33 - 22/05/24
⚗️ EC: 1.0 pH: 5.4
🌡️ T: 20°C H: 70%
🌊
🍗
💧
💼 LST
🧠
🚀
🎬 1 TL video and one TL of LST job
______________
📅 D38/B01 - 23/05/24
⚗️ EC: 1.0 pH: 5.3
🌡️ T: 20°C H: 70%
🌊 2L
🍗
💧
💼
🧠 As I saw clear signs of blooming, I need to pass to bloom phase so I put B01, in the header.
🚀 Clearly she's starting flowering
🎬 1 TL video and 1 LST video
______________
📅 D39/B02 - 24/05/24
⚗️ EC: 1.1 pH: 5.3
🌡️ T: 20°C H: 70%
🌊
🍗
💧
💼
🧠
🚀
🎬 1 TL video and 1 LST video
______________
📅 D40/B03 - 25/05/24
⚗️ EC: 0.2 pH: 5.3
🌡️ T: 20°C H: 70%
🌊 15L
🍗
💧
💼 Flush for two days and then flowering nutes
🧠 I think no more LST, she's now full blooming
🚀
🎬 1 TL video
______________
📅 D41/B04 - 26/05/24
⚗️ EC: 0.2 pH: 5.3
🌡️ T: 20°C H: 70%
🌊
🍗
💧
💼 Flush for two days and then flowering nutes
🧠 I think no more LST, she's now full blooming
🚀
🎬 1 TL video
______________
📅 D42/B05- 27/05/24
⚗️ EC: 1.1 pH: 6
🌡️ T: 20°C H: 60%
🌊 15L
🍗 Calmag - Bloom A-B - Bud Candy - B52 - Big Bud - Seaweed
💧
💼 👉👉👉 Changed res and added nutes
🧠 I think no more LST, she's now full blooming
🚀
🎬 1 TL video


Likes
11
Share


@LACREME
Follow
Começando essa hydriponia, DWC, com o patrocínio da Fastbuds.
Escolhi a Blackberry pra hydro porque eu amo Kush e suas cruzas, fora que ainda fica roxa 💜
Usarei GHE o ciclo todo, e micorrizas.
Siga-me no Instagram:
@LACREME710


Likes
12
Share


@Gorrilla420
Follow
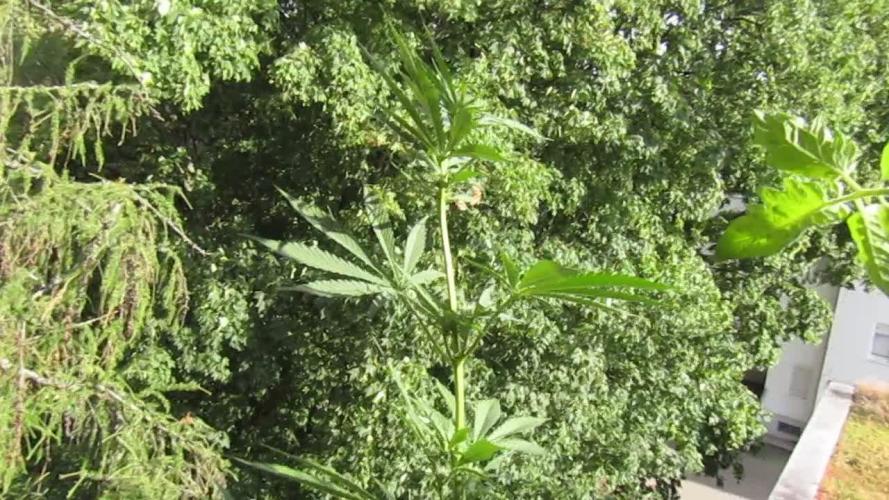
This was probably one of best looking plants I’ve done outdoor, grew really well in the new spot. Had a great main cola with many decent sized side branches. Didnt even do any training on this girl and produced plenty. Next year will do this again but peak summer and do some training on her.
What a great plant, especially in the uk weather she holded off nicely.
Big thanks to barneys farm for sending me these strains to try out.
That’s all, happy growing 🌱

Likes
Comments
Share


@Royalty420
Follow
This strain was amazing! Even though it was my first grow it was easy. This strain is great for people that have insomnia, who have a hard time eating, some one that has constant headaches/migraines, & for people with bad pain through out their body. This high will not only relax the body it definitely will relax your mind. First you will feel the high go straight to your mind were you feel like you’re literally on cloud 9, then bammmm! The rest of your body joins you on that cloud. You feel beyond relaxed and calming, then by the time you know it your mouth will begin to get a little cotton mouth & while you drink some juice to lightin up those taste buds, the high only gets better. Then about 45min to a hour you will be having some insane munchie issues. 😎 again thank you everyone for watching the grow up. 🌱🔥🙌🏾

Likes
19
Share


@Luv2Grow
Follow
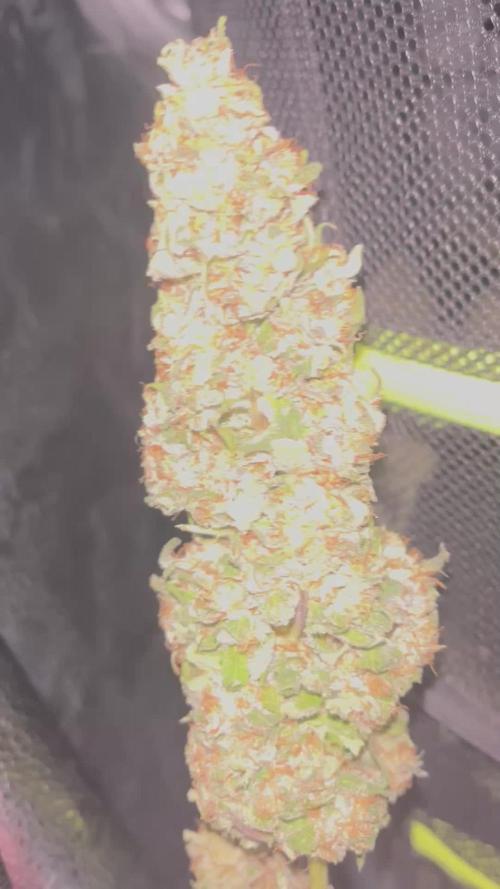
Day 43 - Starting week 7 and gave her the first feed of the week. She’s still stretching but she’s starting to fill in quite a bit too. Starting to have a pineappley scent to her as well.
Day 44 - For the most part, all looks pretty good. I did spot a couple leaves that look like there may be some sort of deficiency but trying to research and figure it out. It’s only on a couple leaves so not really spreading. Checked for any sort of bugs and nothing. Hopefully I can get it figured out and turned around.
Day 45 - Gave her a full feeding of straight pH’d water and upped the cal-mag a little to see if maybe I have the start of a magnesium deficiency. Got advice from someone on a different site so we’ll see if this is corrected. She’s really starting to fill in more and more each day. Not a very strong smell coming from her right now but my fingers smell amazing, pineapple/citrus after doing some leaf tucking and I love it. Just for shits and giggles, I did a test of the runoff and measuring out at 6.7, just like what’s going into her so thinking that’s a good thing. Looking forward to the next and final few weeks.
Day 46 - All looking good I think! Upped the cal-mag and bit and noticed one more leaf that was off. Everything else is looking green and healthy and the buds seem to be filling in and starting to fatten up nicely.
Day 47 - Gave her the last feeding of the week and she starting to really fill in and fatten up. Starting to get pretty frosty and smelling wonderful!
Day 49 - Good lord she’s starting to really smell amazing, tropical citrus. Can not wait to chop but still got some time. Will start the week 8 feeding schedule tomorrow, letting her really dry out.
Likes
44
Share


@Jd1971
Follow
Cut down wet weight 721 g :))))))
Bottom half to do in a week or two:)))) will up date all in harvested week
first weigh in 165 g :))))


Likes
30
Share

@DrGruen
Follow
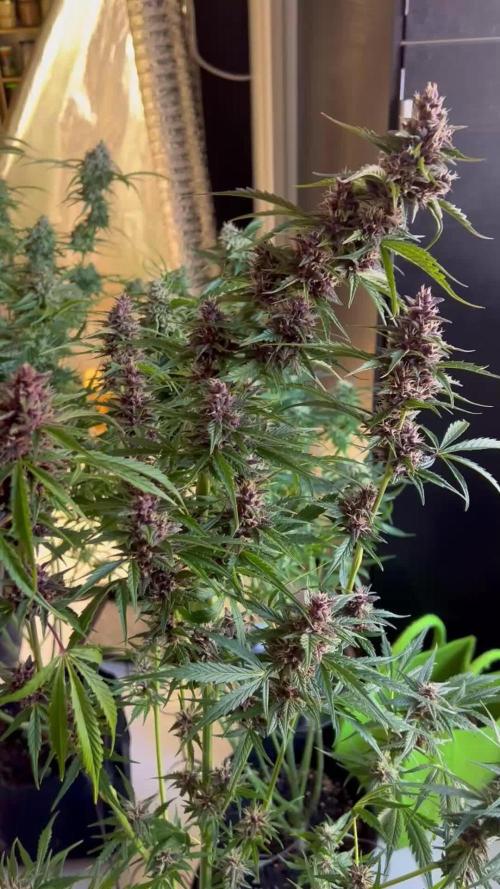
Diese Woche hatten wir mega Wetter und die beiden Ladies sind richtig abgegangen...😜
Eine der beiden hat diese Woche locker 50 cm zugelegt und der Stretch ist noch nicht zu Ende.....😗
Bin echt gespannt wie hoch sie werden ........😁
Die Blütenstände kann man jetzt schon deutlich erkennen und ich hoffe, das daraus richtig fette Buds werden......😎
Hoffentlich ist der Wettergott uns weiter hold und macht uns keinen Strich durch die Rechnung........😎