Likes
Comments
Share
@lasonda
Follow
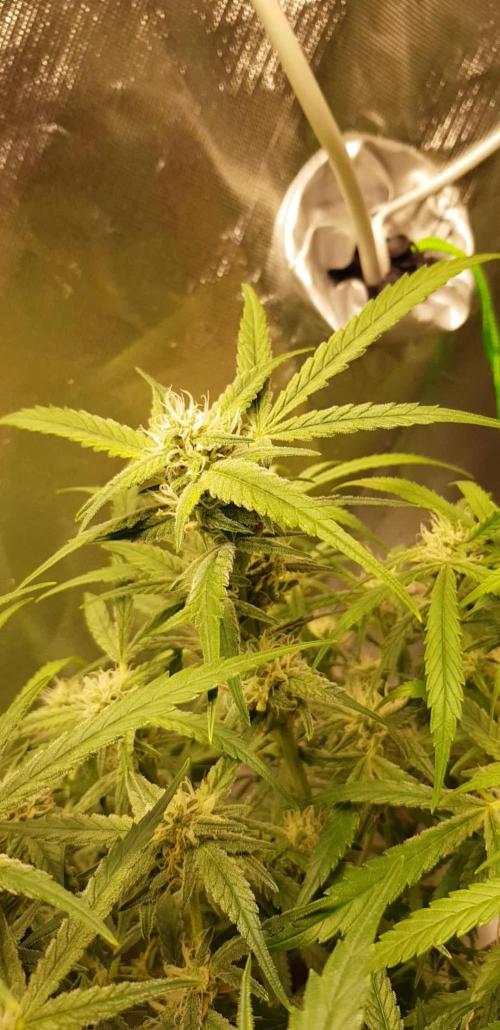
Harvest day! I left it without light for 48 hours. The buds are full of resin and very fragrant. Now I just have to wait to taste them, the hardest part. 😊🍀💪🌴
Likes
29
Share
Hi guys So here is my 10 plant auto run from fastbuds 420 genetics. I will update weekly on this one. So I'm going to be using 3 gal fabric pots filled with biobizz lightmix soil. I will be putting into solo cups after the 18 hour soak then transferring them to there for ever pots. Im looking forward to this run and trying to get 20oz + dry and cured out of this 4x4 tent grow. Part 2 of germination in operation in solo cups with root juice. Hopefully 10 out of 10 pop.
Likes
1
Share
@c1note
Follow
28.10 schmeißt Leafs ohne Ende, typisch FastBuds. Sehr robuste Pflanze breitet sich wunderschön aus. Cal Mag auf 0.5 Ec erhöht. Honeywell Ventilator eingebaut. DLI 37 VPD 0.92 RL 67% 22.9° C. so weit so gut🙏 27.10 schaut aus als ob sie in Vorblüte geht. Nehme zwei bis drei Fanleafs pro Tag raus. Massive Stängel bin gespannt wie hoch sie gehen wird. 26.10 1.5L mit 1.57 Ec. 550 PPFD. 0.9-1.0 VDP. Leichte Entlaubung, LST wie immer. Osmosewasser 0.03 Ec wird mit Cal/Mag Agent immer als erstes auf 0.4 Ec gebracht. 25.10 👇 DLI 35. 22.4°C 68 %RL 0.87VPD. Nächste Woche muss gescorgt werden. 24.10 1L 1.5 Ec. 150 ml Abfluss. Bleibe bei 1L am Tag, scheint es zu lieben. Saftiges Grün so weit so gut 23.10 Runter auf 1.1L pro Tag 1.470 Ec Ph 5.8 wie immer. ca. 500 PPFD. Bisschen leaf tucking, lst und sobald die unteren Blätter keine Chance auf Licht haben werden sie entfernt. Wer sich wundert im Zelt steht noch ein Steckling Gorilla Z. 22.10 Woche 4 In 38 Std. hat sie 2 cm in Blattlänge und 1 cm in Blattbreite zugelegt. wunderschöner symmetrischer Wuchs. Einige Wurzeln versuchen durch den Sack durchzudringen. Bin bis jetzt begeistert. 1.5L mit 1.5 Ec. Ph 5.8 Vpd 0.8.👇🙏
Likes
17
Share
It's been a beautiful strain to work with, the flowrs are definitely worth it after all this time, the quality is definitely high. However this pheno of ak420 smells very different from the other 2 phenos I've grown along with her. The flowrs are beautiful, very solid and frosty nuggets, I smoked a few little nuggets when trimming but I'm excited to taste the big buds, hope you guys enjoyed the process. I want to say that this pheno #1 has a different smell compared to the other 2 phenotypes of ak420 that you can see here on my page as well, so stay tuned guys! Overall result is very nice, good quality, strong weed, sticky, stinky. I can say that it's very great and also you can get them for a very cheap price so it's a very good investment if you're looking for a powerful and affordable strain. Cheers growmies! ❤️💚💛💎👨‍🌾
Likes
8
Share
🌸 Week 6 – Gorilla Cookies Auto Pheno Hunt Another week is in the books and the differences between the phenos are becoming impossible to ignore now 👀🔥 Stretch has been very different across the plants and some phenos are clearly showing completely different growth patterns despite running under the same conditions. It’s getting easier every week to identify which phenos stay compact and bushy and which ones want to reach for the sky. 📈 Current observations: Pheno #3 and #4 have stretched aggressively and are now above 70 cm Pheno #5 took the lead and is currently sitting at around 101 cm 👀🔥 Pheno #1 and #6 are still in early flower / preflower and developing noticeably slower Plant architecture is becoming very clear now — some phenos are growing dense and bushy while others are showing strong vertical growth At this stage I already have clear favorites: ⭐ Pheno #4 and #5 are currently standing out the most for me in terms of structure, vigor, and overall development. But the real decision will come once the flowers fully build up. 🍃 Maintenance & development: Canopy management continues and I’m still removing leaves only where necessary to improve light penetration and keep flower sites exposed. 📊 Current environment: Temperature stable around 26°C Relative humidity sitting around 67–70% VPD target remains unchanged and is being monitored continuously Light intensity continues to increase gradually as flowering progresses The next weeks should become really exciting — structure is one thing, but now the buds will decide who becomes the real winner of this pheno hunt 🌸🔥 💬 Which pheno would you bet on at this point?
Likes
14
Share
ALL THE PHOTOPERIODS ARE IN THE 8X8 NOW. DID SOME MAJOR DEFOLIATION BECAUSE THEY ARE TOO BIG NOW. THEY ARE SWITCHED TO FLOWER AND THE STRIVE NUTRIENTS IS INSANE.. BEST FERTILIZER PRODUCTS EVER MADE. I USED IT 4 TIMES IN 13 DAYS AT FULL STRENGTH AND THERE IS NO NUTRIENT BURN AT ALL AND THEY EXPLODED. AND I HAD A FEW THAT WERE TURNING YELLOW, I THOUGHT IT WAS ROOTBOUND OR CALMAG DEFICIENCY BUT THE STRIVE NUTRIENTS BROUGHT THEM BACK AND THEY ARE SUPER HEALTHY AGAIN.... ATTENTION GROWERS:::::: YOU MUST TRY STRIVE NUTRIENTS. BY FAR THE BEST FERTILIZER PRODUCTS EVER.. I PROMISE YOU THAT AND IF YOU USE IT YOU WILL NEVER USE ANYTHING ELSE FOR EVERYTHING MARS HYDRO VISIT: www.mars-hydro.com www.marshydroled.ca PROMO CODE: rocknroll VISIT THE ALIEXPRESS STORE: @marshydro_aliexpress Instagram: @marshydropenny https://youtube.com/channel/UChU5ZWwNi-DvnO3oWVU3ceA (NEW) STRIVE NUTRIENTS 💪 Thanks for taking the time to read and check out my diary🤜🤛 FC-E6500 LED GROW LIGHT: FC-E6500 grow light with 3978pcs OSRAM BridgeLux Diodes & Moso Driver, market-leading PPF 2.7 µmol/J, Max 2.5g yield/watt with 30% higher Average PPE, more cost-effective when compared to same style type lights. Only consumes 650W, perfectly cover 5x5ft (personal), 4x4ft (commercial) grow space. Innovative Precise Uniform Lighting-Built-in removable bars interval & dimmability enable the exact & dynamic PPFD control over each of the plant growing stages, FC-E6500 detachable bars deliverSuperior Heat Dissipation: Real Aluminum heatsink together with 6 slim profile passive cooled bars (THINNER & LARGER surface) and detachable Meanwell Driver, create less heat. save 50% hydro than other old grow lights! Driver can be mounted remotely on the side of a grow tent/rack or on an adjacent wall to remove heat from grow space. Full Spectrum UV IR LED: With Yield Max spectrum (660nm Osram enhanced Deep Red,2800k-5000k,730-740nm IR,380-410nm UV LEDs), Average PPFD the FC-E6500 LED grow lamp enables cultivators to produce BIG FAT Dense Buds, perfect for full-cycle hydroponic, soil, grow tent/grow room. Dimmable Commercial Grow Light: Cost-efficient, easy dimming & daisy chain With a max up to 20 lights, IP65 Waterproof, master light easily controls the rest. Perfect for commercial & home horticulture. FC4800 LED GROW LIGHT: GET THE MAX FROM MARS👍: Welcome one of  the newest members of the Mars Hydro family🤜🤛🤘. The Mars Hydro FC 4800 480W LED Grow Light can accommodate up to a 4' x 4' area for flowering. It has OVER 2000 LED chips consisting of the best selling Samsung LM301B diodes which has a Luminous Efficacy of: 220 lm/W 0.2 W, 3 V mid power, Osram 660nm Diodes, Infrared light and UV LIGHT👍. It boasts the incredible efficiency of 2.8 µmol/J, maximum 2.5gram yield per watt with 30% higher Average PPFD. This High-intensity spectrum is beneficial for plants at all stages - from veg to bloom, and creates Big dense Buds👍. achieve 50% higher yields & quality compared with the old lights! Only consumes 480W for 4x4ft personal grows, and 3x3ft for commerical grow. It comes with a dimmer and daisy chain function with a  maximum of up to 15 lights, the master light controls the rest👍. Wide 6-bar design offers even & wide canopy coverage and can maximizes your grow space. slim 180° FOLDABLE DESIGN... YES I SAID FOLDABLE🤘🤣 , making it compact and easy to install, it's IP65 WATERPROOF and will give you no worries while growing in a humid environment and makes it a flexible high performance commercial grow light for enormous  SUPER FROSTY yields.😛😛😛. MARS GETS EM FROSTY BOYS👍 AWESOME HEAT DISSIPATION: The Low energy consumption FC4800 growing light has 6 passive-cooled bars and an aluminum heat-sink a removable driver  you can upgrade later or have it outside your tent. with zero noise  you can save up to 50% in your electricity bill compared to HID's or HPS lights! It also has a removable driver so you can upgrade it in the future or have it outside your grow space for better heat control in your growroom👍 UPGRADED FULL SPECTRUM: Yield Max Spectrum with enhanced red (Top-Bin Samsung 3000k-5000knm, Osram 660nm Deep Red), speed up blooming & fruiting, perfectly suited for full-cycle growing. The FC4800 LED grow lamp was born for Big Buds, perfect for commercial, grow tent, grow room, hydroponics, and all soil grows.👍 THE BEST SAMSUNG DIODES: THE FC4800 has Top Bin genuine Samsung Osram Diodes, combined with remarkable 2.8 µmol/J Efficacy, 30% higher Average PPFD, 50% less energy consumption, to maximize your yields. They give you a TRUSTED 3 years warranty 100% Satisfactory guaranteed!!! TSW2000 LED GROW LIGHT: INCREASE YIELD AND CROP QUALITY WITH MARS HYDRO LED GROW LIGHTS: NEWEST SMD LED technology provides the highest PAR/LUMEN output (1122umol@18") and can make you get 30% higher yield compared to OLD blurple led lights.  Max 2.5g yield per wattage and achieve maximum quality and quantity, much better than traditional HPS grow systems LOW ENERGY CONSUMPTION LED GROW LIGHT: Consuming only 300W true output with 684 LEDS! It saves up to 50% energy than other led grow lights. Perfect for 3.5x3.5ft bloom stage, 4x4ft veg stage. Over 90% light energy can be absorbed by plants, it will have higher intensity in a MARS HYDRO grow tent with diamond design mylar, or by crossing over using multiple TSW2000 HIGH EFFICIENCY FULL SPECTRUM INDOOR GROW: 3000K 5000K and IR 660nm 760nm RED, makes it close to natural light, highly engineered to provide improved growing performance for plants at all stages of growing, rapid plant response from seed to flower; Uniform and wide-beam light distribution for your plant's optimal growth 8x8 1680D GROW TENT The MARS HYDRO 8x8 Grow Tent interior is made of a unique diamond design mylar which is highly reflective. (Other companies mylar and reflective rate is as low as 50%, and it won't provide efficient light. They use thick 1680D oxford canvas, and being double stitched, it is tear proof and perfect for locking in the light. Their grow tent keeps 100% of the light inside the tent and helps your plants absorb more light. EXTRA-THICK material means No light leaks or rips at all.👍 Strong Stable metal corner adapters and poles are the trustful supporters of the tent. It's very sturdy, neither rusting or paint flaking off. quick and easy tool-free setup. They use heavy-duty metal zippers, with double layer black lining, by far the best on the market which creates a light-proof seal. The Easy observation windows are made by double layers of cloth. Observe the growing conditions of your plants without opening the tent and avoid disturbing your plants. The observation windows also serves to dissipate heat and ventilate the air. The tent includes 2 removable waterproof floor trays to hold soil and water. The removable tray can be taken out to wash easily. They guarantee the grow tents are easy to install even if you've never done something like this before. Clear Instructions and no tools needed! They also offer 30-day unconditional refunds for quality problems. Just contact their friendly 24 hours customer service 👍
Likes
13
Share
@quigley
Follow
Day 15: 3 nodes now visible on both plants. Day 16: Lights lowered. Canopy now at 20000 lux. At 22" from the canopy, my light is hanging lower than recommended by HLG but I am using a lux meter to ensure the amount of light isn't too much for my plants. I'm at home almost all day almost everyday so it's the perfect time for daily lowering of the lights and monitoring carefully. Day 17: Lowered light to increase LUX readings by another 50%. Canopy now at 30000LUX. One more lowering should bring us into optimal amount of light. Noticed a slight amount of curling on leaves last night so upped the ProCal just slightly. I make my mix using pre dosed calmag & potassium silicate water. I adjusted the final EC with this water to ensure calmag levels remain high enough to prevent the coco from "stealing" it in its own cation exchange points. Ended up adding Green Planet GPH Uptake to the lineup today for the PM feeding. Will continue at recommended dosage going forward. Also picked a foliar calmag. Made a foliar spray with recommended dose of GP Ocean Magic as well; adjusted pH to appropriate level. Did one application then ditched the Ocean Magic as you're only to use this as a foliar once weekly. Made calmag foliar spray and am now regularly using this in my mister. This will allow me to adjust with plain water as to keep the EC down and my nutrient mix stronger. Also had a revelation! Root Guard and GPH Uptake have very minimal impact on EC so therefore can be added after dilution as to insure a full dose of each of these are being applied at each feeding. Day 18: Ladies doing so great now in veg phase of growth. Calmag and Ocean Magic foliar application yesterday and continued Calmag applications throughout the day seem to have really given them a boost. Adding GPH Uptake seems to be a great addition to the lineup. It will take a few more days to truly notice the results.Looking like only a few more days until the Lamb's Breath sees its first round of LST. Noticing a bit of leaf curl on both plants. I have been fertigating with a litre of solution twice daily. I am going to reduce to once daily for at least today. Will try for smaller feeding tomorrow morning and see if I can still achieve the required 10-20% runoff with an EC no higher than 300 points more than inflow. Ceasing foliar calmag applications until plant stops showing signs of oxygen deficiencies, especially the Blue Diesel. Added a Wyze cam to the setup which is awesome. I can check the ladies all the time with out opening up and disturbing their environment. (THIS IS THE POINT WHERE LIGHT BURN WAS FIRST VISIBLE BUT I WASN'T AWARE!) Day 19: EC rose dramatically as i skipped evening fertigation (Day 18). This is NOT a recommended course of action. I was trying to adjust for what looks like oxygen deprivation to the root system of the Blue Diesel (IT WAS ACTUALLY TOO MUCH LIGHT!). I think this plant is lagging behind the Lamb's Breath a bit due to being bleached (TOO MUCH LIGHT!). I believe this may be the root problem (hahahaha!) and why it is a bit behind the Lamb's Breath. Droopy leaves are usually indicative of an over saturation of water in your media. I will fertigate 3 times today to correct EC issues. Still keeping EC to just under 1000 microsiemens. Reducing volume of solution given to the Blue Diesel by half. Day 20: Started LST on the Lamb's Breath. Slowly raising EC back up to ~1000 for the Blue Dream. Lowered the light by about an inch and shuffled the plants just a bit to get optimal light saturation. Everything chugging along at this point now. Day 21 & 22: Soooo I lowered my light too much. Started noticing signs of light burn on the LB. Watched some videos, read some articles then found my manufacturer's recommended hanging height. This HLG 100 V2 should be at 24" for veg stage. So thats where it got put back up to. Measured 20000LUX on the meter still which is within optimal range. I'm sure with the light up higher, the penetration to the lower canopy will be better due to the reflective walls of the tent. I removed the first pipe cleaner of LST on the LB to let it grow up toward the light a bit more. The one day of being tied down has had a dramatic effect on the production of branches lower down. I'll (probably) let it ride out for this week to allow unfettered growth before starting to tie down new branches. Days 23-26: Everything rolling. Figured out optimal EC is around 800 for inflow for both plants. Thinking this may be the optimal inflow EC for the Green Planet Line. Decided to pick up an HLG 65 V2 4000K light as well as an HLG 135w RSpec. Both are KILLER lights for sure. The 65 has really helped in veg phase. I would highly recommend it! Optimal light hanging height ended up being around 24" for the 65 which is manufacturers recommended height. Can't wait to see what the 135w fixture can do. Day 27: Switched lights to the HLG 135w RSpec today. Lowered light down to 90 watts so the lights aren't too much of a change from one day to the next. They are about 50% brighter than the HLG 65 V2 4000K when hung up to the maximum height my tent will allow. It looks to be a sweet light and the plants are getting new hues of green showing almost immediately.
Likes
3
Share
Muy buena cepa, potente, productora y fácil de cultivar. El efecto fue exactamente lo que buscaba; intenté curar la yerba lo mejor que pude para poder preservar los terpenos y así disfrutar aún más. Cepa recomendada😄
Processing
Likes
27
Share
@CannaBury
Follow
As week 8 started, buds are gaining size. Plant is drinking lots of water. About. 3/4 a gallon a day to day 1/2. Added a second light to setup now. Hoping to help the flowering buds with extra light. Relocated my fan to help circulate air flow around more of the taper colas. Should have a around 3 week a left til harvest. Can’t wait to see how this first grow turns out and what to learn from it overall at the end.
Likes
11
Share
@Kirsten
Follow
23.2.25: I watered with approximately 1.5 ltrs per plant. I mix 6.5ltrs of dechlorinated water PH'd to 6.4. This time, I only added Ecothrive Biosys to the water because I have just top dressed the soil. Adding anything extra right now would probably be overkill and result in toxicity from too many available nutrients. I defoliated minimally mostly Do-sì-dos, Watermelon, and Pink Mist. Due to the scrog net, it's about all I can reach 😅 I've moved the plants to increase space for Gorilla Cookies 🍪 and Bubble
Likes
7
Share
She is a very beautiful baby. The Purple Lemonade is growing regular, she is very topping reactive and new brunches go fast. In this case the first top was not so perfect and a central brunche is reborn and i fimmed it. The first buds "peluria" is visible.
Likes
3
Share
@BigDaddyK
Follow
Repotted into 18l pots , these are the final , you shouldn’t really repot autos ( start them in final pots ) , but I have 😜 Watering @ 7 litres per pot with above nutrients , I put a bucket underneath to catch the runoff , ph out was 6.3 What you can see , is that even the best performing soil , doesn’t compare to worst performing DWC
Likes
96
Share
Week 5 Report: Big Cheese Auto Blossoms into Flower Power! Hi Guys! Buckle up for another thrilling chapter in the saga of our green queen, the Big Cheese Auto. Week 5 marks her grand entrance into the world of flowering, and oh, the excitement is palpable! Big shoutout to Seeds Mafia for the genetics that keep surprising and delighting us. As we transition into this flowering phase, it's like witnessing a well-choreographed dance, and our Big Cheese Auto is stealing the spotlight. 🌸✨ The Autopot system is proving to be a game-changer. She's sipping on her own schedule, and the results are nothing short of spectacular. It's like having a master chef in the kitchen, deciding when and how much to feast on those nutrients. Now, let's dive into the nutrient symphony: Regulator (0.15ml/L): Our humidity maestro is still grooving. The dance with Mono-silicic acid (Si) continues, ensuring a stress-free environment as our star transitions into flowering. P-Boost: A round of applause for the latest addition to our nutrient crew. P-Boost Provides a large amount of organic phosphorus (P)and brings a powerhouse of organic nitrogen (N) and highly concentrated L-amino acids. It's like giving our plant a secret weapon for flowering. Calmag (0.25ml/L): Calmag, our guardian of structural integrity, remains vigilant. Strong stems, sturdy leaves – the foundation for the floral fireworks that lie ahead. All-in-One Liquid (1ml/L): The NPK trio continues to be the backbonebut (just for this week), but here's a twist - the soil pellets are now in play. It's like the stage is set, and our Big Cheese Auto is the leading lady in this nutrient-filled drama. Start Boost (0.25ml/L): The roots are thriving, thanks to Start Boost. It's like a construction crew working tirelessly to ensure a solid foundation for the upcoming bloom spectacle.(i will stop this ) Topbooster: Introducing the bloom and maturation stimulator that's about to revolutionize our green symphony. Topbooster is the 100% organic maestro with a concoction of active ingredients that scream "flower power." L-amino acids, polysaccharides, trace elements (B, Fe, Mo), bloom-promoting natural plant stimulants, and vitamin complexes from natural fermentation — it's a holistic approach to enhancing the flowering response. How Topbooster Works: It's a botanical ballet! L-amino acids: Leading the floral development and maturation charge. Trace elements (B, Fe, Mo): Assisting in the intricate dance of floral development. Polysaccharides (sugars): Stimulating nutrient uptake and microlife populations, like a sweet rhythm for our plant. Vitamins: The conductors of hormone production. Gibberellins for shooting, cytokinins for cellular division — it's like the choreography that transforms a bud into a floral masterpiece. Together, P-Boost and Topbooster form the dynamic duo, ensuring our Big Cheese Auto doesn't just flower but does so with a grandeur that elevates the end product's quality. Larger fruit, more fibers, resins, and sugars — it's like a recipe for cannabis opulence. Aptus Mycor Mix: The underground alliance with mycorrhizal fungi is strengthening. Picture it like a secret society beneath the soil, enhancing nutrient uptake, and fortifying our plant's foundation. NutriSpray by Aptus Holland: The foliar spa treatment continues. The microelement cocktail is like a VIP party for our leaves, creating a protective shield against nutrient deficiencies. 🚿🍃 Training Update: The leaf-bending symphony continues. It's like sculpting a masterpiece, preparing the canvas for the grand artwork that lies ahead. And the best is yet to come - defoliation is on the horizon. Clearing out the clutter, allowing her to shine from the inside out. TDS and pH: Our numbers are looking sweet with a TDS of 390 and a pH of 6.0. It's like hitting the perfect notes in a musical composition, creating an environment where our Big Cheese Auto can thrive. As we transition into the next chapter, the anticipation is building, armed with the botanical brilliance of P-Boost and Topbooster. It's not just cultivation; it's an artistic expression of nature's bounty. Flowering is like the crescendo in a symphony, and our green maestro is ready to lead the orchestra. Once again, a massive thanks to Seeds Mafia, Aptus Holland, Grow Diaries, and our incredible community. Your support is the backbone of this green tale. Let's continue to cultivate greatness together! Genetics -Seeds Mafia Big Cheese Automatic Light - LUMATEK ZEUS 465 COMPACT PRO 
Food - APTUS HOLLAND 
 
All info and full product details can be find in can find @ https://seedsmafia.com 

https://aptus-holland.com/
 

https://lumatek-lighting.com/ As always, thank you all for joining me on this journey, for your love, and for it all. My horticultural odyssey would never be the same without you. Your love and support are cherished, and I feel both honored and blessed to have you in my life <3 <3 <3 With true love comes happiness. Always believe in yourself and always do things expecting nothing in return, with an open heart. Be a giver, and the universe will respond in ways you can't even dream off. Friendly reminder: all you see here is pure research and for educational purposes only <3 <3 <3 Growers love to you all <3 <3 <3 P.S- I must extend my sincerest apologies for the missing video reports. Regrettably, Grow Diaries is still facing some technical issues that are preventing me from uploading them. Rest assured, as soon as the situation is resolved, I'll share those videos to give you an even closer look at this fascinating journey.( i can only upload 100 Mb files with is not enough for the most type of videos i do, and even the photos is hard sometimes )
Likes
21
Share
@DogterB
Follow
Week 9 Day 57 (9/11) Things are going well, or so it seems. She looks like she is starting to bulk up at her bud sites. Her pistils are everywhere and I'm hoping to see the buds forming soon. Being a first timer, I have no idea what I'm looking for, but it's still exciting! Temps and humidity have been holding fairly steady. I think I'm to to point of bumping the humidity back some, keeping it below the 60% range. I have a couple VPD charts I'm trying to go by and they give me a range I am trying to keep the temp/humidity in. I fed her last night and she seems happy. Haven't noticed any of the discoloring or anything continuing, so that's good. I added some Alaska Fish Fertilizer to the mix just because I got it for free and wanted to give her a little nitrogen boost because her youngest leaves are kind of pale. I've heard that it's hard to overdo it with it, so figured it was safe enough. It has an NPK of 5-1-1, so I thought the P & K boost might be good too. Day 58 (9/12) Humidity keeps getting a little high, so I busted out a dehumidifier. There is some yellowing on some newer leave serrations, but idk if it is new or I'm just thinking it's new. Day 59 (9/13) Yesterday got a little rough for her! I kicked on the dehumidifier I have before I left for the day, and good thing the wifey was home to check in! Apparently that dehumidifier pumps out some heat! Within a few hours, the tent temp was almost 93F and humidity was nearly below 40%. She was quick to turn it off, crank the exhaust fan, and get the window opened to cool it off. When I turn it on in the future, I'll have to be sure to keep an eye on the room temp. I feel like she is a long way off from being ready, really doubt she will be anywhere near the 70-77 day grow time. That's fine with me, as long as she's happy and filling out, she'll get there eventually. Most other journals I've seen, they don't chop until week 12 or so. I also felt up one of the forming buds a bit, and the smell she left on my fingers is maddeningly delicious, about knocked my socks off. Day 60 (9/14) Pulled her out last night and tried tucking in a bunch of leaves to get more light to some of the lower bud sites. It's wild how many she has. She probably could have used some defoliation, but being an auto (and my first time growing) I held off. Maybe in future grows I'll give it a shot. Doing a better job at LST would probably have helped as well. She's still trucking, starting to see some start of frostiness. Day 61 (9/15) She seems fairly light in the pot, I'll probably try to feed her tonight or tomorrow morning, it just depends on when I get outta school today. I have surgery today, so I'll be here until late so will more than likely just get it mixed up tonight for in the morning. Day 62 (9/16) I mixed her up some feed last night. She's been having some yellowing on her tips and serrations, likely from phosphorus deficiency. Hoping what I mixed up is plenty to stave that off. I mixed it last night and gave it to her this morning after lights on. Her smell has really kicked in, I'm glad I got a filter and exhaust fan or the house would smell amazingly illegal. I was running late this morning and didn't even remember to get a pic of her this morning. I'll try to get one tonight before she goes to bed. Day 63 (9/17) Some of her lower leaves are starting to yellow between veins, showing magnesium deficiency. I almost put some cal-mag in yesterday with her feeding, now I wish I did. I'll wait it out and get her some next time she gets watered, or sooner if she's gotten worse since last night. I feel like she is just gobbling through her food, but honestly idk. I may be just keeping her right at the edge of deficiencies.
Likes
7
Share
@Mimi420
Follow
This past week was a major turning point for the girls. After the rough transplant stress and dehydration, they finally bounced back and are now showing strong, vigorous vegetative growth. The transplant into final 20L smart pots together with Big Plant, mycorrhizae and a drainage layer of clay pebbles seems to have kickstarted the root zone really nicely. The girls were topped this week and handled it surprisingly well. New tops already started pushing hard and side branching is waking up fast. Bio Heaven definitely seems to help with recovery and overall vigor — new growth is looking healthier, greener and more explosive every day. The LED is performing beautifully so far. Internodal spacing stays super tight and the plants are stacking very compact and bushy, exactly what I want for the upcoming SCROG run. Structure is looking ideal for training: low profile growth, dense branching, tight node spacing, nice lateral expansion starting. Next phase now is: spreading the branches outward, starting LST, opening up the center, preparing for the screen. Currently watering every 3–4 days with around 2L of nutrient solution per pot. The smart pots are drying back nicely and the medium still feels airy and healthy. Lower yellowing leaves are still showing some leftover damage from the earlier stress period, but the important thing is that all fresh growth looks healthy and active now, so I’m not worried about it anymore.
Likes
27
Share
Week 12 for Kalini Asia by Zamnesia Also going to be giving her a little dose of BioGrow before giving her a full dose of BioBloom before flipping her to flower this weekend. Shes about the same height as the white widow.
Likes
1
Share
The plants have been moved to a new grow tent; they're now under a 300-watt light. The tent is now 1x1 meters. The overall height of the plants is fairly uniform at the moment, except for two: a Lemon Pie and an Apricot. I've also noticed the plants are stretching; they're in pre-flowering. The pots are 3.4 liters, which I think is sufficient for a Sea of Green (SOG) grow in a 1x1 tent. This allows the lower branches to receive more light and shed leaves as they grow. I've added nutrients with every watering.
Likes
41
Share
Likes
8
Share
@Kirsten
Follow
19.12.24: Ok so the powdery Mildew has appeared again, I have not watered, and the plants are doing well. It seems to have recovered significantly since last week. It is still very short, so that's not great. I have scooped out the top layer of soil to get rid of the Mildew, again. I then top dressed with;- Biobizz Light Mix, cinnamon, extra perlite, Vitalink Bat guano, and worm castings. Looks like we're are entering very early pre-flower. Really hoping the final stretch will make the plants bigger, as they're still looking small. Compared to my Fat bananas 🍌 in my first grow. Watered in with 300ml per plant containing;- 1ml per litre of Biobizz Bio-Grow 1ml of Biobizz Fish Mix and 1ml of Ecothrive Flourish, 1ml of Bio Bloom, 1ml Biobizz Top Max Fingers crossed 🤞 Thanks for checking out my diary 🍃 ✌️