
Likes
Comments
Share

@GoodTimesOrganics
Follow
Welcome Back!💚
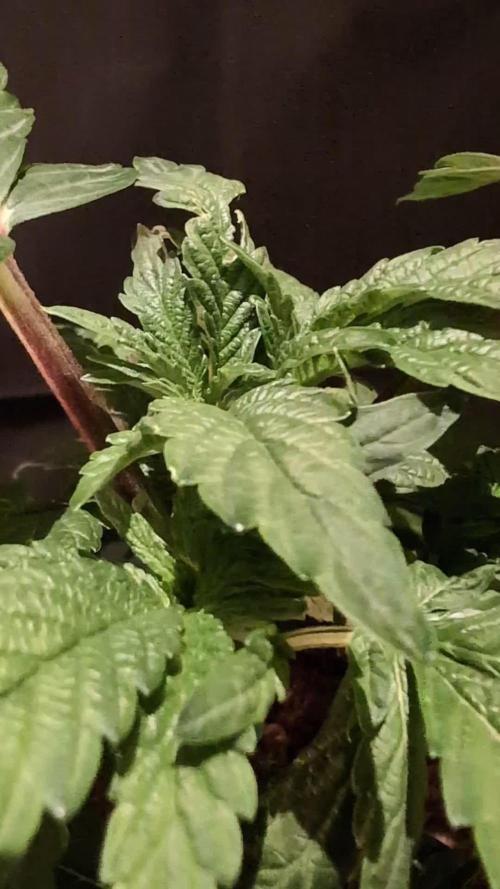
Nach der fünften Woche des Wachstums entwickelt sich die S Apple Apple durch das topping etwas gehämter.
Scheint so, als hätte sie das nicht so gut vertragen / kann aber auch sein, dass ich sie zudem etwas Überwässert habe.
Daher habe ich die Pflanze nun ein paar Tage nicht gegossen und langsam erholt die sich etwas.
Allmählich ist eine reguläre Triebform erkennbar, dennoch bilden sich die Triebe sehr langsam und eng anliegend aus.
Daher habe ich ein paar Beugungselemente an die Seitentriebe angebracht.
Sie fasziniert mich sehr und ich bin so gespannt, ob sie dann auch ordentlich so die Triebe ausbildet.
Ich bin gespannt, wie sich die Pflanze entwickelt.
Diese Woche habe ich die Pflanze zudem noch mit Orgatrex gegossen..
Die Umgebungsgegebenheiten sind OK:
—————
🌞 Temp: 21°C
🌚 Temp: 18°C bis 19°C
💨 RH: 54%
VPD: 0,85 kPa
—————
Viele Grüße 👋
Likes
12
Share


@thonhash
Follow
Finalizamos estas mataro blue,con un olor bastante “inquietante” que se hace de notar,veremos que tal una vez secado y metido al bote. Aquí ya no hay nutrientes,ya que se hizo el lavado de raíces y como dije,posterior engorde por sequía.

Processing
Likes
5
Share


@ladyjane
Follow
8/19 - Start of week two and so far everything is going smoothly. Just watering each day w/ RO water and organic black strap molasses.
8/21 - I think I may have two phenotypes going here. It seems I have two of the faster growing/taller pheno and one of the shorter, slower growing pheno.
8/24 - Doing a 24 hour brew of some compost tea for all my plants. I think these new seedlings will love it.
8/25 - Watered all with compost tea. They seem to be coming along nicely. No issues so far!

Likes
16
Share


@ShowsWorld
Follow
Loving the way this strain is bushy but yet so compact. I plan on vegging her for atleast another month or so before I throw her into flower. I definitely recommend this strain especially if your looking for explosive vegetative growth.

Likes
7
Share


@Tio_Shuni
Follow
Un hobby que demanda mucho tiempo, hago lo que puedo con los horarios, espero disfruten este crecimiento de las hermosas presentes.
Primera semana de Floración, espero las raíces dejen de crecer, no tengo contemplado hacer un cambio de macetas 😬
Riego cada 2 días, para ser invierno toman mucha agua 2L. por maceta 6.3 ph.

Processing
Likes
6
Share


@Weedzoks
Follow
Hi,
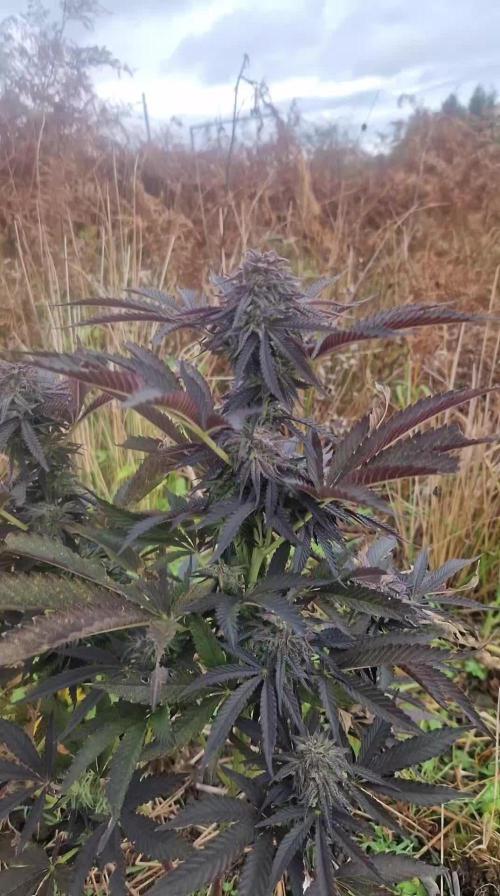
La sénescence se fait naturellement du fait d’une légère carence en N, j’ai quand même ajouté du Power Clean pour l’accélérer et améliorer encore plus le goût et l’odeur.
Les couleurs violettes se propagent petit à petit vers le bas de la #2, et très légèrement sur la #1, comme des reflets.
La puissance du panneau LED a été abaissé sur 55%
La floraison est prévu pour 7-8 semaines et pourtant j’en suis à 10, sûrement du à la carence post stretch qui a ralentit la floraison et réduit le rendement ; J’ai observé les trichromes le 28/10, ils sont presque tous laiteux et les premiers ambrés arrivent doucement..
A la semaine prochaine 👋

Likes
11
Share


@MrPistil420
Follow
1 - 2 week left before Harvest!! Smells like Grape and Blueberry if anyone's had blueberry hash they would understand what I'm smelling .Not A Huge yield but quality should be !

Likes
6
Share


@Edwinbarragan
Follow
Cada día crecen más esta semana las pasamos a floración y mostraron un buen desarrollo sin estrés ni deficiencias alguna, detectamos en la candy crush que se volvió hermafrodita,posteriormente la retiramos del cuarto de cultivo........
Processing
Likes
2
Share


Likes
97
Share


@OrganicNature420
Follow
JungleBoys
Gelato33 x ZkittlezCake (clone)
THC: 30+%
Terp: 45%
Nutrients • GreenBuzzNutrients
(DISCOUNT CODE • (GD42025) %25 off
I use the whole product range and this stuff is a game changer. I've not had one bad grow with this company and it hasn't let me down once. Terps and taste are through the roof. No need for run off in coco only during flush week (i use a 0ppm distilled water) Hands down the best nutrients on the market
GREEN BUZZ OUR NOW GIVING YOU GUYS A SUPER DISCOUNT OF %25 WHEN USING THE NEW CODE ABOVE. JUMP ON BOARD THE GREEN BUZZ TRAIN AND GIVE YOUR PLANTS WHAT THEY DESERVE 💚🌱
LIGHT/TENT • Mars Hydro FC-E6500 5x5 tent
Buds are rock solid and massive. Going to be a huge yielder. Going to guess 8 ozs as long as cure goes to plan. Absolute beast of a plant 💚
Likes
5
Share


@Ieiogrow94
Follow
Eccoci qui...
Finalmente dopo uno stop per il lavoro torno ad aggiornare il diario con il capitolo finale...
Sono stato davvero sorpreso da questa piccola che nonostante avesse una piccola carenza si è dimostrata molto vigorosa generando cime davvero compatte e resinose!!!
Grazie a @MSNL e ad @Xpertnutrients per la collab e a tutti per il supporto🔥🌲❤️
NE VERRANNO DELLE BELLE

Likes
10
Share


@Xspellsx
Follow
Start of the second week of flower. Things are looking great these are from bag seeds so sexing has been well drama in the grow room to say the least. Much bigger then expected that was good and bad ive had one boy so far and one is questionable its in the pics also my punch breath still hasnt shown anything but its a beast and looks promising very female like growth patterns super stinky too she always was since her first set of real leaves she was a skunk
Likes
5
Share

@PEAKYPLANTERS
Follow
💣 Booom 💥
It literally exploded with shoots and its structure is phenomenal

Likes
3
Share


@CanJey_Vec
Follow
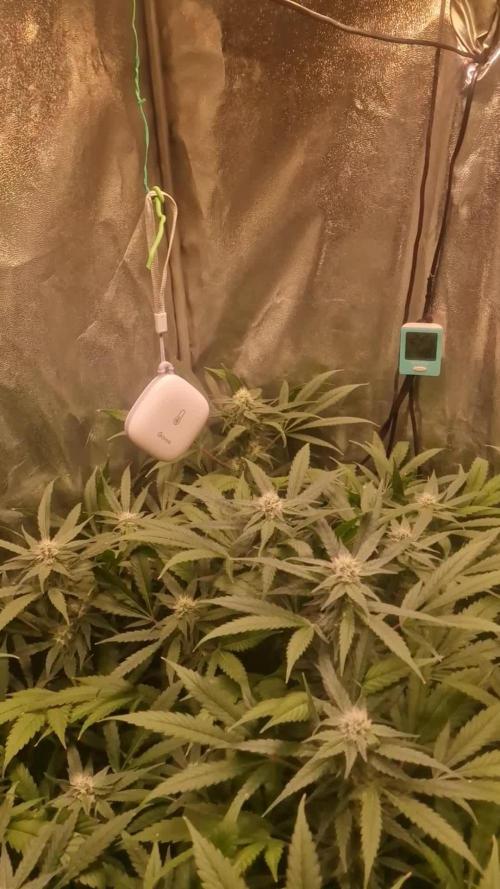
44 meiner Ganja Pharma Ladies.
Sie stehen wie immer in meinem Living Soil von @white_ash_botanic , bereitgestellt von @growandstyle , und laufen stabil unter meiner @hortispectra .
Sattes Grün, starke Struktur – das Mikroleben arbeitet, und die Ladies entwickeln sich genau so, wie sie sollen. ✨
Ich liebe diesen Run und feier die Energie aus der Community jeden Tag aufs Neue.
Danke an euch alle und an die Canna Community Germany für euren Support! 💛🌱


Processing
Likes
9
Share


@High_Grade_Dadli
Follow
#1 start showing male parts so it got pulled....also seem like a have a mag. Prob hopeful it clear out during the week..... TP #3 to 7gal pot during 2week flowering....also TP another one that i wasnt keeping track of in veg into a bigger pot that only start growing after I topped it
Likes
2
Share

@Olduffybastard88
Follow
The black diamond from zamnesia was grown outside while the rest where inside the tent look how beautiful my black diamond turned out left all alone no feed or water for 5 months I returned to find this im in scotland so you know its very hard to grow out here

Likes
7
Share


@Krautbauern
Follow
Gradually, Gorilla Cookies begins to extract the nutrients from the leaves. it is impressive how much resin it produces. Hopefully she will do well in the last few weeks.
Likes
37
Share


@AutoCrazy
Follow
Another week of scorching heat has made this lady grow like crazy. I had to do some defoliation as she was so bushy!! I also topped her again.
I will be moving her outside this weekend and I will start to lst her to get that nice even canopy that we all love 🔥. I have started watering with Fish Shit and will be doing it weekly now.
Humboldt genetics are always a sight to behold!!
Onward!!!
😎🍿🍻

Processing
Likes
4
Share


@DrewbieDoobieNoobie
Follow
Flip the script to 12/12 waiting on a small tent via amazon to put my MILF in so I do not contaminate the other ladies, clones are hanging in there hope they will be ready to go into flower at 21 days. I just potted up to a 5 gallon fabric pot. They were drinking so much they were dry in 1 1/2 days. gave them a mild feeding and a good watering did not want to give to much trans nuites this week as I just lolly popped and potted up on the same day they look healthy enough to take it but I did not want to over whelm them with the food.
so the plan moving forward it to start spraying MILF A in her own tent while the others flower in the big tent then the clones will move in to the tent and flower for 3 weeks all the while spraying MILF A 2 times a day with the CS the hope is by off setting the clones and the mothers by a week the MILF at 4 weeks while have Feminized Polled sacs that will be ready to sprinkle on the clones the other to mothers will flower to completion be chopped and dried and the clones will go until the seeds are mature with in an extra week or two.
Stay Safe🙏 I will post more pics this week end.
Processing
Likes
8
Share


@eldruida_lamota
Follow
Impresionante, mirad que flores se están formando aquí , Zambezaseeds si a echo un buen trabajo con estas candy caramelo version fast flowering.
6 semanas de floración y ya no queda casi para cosechar, Añadi esta semana overdrive y retire big bud de advanced nutrients.
Las flores no son muy grandes pero si se ven flores muy compactas y con mucha resina.
Ph controlado 6.2 , humedad entorno al 50% y temperatura media de 26.5 grados, que cara al verano no está mal.
Todas estas flores fueron logradas gracias a una buena iluminación (ts-600 mars hydro) y vaya resultados.
Estas semanas sigo actualizándoos todo , sin más novedades me despido, un saludo fumetillas y buenos humazooos 💨💨💨
