
Likes
Comments
Share


@PestoMaker
Follow
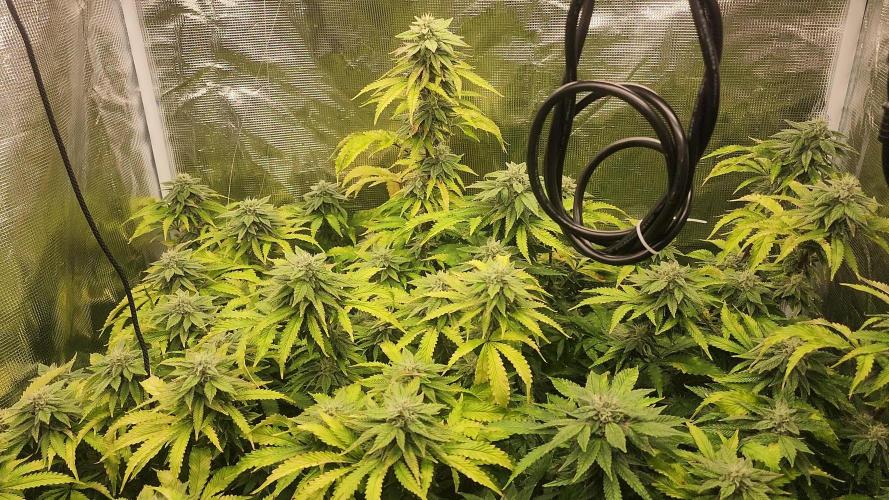
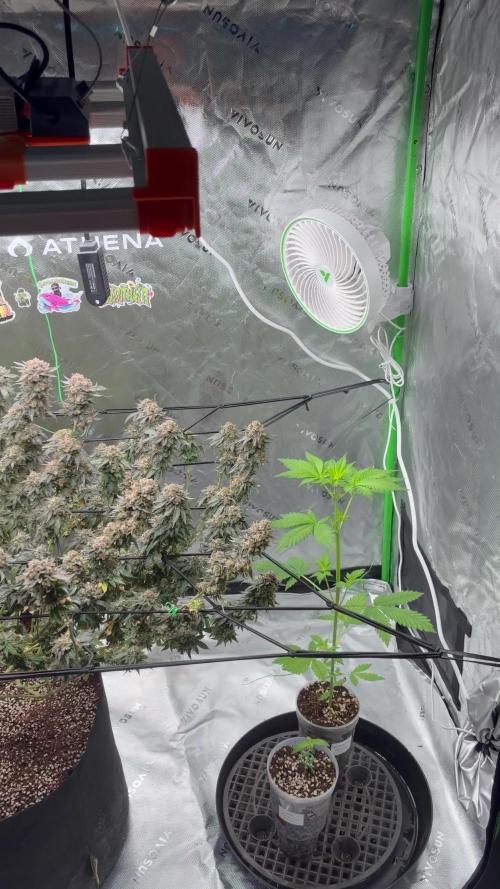
Overall, plants continue to grow well and recover from LST. Continue to worry about under / over watering and whether leaf / root mold or bugs is causing spotting on leaves and wilting leaves from time to time. Have fought off white bug infestation and possible yellow leaf mold (maybe ph flux or root rot) in past weeks, but seems to be under control now with rarely a bug sighted and old rust spots on leaves at bottom of 1 or 2 plants being replaced by vibrant green growth above.
Trying to water ever 3 days or so with approximately 1/2 gallon of water each plant with 1/4 recommended Fox Farm nutrients and root protector from ILGM phd at around 6.3.
Tent is starting to smell abit skunky when opened. Tallest plant is around 12.5 (White LSD) and smallest is around 7" (White Widow #3). Avg plant is around 10" tall.

Likes
Comments
Share


Likes
23
Share


@Firepharmer
Follow
Flushed and chopped down!!
Vert impressed with the Futur vert flora max series led’s killer quality killer yield


Likes
15
Share


@Uwish
Follow
Hello guys,
Here I am again to present you a new run, still with the best leds of the market nevertheless as I changed my growing space from 120x120 to 150x150. So I had to update the material inside...
I will run with 3 EVO 5-150 lamps of 320W or 960W with Bluetooth dimmers.
For the Hydro system, it will be the V-SYSTEM from Alienhydroponics.
In fertilizers I am always with Advanced Nutrients.
I work with osmosis water.
Currently, 4 clones took on 4.
Once the roots are ready, I will transfer the cuttings from the propagator to the V-SYSTEM.
------------------------
since the 16/08, when I transplanted the plants in the RDWC system, I noticed some points that I will mention below and correct next time.
1. The cuttings are too small, allow enough time so that I can completely fill my pots with clay balls.
2. Cut out the bottom of the pots from the cuttings.
3. 3/4 of the cuttings are touching the water, so one is late. Next time when transplanting, add more water, up to the basket in order to immerse all the plants and not to create a difference between each one, consequence now I have 3 that are ready to explode and one that will struggle behind, problem corrected today by increasing the volume of water.
4. The b-52 is a real pain in the ass in RDWC, you have to clean the 2 filters almost every day, with this new soup I'm testing without and I think I'll continue like this just with the base sensi grow A and B, as I use Root rot X, I won't use voodoo juice since all the bacteria would be killed.
5. Use of Voodoo Juice is useless if using Root Rot X which will kill the bacteria.
I don't know why but when I transplanted in the RDWC, I put my set up in growth mode, except that the plants were not ready for it, moreover, I made a FIM on each. So I lost some days, these last days I went back to a ppdf of 150, now that my roots touch the water, I declare growth 0 on 22/08, I will do between 21 and 28 days of growth. And as my roots are doing well and touching the water I'll go to a PPFD of 300
++

Likes
9
Share


@Lazuli
Follow
I havent touched this plant once its just sitting there in the autopot, i fill the reservoir once a week and call it a day hahaha super easy


Likes
17
Share


@MoneyGrowup
Follow
Things are looking good, started with some lst with my hands at first now I've secured them with ties. The gelato looks like it finally want to start its growth due to whatever stress it was going through. Happy with how things are picking up

Likes
23
Share


@nonick123
Follow
Día 48 (10/06) Riego con 1 Litro H2O + Regulator 0,15 ml/l + CaMg-Boost 0,25 ml/I +TopBooster 0,2 ml/l - pH 6.2
Día 49 (11/06) Riego con 1 Litro H2O + Regulator 0,15 ml/l + P-Boost 0,5 ml/l + K-Boost 0,5 ml/l + CaMg-Boost 0,5 ml/I +TopBooster 0,2 ml/l - pH 6.2
Subo el CalMag a 0,5 ml/L porque BPPA no se recupera, y el resto muestran inicio de deficiencia
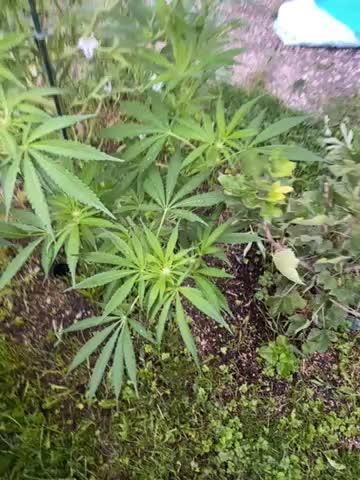
Día 50 (12/06) Está lloviendo mucho por aquí. Menos mal que tengo el techo de policarbonato en mi invernadero casero. Hoy no necesitan riego
Día 51 (13/06) Riego con 1 Litro H2O + Regulator 0,15 ml/l + P-Boost 0,5 ml/l + K-Boost 0,5 ml/l + CaMg-Boost 0,5 ml/I + TopBooster 0,2 ml/l - pH 6.2
Día 52 (14/06) Riego con 1 Litro H2O + Regulator 0,15 ml/l + CaMg-Boost 0,5 ml/I + TopBooster 0,2 ml/l - pH 6.2
Día 53 (15/06) Riego con 1 Litro H2O + Regulator 0,15 ml/l + P-Boost 0,5 ml/l + K-Boost 0,5 ml/l + CaMg-Boost 0,5 ml/I + TopBooster 0,2 ml/l - pH 6.2
Día 54 (16/06) Riego con Té de Floración - 750 ml / planta
💦Nutrients by Aptus Holland - www.aptus-holland.com
🌱Substrate PRO-MIX HP BACILLUS + MYCORRHIZAE - www.pthorticulture.com/en/products/pro-mix-hp-biostimulant-plus-mycorrhizae


Processing
Likes
5
Share


@Mr_nugs_lover_David
Follow
She's looking gorgeous on her 3rd week of life in this crazy world. Love this pheno and love how she's developing, let's see what we can do!


Processing
Likes
13
Share


@Cheesefarmer420
Follow
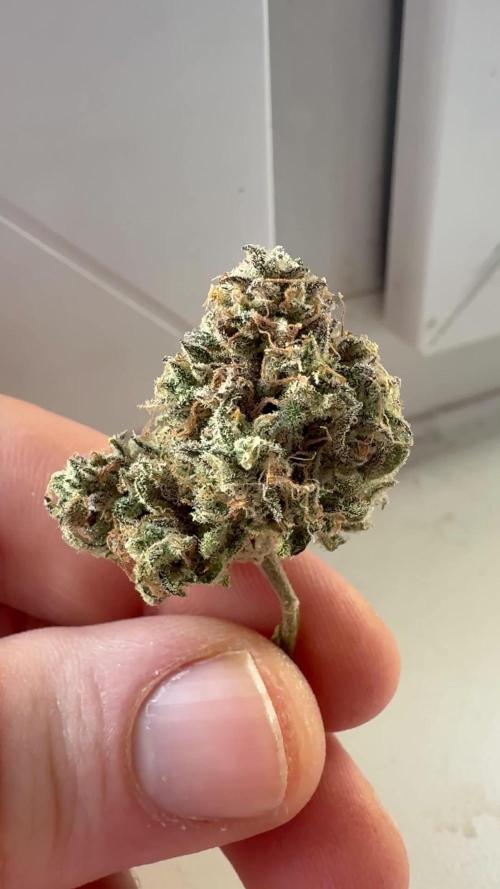
Growing this popsicle cake definitely had its ups and downs. What started out looking like a dud of a seed turned out to be something pretty spectacular. Stacks the buds nicely to fill up the whole colas, super frosty, with an un godly stench of sweaty dirty socks. Still in the curing process but definitely has a heavy indica punch!
Likes
4
Share

@Daidai
Follow
Plant is swelling slowly but surely. Its future behind then I'd like. She smells like fruit but not gone lie i dont know what papaya smell like. Moved the light up a couple inches some of the leaves where getting a little purple and I dont think its fading more like stress.
Likes
22
Share

@BeautyBudsVio
Follow
31.08.2025
La Kush Cake photo looks fine.
She build her buds very good so far.
Weather is pure shit, but im sure she will do her best possible :-)
Likes
Comments
Share

@AlpenZilla
Follow
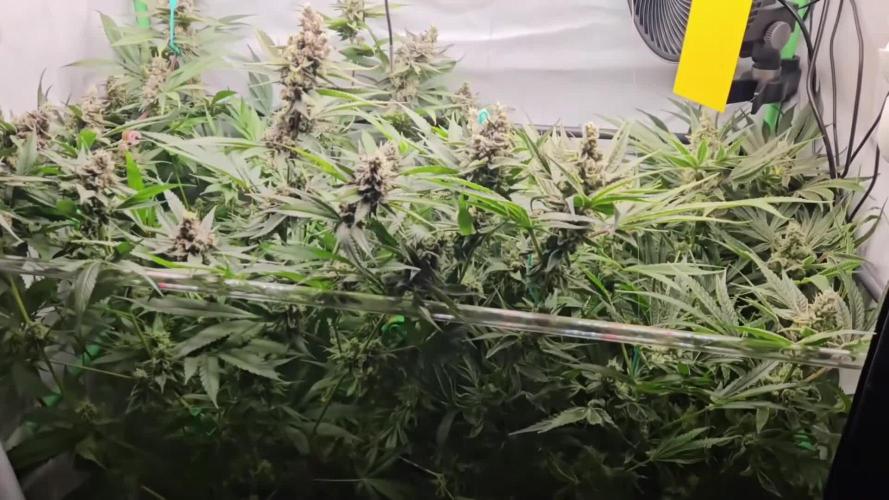
🗓️ Week 12 – Flower Week 8 ✅ (Late Flower)
🔹 General
The plants have now entered deep late flower.
Buds are gaining more density and resin, and the aroma is intensifying day by day.
For Cherry MAC Muffin, fruity-sweet notes are becoming dominant 🍒✨
🔹 Feeding
After a longer phase of reduced EC, feeding has been increased again.
Input: 1.65–2.0 EC / pH 6.3
Runoff has built up to ~3.0 EC, but remains stable – no signs of overfeeding or stress.
No flushing yet – the final flush with Flawless Finish is planned in about a week 💧
🔹 Observations – Cherry MAC Muffin
🍒 Development: Densest buds in the tent, very sticky and frosty
📏 Runoff EC: 3.0
✅ Status: No stress symptoms despite the high EC – watering frequency slightly reduced to maintain balance

Likes
22
Share


@drgreentips
Follow
I have a nice yield not the best but at least the smell and taste is beautiful on the BlackBerry I really do recommend to any grower out there
Likes
9
Share

@Fyno_TH
Follow
💧 Week 10 – Flush (10 Days)
Final flush week went smoothly. Used Advanced Nutrients Flawless Finish to help clear excess salts and nutrients from the medium, then followed with clean RO water to let the plant fade naturally.
Leaves gradually lightened in color, water uptake slowed, and buds continued tightening nicely. Trichomes reached mostly cloudy with a touch of amber — right in the harvest window I was aiming for. Aroma stayed strong and clean through the entire flush ❄️🔥
Kept RH low with steady airflow to protect resin and avoid any late-stage issues.
Flush completed and the plant was fully ready for chop ✂️🌿
Likes
4
Share

@Bear_Grows_Green
Follow
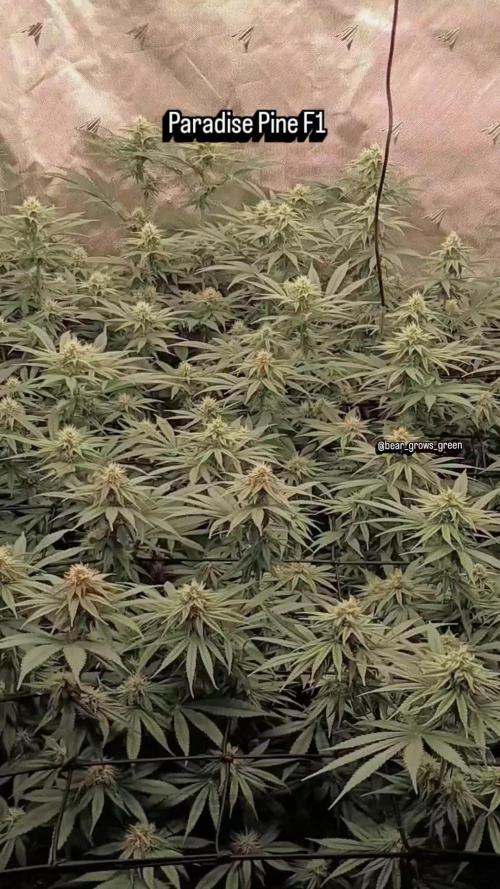
01/29 day 23 start of week 4 and things are popping!! Haven't fed at all this week should tomorrow .
01/30 bed for 7 gallons water 2.5 gallons feed full bloom recipe
Likes
53
Share


@DogDoctorOfficial
Follow
Harvest Report: The Swift Journey of Blackberry Auto
Greetings, fellow cultivators! The moment we've all been eagerly awaiting has arrived – the harvest of my Blackberry Auto. This beauty has moved through her life cycle with astonishing speed and grace. Let's take a moment to reflect on her incredible journey from seed to harvest and celebrate the fruits of our labor.
Seed to Sprout: It feels like just yesterday when I planted the tiny seed of Blackberry Auto. Nestled in a Root Riot cube, she sprouted with vigor, her first delicate leaves reaching for the light. The conditions were perfect, with temperatures at a steady 28°C and relative humidity at 95%, creating an ideal environment for her early growth.
Transplanting and Early Growth: As she transitioned to a small pot filled with rich soil and Mycor Mix, Blackberry Auto continued to thrive. The Mycor Mix, with its blend of various mycorrhizae species, worked wonders in enlarging her root system and facilitating nutrient uptake. Her early growth was nothing short of spectacular, setting the stage for the robust plant she would become.
Rapid Vegetative Phase: Blackberry Auto quickly outgrew her initial pot and was soon transplanted into her final home – a 16L AutoPot. This setup allowed her to drink as she pleased, supported by the precise hydration of the AutoPot Aquavalve. With a foundation of Aptus All-in-One Pellets and Mycor Mix Soil, she had everything she needed for explosive growth. Her leaves grew enormous and lush, and her branches spread wide with gentle low-stress training.
Swift Flowering and Stunning Development: Entering the flowering phase, Blackberry Auto didn't slow down. Her buds formed quickly, each one a masterpiece of nature. The colors were a sight to behold – deep purples, vibrant magentas, and hints of dark blue. The aromatic symphony filled the grow room, a testament to her potent genetics and the meticulous care provided.
Natural Brilliance and Final Weeks: Observing her rapid progress, I ceased all feedings to let Blackberry Auto showcase her natural brilliance. Her final weeks were marked by a dazzling display of colors and an incredible pace of bud development. Each day brought new marvels, as her buds swelled and her trichomes sparkled like a constellation.
A Heartfelt Reflection: From the moment she sprouted to her final days of flowering, Blackberry Auto has been a true wonder. Her speed and beauty have exceeded all expectations, and it's hard to believe how quickly she reached this point. This journey has been a testament to the magic of cultivation and the resilience of a well-bred strain.
Acknowledgments and Gratitude: As we celebrate this harvest, I extend my deepest gratitude to @fastbuds_official for creating such a remarkable strain. To Aptus Holland, my main sponsor, your support has been invaluable in nurturing this beauty. A special thank you to Grow Diaries for providing a platform to share this journey, and to the community for your shared passion and camaraderie. 🌱💚
As we move forward, I eagerly anticipate the trim and smoke reports, where we'll dive into the sensory delights of Blackberry Auto. For now, let's revel in the joy of a successful harvest and the extraordinary journey that brought us here.
Genetics Blackberry Auto @Fast_Buds
Food - @aptusholland @aptus_world
As always thank you all for stopping by, for the love and for it all , this journey of mine wold just not be the same without you guys, the love and support is very much appreciated and i fell honored and blessed with you all in my life
Likes
14
Share


@LokalGrenz
Follow
It’s been 7 days and one of my amnesia hazes is getting yellowish spots on it not 100% sure what’s the issue im going assume it’s too much water? Confused cause the other have same soil and every same amount of water and don’t have those issues I have the light right now about 1.5 ft away from the plants moved the light down I felt like they was stretching and becoming real skinny been keeping the temp about 75 and humidity somewhere around the 60% also I used fishshit today in the watering hopefully that’s helps
The sour diesel I’m pretty sure I dropped the seed to deep my mistake so I removed a little soil until I seen top of it and now it’s looking like it might make it it just a little behind the amnesia haze
The two in red solo cups (black Truffles) are growing pretty fast looking bit better then the amnesia haze and I found them seeds lol anyway if you looking and see anything that could help (Please do!!!) also if your using ac Infinity controller 69 I need help!!! Today the first time I messed with it to make make the 18/6 schedule and not 100% sure if I did it right yet I wanted to make it on 5am-11pm off the other 6 I had it on 24/7 all last week and not sure is that caused the yellowing or not I doubt it but I’m NEW and I’m not sure I’m a YouTube university grad 😂😂
But yea thanks for looking and I’ll try to post more day
D14
