
Processing
Likes
Comments
Share


Likes
7
Share


@Mr_nugs_lover_David
Follow
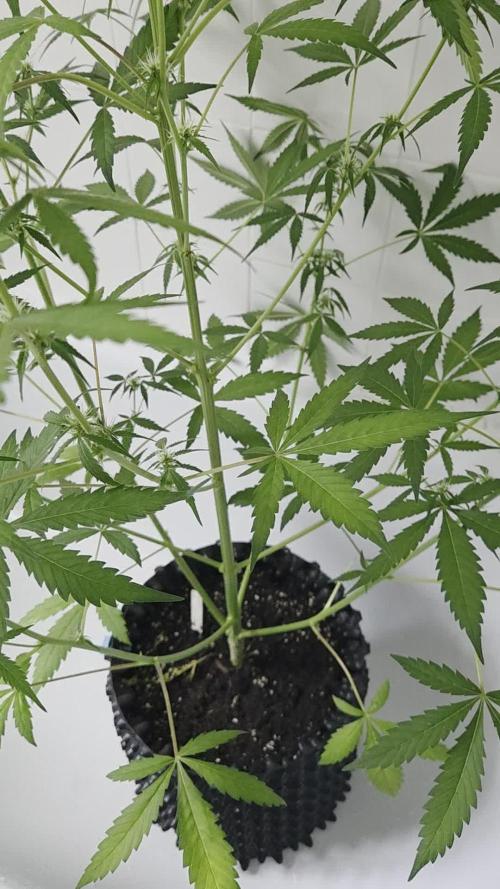
Beautiful looking seedling, very healthy and developing at a fair pace, let's see what awaits us in this diary!! She's developing super fast each day just like her sisters in this run, let's see how she keeps developing! I only use pure water and watch them grow thanks to the amazing living soil blend that I'm working with called FLO Living soil blend, very recomended to all the organic gardeners out there!! I have Transplanted this big girl after just 17 days since she was planted, she is very well developed and so ai took the decision to transplant her and all her sisters in this run, let's see how she performs! 💚❤️💛👨🌾🔝

Likes
4
Share

@SamDo
Follow
Vegetative Week 6 – Pineapple Upside Down (Round 2)
This week confirms a full recovery in vegetative growth.
The plant clearly regained vigor and momentum.
Growth is strong, foliage is dense, and overall structure looks healthy.
Internodal spacing is noticeably tight, resulting in a very compact and bushy plant.
This could be influenced by the full-spectrum lighting, which appears to promote dense vegetative development.
Although topping or defoliation was considered, no structural work was done this week.
The priority is to let the plant continue growing naturally and fully stabilize before any training or shaping.
Nutrition remains unchanged from the previous week.
The nutrient solution is maintained around EC 1.4–1.5, with pH close to 6.0.
The plant is responding well, showing no signs of deficiency or stress.
While some time was lost earlier in the cycle due to initial issues, the delay is clearly less significant than in the previous run.
Progress has improved, and this recovery phase highlights areas to refine in future germination and early-stage management.
This week ends on a positive note.
The plant looks healthy again, and the focus moving forward is simply to let her grow and maintain consistency.
See you next week. Take care.
-Update: 04/02/26-
•Structural work update:
Today, a full structural intervention was carried out on the plant.
Defoliation, topping, and pruning were all done in one session.
The plant had become too bushy and overly dense, with poor airflow and excessive humidity trapped inside the canopy.
To correct this, the structure was reset: four lateral branches were selected and kept, while the main apexes were topped to start defining the future shape of the plant.
At this stage, the goal was not refinement but foundation.
This intervention marks the beginning of the plant’s final structure, or at least the first clear step toward it.
A significant amount of foliage was removed, leaving the plant with much less leaf mass than before.
The work is now finished, and no further cutting is planned for the moment.
From here, the plant will simply be left to recover from the stress of this heavy intervention.
The focus now shifts to recovery, stability, and healthy regrowth.

Likes
103
Share


@Schnabeldino
Follow
_____ Week 10 | Day 70 - 77 | 3rd week of Flower ______
Day 71 🌞
- I mounted a fan below the net for more air circulation
Day 72 🌞💧
- 24 liters were mixed and distributed among the 8 plants / each plant 3 liter, at the moment I can water them every 4 days
Day 76 🌞💧
- It remains every 4 days 3 liters of water each plant
____________________________________________________________________________________________
Light - 12/12 h - 560 Watt
- 2x 200 Watt Toplight
- 4 x 40 Watt Lightbars
PPFD - 900 - 1000 µmol
Temp. avg. - 22,9°
Hum. avg. - 61 % RLH

Likes
32
Share

@Cooky_420L
Follow
je me suis trompé de journal pour cette mise à jours fait partie du journal Appel Friter.
Merci les Growmies bonne semaine de croissance les p'tites ✋️ vertes 🌱🌞🌱

Likes
8
Share

@Arcadium
Follow
Super hot week again, 32c days, she's loving it. Growth slowed a bit, just starting to finally see pistils, so hopefully on track for end of September harvest.
Got a new DJI Mini 4K so I don't need to get on a ladder to get pictures anymore! Just drip irrigation and LCPT spray this week and that's it.
Full 4K Drone video on YouTube @VanIsleTerps

Likes
7
Share


@hooolian
Follow
07/01/22: Pre Flower week - lights have been switched to 12/12 and are at 80% still. The plants are really showing their sativa genes with huge growth. plants are average 70cm although two are 90cm. bud sites have finally started to show growth and lightening of the green toward the end of the the week. humidity is low - the carbon bag seems to have done a good job also.

Likes
11
Share


@Paradox_1ste1
Follow
When i harvest it it looked very good in quality but it took some time to get dry so it maybe had a bad drying so thats why.
Likes
16
Share


@FreedomOfSeeds2009
Follow
Germinating 3 Purple Kush Feminised seeds.
filtered water in glass, also add 3/5 drops of hydrogen peroxide, stir water well before adding the seeds, and stir again after adding seeds to water.
I will leave it for 24 hours
The seed coat softens by soaking your seeds in a hydrogen peroxide solution, allowing the seeds to absorb more oxygen. This results in increased germination speed
Hopefully all 3 seeds will germinate by tomorrow?
Seeds popped today:-)transferred 3 Purple Kush seeds in to small pots 10/09/23
3 Purple Kush seeds, 1 seed in each small pot.
Each Pot is Half filled with lite mix compost and Half filled with Vermiculite , watered planting medium before sowing seeds 2cm deep in planting medium.
The seed will push through the vermiculite easley with very little effort, in effect increasing higher successful germination rate, the compost will offer the first tap root an immediate lite nutrient supply.
Placed 3 pots on top of a Propagation heating mat for correct germination temperature, position in a shaded place, and keep out of direct sunlight.
This may seem like a lot of effort? and it is, but it will be highly beneficial by increasing a higher germination rate and higher amount of seeds will germinate from using this method :-) especially if your seeds were expensive.
11/09/23 no sprouts above the vermiculite yet, i will check it again tomorrow.
Today 2 Purple Kush Germinate and rise above the vermiculite 3 days after sowing.
Purple Kush is going ok, it could be growing faster, unfortunately i can't upload new photos because there is a problem in the GD system, they are doing there best to fix this problem as soon as possible.
GMO Cookies where started 16/09/23 filtered water in glass, also add 3/5 drops of hydrogen peroxide, stir water well before adding the seeds, and stir again after adding seeds to water.
3 seeds sprouted, but only 2 survived, it become to hot and one GMO Cookie sprout died.
I have now started another strain (Party Monster) 19/09/23 filtered water in glass, also add 3/5 drops of hydrogen peroxide, stir water well before adding the seeds, and stir again after adding seeds to water.
I will leave it for 24 hours, 5 seeds of Party Monster have sprouted and are under the same 100W LED grow light.
GMO Cookies have all come up above the vermiculite and are now positioned under a 100W LED, there is a small clip on fan blowing and circulating the air. This is my second attempt to grow GMO Cookies from 3 feminised seeds, i messed up on the first 3 seeds, i put them under a 250 Watt LED and it fried them, my folt.
Growing from germinating seeds is a very delicate situation, your environment temperature needs good control.
2 Party Monster seedlings are looking good, coming along well under the 100W LED light.
3 GMO Cookies are looking good also under the 100W LED light.
Plus i have now started soaking in glass of water 03/10/23, 5 Strawberry Yields fem seeds aka Strawberry Fields.
filtered water in glass, also add 3/5 drops of hydrogen peroxide, stir water well before adding the seeds, and stir again after adding seeds to water.
I will leave it for 24 hours.
The seed coat softens by soaking your seeds in a hydrogen peroxide solution, allowing the seeds to absorb more oxygen. This results in increased germination speed
Hopefully all 5 seeds will germinate by tomorrow?
The 3 GMO Cookies fem seedlings are coming along well, keeping them under the hood of a propagator, i have many mixed seedlings under the same hood, to keep seedlings protected from this relentless Spanish heat.
5 Strawberry Yields fem seeds have all sprouted and are above vermiculite, keeping them under the hood of a propagator, i have many mixed seedlings under the same hood, to keep seedlings protected from this relentless Spanish heat.
Also positioned also under the 100W LED light, indoor temp 29 degrees humidity 65%, still to hot for seedlings to be directly under lights due to high temp in the room.
3 Strawberry Yields sprouts are doing well, gave 2 seedlings away, no space for all 5 plants, coming along well under the 100W LED light.
27 degrees humidity 55% good growing conditions
Super Lemon Haze
I began soaking 13 feminised seeds SLH since 27/10, after 24 hours soaking 11 seeds opened in
filtered water in glass, also added 3/5 drops of hydrogen peroxide, stir water well before adding the seeds, and stir again after adding seeds to water.
The seed coat softens by soaking your seeds in a hydrogen peroxide solution, allowing the seeds to absorb more oxygen. This results in increased germination speed!
1 Super Lemon Haze fem seed planted in a 2 ltr pot 28/10, this is the only plant i will keep for flowering.
The Pot is Half filled with lite mix compost, and the rest of the pot is half filled to the top with Vermiculite , watered planting medium thoroughly soaking it before sowing seeds 2cm deep in vermiculite.
The seed will push through the vermiculite easley with very little effort, in effect encouraging a higher successful germination rate, the compost will offer the first tap root an immediate lite nutrient supply.
And i planted the 11 remaining popped SLH seeds in the brown round pot, this is just to see how many will rise above the vermiculite from the 13 SLH fems seeds soaked on 27/10.
I will give these away to a friend.
Both pots have been placed on a propagating heating mat for consistent and ideal germination temperature until all seeds have risen above the vermiculite.
Once my 1 fem seed has germinated! i will cover the pot with a transparen plastic bag and place the pot 20cm below a 100W LED light.
Super Lemon Haze feminised seeds
Seeds sourced from Satdica Bulk Seeds
Soaked seeds 27/10 planted up on 28/10, 12 out of 13 seeds have transformed in to 12 healthy little seedlings.
11 seedlings will be given away to a friend, and i will keep the one seedling you see already planted up in a black 2 ltr size pot.
Now positioned under my 100W LED light, distance 15cm above seedlings.
Light cycle 24 hours.
Keeping them covered with propagating hood for a few days longer to allow seedlings to become better established before removing the hood.
The vents on hood are fully open to allow seedling to slowly become accustomed to the outside vege room space.
Gelato Cookies 3 Feminised seeds
Satdica Bulk Seeds
Popped 3 Gelato Cookies Feminised seeds today 06/11
filtered water or bottled water in a glass, also add 3/5 drops of hydrogen peroxide, stir water well before adding the seeds, and stir again after adding seeds to water.
I will leave it for 24 hours
The seed coat softens by soaking your seeds in a hydrogen peroxide solution, allowing the seeds to absorb more oxygen.
After placing on propagating heating mat for 24 hours.
This resulted in increased germination speed! and today i can see little white taproot tails protruding out from the seed husk 👌
3 Gelato Cookies seeds, 1 seed in each small pot.
Each Pot is Half filled with lite mix compost and Half filled with Vermiculite , watered planting medium before sowing seeds 2cm deep in planting medium.
Spoon your seeds into it's planting medium, do not touch with fingers, spoon it in with half spoon of water and a seed, place the seed in the center 2cm deep in the planting medium, water it in again very lightly to help the seed settle into a comfortable position before leaving it to rest covered on your heating mat.
The seed will push through the vermiculite easley with very little effort, in effect increasing higher successful germination rate, the compost will offer the first tap root an immediate lite nutrient supply.
Watered and fed them in with Plagron Terra Grow 5ml to a ltr of water, i may have added too much, perhaps 2/3ml to a ltr of water would have been enough?
placed 3 pots on top of a Propagation heating mat for correct germination temperature, position in a shaded place, and keep out of direct sunlight.
This may seem like a lot of effort? and it is, but it will be highly beneficial by increasing a higher germination rate and higher amount of seeds will germinate from using this method :) especially if your seeds were expensive.
3 Gelato Cookies have come through the vermiculite, 09/11 and now they are positioned under my 100W LED grow light.
I didn't expect all 3 seeds to pop, because 1 seed looked like perhaps not viable, because i only keep the bad looking seeds for myself and keep the best seeds for customers.
I am keeping them covered with transparent plastic bags for a few days to protect them in case it's to hot in the 24/7 grow room which is 24 degrees, this is probably an ok temp for them? but i'd rather not run the risk.
Romulan Feminised seeds
Germinating 3 Romulan Feminised seeds 26/11
filtered water in glass, also add 3/5 drops of hydrogen peroxide, stir water well before adding the seeds, and stir again after adding seeds to water.
I will leave it for 24 hours
The seed coat softens by soaking your seeds in a hydrogen peroxide solution, allowing the seeds to absorb more oxygen. This results in increased germination speed
Hopefully all 3 seeds will germinate by tomorrow? 27/11
Likes
2
Share


@Home_Grower
Follow
Día 51 de Floración: Agregamos otra lámpara de Sodio HPS de 70W colocando las dos lámparas en pantallas águilas. Continuamos los 3 riegos semanales intercalando con agua.
Día 57 de Floración: Comenzó el engorde de las flores y ya se puede ver tranquilamente el cambio de color de las hojas. 😍


Likes
23
Share


@Sators
Follow
🌱Day 50.💚
🌱Day 52.💚
🌱Day 54.💚
🌱Day 56.💚
Keep watering with ph balanced, plain water.
Likes
9
Share


@NanoLeaf
Follow
End of Week 15 (8th week of flower)
I have stopped the CO2 supplementation for this week and onwards as the plants naturally slow down photosynthesis and it is not needed during the last 2 weeks of flower.
Also raised the lights by 5cm to make sure the trichomes don't get damaged and also dropped the RH and temperatures even more than last week, and surely the colours are becoming more and more vibrant as the ladies are fading into their autumn shades.
Feeding just water since middle last week, all I'm doing is giving the ladies PH correct water until harvest to naturally deplete the soil from nutrients and flush out the soil slowly this will help bring out even more colours as the ladies use up the remaining nutrients stored in their leaves as they reach the end of their life cycle.
Pest Report: None
Smell Report: Staaaaanky!

Likes
8
Share


@xXTazfamilyXx
Follow
Just perfect harvest thanks to Platinium for their great fertilizer and to barney's farm for this strain that I recommend a just incredible taste🤤🤤🙏

Likes
10
Share


@Cannabeast40
Follow
Week 3 and a repot is done and now in day 3. Finally it’s settling down after the repot, which was not pretty at all😂
Hope to get some massive plants this run 🌱
________________________________________________________________________________________
Light from @MedicGrowLED 😎
NEO 780 LED🔥
780 Watt⚡️💥
PPF of 2184 μmol/s & 2.8 μmol/J🔥
Full Spectrum V1/F1 🌈
WiFi smart connection & Smart Aura Control 😱

Likes
5
Share


@Ozgrow
Follow
2 choc mints are looking very nice thickening up nicely. Smell is unreal. Gorilla nugs are very white and full of trichs however not as dense as the choc mint. The choc mint buds are extremely dense i would be careful with temp and humidity as there is definitely potential for mould due to sheer size and denseness. 2 different phenos of choc mint both really nice but one has stretched slightly more and and has more crown buds.


Processing
Likes
9
Share

@Mr_nugs_lover_David
Follow
Man oh man,without noticing I just found a new favorite strain man.Love the strong fruity and floral aroma coming from these flowers I can't wait to grow her Photoperiod version,it's been a pleasure to grow her,unfortunately I lost her four sisters,I would love to get a lot of full jars of this amazing haze 👃🔝🔝💚
Processing
Likes
14
Share


@kevgrow
Follow
Hey Friends, end of Week 10 from seed
Colas are looking Very nice
Noticed some orange color on some leaf tips so I lowered the amount nutrition when feeding
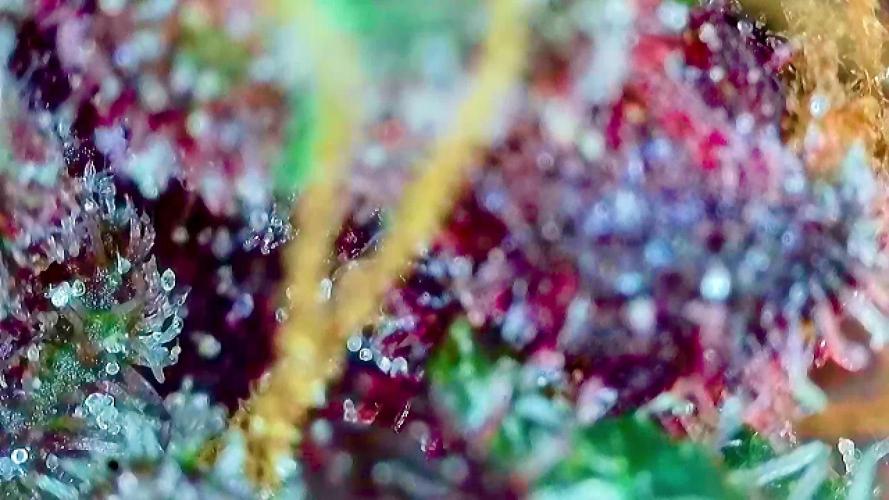
I used a magnifier to have a closer look at the colas, trichomes used to looked like little crystals, now they are bigger and cloudy.
So far no amber coloring on trichomes
I need some advice as to when I should begin flushing and harvest
Smell is slowly getting stronger, like a muffin with a small touch of gas ⛽️
Looking Forward in seeing some bud growth in the following week, will keep you guys posted!
Likes
6
Share

@CalGonJim
Follow
11/25 503AM Forgot to add Monday. DDA is done but I will keep her going because reviews take time ...SO here is a photo of the back of Christine soundtrack 1983 record. This was a Halloween grow but its now the Winter 25 to Spring 26 grow.
11/26 230am. 👍.
4am😈💡.
11/28 11am
11/29 10:04AM.... Recipe for disaster...Use tap water without letting it rest over night uncovered THEN use too much of a perfectly good organic like Tasty Terps to ruin the balance with non-organic nutrient mix /coco and damage the plants....Also, use too much Purpinator....its works great but I can not make it work right YET in my microsystem..... I thought I had it all figured out....but the LIGHTS WERE TOO BRIGHT. this is my first grow with Samsung LED's....88-93 Watts seems to be the safe range for flowering. at those watts they dont produce much heat , I dont have a light meter thats reliable I ll get this one from Amazon and do screen shots.


Likes
4
Share

@Papadubz
Follow
Well!!! These girls are incredible Zup 2 is already getting very sticky and smells like lime cordial amazing 😋 . Zup 1 is a few days behind, yet is coming along just the same.
They both have a huge appetite and are drinking very quickly.


