


Likes
Comments
Share

@GoodTimesOrganics
Follow
Hi liebe Community and Welcome Back! 💚
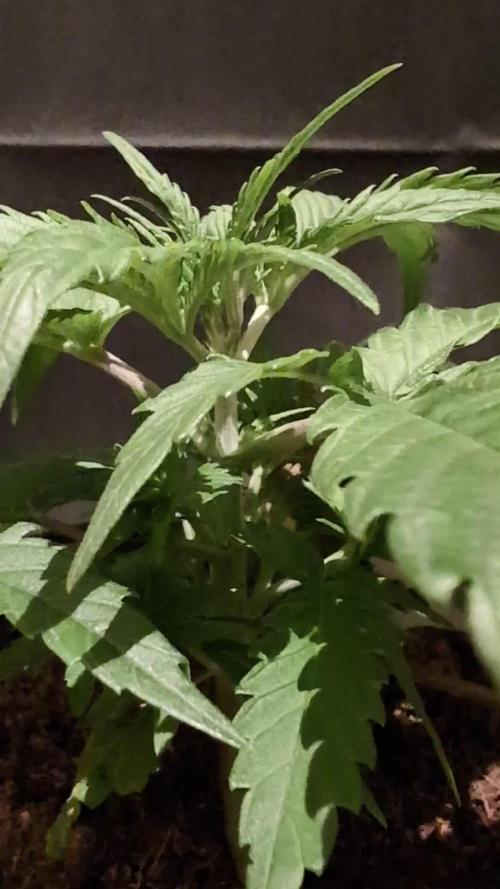
Nach der dritten Wachstumswochen entwickelt sich die Orange Bud solide. Die Verformungen haben aufgehört und das Pflänzchen entwickelt sich sehr Vital.
Die neuen Blätter sehen sehr Gesund aus und insgesammt hat sich die Pflanze gut erholt.
Diese Woche habe ich die Pflanze mit etwas Orgatrex gedüngt.
Die Umgebungsgegebenheiten sind aktuell gut:
—————
🌞 Temp: 21
🌚 Temp: 18°C bis 19°C
💨 RH: 48%
VPD: 1,00 kPa
💡ppfd: 330 mpm
—————
Viele Grüße 👋

Likes
3
Share


@FrostyB
Follow
Not sure exactly when she finished I believe around 3 weeks more than stated. Again this lady too everything I had to offer, always stood proud and tall and gave me no troubles at all! A pleasure to grow and one I will run again in the future.

Likes
27
Share


@Prototype0181
Follow
Week 3, check
Had to battle fungusgnats again:( thought i had em all. So did a h202 3% 33/66 mix with water and flushed again-_- I also added a 1000 predatory Mites in the ballpark and nematodes. I also picked 2 new toys up microscope videorecorder 50/500x and a IR temp reader. Chasing the perfect VPD
Rock on Growmies


Likes
5
Share

@gse314
Follow
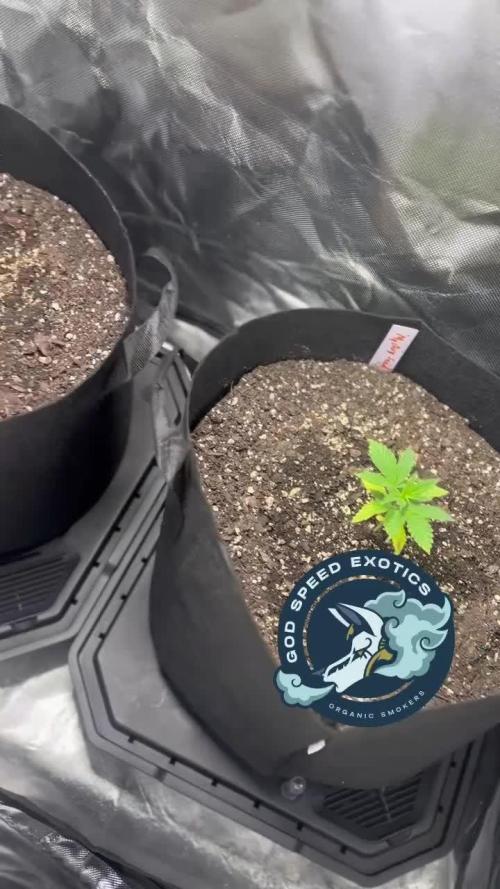
I was a few days late on transplanting, I will be taking a clone from these also this will be my first time❤️🔥

Likes
2
Share


@Cmftrblynmb
Follow
These girls are in the same room as my photos that I have just flipped. The Strawberry Cheesecake has started flowering and there are three more about 10 days behind her, with a couple of new ones just hitting the three week mark. I started too many at one time, so we will see what happens. Trial by fire!


Likes
15
Share

@RelaeX
Follow
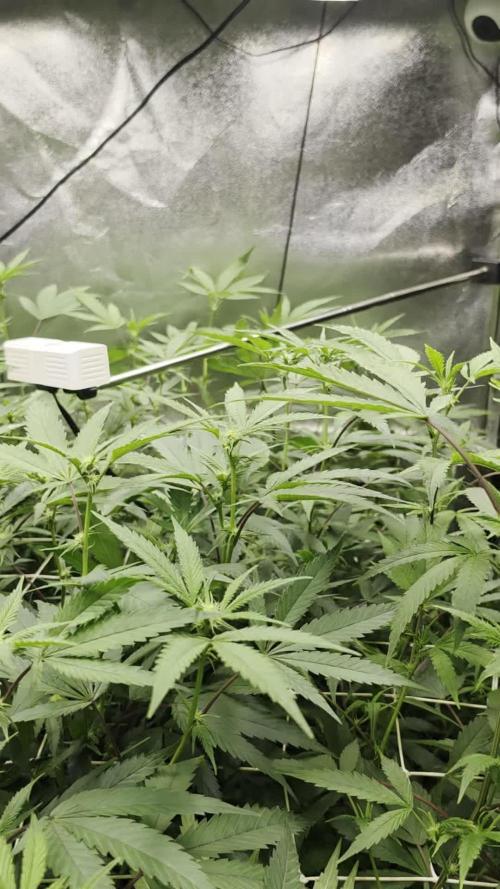
Week 20: Flowering Week 3 – Lollipopping, Climate Control & Heavy Water Intake 🌸🌸
Relax! Hey, it's Week 20—Flowering Week 3 is officially underway!
We are entering the final stretch of the stretch phase, and the canopy is looking dense, lush, and super active. The Screen of Green (ScrOG) net, which was installed at the start of Week 18, is doing an amazing job keeping everything level and evenly spread out across the tent.
Environment & Climate Adjustment 🌡️💧
With the massive canopy and high transpiration, humidity started spiking. To keep the environment safe and prevent any mold risks in this critical phase, we installed a dedicated A/C unit with a dehumidification function.
Day Temperatures: Ranging steadily between 21 °C and 27 °C.
Relative Humidity: Kept under control between 54 % and 78 %.
Plant Training & Maintenance ✂️
Lollipopping & Defoliation: This week, we performed a thorough lower-canopy trim (Lollipopping) in the main tent. Removing the weak lower growth ensures the plants divert 100% of their energy to the top sites. Combined with regular defoliation, airflow through the ScrOG net is top-tier.
Canopy Height: Total plant height is sitting right around 1.40 m (including our 30–35 cm pots).
Light Distance: The lights are dialed in at roughly 40 cm from the canopy.
Strains Progress 🌿
High Society: Absolute monster growth! It has reached impressive height and filled its section of the ScrOG screen completely.
Zupernova: Catching up nicely, building compact and dense bud sites across the screen.
Side Tent (Mothers): In the neighboring tent, the two mother plants are chilling under reduced light, growing slowly and steadily at a manageable pace.
Feeding & Watering 💧
Water consumption has surged massively this week—the plants are drinking non-stop!
Total Volume: We are currently going through roughly 100 Liters of plain water per week, plus an additional 20 to 40 Liters (2–4 10L watering cans) mixed with nutrients.
pH & Stability: After a short temporary fix with citric acid (which drifted up to pH 7.5 after settling), we are back to a rock-solid, stable setup using phosphoric acid to keep our water dialed in at a steady pH 6.5.
Nutrient Mix: The flowering tents are receiving Hesi Bloom Complex, Root Complex, and SuperFit to keep up with the heavy demand during this key phase.
Everything is primed for the buds to stack up over the coming weeks! Stay tuned and see you all next week! 🚀


Likes
14
Share


@CANNASIM
Follow
This is an un conventional diary.
As expected i have taken a wile to update the original diary and basically this is the second generation of Charlotte’s Angel genetics.
Recapping, ;) , the first generation or the mothers there grown as shown in the first weeks of this diary, flowered in 5 gal pots, in supersoil, and suplemented with biobizz and a few compost teas, harvested dry cured as usual. I have really liked the result, clean smoke or vape with a lemon like aroma, the effects are subtle, calming and gradual, anyone can enjoy this strain, you can smoke as much you want with no side effects. Very interesting.
Before flowering I have taken clones, and this are the plants, originated from that op, transfered in to 5 gal smartpots with peat perlite mix, in the end of week one of flower.
The scrog net was put in to place yesterday, basically is a hybrid scrog, some are making the knitting movement some re just been separated by the spaces, in another words this is a beta scrog, more to open a bit the plant than to really create a clean and organized classic scrog setup if that makes sense.
As far as the nutrient line i have adventured myself in to the organics, but really is not biobizz or the super soil does not compare to synthetic nutes as far as harvest and full potential *in my experience thus far, this experiences will continue, for the sake of research and experimentation. So I’m trying a new nutrient line, the Remo nutrients. After mixing in to RO or unclorinated water the mix pinpoint at 6.2-6.5ph, note that this is not a ph perfect marketed line, so that is a comfortable coincidence.
To flower I’m using a 1x1m tent with my quantum boards.
The third generation of clones have been taken and is in the propagation tent rooting.
Lets see how this goes along. :)

Processing
Likes
39
Share


@Weird_Jimmy
Follow
👉With each day it grows a noticeable amount. Its staying short and the leaves are actually touching the media on the lower set. Its actually on its 3rd node, and i will probably top it on the 4rth. I lowered the light from 36 to 24". This week i will lower it again to 18". The plant is short but its growth is still vigorous enough. under the leaves there is vegitation emerging as well. I like the fact that its staying short, I will probably need every inch of of my tent so the longer its stays short and grows like a bush, the better.
👉Im doing the week 3 nutrient schedule for another week because week 3 is the highest levels of grow nutrient. My EC target is 1.7 and is near the high end of the recommended range. I usually start with 2 gallons and then mix and pH the batch. If the EC is high I then ad pHd/calmag/ArmorSI water to lower the EC to the desired range. Im feeding 1 liter of nutrient solution and the runoff is an average of .6l. I give this 2x a day. The EC is slowly creeps up over 3-4 days and when it gets to 25 to 30+ EC I use a liter of rinse solution before the next fertigation. the rinse solution is same water source as the nutrient mix, (RO water at 5 micro-Siemens from a medical grade RO unit) with Armor SI and Calmag pH's to 5.9. The machine isnt at my house so I mule the water in 6 gallon water carriers. Eventually the plant will be big enough that more solution is needed at each feeding. During the Critical Purple and Hindu grows, the EC would actually never guild up because the plants were absorbing a lot of the nutrients. I will gauge the needed inflow volume of nutrient solution by the amount of run-off. Currently 1 liter is what I determined is the minimum needed to keep the coco wet and buffered. As the plant absorbs more water the drain off will decrease. I will target 20-30% run-off from inflow volume. EC value also determines inflow volume but to save on mixed nutrients I like to precede a feeding with the rinse solution if the EC is too high.
👉I disinfect the water jugs 1 time a week with 1% bleach. I disinfect my nutrient solution dispensing jugs at each batch mixing. My watering can and measuring vessel, I rinse with the H2O2 spray at each use.
👉To help keep the grow clean I have a 1 gallon garden sprayer filled with water and 60ml of H2O2. The recipe is usually just 30ml/gallon, but I wanted it a little stronger. I spray the exterior of my cloth pot once a week to rinse of the build up nutrients and prevent mold, mildew and green fungus. I also use the spray to disinfect the drain trays as I swap them out after a feeding. I have a couple dozen white wash cloths that I use to help clean and dry things. I use fresh wash cloth each day, and keep everything as clean as possible.

Likes
218
Share


@ClubRiot
Follow
Start week 8 , Bio Bloom 4 ml/L + Sensi Cal-Mag Xtra 2 ml/L + CarboLoad 2 ml/L + Top Max 4 ml/L (Ph 6.7).
Likes
2
Share


@SolitudeCorners
Follow
Blue Banana Cream by Mademen Genetics - Week 5 Update
VPD aim 1-1.2kPa
Continuing from the last update, this week has shown even more trichome development.
Pheno #1: Bud structure remains airy, but trichomes are steadily increasing
Pheno #2: Medium-density compact buds, showing traits reminiscent of the Banana lineage
The grow room is starting to fill with a stronger aroma as the plants enter the bud-building phase. Exciting progress ahead—thank you for following along!
Likes
2
Share

@pareto
Follow
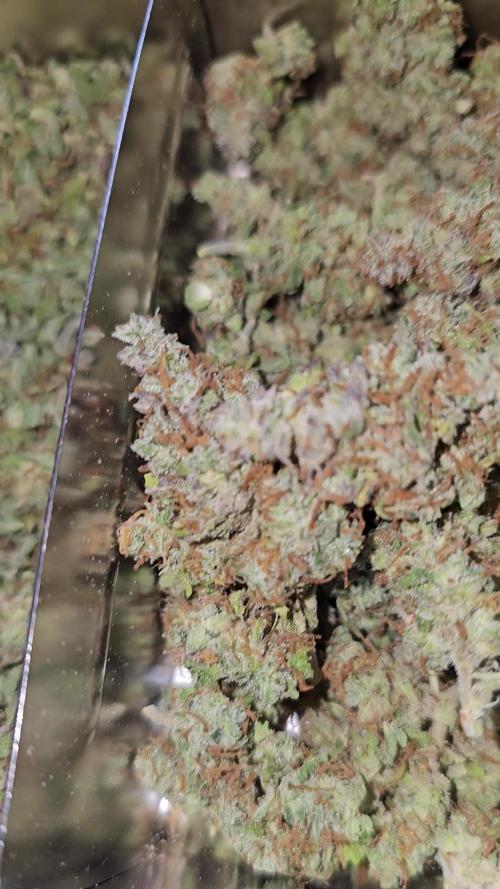
The summer was super wet and humid so she lost 2 of the big buds to mold.
Other than that she did great! really big, vigorous and heavy, dense buds. All arround winner. Really looking forward to the seeds.
These plants are not mine. I am just documenting them.
Total Runtime: 81 days
--------------------------------------------------------------------------------------------------------------------------------------------------------------------------------
Set up cost (fixed costs)
-Lamp: 40€
-Timer: 3,5€
-Pot: 4€
-Total fixed costs: 47,5€
Given 5 years (or 15 grows) usage time translates to around 3,17€ per grow in materials.
Variable costs:
-Seeds: 13,17€
-Soil: 6,00€
-Fertilizer: 3,50€
-Power: 21,00€
-Total variable costs: 43,67€
-Total costs per grow: 46,84€



Likes
48
Share


@GanjaReaper
Follow
Day 83:
After being in the dark for like 4-7 days, they where ready to harvest. All plants getting cut by the machine, big buds are cut by hand.
I never weight wet buds because that doesnt make any sence. I will update soon on how much it is dry weight.
My friend helped me with the harvest since it takes many hours of work.
I have many buds that are as big or bigger as my hand.
Quallity so far looks promising even thought there are shitty buds as well, but thats normal and oke.
They have been cut freshly so I won't lose much weight when cutting. This will happen when cutting dry buds.
The remaining small leafs on the wet buds will dry in with the buds and will be barely visible.
Thanks @Fastbuds for sponsering the seeds. It was a really hard thought to make a diary about it while having more then 100 other strain plants.
So both diaries look almost the same now. Ill hope you guys liked my grow and that we can go bigger in the future, so that i can make a , single strain,better and full diary about it.
More info soon.
Likes
12
Share


@MaltaHerbman
Follow
Day 9 and allready can see the roots in the bottom of the first small pot.
She is getting feed with Hesi Nutrients.
Day 12 had to repot as you see in photos roots were ready to transplant

Likes
3
Share


@Orchard
Follow
&&&&&__ WEEK 4 VEG / FINAL TRANSPLANT COMPLETE___&&&&&
***!!!!FOGGER WORKS AWESOME!!!!***
Introduced and created the ultra sonic fogger humidifier. This thing rocks it works so damn well. Being in Arizona we have ZERO humidity plus if you have AC to cool it just takes the humidity out anyways. This thing only effects the tent and its hooked up to a constant supply line and float so zero hassle. No... if your wondering it doesnt soak anything inside the tent it leaves ZERO water marks moisture or residue absolutely no spotting on anything including the lights. ---->👌I HIGHLY RECCOMEND THIS SETUP FOR ANYONE IN A LOW HUMIDITY SITUATION. 👌<----INSPIRATION AND CREDIT : 👽 This on https://allgrowers.grobo.io/t/everything-flora-flex/4636/1192. The original poster is a freaking sweet genius AUSSIE that change my desert dwelling life. Here is the original how to and with a few tweaks what I use. https://youtu.be/vmiO6Z_HLCE
+++ 03.08.2021 +++
<---NOTES--->
Notes: Week 4 Start Final Transplant from SOLO cups to 2 Gal 8" FloraFlex Pots with 8" Caps. Medium is COCO hybrid mix (Coco60%,Perlite25%,Hydroton15%) using FloraFlex V1 & V2 @ 3g / Gal each. Week 4 Nutes. !!!SWITCHED TO ALL LIGHTS!!! TOOK LIGHTS BACK TO 30" --- !!!VENTALATION ON TO LOW!!!--- Topped off with full week 4 nutes.
(((((((((((((((((((((((( CONDITIONS )))))))))))))))))))))))
*Nutes: CaliMagic GHE 2ml / Gal, FloraFlex V1 1 tsp/gal, FloraFlex V2 1tsp/ gal, pH Down
*Ph: 5.9
*Ec: 2.1
*Light: Mieemclux 1500W LED Veg+Bloom@ 30" 18/6; Mieemclux1500W LED Veg+Bloom@ 30" 18/6; Parfactworks RA1000W LED@ 26" 18/6
*Rh: 65%
*Temp: 78F
<-------- END -------->
+++ 03.10.2021 +++
<---NOTES--->
Notes:
(((((((((((((((((((((((( CONDITIONS )))))))))))))))))))))))
*Nutes: CaliMagic GHE 2ml / Gal, FloraFlex V1 1 tsp/gal, FloraFlex V2 1tsp/ gal, pH Down
*Ph: 5.9
*Ec: 2.1
*Light: Mieemclux 1500W LED Veg+Bloom@ 30" 18/6; Mieemclux1500W LED Veg+Bloom@ 30" 18/6; Parfactworks RA1000W LED@ 26" 18/6
*Rh: 65%
*Temp: 78F
<-------- END -------->
+++ 03.13.2021 +++
<---NOTES--->
Notes: All plants enjoying new humidity and fog. Checkup add pics.
(((((((((((((((((((((((( CONDITIONS )))))))))))))))))))))))
*Nutes: CaliMagic GHE 2ml / Gal, FloraFlex V1 1 tsp/gal, FloraFlex V2 1tsp/ gal, pH Down
*Ph: 5.9
*Ec: 2.1
*Light: Mieemclux 1500W LED Veg+Bloom@ 30" 18/6; Mieemclux1500W LED Veg+Bloom@ 30" 18/6; Parfactworks RA1000W LED@ 26" 18/6
*Rh: 65%
*Temp: 78F
<-------- END -------->

Likes
21
Share


@GODSGIFT_2005_JM
Follow
🍼Greenhouse Feeding BioGrow
⛺️MARSHYDRO
The ⛺️ has a small door 🚪 on the sides which is useful for mid section groom room work. 🤩
☀️ by VIPARSPECTRA (models: P2000 & XS 2000)


Likes
38
Share


@Cariboo_OG
Follow
Utopia Haze is a rare heavily sativa dominant hybrid (90% sativa/10% indica) strain created through back crossing Brazilian Sativa strains. This tasty little bud took home 1st Place for Best Sativa in the 2008 High Times’ Cannabis Cup and for good reason – with its potent 18-22% average THC level and long lasting cerebral effects, Utopia Haze is one powerhouse smoke. The Utopia Haze high comes on soon after you finish your first toke, hitting you with a strong cerebral lift that infuses you with a sense of hazy relaxation.
Type: Feminised/Photoperiod
Cultivation: Indoor/Outdoor
Flowering Time (days): 70-75
Indoor Yield (g): Up to 650
Feminised Outdoor Harvest Month: October
Feminised Outdoor Harvest Month Week: 3rd-4th week
Aroma: Citrus, Woody, Pungent, Mint
Effect: Cerebral Lift, Hazy Relaxation, Sleepy
Welcome Everyone to the Final Entry of my Utopia Haze Grow !
There is so much to discuss ! I have been extremely busy as of late trying to get this Harvest together, but i am happy to have it here for you now !
I Seriously under estimated the amount of time, help from others, and my own necessary skills to pull this off.. and i still kind of screwed it up lol !
But its worth noting i have never actually done this before and trying to document it during....was extremely hard.
It is next to impossible to work an iPhone with rubber gloves on !
First I want to discuss everything step by step so before you jump straight into the comments on how the end product is so small in "quantity"
Rest assured i am happy with its"quality"...and thats all that matters to me because Life is a journey not a destination! and i have learned so much from this grow that I couldn't be any happy even if i messed some things up :)
But at the very least I hope you read through this entry in its entirety with an open mind and focus more on the process, rather than just the outcome!
I ran out of Ice & i was only able to wash three times..(normally I've heard you should go sometimes 5-6 washes)
Preparation is Key & things will be much better next round :)
Photos 1-22
These are pretty self explanatory but for those of you just tuning in now.. this is what happens to a very happy plant when you don't have the necessary tools to monitor key components of growing cannabis.. Ph, as well as EC levels play a very key role in the outcome of your grow lol that being said I was just able to save this plant by purchasing both tools but that doesn't mean the plant didn't suffer because of the prior events.. This was a Huge reason behind me choosing to turn this harvest into what i would consider
"Solventless Hash Rosin" from "Ice water extracted Bubble hash".
Pictures 23
The idea here is the process of using "fresh Frozen Cannabis" this has been discussed many a time online on such sites as instagram and here on grow diaries as well.. I personally have Never tried the process so i decided to try it out and make a judgement for myself..
Video 24
The Cannabis has now been in the freezer for 72 hours making it very well frozen.. as you can tell i struggled getting it all into the 25u Screen Wash Bag. One thing of note i would do differently is i will de-stem my next batch as i also believe this played a part in the amount of plant matter that escaped through the sieves.
Photo/Video's 25-28
The idea here is "ice water Seiving" & especially with the bags that I am using here that are only have screen material on the bottom portion of the bag it is very important to have spaces in-between the screens to allow the water to pass directly through the screens into the bottom bucket with the least amount of resistance.. because the hash is so extremely temperature dependant if it gets warm on the side of the bag.. it will stick there and not make it to the bottom to become use able product..
29
You do not need to use as much Ice as i used here lol... the idea is to keep everything very cold..i certainly achieved that but at the sacrifice of using so much that i ended up grinding product and producing "contaminants" but in the end they are just plant matter that i would be smoking when i rolled up my joint either way so.. I'm not super disappointed..
But it should be noted that what you want to achieve here is a Layering effect where you have the wash bag between two small layers of ice while the "water current" washes the Trichomes away allowing them to be separated by the screens setup below :)
Before Starting the machine you should allow some time (i.e.;10-12minutes pre soak to allow the product to become saturated) before the first cycle.
By video 32 I have just ran out of ice lol..
Video 33-34
Here I have a tip for you.. to separate the screens that you sieve through.. cut 5 gallon buckets to stretch them across nice and tight.. it'll make scooping your Bubble that much easier ! i learned this from the many "Frenchy" videos I have watched :)
Picture 35
Here in lays the problem for most people.. drying your hash without loosing vast amounts of "Terpenes" whilst also stay ever vigilant against mold !
Thanks to all those videos I've watched on youtube.. id like to think this was one of my most successful parts of this process..
Things to Note; Terpenes start to seriously evaporate at temperatures 68F or 20C
you need to stay as cold as possible whilst bringing the Relative Humidity in the space down into the 40-30% to stay away from that nasty mold !
I used my cold storage room in the basement.. with a dehumidifier running to keep the space at 45% RH & staying at a constant 15c.
All while spreading the hash as thin as possible across parchment paper, on top of the white screens with a fan moving air across both sides of the paper.
Pictures 36-38
These are some macros i took in the middle of my drying session I fell in love with the colour.
Yes i know the black spots are plant material but they will get caught when i bag the hash & squish the oil out.
Thing to Note; at this stage it is important to ensure you 'micro plane" the hash down as fine as you can whilst staying weary of the temperature... any "chunks" will hold pockets of moisture.. that lead to potential problems..ie; mold ...
Picture/Video 39-41
Successfully planed bubble hash ready to be bagged and Squished !
Picture 42
Ive decided to follow Pedro.. from Pedros Grow Room and double bag to be on the safe side so i don't have any blow outs.
So thats One 25u bag inside one 160u bag ! :)
Pictures 43
This is almost 3 grams of the bubble hash from above, already melting in the bag.. this is where i ran into trouble again lol things started getting to warm in the house and i was only able to get one of the three squish's i did on video :( things started getting sticky.
Picture 44
This is basically just a photo of the equipment I'm using; 3x5 LowTemp Cage in the frame I built myself, with a 20Ton bottle jack.
Something to note here is this is an older Lowtemp model with only a single heating zone which is which i have it closed here heating Both sides of the press :)
As well as the importance of having adequate pressure on your plates.. my rig is very overkill for the size of hash bags..lol
Video 45
Here is the lovely press video.. its didn't quite work the way i wanted either lol my directional folding wasn't quite tight enough for a big "drip" :)
&the Press was set to 65°c
Photo's 46-50 are pretty self explanatory :) I had a blow out.. but still managed to pull an 80% return from the hash once squished...& yes it tasted amazing :)
Was it worth it in the end... that could be debated.. for some..i understand..its not your thing, but for those of us that are interested in making our own concentrates.. free from Solvents...
I wouldn't make it any other way :)
If even ONE of you reading this diary finds it helpful to reference for ANYTHING.....even if its "what not to do" ill consider it a success !
Thanks again for tagging along on this garden adventure.. its been one heck of a journey !
Much Love from B.C. Canada,
Until Next time,
Cariboo


