


Likes
Comments
Share


Likes
8
Share

@RockoCalenberg
Follow
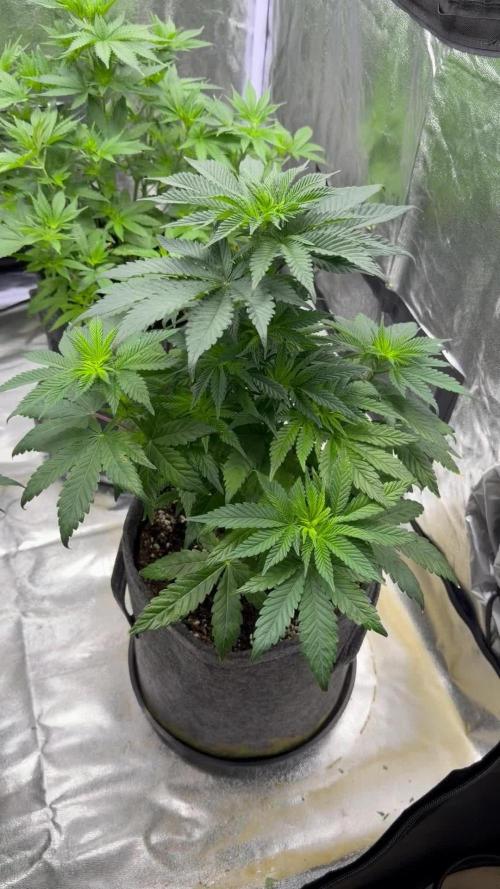
Rocko’s Runtz Rumble Tag 49
– die letzte Runde Vegi ? 🌱🥊
Eine weitere Woche ist rum – und mittlerweile sieht es ganz danach aus, als hätten die drei genug Vegi bekommen.
Nach dem deutlichen Schub der vergangenen Woche haben sie ihre Fläche weiter ausgefüllt und stehen insgesamt gesund und munter da. Deshalb werde ich wahrscheinlich schon morgen oder übermorgen auf 12/12 umstellen. Viel länger möchte ich ihnen jedenfalls nicht mehr geben.
✂️ Training
Auch diese Woche ging es hauptsächlich mit LST und Clips weiter. Ziel war weniger, noch großartig etwas am grundsätzlichen Aufbau zu verändern, sondern die vorhandenen Triebe möglichst sinnvoll über die Fläche zu verteilen und die letzten größeren Höhenunterschiede auszugleichen.
Jetzt dürfen sie langsam zeigen, was sie aus dieser Ausgangslage machen.
🍈 Melonade Runtz
Melonade bleibt dabei diejenige, die etwas mehr Aufmerksamkeit verlangt. Sie wächst weiterhin ordentlich, zeigt aber nach wie vor ihre helleren bzw. gelblichen Spitzen und teilweise etwas verdrehten Neuwuchs.
Bislang scheint sie das allerdings nicht großartig auszubremsen. Insgesamt entwickelt sie sich weiter gut – nur eben mit etwas mehr Drama als die anderen beiden. 😄
🍌 Pink Banana Runtz
Bei Pinky gibt es momentan erfreulich wenig zu berichten – und das ist durchaus positiv gemeint.
Sie wächst zuverlässig weiter, bleibt gesund und macht beim Training keine Probleme. Ihr dichter Aufbau hat sich weiter gefüllt und sie wirkt bereit für den nächsten Schritt.
💙 Blue Zushi – Wildcard
Auch die Wildcard marschiert weiter. Blue Zushi macht nach wie vor einen sehr kräftigen und unkomplizierten Eindruck und hält trotz ihres kleineren Topfes problemlos mit.
Auch hier wurde die Verteilung der Triebe noch etwas nachgebessert. Ansonsten gibt es aktuell wenig Grund, ihr großartig dazwischenzufunken.
🔴 Far Red 730 nm
Das Far Red bleibt vorerst Bestandteil des Setups. Nach den ersten vorsichtigen Tests der vergangenen Woche läuft es weiterhin nur gezielt und kurz rund um das Ende des Lichtzyklus.
🌿 Nächster Halt: 12/12
Damit dürfte die Vegi ziemlich genau dort angekommen sein, wo ich sie haben wollte. Die drei haben ihre Plätze gefunden, das Training steht und die Fläche ist ordentlich gefüllt.
Wenn nichts dazwischenkommt, fällt der Startschuss für die Blüte in wenigen Tagen.
Dann beginnt der eigentliche Rumble. 🥊🌿
Am Ende zählt nur, welche Runtz am härtesten rumbled.🌱💚✌️

Likes
13
Share


@Robeeriegenetics
Follow
Ooops I made some mistakes lol all gravy teachable moment …I really think I got a ghost in my grow op lol….anyone recommend an exorcist …im scared lol
Likes
34
Share


@Roberts
Follow
Blue Dream Auto has grown a little, but I think more was going on in the coco mix. I imagine she will make some progress this next week. She looks healthy and she is getting nutrition with the darker shade of green development in her leaves. Everything is going well, and ready for her to shine. 🤣Thank you Medic Grow, and Seedsman. 🤜🏻🤛🏻🌱🌱🌱
Thank you grow diaries community for the 👇likes👇, follows, comments, and subscriptions on my YouTube channel👇.
❄️🌱🍻 https://www.seedsman.com/?a_aid=Mrsour420.
This is my affiliate link to seedsman.
Thank you Happy Growing 🌱🌱🌱
https://youtube.com/channel/UCAhN7yRzWLpcaRHhMIQ7X4g.

Likes
1
Share


@Pestitel
Follow
Amazing experience with the Mix Pack, I will try it again next summer for sure. Love the variety.

Likes
12
Share

@NuclearPyro
Follow
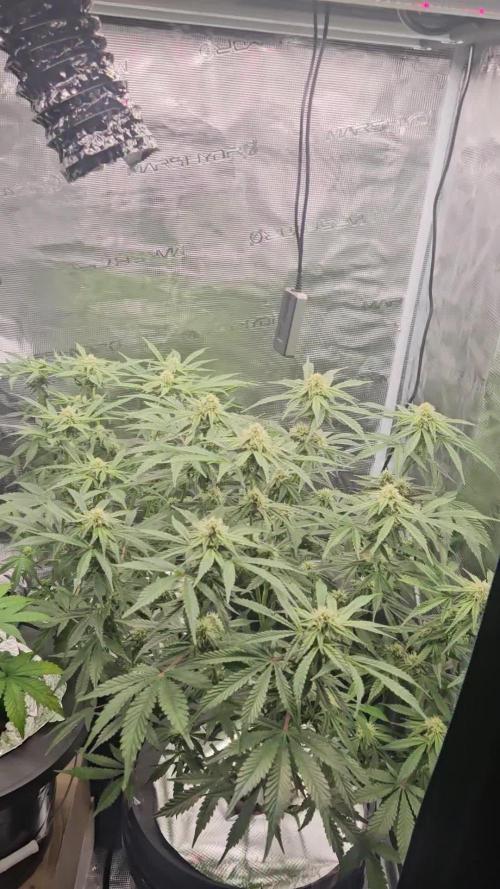
Forgot to upload week 7. After res change, next day that polka dot pattern came on top leaf. Cut off with a bud (another location) that dried up prematurely. The 650 nutes got sucked up a lil bit compared to these sativas water intake. Every day 1-1.5 gallons. That in an 9 hr spand when im at work. Struggling with rh bc of blizzard than warm, then rain, then cold, then repeat. Put a dehumidifier that does my whole basement in the room to suck out the moisture so the new air intake can pump dryer air
Likes
Comments
Share


@Elguacho420
Follow
Buenas a tod@s... Otra semanita más ya en flora, van creciendo muy bien, uniformes, hermosas y fuertes... Ricos aromas ya están formándose los cogollos de a poquito, van tomando forma de a poco, me encantan, se las ve muy bien y aguantan muy bien la temperatura ya q hay veces q hace bastante calor, se toman otras medidas en ese caso pero de momento van muy bien... A seguir creciendo, me está gustando la evolución de este cultivo, y el siguiente, mejor... 💪🏻⚡💀😎
🇦🇷🤝🏻🇪🇦

Likes
Comments
Share

@Organic_bud21
Follow
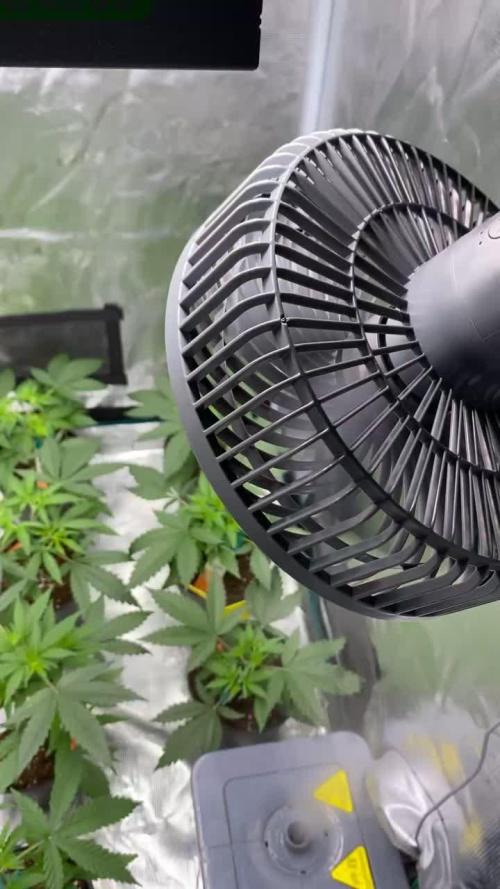
Diese Woche wurde nach und nach getoppt über 3 Tage hinweg. Sobald die ersten Triebe des 4ten Paares entwickelt waren, habe ich das Unterste paar Triebe + Blätter und die Keimblätter entfernt. Pro Pflanze möchte ich diesmal mit 6 Haupttrieben arbeiten. Nachdem ich mit allen fertig war und die Wunden 1 Tag geheilt waren, habe ich wieder B-52 mit Break Thru zusammen eingesetzt um Stress zu minimieren und den Wachstum zu fördern. Ab jetzt fange ich auch an alle 3 Tage mit 10-15% Drain zu gießen. Fürs nächste Mal ist auf jeden Fall vorgemerkt, dass als erstes umgetopft wird in den Endtopf bevor ich Toppe, um Zeit zu sparen. Wir sind in vegi Woche 4 und werden die 5te zur Erholung nach dem umtopfen brauchen und ich muss noch ins Netz einarbeiten. Das lief nicht ganz wie geplant, aber die Pflanzen sind alle zu 100% gesund. Die Green poison F1 scheinen mehr Probleme mit den thripsen zu haben als die anderen. Ich denke das liegt an den schwach vorhandenen Geruch. Alle anderen sind bisher Geruchslos. Ich arbeite auch noch ohne Filter.

Likes
6
Share

@Alvareas
Follow
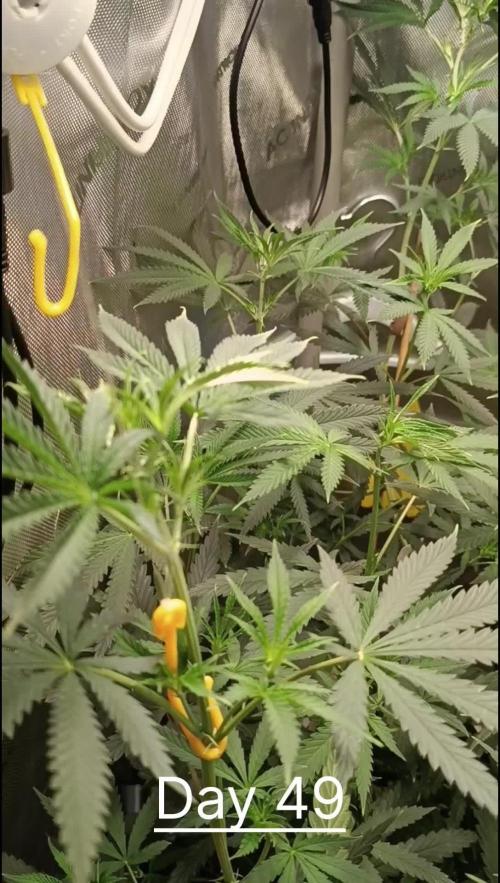
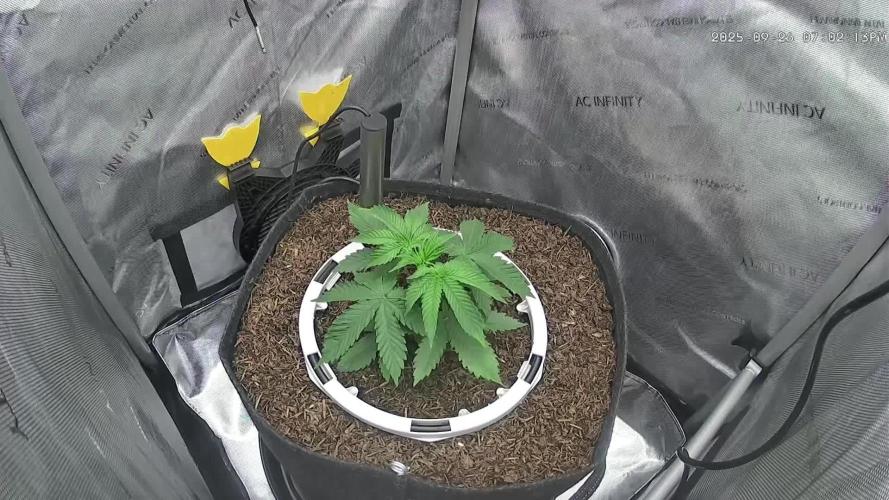
Woche 4 / Vegi Woche 3
Der Grow:
Am Anfang der Woche wurde das erste Mal getoppt.
Ziel des toppen war es, 6 neue Haupttriebe zu haben.
Da die Triebe der ersten Nodien viel kleiner waren, als die der zweiten, habe ich solange gewartet, bis die Triebe der vierten Nodien, so große Blätter hatten, dass sie nachdem toppen, gleich mit Photosynthese beginnen können.
Dann wurde über den vierten Nodien getoppt und die Triebe, samt Blätter, der ersten Nodien entfernt.
Die Pflanze hat das toppen gut verkraftet.
Ich mache von jeder Woche Zeitrafferaufnahmen und man konnte sehen, dass alle Triebe gleich nach dem toppen weitergewachsen sind.
Den Rest der Woche, habe ich die Pflanze, einfach wachsen lassen.
Die Triebe haben sich gut entwickelt und die Pflanze ist wie erwartet kompakt geblieben und extrem buschig geworden.
Vermutlich werde ich in der nächsten Woche, die 6 Haupttriebe erneut toppen, um auf 12 Haupttriebe zukommen.
Dazu aber im nächsten Update mehr.
Im letzten Update hatte ich geschrieben, dass ich die Bodenfeuchtigkeit, versuche bei 55% zuhalten.
Dies scheint jedoch zu viel zu sein.
Nachdem ich die 55% einige Zeit gehalten habe, wurde der Topf, in der Drainageschicht, sehr nass.
Ich hatte zwar noch keinen Drain, aber das der Topf in dem Bereich sehr nass war, hat mir gezeigt das sich dort Wasser sammelt.
Aber eigentlich sollte der Bereich trocken sein.
Deshalb habe ich die Bodenfeuchtigkeit langsam gesenkt und peile jetzt die 50% an.
Man konnte auch sehen, dass sich die Blätter im Verlauf des Tages nicht mehr komplett aufgestellt haben.
Sondern ehr leicht nach unten hingen.
Was für eine beginnende Überwässerung spricht.
Mittlerweile ist der Bereich der Drainageschicht, wieder komplett trocken.
Den VPD habe ich im laufe der Woche langsam erhöht, bis auf 1,4kpa am Ende der Woche am Tag und auf 1kpa in der Nacht.
Diese Werte werde ich jetzt so weiter fahren, bis zur Umstellung auf die Blüte.
Der DLI wurde am Anfang der Woche auf 30 erhöht.
Die Parameter in Woche 4:
Durchschnittliche Tagestemperatur: 27 Grad
Durchschnittliche Nachttemperatur: 22 Grad
Durchschnittliche Luftfeuchtigkeit Tag: 63%
Durchschnittliche Luftfeuchtigkeit Nacht: 61%
Durchschnittliche Bodenfeuchtigkeit: 53%
LED Leistung: 30% = 110 Watt
Beleuchtungsdauer: 18 Stunden
DLI: 30
Controller Einstellung Tag: Advanced AI VPD 1,4
Controller Einstellung Nacht: Advanced AI VPD 1,0
Durchschnittlicher VPD Tag: 1,3
Durchschnittlicher VPD Nacht: 1,0
Umluft: Stufe 1 oszillierend

Likes
4
Share


@Gruenerfinger85
Follow
Heute stehen die beiden hübschen noch in der 48 Std Dunkelheit Phase. Morgen folgen die Bilder von der Ernte.
Die beiden Ladys stehen für 48 Std in absoluter Dunkelheit bei einer Raumtemperatur von 27,7 Grad Celsius und 62% RLF

Likes
10
Share


@Eauderay
Follow
The end is in sight, likely in 2 weeks, they are producing compact and sticky buds, looks like it is going to be easy to trim, so little leaves in those buds!
They smell fruity, earthy, fuel and a very strong kush base with lemon on one of my pheno, the second one is a little smaller and she smells more like carame&peaches in a kush sauce lol absolute beauties!

Likes
6
Share


@Fullmeltalchemist
Follow
D71/F24 - 11.29 - There's not much to say about these two. They didn't even hiccup after the defoliation, though it does appear their stretch has just about finished. They both have fat greasy prebuds right now, and the Passion Berry has particularly long pistils. A pleasure to watch em grow! <3
D76/F29 - 12.4 - Just like holy fuck these things are monsters. 🙏🙌 Praise be to Swerve 👑, I'm astonished at the pace and vigor of these two plants


Processing
Likes
11
Share


@kcartel
Follow
there is a significant increase in growth after bending the upper cola, as compared with the sativa, the WB grows and blooms much faster, very grateful to your advice, everything is clearly illuminated, on the next allotment I think to add some ice and shed everything with cold water, the flavor is very strong, for three days I made leaf clippings on the lower part of the plant, fertilized 2-3 times a week, I try to add less than the specified norm, I don’t feel like leaves, I feel as you can see it’s not very bad, I feel this variety will be closer to the harvest than the neighboring sativa, it pleases, and I feel the harvest will not be bad) Well, we are waiting for 7 weeks, wish me luck)
Likes
7
Share

@TheRexxx
Follow
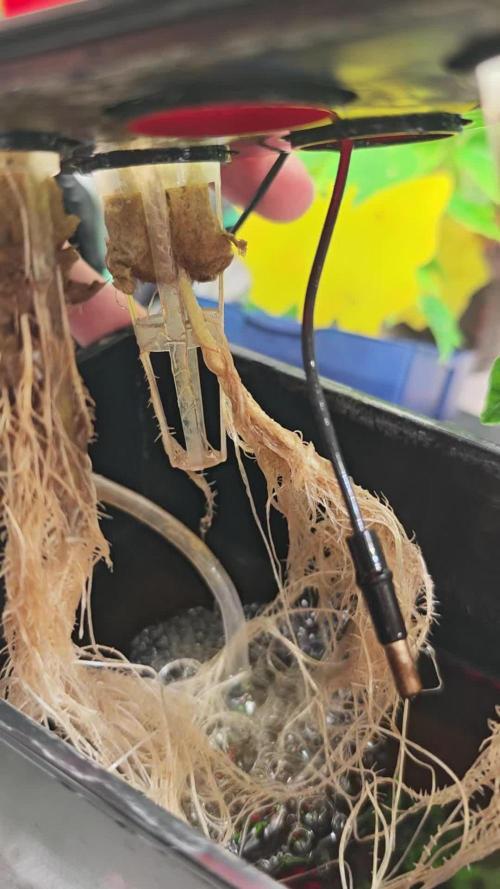
Der Wechsel in die Blüte ist offiziell vollzogen und ich muss sagen, die bisherige Entwicklung im Zelt ist wirklich beeindruckend. Schon direkt nach den Keimblättern sind die ersten Blätter extrem groß geworden und man konnte förmlich zusehen, wie die Pflanzen einen massiven Wachstumsschub hingelegt haben, sobald die Nährstoffdosierung erhöht wurde. Auch die Wurzeln entwickeln sich in einem extremen Tempo.
Besonders spannend ist der direkte Vergleich der Steinwoll-Varianten im System. Bei der Versuchsreihe mit den kleinen, kurzen Würfeln sind die Wurzeln eher knapp gewachsen, haben sich dann aber in die Breite ausgedehnt.
Die Variante mit der doppelten Menge Steinwolle für die doppelte Höhe hat zwar länger gebraucht, bis die Wurzeln unten sichtbar wurden, aber dafür kommen sie jetzt deutlich stärker und in einer viel höheren Vielzahl heraus. Ein großer Nachteil ist hier allerdings, dass die Steinwolle teilweise leider im Wasser steht. Das könnte theoretisch zu Fäule führen, was ich natürlich ganz genau im Auge behalte, auch wenn wir hoffen, dass alles gut geht.
Lichttechnisch lief das Setup bisher mit 58 Watt, bestehend aus einer Sanlight Flex 2 mit 15 Watt und zwei Sanlight Stixx 50, die jeweils auf 40 Prozent Leistung liefen. Heute habe ich die eine Stixx direkt über dem Hydro-Test auf 60 Prozent hochgedreht, sodass wir jetzt bei insgesamt 70 Watt im Zelt sind.
Beim Wachstum sorgt vor allem die Pineapple Express X Tangie für Überraschungen, da sie bereits das fünfte Noden-Paar ausbildet. Die Papaytons stehen aktuell bei etwa 3 bis 4 Noden. Sogar die Pineapple Express X Tangie Freak Edition hat noch mal einen respektablen Schub gemacht; sie ist zwar immer noch etwas kurz geraten, hat dafür aber einen bemerkenswert dicken Stamm entwickelt. Ich bin wirklich gespannt, wie sich die Pflanzen in den nächsten Tagen und Wochen transformieren und weiterentwickeln.
Likes
37
Share


@Aedaone
Follow
The temperatures, humidity, and watering volume(if measured) in grow conditions are all averaged for the week. The pH is soil pH. Any watering done by me is well water which is 7.6 pH The temperatures, humidity, and watering volume(if measured) in grow conditions are all averaged for the week. The pH is soil pH. Any watering done by me is well water which is 7.6 pH and 50° F. Any listed nutrients are ml/gallon of soil.
This soil has nutrients premixed into it. I mixed 320ml Organic Coop Poop 2-4-3, 160ml Espoma blood meal 12-0-0, and 480ml Gaia glacial rock dust per 32 gallon pot. The above listed nutrients, with the exception of ferrous sulfate, will be dry amendments premixed per gallon of soil.
On day 3 I top dressed with ferrous sulfate monohydrate at the rate of 2.5ml/gallon of soil as listen in nutrients section. I didn't fill these pots above halfway with soil in the case we had heavy consistent rain. Half a pot dries faster than a whole one. I will be filling these pots completely as soon as these get more height and the rain lessens.
Day 1 we had heavy dew and it was mostly cloudy.
Day 2 we had a heavy dew in the morning. That afternoon we had cooler temps and intermittent rain that continued overnight.
Day 3 was overcast with thunderstorms and rain that evening and night.
Day 4 we had a rain shower late morning, but the sun came out mid day.
Day 5 early morning 2-3 a.m. we had very heavy thunderstorm. The rest of the day was sunny and cool.
Day 6 forecast was 5% rain that became 100% thunderstorm. There was heavy rain and wind on day 6 for about a hour from 9.30 a.m to 10.30 a.m., then a second round later that afternoon.
Day 7 turned out very good. Lots of sunshine and a light breeze that'll help dry out that soil a bit.
These soaking wet conditions we experienced this week are something cannabis seedlings survive with difficulty. I've found fastbuds genetics withstands these conditions consistently where other brands have total failure.
We had a very successful week considering all of the difficulty with the weather. Fastbuds genetics have consistently withstood the harsh outdoor environment here in the Ozarks. These girls are pushing two inches and are thriving.
Likes
67
Share


@PapaNugs
Follow
Another good week here in the tent. Getting water daily. Defoliated as needed every other day. The girls are looking great and smelling great. Lots of frost coming off these girls.
Started the UVB at 30 minutes and have moved up to an hour. The tests went right to two hours but I wanted to ramp it up. Will go up thirty minutes tomorrow and continue that every few days to ramp up usage.
The trichomes are coming along but not milky


Likes
44
Share


@Cogollo_eu
Follow
**Encontrarás la traducción a español al final de la descripción**
From/Desde: 10/05/19 || To/Hasta: 16/05/19
From day/Desde día: 78 || To day/Hasta día: 84
You can find the Money Maker Diary here:
** Podéis encontrar el diario de las Money Maker aquí:**
https://growdiaries.com/diaries/25667-gorillamakingmoney-gorilla-vs-money-m
-----IMAGES & VIDEOS-----
5 - HomeMade Organic & Cheap CO2 generator (more info in week summary)
9, 10, 11 & 12: The bud on the right is a Gorilla one, the buds in the left or/and in the middle are Money Maker ones.
15 - Same Gorilla plant buds, one affected by CO2 in the roots and the other not.
-----WEEK SUMMARY-----
The smell is more sweet and intense every day, friends that came home turned them eyes into crystals when they see this little babys. The size isn't awesome, but the high ammount of buds full of crystals plus the strong sweet aroma makes them awesome. Buds are growing and fattenning very very well.
This week i added a boost of HomeMade CO2, i never measured the results of this invention so i can't give CO2 measurements. This method is widely used in home aquariums and there is where it comes from. For those interested i'm going to write here more detailed instructions. The 4 liters i've made will last for about 2 weeks.
---NEEDINGS---
- 250 ml Bottle
- 6~10 l Bottle
- 400 g Sugar / l water
- 1 Envelope of organic baker's yeast / l water (CHEMICAL WILL NOT WORK)
- 3 mid plastic tubes 40~50 cm
- 1 short plastic tube 5~6 cm
- 4 tube adapters
- Hot glue to seal adapters
The process of creating CO2 is simple, mix water, organic yeast and sugar in a bottle, and the sugar will free CO2 in the process of fermenting to alcohol due to the yeast.
1. Make a hole in the center of the big bottle cap, insert an adapter and secure it with hot glue
2. Make 3 holes in the small bottle cap and glue the other 3 adapters
3. Link both caps with one of the mid tubes and insert the other tubes on free adapters
4. Insert a short tube in the bottom of the small cap in the adapter that came from the big cap
5. Watch the Video!!
-----WATERING CALENDAR-----
Plants are beginning to drain the pots a bit faster so from now on i will raise the water ammount on each watering day 0.25 l.
11/05/19 - 1,5 l with All week nutrients -(Nirvana & Blombastic) also Big Bud half dosed @ PH6.4 & 2 E.C.
14/05/19 - 1,5 l with Bud Candy, Big Bud, Nirvana, B52, Bud Factor-X, Sensizym & Blombastic @ PH6.4 & 1.5 E.C.
*****ESPAÑOL*****
-----IMÁGENES Y VÍDEOS-----
5: Generador de CO2 casero, barato y orgánico (más info en el sumario semanal)
9, 10, 11 & 12: El cogollo que sale a la derecha es de una Gorila, el de la izquierda y/o el de en medio son de una Money Maker
15: Dos cogollos de la misma planta, uno afectado por CO2 en las raíces y el otro no
-----SUMARIO SEMANAL-----
El olor es más dulce e intenso día a día, los amigos que vienen a casa a verlas se quedan ojipláticos al verlas. El tamaño no es una maravilla, pero la gran cantidad de cogollos llenos de cristales añadido al aroma que entra por las fosas nasales las hacen increíbles. Los cogollos crecen y engordan de maravilla.
Esta semana he añadido un boost de CO2 casero, nunca he hecho mediciones de los resultados por lo que no puedo darlas. Este método es ampliamente usado en peceras caseras y de ahí saqué la idea. Para aquellos interesados dejo aquí instrucciones más detalladas. Con los 4 litros de agua que he preparado yo da para unas 2 semanas.
---NECESITAMOS---
- Botella de 250 ml
- Botella de 5 a 10 litros
- 400 g de azúcar por litro de agua
- 1 sobre de levadura de postre orgánica (LA QUÍMICA NO FUNCIONARÁ)
- 3 tubos de plástico de tamaño medio 40~50 cm
- 1 tubo de plástico de tamaño pequeño 5~6 cm
- 4 adaptadores para los tubos
- Cola caliente para pegar y sellar los adaptadores
El proceso de generar CO2 es simple, mezcla agua, levadura orgánica y azúcar en una botella, y el azúcar liberará CO2 en el proceso de fermentación a alcohol.
1. Haz un agujero en la tapa de la botella grande, inserta un adaptador y séllalo con cola caliente
2. Haz 3 agujeros en el tapón pequeño y haz lo mismo con los otros 3 adaptadores
3. Conecta los 2 tapones con uno de los tubos y conecta los otros 2 tubos a los adaptadores restantes
4. Conecta el tubo pequeño en la parte libre del adaptador del tapón pequeño que viene del tapón grande
5. Mira el vídeo
-----CALENDARIO DE RIEGO-----
Las platas comienzan a secar los tiestos un poco más rápido, asi que de ahora en adelante incrementaré 250 ml de agua adicionales en cada riego.
11/05/19 - 1,5 l con todos los nutrientes semanales -(Nirvana & Blombastic) BigBud mitad de dosis @ PH6,4 & 2 E.C.
14/05/19 - 1,5 l con Bud Candy, Big Bud, Nirvana, B52, Bud Factor-X, Sensizym y Blombastic @ PH6,4 & 1,5 E.C.

Likes
9
Share


@TrialAndErrorGrows
Follow
Week 1 bloom
Everything stretched a lot this week. I’m not sure why. My lights are powerful I’m feeding by the green planet chart. So lots of nutes. Hopefully they slow down or I’m going to run out of room.
At the end of this week I did another lollipop and small defoliation. The canopy was super dense.
If you got this far hit the like button and give me some validation lol.
