


Likes
Comments
Share

@Bread_n_Buds
Follow
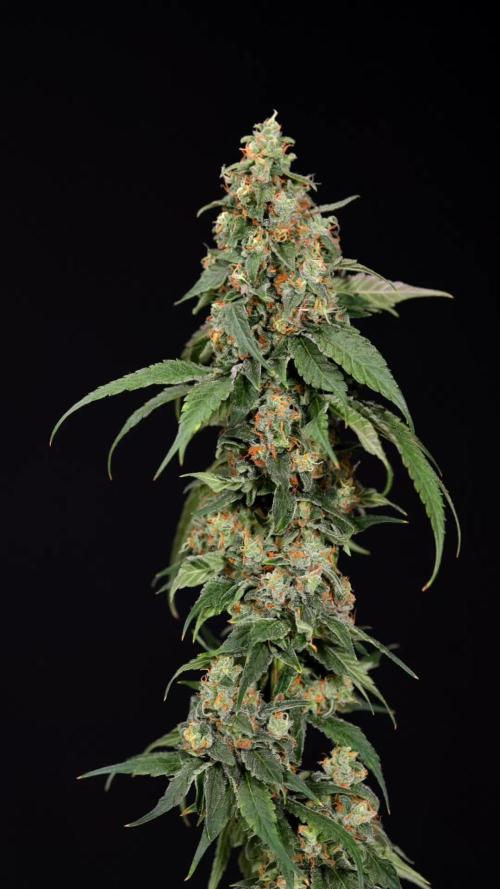
Zamnesia's newly harvested Tropicana Cookies #1 has given us a lot of satisfaction, starting with a huge main cola and ending with a very good resin build and a good production and composition of beautiful, hard buds.
The aroma it releases is sweet, delicious, and intoxicating. The plant has grown a lot and is a nice, large plant, although the side branches are a bit too long, which needed support.
It's a plant with medium-wide internodal spacing, so it grows tall, with the main cola standing out from the lower buds, and it's very virile, if that concept can be applied to plants.
This strain is much-loved; there are many good and famous versions, but ours here at Zamnesia is the best of them all.
Look at my plant arriving soon, look at the work of my brother MontyDiabalero, master of giant plants.
The resin content is excellent; really, the videos and photos speak for themselves.
We grew in a standard 11-liter plastic pot.
Maturity - The pistils have been looking super ripe for a long time, especially the upper ones, which are very red, and we're still over 90%.
The trichomes are about 20% amber, 50% cloudy/milky, and 30% clear, more or less naturally, but I think that's fine. Remember, my friends, the harvest window for amber trichomes is 15%-30%; THEY DON'T HAVE TO BE ALL AMBER. Amber is a sign of maturity but also of THC oxidation, which transforms the plant's effect into a relaxing "indica," even if the plant is used for daytime use. So my advice is to harvest based on the plant's characteristics if you want to maintain the described effect and according to your needs. If you need to make weed for sleep, let it ripen very, very much, and then you'll need a more pronounced amber. For sativas, or better yet, to maintain daily effects, I recommend around 15% to 20% amber and mostly milky.
The flowers are all excellent quality and the yield is excellent, I believe 50-70 grams, cleaned and trimmed, not a full-sized plant.
The overall shape of the plant is very good, a tall girl, no techniques used. I have another in a 20-liter pot that is exceptionally large and full of flowers.
It's probably very suitable for scrog; it responded excellently to topping.
It has a particular characteristic of strong and powerful roots.
We chose a 100% organic soil, 1000% Plagron, as always.
The soil we chose is the recently launched Plagron Bio LightMix, which will allow us to start with more gradual and consistent watering, without the sudden changes that liquid fertilizers can cause. A week of soil is enough, so don't overdo it.
Choose your favorite style and calculate your results on the website:
www.plagron.com
Visit the new Growshop area on the Zamnesia website:
Z - https://www.zamnesia.io/it/531-growshop
Our Tropicana Cookies is now in great shape, give it a try!
Z - https://www.zamnesia.io/en/10921-zamnesia-tropicana-cookies-semi.html
Z - The award-winning Girl Scout Cookies is a cannabis strain that lends itself very well to breeding projects. That's why we boldly experimented by combining its genetics with a fruity Tangie. The result is Tropicana Cookies, a fast and potent hybrid with 22% THC. This strain is highly productive, and its buds are not only rich in sweet and spicy terpenes but also covered in a layer of sticky trichomes (which facilitate the extraction of high-potency concentrates). Tropicana Cookies' genetic makeup is 60% sativa and 40% indica, a blend that produces a balanced and euphoric effect.
Although easy to grow both indoors and outdoors, Tropicana Cookies thrives outdoors in warm climates. If you have enough space and good sunlight, the plants can reach heights of 180 cm. Wait until mid-October and, in optimal conditions, you can harvest a whopping 700 g/plant. A result well worth the effort. This strain also impresses indoors, reaching heights of 150 cm and producing 500 g/m². Tropicana Cookies also stands out for its rapid flowering. After just 7-8 weeks of indoor flowering, it will be ready for harvest.
You know it, but I recommend it: here you can find so many beautiful things, essentially "the best that nature has to offer."
Z - www.zamnesia.com
Music // Tropical Playlist
www.radionula.com
+ Feng Shui Music
+ 432 Hz Frequencies

Likes
6
Share


@FumateAlgoo
Follow
🌱 Terminando la semana 4 y las plantas se ven vigorosas 💪
Después del trasplante, las niñas se han mostrado bastante fuertes y adaptándose muy bien al cambio. Se nota que el trabajo previo dio resultado.
Detecté una pequeña carencia de nitrógeno, así que en el próximo riego voy a incorporar unos mililitros extra de Bio Grow para corregirlo. Por ahora, todo marcha excelente y las plantas están respondiendo de maravilla. 🌿
Dato útil: Unos días antes del trasplante (semana 3), a las macetas de 11 litros les apliqué al menos 1 litro de agua con una dosis mínima de Root Juice. Esto fue para preparar y humedecer el sustrato, lo que facilitó mucho el trasplante y evitó la necesidad de regar en exceso esta semana.
¡Seguimos dándole con cariño y atención al cultivo! 🌞🌱

Likes
4
Share


@Budking420
Follow
This is by far the largest autoflower that I have personally had the pleasure of growing. She is in full on flower as shes heavy pre flowering and has an awfully wonderful smell. I may end up setting her out in a greenhouse at some point as shes so much taller than all her friends and sisters. Check back next week to see just how fast she flowers! & remember its 4:20 somewhere!!!!!!

Likes
18
Share


@TheCannaProphet
Follow
~ FASTBUDS TESTER #2206 ~
Well friends, here we go on another 'canna-venture' together!
The grow room has had a complete remodel and some upgrades done to it including brand spanking new 4x8 and 4x4 tents and a Trolmaster Hydro X controller along with a new Control Panel.
This tester strain is one of six tester strains that FastBuds has graciously provided me with and I'm looking forward to seeing what this girl has to offer when she's grown to her full potential!
One drawback of 'testers' is I have little to no information on it other than its number and that it's an autoflower... 🤪 But, it's ALWAYS a blast growing them for me because not knowing a lot allows me to just concentrate on the essentials: Light, Environment, Water, Nutrients and possibly a bit of LST... not complicated, just basics like keeping a constant temperature and RH in the tent at a level that gives a good VPD, watering when almost dry and maintaining proper light levels according to their stage of growth.
____________________________________________________________________________________________________________________________________________________________________________________________________________________________________________________________________________________________________________________________________________________________________________________________________________________________________________________
~THE SETUP~
~Initially seeds were lightly scuffed, then soaked for 3 hours in 78℉ distilled water after which they were transferred to moist paper towels laid out in a Jiffy Pellet plastic starter tray with lid. Underneath the tray was placed a Vivosun Heat Mat with Controller that was set to 78℉ where they stayed until their tap roots emerged.
~Planted into Jiffy Peat Pellets that were hydrated with distilled water warmed to 78℉ with a 7.0 ph.
~Once roots emerge from the Jiffy Pellet they're transferred to their fabric pots.
~Grown 100% organic in a 4g Gronest fabric pot and a 3g fabric pot by Wraxly filled with Mother Earth 70/30 Coco/Perlite medium and initially amended with Dr. Earth 4-4-4 / Earthworm Castings / Dr. Earth Flower Girl 3-9-4 and Coast of Maine Stonington Blend Organic Plant Food 5-2-4.
~19/5 light cycle for the entire run with supplemental UVA added during flower. Lights are controlled by a Trolmaster Hydro X controller set for a 15min Sunrise/Sunset simulation.
~Top dressing every 3-4 weeks with slow release dry amendments and Earthworm castings.
~Straight water ph'd @ 6.2-6.8 when needed and bi-weekly Compost Tea's.
____________________________________________________________________________________________________________________________________________________________________________________________________________________________________________________________________________________________________________________________________________________________________________________________________________________________________________________
Weekly Updates:
1/19- Here we go into Week Four of flower and these testers are ON FIRE!🔥🔥🔥
Both testers are in a flower frenzy and are ready to eat! Today I gave both girls their last top dressing with Down To Earth 4-8-4 Flower Mix at a ratio of 2tbsp/g and Coast of Maine's Stonington Blend 5-2-4 Organic Plant Food at a ratio of 1tbsp/g which I simplified by using 1/3 cup of the 4-8-4 and 1/4 cup of the 5-2-4 in the 4g pot and 3/8 cup of 4-8-4 and 1/8 cup of the 5-2-4 in the 3g pot. After working the amendments into the medium, I watered it in with 1g of straight de-chlorinated water ph'd to 6.6 @ 74℉. It will take a week for the microbes to begin breaking it down and will last for 3-4 weeks after that which should coincide with them finishing up, or close to it, enabling them to naturally 'flush' themselves out.
I've also increased the power to the HLG 650R's the the Trolmaster Hydro X Controller to 75% which has them pulling 990w at the wall and have them hung 32" above canopy. I also starting adding in 4 hours of UVA during the middle of the light cycle for the remainder of flower. I've been monitoring their leaf temperatures and they're running 71-73℉ which is perfect! I have the AutoPilot APC8200 co2 Controller set to 1100ppm with a 100ppm window and the AC Infinity Cloudline T6 controller set to maintain a 74℉ temperature in the tent while the lights are on.
1/21- I'm watering these thirsty girls daily with straight de-chlorinated water ph'd it to 6.6 @ 74℉ and they're both thriving! The #1 pheno stays in a perpetual state of 'praying'.... a VERY happy girl she is and the #2 is just an enormous plant with tons of bud sites and flowers that are starting to get a coating of white trichomes giving them that frosty appearance!
1/23- I watered/fed both testers today with 0.75g of de-chlorinated water each with GreenGro's Natures Brix, Granular Myco and Flower Finisher mixed in, after which I added 1 tsp/g of unsulfured molasses and then ph'd it to 6.6 @ 74℉. They'll be getting straight water from here moving forward as the medium has enough food in it to support them until they finish.
1/25- Daily watering continued today with both girls receiving 0.75g of straight de-chlorinated water ph'd to 6.6 @ 74℉.
OMG they're both looking fantastic, both are amazing cultivars with a generous coating of trichomes beginning to cover their flowers. I'm really looking forward to Week Five of flower where these ladies should really start to turn it up a notch!! 😍💚
😎💚 Thank you for checking out my passion in life! Please visit as often as you wish and I hope you enjoy this journey as much as I know I will! Grow Strong! 💪😎🤙

Likes
31
Share


@Harukisan
Follow
We are reaching the end, the buds are heavy and the smell is delightful.
The trichomes look alright, I will harvest next week. Can't wait any longer to be honest.

Likes
10
Share


@KcKush
Follow
*Will probably trabsplant these into 1 Gallon Pots in 2 days.
*Nothing crazy
*Only 4 of 5 beans popped.

Likes
13
Share


@Robeeriegenetics
Follow
Dropped light hours down to 16 . Topped off nutrient solution with 5.0 ph evened out .removed none chosen phenos to be flowered in separate room no longer tracking those we will only follow the chosen mothers clones i cut clones today as well had the lady friend clean floor with bleach and dawn put clones in ez cloner 32 systems
Likes
12
Share

@farah4weed
Follow
Hello guys 😍👽
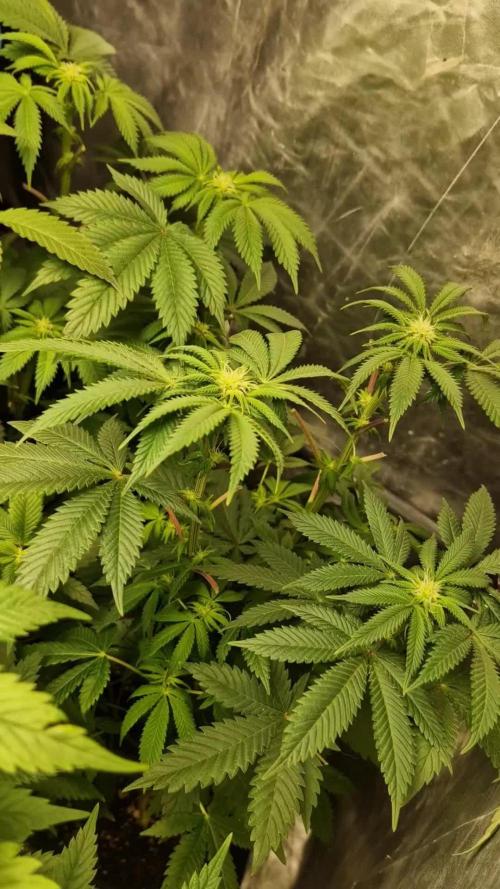
This week is the most exciting time of my cultivation.
After we grew 10 og creams, today in the third week of flowering, all the seeds showed that they are feminized😍😍
My project has given the right result
But more important than this is the final product, which we compare with the father (og kush) and the mother (cake n cream) and the traits it inherited😍😍
Thanks for your comment🙏😍👽
"farah4weed"
Likes
2
Share

@Sativa1444
Follow
HAZIRLIK
Dolabı yapmak bir aydan fazla ileri sürdü; aydınlatma, havalandırması, iç kaplaması, montajı, elektrik kabloları, fişleri, soketleri, prizleri vb. Tüm bunların ardından, sonunda bitirmem ve kotiledonların görünenlerin görünmediğini gördüm. Burada yaşadığım mücadeleyi okuduğunuzda, heyecanımı ve mutluluğumu paylaştığınızı düşünüyorum… =)
//LED'LER//
Torch LED'leri kullanıyorum ve bu LED'ler fiziksel olarak oldukça büyük olduğu için, dolapta ciddi miktarda dikey alan kaplıyorlar. Toplam 70 cm'lik aralıklardan 50 cm'ye düşüyorlardı ve toprak birleştirmeyle yaklaşık 40 cm'ye düştü, bu da başlangıç büyümesi için neredeyse hiç yer bırakmadı. Bunu çözmek için Torch LED'lerini plastik yuvalarından çıkardım ve bunları ayrı ayrı boyutlandırılmış ahşap plakaya düz bir şekilde monte ettim. Bunu yaparak yaklaşık 15 cm'lik alandan tasarruf sağladınız. Ancak dolap yapısı ve Torch LED'lerinin kendisi nedeniyle ciddi ısınma sorunlarının belirtileri.
//KABİN//
LED'leri açtığımda, 26,5°C'lik iç havayı alıp 37–38°C'de dışarıya atıyorlardı. Her lamba bana yaklaşık +4°C'lik bir ısı artışı sağlıyordu.
Durum böyle dönemde fan kapsamını artırdım; bu sıcaklıkta yardımcı oldu, ancak daha sonra içerideki nem 35–30'a, hatta %25'e düştü.
Ne yeteneğimi düşünürken, 12V çift taraflı bir Peltier modül kullanmayı planladım: soğuklukta bakır borular sararak bunu fan destekli bir sıcaklığa dönüştürdüm. Aslında işe yarayabilirdi, ancak sıcak ortamdan ısıyı uzaklaştırmak için ihtiyacım olan sistem çok hantal hale geldi. O yerde, "Büyüme hayali bitti" dedim ve vazgeçtim.
Birkaç gün sonra "Neden olmasın?" diye düşündüm ve dolabı balkona taşımaya karar verdim. Sonuçta, gizliydi - kimse içinde ne olduğunu bilmeyecekti - ve balkon uydu yoluyla mükemmeldi.
Dolap balkonunda olacağından, iç kısım ısıdan, yağmurdan, bölgelerden ve diğer zararlılardan tamamen yalıtılması gerekiyordu. Tüm delikleri ve ortamları sıcak silikonla kapatırım. Daha sonra ısıl işlem köpüğü yerleştirdim ve her şeyi bölme filmle kapladım.
Tüm bunları yaparken termostat, ısıtıcı, nemlendirme ve vantilatör için hiçbir şey görünmemesi için tüm kablo bağlantılarını da gizledim. LED aydınlatma için tek tek veya hepsi birlikte kontrol edilebilen ayrı lamba yuvaları ekledim. Ayrıca dolap kapağı açıldığında tüm ana LED'lerin otomatik olarak söndüğü ve yalnızca küçük bir 5W LED'in açık kaldığı bir sistemim oluştu.
Vantilatörü dolabın sağ üst arka köşesine monte ederek egzozu diğer noktalara yönlendirdim. Vantilatörün gücünde, negatif basınç o kadar güçlüydü ki hava yalnızca girişten katılıyordu - başka hiçbir yerde 0,001 m³ bile hava kaçağı yoktu. (Bunu hava verileri için değil, zararlıları uzak tutmak için yaptım.)
//SICAKLIK VE NEM//
Dolabı balkona taşındıktan sonra bu sefer ciddi bir soğukluk sorunuyla karşılaştım. Geceleri sıcaklık 8-9°C'ye düşüyor, gündüzleri ise 24-27°C'ye kadar çıkıyor.
Elektrikli fanlı ısıtıcılar kullanmak istemedim çünkü havayı çok kurutuyorlar ve tehlikeliler.
Peltier fikrinden ilham alarak tekrar düşünürken çözümümü bir PTC ısıtıcı kullanarak buldum. Hava bağlantıları olan iki alüminyum bloktan oluşan bir PTC ısıtma elemanı yerleştirdim ve gelen tüm havayı bu kanallardan mülkler.
Sistemi 24,5°C'de açılıp 24,6°C'de kapanacak şekilde ayarladım. Bu şekilde sıcaklık sadece 1,5° tolerans içinde -24,5 ile 26,5°C arasında dalgalandı ve LED sayıları azaldıkça daha stabil hale geldi. PTC'yi termostata bağlayarak ısıtma sistemini tamamladım.
Gündüz sıcaklık sorunlarının çözülmesi için, elektrikler 11:45'te kapanıp 17:45'te tekrar açılacak şekilde programladım; böylece 6 saatlik bir kesinti süresini elde ettim. Bu süre boyunca kabin yaklaşık 24°C'lik dış havayı çekiyor, maksimum 27°C'ye ulaşıyor ve ardından tekrar soğumaya başlıyor; tam da bu noktada PTC devreye giriyor. Böylece
daha önceki büyük yangının sorunu tamamen çözülmüş olmuştu.
Ayrıca nemlendirmeyi termostata bağlayıp %70'e ayarlayarak nem sorunu da çözülürm.
Tüm bu süreci 1,5 ayımı aldı ama değdi.
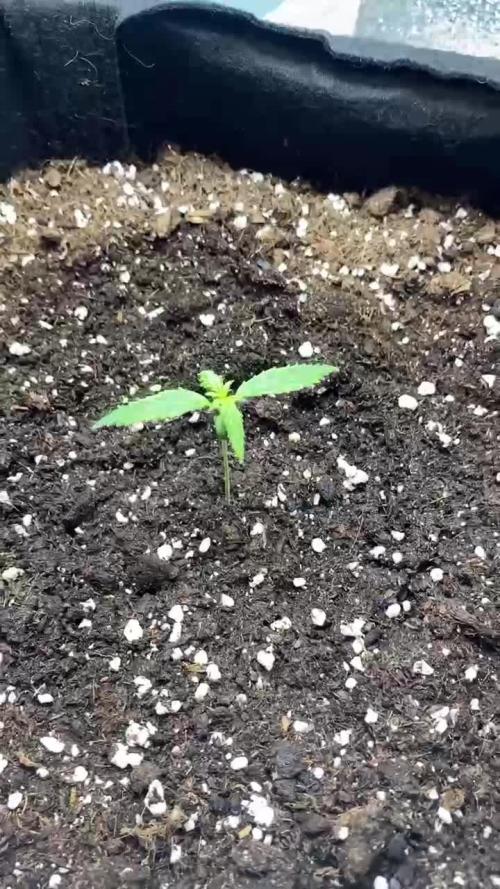
1-2-3. güne kadar tek led 3. günde 10. güne kadar 3 ledide açtım ama bitkide büyüme problemi olduğunu gördüğüm için ışıkları söndürüp tek ışık 40cmden devam ettim.


Likes
17
Share


@CanadianFillmore
Follow
Week 7 begins. Removed some dead leaves and big leaves that were blocking light to the lower parts of the plant. Buds are getting big and frosty! Very happy with the plants development up to this point.

Likes
9
Share


@TiRobotProds
Follow
Nous somme à la 6ème semaines de floraison tout se passe comme prévu les bourgeons continuent de gonflés les paramètres sont excellents 24 degrés en température 55% en hydrometrie.
- L'ajout de RQS guano a redonner un coup pouce à la plante les bourgeons ont sacrément gonfler aimer et regarder par vous même. Cet semaine sera aussi la dernière irrigation avec nutes. Ce run est l'une de mes préférée.
Léger carences en azote post-stretch cela es dû a un faible apport de celui-ci mais rien de grave cela indique les derniers semaine de vie de cette dame le rinçage sera simple et éfficace.
L'odeur quelle dégage es fortement fruité cela sent le 🍬 🍬. A plus pour d'avantge d'informations.👍🏼

Likes
6
Share


@Fyno_TH
Follow
🌸 Flowering Week 4 (Oct 23–29) — From Stretch to Stack!
Week 4 hit different 🌿🔥 — the early-flower stretch is done, and now the girls are putting all their energy into stacking dense buds. Each cola is forming shape, pistils bright and fresh, and the first layer of trichomes starting to glisten under the Spider Farmer G3000 💡.
The air inside the tent feels balanced now — clean after the PM fight, RH stable at 45–50 %, temps steady around 26–28 °C. The dehumidifier and airflow combo are working perfectly 🌬️💧.
Feed mix (per L):
• Corex 1 ml
• Mira 0.5 ml (pH adjust)
• Florex 2 ml
• Aurora 1 ml
• Bud Candy 2 ml
• Terpinator 5 ml/gal (~1.3 ml/L)
• Oxyroot 1.5 ml
• Athena IPM (foliar every 3–4 days)
💧 15–18 L each with 10–20 % runoff
⚗️ PPM 1760 | EC 3.5+ | pH 6.0

Likes
2
Share

@NAG420
Follow
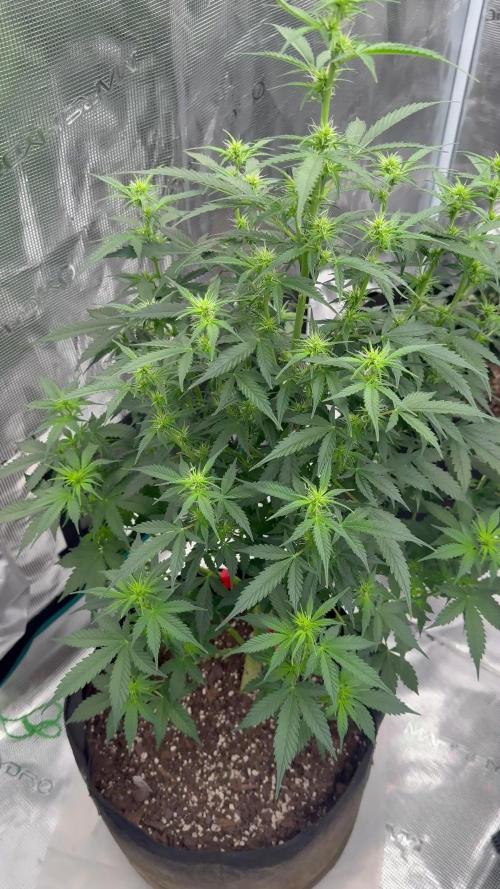
This week I did some defoliation on her just did lower bud site LST. I forgot to mention last week I did do some
removal of lower bud sites focusing more on the to bud site production.Just got some new food to add to the list will be feeding it the next few days see how she likes it.
Likes
4
Share


@AngeLus
Follow
Yellow big leaves . Buds 🙂 ok . No nutrients start flush with bud Candy . Great happy qeens 😍 best wishes 👏
Likes
117
Share


@Nomad
Follow
What can i say the maui is charging it handle my little heat problem this weekend alot better than my TSA plant (trans siberian auto). I topped her once and have her tied down im gunna try and let her veg until the TSA is almost finished then ill flip the light schedule just so she can grow up big and the autoflower still gets 20/4 for most of its flowering stage. Im thinking about scrogging this plant im going to let it veg for a really long time so everything can grow up sortve tall so when i flower it i can make it a giant. Ill vaeg it until my tsa is harvested than flip it.
THE GIRLS ARE LISTENING TO NEIL YOUNG


Likes
Comments
Share


@absolutgrow
Follow
This is my growdiary for the Royal Gorilla seeds. They are growing together with NL from RQS. I planted 3 of them and all are growing happily. I planted each seed in a different pot so i can look for differences in yield and quality. Im looking forward to share the grow-process with you and i hope you enjoy my diary :).
Likes
46
Share


@Crwfz1
Follow
This plant is a monster idk what else to say 🤣 I'm stoked as hell and can garentee it will have best yield iv had indoor to date off one plant I can't believe how well it takes to training it is slow coming into flower and all the nodes are crazy close together these nugs are gonna be massive and heavy the roots on this plant are so robust you can't stick in a probe it's solid roots as u can see in the video the soil is straight roots not even a half inch under surface she's inhaling tons of water stay tuned it's gonna be worth it !!


