Likes
Comments
Share

@420DeepGrow
Follow
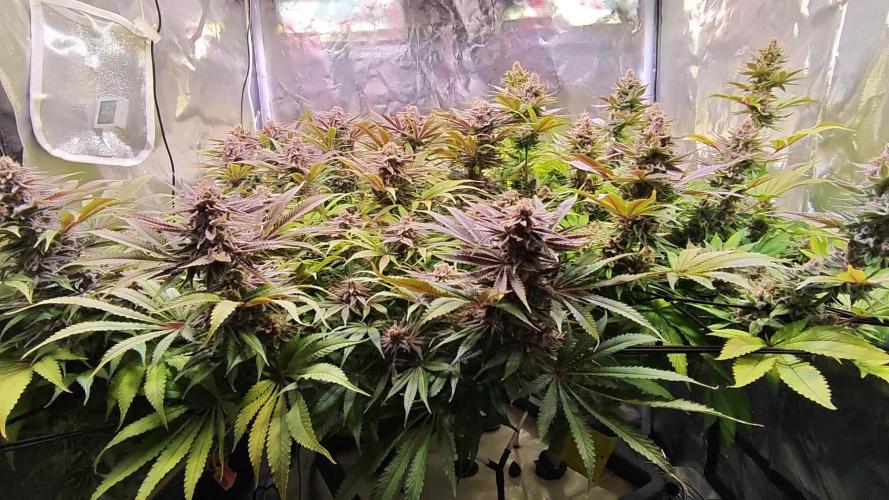
📆 Semana 5
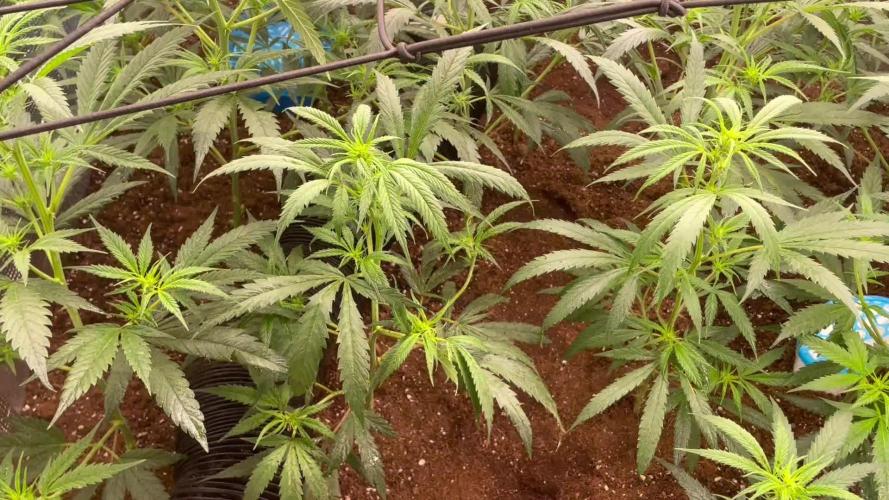
Con la estructura ya marcada, el cultivo entra claramente en fase productiva. La canopia se mantiene uniforme y las puntas empiezan a ganar presencia a medida que las flores se desarrollan.
Los cogollos avanzan en el apilamiento y empiezan a compactar, formando erizos cada vez más definidos. La resina comienza a hacerse visible en cálices y hojas cercanas.
El consumo progresivo de hojas grandes continúa de forma natural, señal de que la planta dirige su energía hacia el engorde y la formación de flores.
Seguimos creciendo fuerte 💪!

Likes
33
Share


@weedelicious030
Follow
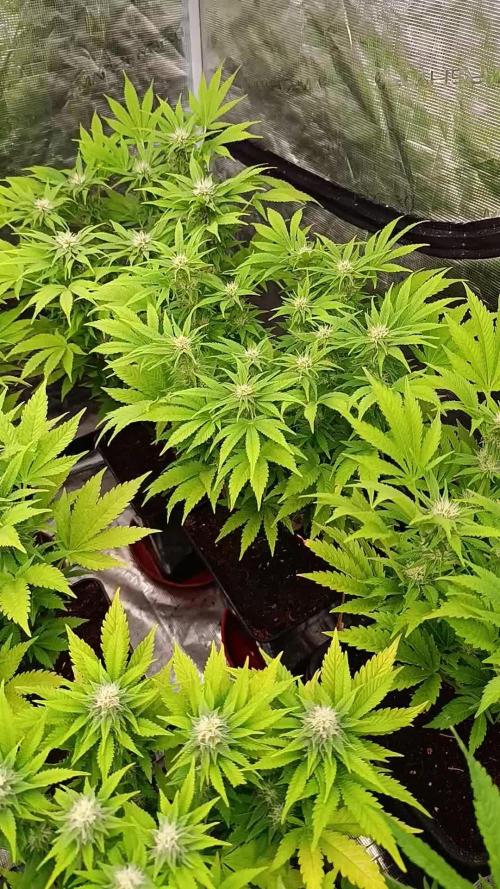
Alle Pflanzen wachsen sehr gesund. Das Training haben alle gut vertragen. In dieser Woche gab es keine Probleme


Likes
22
Share


@UnorthadoxDude
Follow
Hey! Welcome to week four for Misty, a mystery auto from FastBuds.
I update daily so go check last week which is now complete. :)
Day 22: I have reconfigured the tent - see video for new config. Misty has more light now. Fertigated 2l.
Day 23: I have heavily pruned the companion plants and performed some LST and defoliation (where big fan leaves block nodes, or are in the way). Pretty radical looking changes, brutal perhaps. I did it to Nesia last week and she responded very well. So let's see how Misty handles it. I have been doing increasingly tough LST since Day 7 in preparation for this brutality so she should bounce back.
Day 24: See? :)
Day 25: Misty had breakdrought at 0900. Fertigated approx 4l.
Day 26: Trying to wait a week before further training.
Day 27: Did a little gentle LST and took off 2 leaves. Didn't manage to wait a week only 4 days.
Day 28: Fertigated 5l.


Likes
24
Share


@Puraweeda
Follow
The Gorillaz zkittlez (on the left) start to be really sticky. And smell like zkittlez... One of them has some really Orange pistils.
The blue sherbet x purple punch (on the right) is a little bit slower. Less trichromes, less smell. Bud the bUds start to be nice as well.
As the brand suggests at the 4 week of flowering I add 5grs/L of guano for flowering stage on the top of the soil.
No pk booster this time for watering. Maybe I will put the minimum amount of power feeding booster the next watering.


Likes
26
Share


@Inquisitor
Follow
Well well well, she is coming along nicely but the nugs seem smaller than the 2 previous pheno's im hoping they build nicely and form big cola's but obvs will have to wait and see. I seem to have trouble getting those arm sized cola's i see on youtube. maybe its the strain or am i doing something wrong? Also i see a lot of people with massive stems that look so fat... mine dont seem to get as thick, is there something i can do better?

Likes
5
Share

@RealGrowDiary
Follow
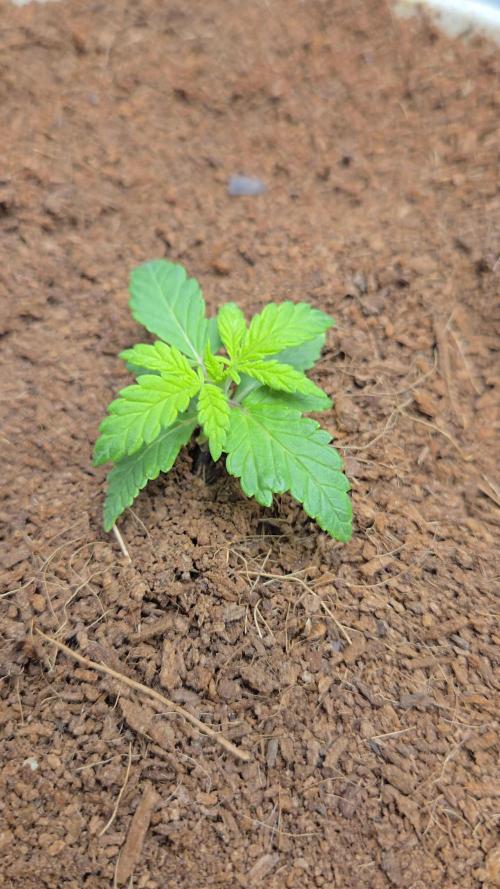
Week 2
In the second week, the plant begins to adjust to its environment, but its growth remains noticeably stunted. New leaf sets emerge slowly and stay significantly smaller than expected, despite maintaining a healthy green color. The stem shows little thickening, suggesting limited root development below the surface. Compared to the other plants, its reduced size is especially apparent. The plant remains upright but appears compact and dwarfed, with leaves growing closely together. Overall, it conveys a sense of stability, yet with severely restricted growth rather than visible expansion.
No water given so far!

Likes
63
Share


@TheFairyBudMother
Follow
It’s so warm today! Of course I pulled all my plants out to spray with spinosad and feed/water.
*********
I use a Hudson 2L sprayer. My partner used to work in the film industry and they found this brand of sprayer gets the most thorough even coverage for makeup or whatever movie magic they use sprayers to create. It’s great.
*********
The larger gorilla glue has come around but I lost a few nodes. I’m seeing a little PMD, but I’ve been knocking it back when baking soda and water. I’ve been taking scalps, defoliating the big one gently and the little ones need almost daily lollipopping. I’m watching my ph and using more cal mag. I definitely feel like they are two different phenotypes.I have them on individual diets.
**********
Some fungal gnats come with the humidity so I topdressed with gnat nix. I don’t believe I overwater so I hope that’s the solution! I think I may wait another week or two and get things more stable before moving to flower. I will update video tomorrow when I have access to faster upload speeds.
**********
Added videos!


Likes
3
Share


@CannaBossBizz
Follow
The Moby Dick ist gettin bigger every day. Lovely plant.
Did top her and some LST so every branch's gettin enough light. Stay tuned for more 🤙🏽
Processing
Likes
2
Share


@FolloMiSensi
Follow
Nice growth this week, lst from last week resulted in more cola growth. Readjusted lst for even canopy.
Both showing sex, treating as pre flower and starting to transition into bloom nutes with a light feed.


Likes
7
Share


@sensistar9
Follow
The strain is not the biggest yielder but its quite promissimg,the smell is top and the effects are a very mellow creative smoke,tastes like sweets,will grow it again ✌️✌️
Likes
4
Share

@Nistnov
Follow
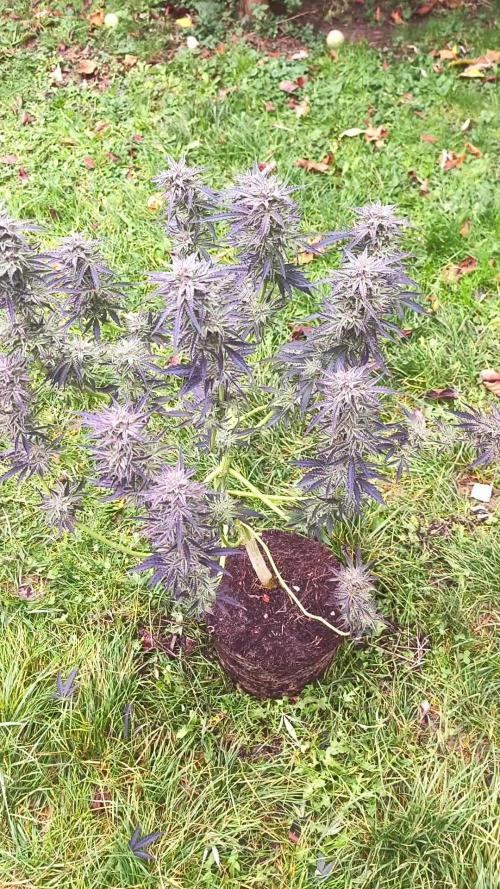
Okay so this is the last week, i already cut her down as you can see in one of the vids.
Im in love with this plant, mainly because there is not a single sign of bud rot, she survived sveral days with humidity at 90%+ and rain.
While there was almost no sun shine she fattend up quite good.
The smell is so amazing, the fresh buds smell of caramell and it has this nostalgic indica smell. The dried buds, even though not cured, smell sweet and a bit like ripe mango, truly amazing just like the crazy amount of trichomes everywhere, shes so frosty.
Im mourning that she didnt flower earlier, more sun would have helped her getting even fatter.
Im preparing her for the harvest with the "living dead" method, i used lemon juice and water which i filled in a vase in which she will now slowly finish up in the darkness, this will help to fill the last clear trichomes with all the good stuff. I will post the harvest in the coming week.
Processing
Likes
12
Share


Likes
9
Share

@Gnrlymsntrp81
Follow
Hi Growmies,
Last week for my ladies, going to harvest any day. Not giving any nutrients .Conditions are perfect and 2 weeks no rain are predicted with temps around 18°. Thanks for swinging by .


Likes
60
Share


@Lungboi
Follow
Hi everyone! So nothing really of note to report this week, she is definitely getting closer to harvest as she is uptaking significantly less nutrients now than she did a week or two ago so I have had to go down on nutrients and will probably have to lower it even more as it is still raising daily. She is also getting a bit fatter and denser but I'm really hoping to see some improvement here over the last weeks🙏
I have again been pretty busy outside the grow tent this week building and setting up an outdoor gardening area at our house for my girlfriend to grow her vegetables, fruits, and flowers so I have had less time to be in there and have forgotten to take pictures some of the days. But it has been lucky that I haven't really had any problems to attend to in the tent so all I have had to do is the daily PH and EC measurements and then change the water every other day.
Happy growing to everyone and thank you for the comments and encouragement! really appreciate the community in here and it's been a real help in my first grow!

Likes
14
Share


@All_our_small_plants
Follow
Bewässerung: 500 ml jeden 3 Tag in der Dritten Woche
pH-Wert: 5,8
EC-Wert: 0,7 mS/cm
Temperatur: 22ºC
Luftfeuchtigkeit: 50%
Schädlingsbekämpfung: im Moment haben wir keine Anzeichen das es was zu bekämpfen gibt, sobald die ersten Anzeichen da sind werden wir handeln :)
PPFD: 200 µmol/m²/s
DLI: 15 mol/m²/Tag
Düngemittel: COMPO GROW ORGANIC WACHSTUM DÜNGER, Sie bekommen auch ab jetzt immer etwas CalMag von BioBizz zu Prävention. Ab Tag 18 haben wir angefangen sie mit einem Mineralischen NPK Dünger (NPK 7-3-5) zu Gießen .
Besonderheiten: Die Linsen wurden entfernt und wir haben mir dem LST begonnen
-Tag 15 Heute haben wir mit dem LST Begonnen und sie hat sich sehr gut vom Toppen erholt.
-Tag 16 heute wurde sie Entlaubt.
-Tag 17 heute wurde sie Entlaubt damit die Triebe mehr kraft bekommen und schön im Licht stehen.
-Tag 18 heute wurden wieder die LST Sticks angepasst damit sie in form bleibt.
-Tag 21 heute wurde sie entlaubt und wurde wieder nachunten gebunden, sie wächst wie beim letzten mal extrem gut, das wird sicher wieder ein Monster 💪💪💪