


Likes
Comments
Share

@TyRun
Follow
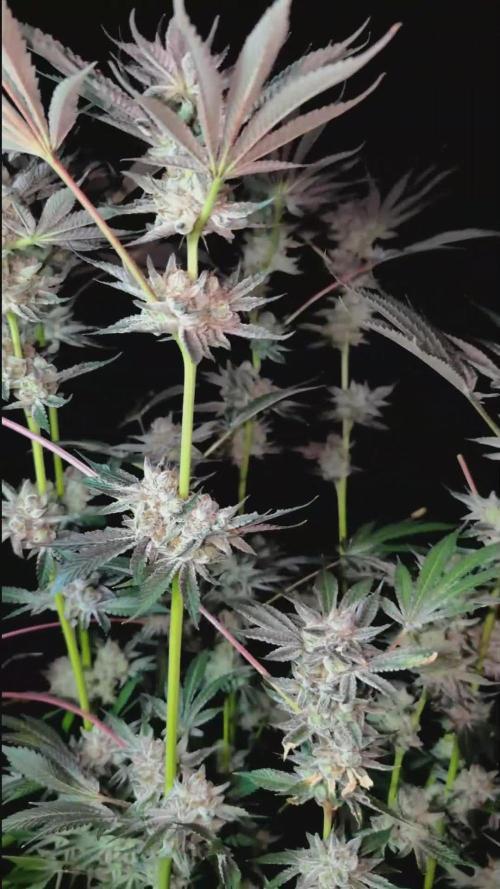
Thats all folks ))
Magnetic field is definitely working but should be improved both the schedule and the hardware.
To be continued....

Likes
Comments
Share


@Alejangrow
Follow
Shes reached 4 feet tall this week😎🌿
Did some defoliating to unblock some of the bud sights.🌺
She took well too last weeks flush & is back on the recommended regimen. 💉
Cant wait to see how these 2 turn out.
This is supposed to be a 7 week flower strain but probably gonna let go for 8 weeks flower.🤷♂️🏽


Likes
24
Share


@nonick123
Follow
Día 94 (02/09) Aplico Insect Frass como Top Dress para ver si revierto un poco el amarilleamiento que muestran algunas hojas, ya que empieza a ascender por la planta
Riego con 500 ml H2O pH 6,5
Día 95 (03/09) Dia nublado y de temperaturas entorno a 24 ºC. NO es necesario regar!
Día 96 (04/09) Llueve que te llueve! 🌧️. Temperatura 21 ºC. Días de humedad alta por aquí!
Riego con 500 / 1000 ml H2O pH 6,5
Día 97 (05/09) Floración en progreso. No veo ni una sola oruga con el bacillus thuringiensis y espero que siga así! 🤞
Dia muy nublado. No hace falta riego
Día 98 (06/09) Riego con 500 / 1000 ml H2O pH 6,5 + 4 ml/L de BioGrow de Biobizz para tratar de parar el amarilleamiento que asciende por la planta
Día 99 (07/09) Riego con 500 / 1000 ml H2O pH 6,5 + 4 ml/L de BioGrow de Biobizz para tratar de parar el amarilleamiento que asciende por la planta
Día 100 (08/09) Riego con 1 Litro de Té Floración de Lurpe Solutions. Preparación: 24 horas con bomba de aire (oxigenación) con ingredientes:
Healthy Harvest 8 ml/L + Insect Frass 16 ml/L + Hummus Lombriz 8 ml/L + Melaza 1 ml/L + Kelp Hidrolizado 0,25 g/L
Aplico de nuevo Insect Frass como Top Dress
💦Nutrients by Lurpe Solutions - www.lurpenaturalsolutions.com
🌱Substrate PRO-MIX HP BACILLUS + MYCORRHIZAE - www.pthorticulture.com/en/products/pro-mix-hp-biostimulant-plus-mycorrhizae

Likes
34
Share


@TripleCcannabis
Follow
Going into week two I did a reservoir change and added 1 tsp of GH Floramicro, Floragro and Florabloom for a total of 3 tsp of base nutrients instead of 3 3/4 to try and combat the yellowing of the leaves. Iv also added 18 ml of B-52 to help alleviate the stress this girls experiencing. May increase nutrients dependent on leaf colour and how much water/nutes are used over the next few days. I will also be adding in some benificial fungi + bacteria and some calmag. This will happen over the next few days as I dont want to shock her. After adding the calcium, magnesium and iron the yellowing improved significantly. As you can see in the video from day 13 though the roots are a little brown. I did add RAW microbes and im wondering if the browning is just a stain. If not though, being new to this I don't know if this amount of browning is something to worry about just yet. On day 13 I removed the plant dome as my humidifier finally arrived. Nice bonus is my temps went down since its a cool mist humidifier. As of day 13 I'm running at 60% RH and 23.5 C. Any comment to let me know your take on the root browning would be awesome. Thanks for following.
Likes
168
Share


@Tropicannibis_Todd
Follow
💩Holy Crap Growmies , we are outdoors and in the Ground and there Doing Great💩
👉It's been another full week 63 days from seed and she's doing great , very nice Growth, considering shes been up against the wind and rain 👈
No problems 😊 so far so good 👍And she's now in full on flowering 😁👈 lots of sun and some nice weather 😎 The only one that hasn't had bud rot 👈
I GOT MULTIPLE DIARIES ON THE GO 😱 please check them out 😎
👉THANKS FOR TAKING THE TIME TO GO OVER MY DIARIES 👈
👉NutriNPK NUTRIENTS USED FOR FEEDING 👈rain water to be used entire growth👈
👉www.nutrinpk.com right now get 10% off using SPRING2022 as the coupon code👈

Likes
28
Share


@SooSan
Follow
Dans l'ordre :
Blueberry
Dutch Passion
Blueberry
00 Seed
Blueberry
PEV Seed
Blueberry
Bulk Seed
Animal Cookies x Blue Monkey
Exotic Seed
Red Hot Cookies
Sweet Seed
DoSiDos x Purple Punch
PEV Seed
Purple Shot
Exotic Seed


Likes
2
Share


@Kelly420
Follow
Insane stretch this week.. that single super cropping pinch and lay over a few weeks ago has really paid off. It went from about 6 or 8 inches to almost 20 in two weeks. Looks like I'll be needing to support these side branches toward the end.

Likes
3
Share

@Black_Widow
Follow
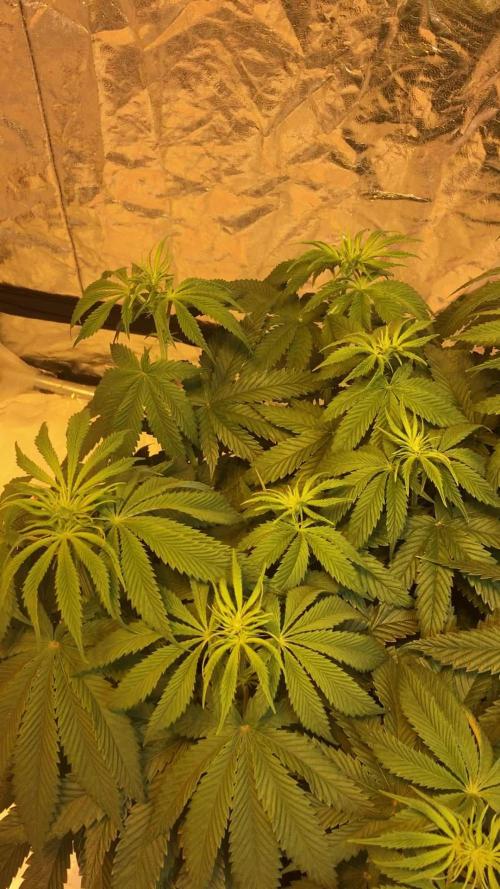
Привет садоводы !
началась новая неделя и я пока решил не переводить растение на цветение и дать ему еще неделю
это будет и хорошо для авто цветущих
они к сожалению задержались в посылке на 2 недели и уже не успевают на вегетативный световой режим
хотя 1 цветок я уже убираю на ночь в режиме 12/12 и он уже почти зацвел
растения чувствуют себя хорошо а в новом боксе им стало просторнее

Likes
40
Share


@valiotoro
Follow
easy trim✂️
The buds are Absolutely perfect,exactly what i was looking for🤩
Green pheno : cookie,diesel & gelato🍪⛽️🍦
Purple pheno : flower,sweet & honey🌸🍯
After 7 days on the dry rack she was ready for the jar to start the curing process.😋


Likes
3
Share


@Briangrowss
Follow
I think she start to look delicious
28/7 she really start to smell good
30/7 give her this morning the first time green sensation and build it up to 0,5 in the next week that starts tomorrow ☘️


Likes
137
Share


@Roberts
Follow
Well she has ripened and I missed my flush time. So she has been on just water for about 5 days. Will likely put into darkness then harvest in days. Thanks again AMS🤜🤛
Thank you grow diaries community for the likes, follows, and subscriptions on my YouTube channel. I greatly appreciate the support. Happy growing 🌱🌱🌱


Likes
10
Share


@w33dhawk
Follow
Moin an alle diese Woche habe ich die Damen auf 12/12 gestellt alles läuft soweit nach Plan die einzige Dame die mir sorgen macht ist die Dame vorne rechts sie wächst sehr sehr dicht bewaldet hat wohl etwas mehr indica gene abbekommen was jetzt nicht wirklich ein problem ist allen Pflanzen geht es soweit gut. Ich bin mit der Umstellung auf 12/12 um 1 Tag verrutscht eigendlich ist immer Ende der Woche für mich am Donnerstag somit also Freitag Umstellung auf 12/12 habe ich auch gemacht schalter auf blüte gestellt und vergessen die Zeitschaltuhr um zu stellen das viel mir dann abends auf als die Lampe noch lief obwohl sie hätte aus sein sollen somit habe ich sie den Tag noch 18/6 gehabt und bin erst am samstag 12/12 gefahren somit verschiebt sich das ende der jeweiligen woche auf Freitags, (ich bin halt zu stoned unterwegs zur zeit, was heißt zur zeit! eigendlich immer 😂😂) am anfang dieser woche gab es 20ml/L orgatrex und 1g/L bactrex, davon aber nur 500ml der lösung an die Basis für die lösung verwende ich destilliertes wasser damit die Bakterien schonend dem Medium zugeführt werden, beim normalen giessen ohne Nährstoffe verwende ich abgestandenes Leitungswasser was einen Ph von ca 7,8 aufweist was ich mit Ph down von GBN(Green Buzz Nutrients) runter regel auf einen Wert von 6,5 was super funktioniert bis jetzt! das Boden leben scheint äußerst gesund zu sein, die Pflanzen wachsen gut und robust, weisen ein sattes Grün auf und haben bis jetzt keinerlei Schädlings Spuren, Mängel oder Überschüsse an Nahrung. Bei meiner Lampe bin ich mir nicht ganz sicher habe sie jetzt zur blüte auf 75% der Leistung laufen da ich Schiss habe das wenn ich auf 100% fahre meine Damen sicher licht brand bekommen werden also muss ich abschätzen 75% und mit der Lampe nach und nach ran gehen oder 100% und bei ca 60 bis 70 cm bleiben ich Weiss nicht genau was ich machen soll oder eher gesagt was besser kommt....... Naja das wars für die woche.!
Likes
4
Share

@GoodTimesOrganics
Follow
Hi liebe Community and Welcome Back! 💚
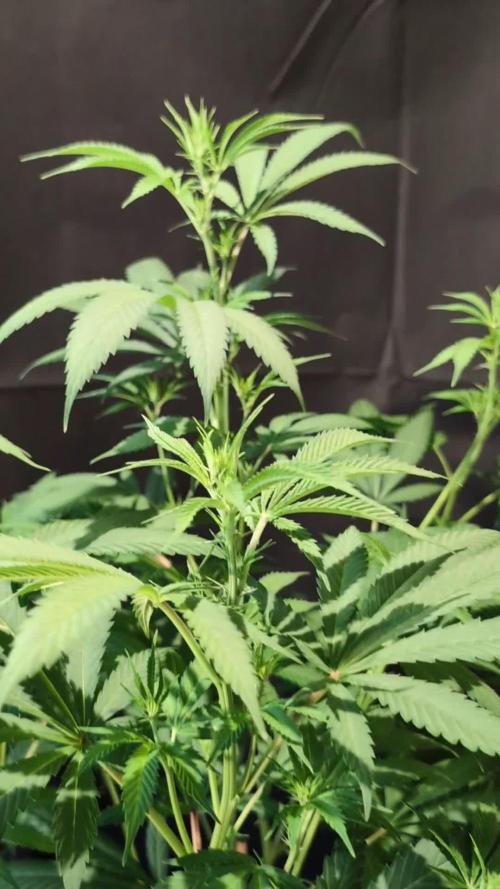
Woche 7 im Vergleichsgrow!
Bio Tabs NL. vs. Weedefix (Stuttgart/ Germany)
Hier im Bio Tabs Grow haben wir nun nach 50 Tagen des Einpflanzens eine Höhe von 97 cm Erreicht.
Blütetag: 7 (BW1)
Nach der ersten Blütewoche, lässt sich eine sehr ähnliche Performance der beiden Düngersysteme beobachten, außer dass bei der Bio Tabs NL Pflanze die Blätter nach wie vor eher etwas dunkler sind.
Die Pflanze legt einen guten Stretch von ca. 20 cm in der ersten Woche hin.
Die Beleuchtung wurde auf 630 PPfd hochgefahren.
Es bleibt spannend!
Diese Woche, habe ich einmal mit Wasser und 10ml Bio PK 5-8 (Ferment mit Melasse und Bananen extrakt) gegossen. So nach Angaben.
Ansonsten nur Wasser.
Und es zeichnet sich weiterhin ein stärker werdendes Aroma ab.
Die Bedingungen im Growschrank sind für den Anfang in Ordnung, auch wenn es aktuell schwül ist!
—————
🌞 Temp: 26
🌚 Temp: 18°C bis 19°C
💨 RH: 64%
VPD: 0,78 kPa
💡ppfd: 630 mpm
—————

Processing
Likes
1
Share


@BigGGrows
Follow
She has been in the greenhouse OUTSIDE for about 10 days now. I do have supplement lighting and air circulation in there. Running 2 450 watt advertised full spectrum tripple led cobs with an 120 watt true draw per unit. So 240 watts from the plug in the green house. I run them as supplemental on cloudy days and an hour or 2 before complete sunset. I have began flushing towards the end of this week. She was fed 1/4 strength nutes DAILY up to this point. Now only TPS signal and molasses to flush her with. I plan for a 10-14 day flush. The last 4-5 days i will drop the molasses and run straight TPS signal and ph tap water. I am now begining to see the swell towards the end of this week....i am happy about that! I hope those calyxes get nice and fat during this flushing. So far so good.....she has taken to the green house well!

Likes
7
Share


@MariRemediesLLC
Follow
Germination began today! 5/20/2022
Germination Complete! 5/23/2022

Likes
25
Share

@DogDoctorOfficial
Follow
Ghost Train Haze — Harvest / Trim / Cure
Part 2 — Trimming, Resin & First Cure
First of all, once again, sorry for dividing this harvest into three different parts. But honestly… there was just no way to fit this entire experience into one single update without rushing it.
This run became something special for us.
So instead of throwing everything into one giant report, we wanted to slow things down and give each phase the attention it deserves.
Part 1 was about harvest day itself — especially the frozen plant and the preparation for the future ice water hash runs.
Now in Part 2, we focus on the monster of the room.
The big Ghost Train Haze girl.
The giant.
And damn… she was beautiful.
⸻
The Giant Finally Ready
After drying slowly and patiently, she finally reached that moment every grower waits for:
the stem click.
Not bending anymore.
Not soft anymore.
That perfect dry snap telling us she was finally ready for trimming.
And honestly, seeing this massive plant hanging there fully dried was already rewarding by itself.
Huge flowers. Dense structure. Long spears everywhere. Frost absolutely covering the plant from top to bottom.
At this point, we brought out the Trim Bin, got comfortable, and of course…
Mr. Baggy joined the session too.
Because trimming alone is trimming.
But trimming with the homies becomes part of the memory.
⸻
Trimming This Beast
Once we started separating the branches and working through the flowers properly, one thing became immediately obvious:
This plant was ridiculously frosty.
And I mean ridiculously.
Possibly the frostiest plant in the entire room.
Every touch released resin.
Every nug felt sticky.
Scissors getting glued together constantly.
Gloves turning darker and shinier minute after minute.
The flowers themselves came out incredibly dense and compact too. Heavy in the hand. Proper weight to them. Not airy at all despite the sativa influence from Ghost Train Haze.
And visually?
Beautiful.
Silver-covered calyxes.
Orange hairs fading perfectly into the resin layer.
Chunky flowers with that classic “don’t squeeze too hard or you’ll ruin the trichomes” feeling.
This girl truly felt like a reward after the full cycle.
⸻
The Trim Bin Surprise
One thing we absolutely loved during this trimming session was watching how much resin naturally collected inside the Trim Bin.
By the end of the session, the amount of loose trichome heads sitting underneath the screen was honestly crazy.
No dry sift machine.
No mechanical shaker.
Just trimming.
And still…
A beautiful golden layer of resin waiting for us underneath.
Of course, finger hash also started building up naturally while trimming. Sticky gloves. Sticky fingers. Sticky scissors. The classic signs of a happy trimming session.
Then came one of our favorite moments of the day.
⸻
Playing The Drums — Moroccan Style
At the end, we decided to have some fun with the trim itself.
Using the dry material almost like traditional Moroccan drum-sifting techniques, we gently worked the trim leaves and remaining material to knock off even more trichomes.
Simple. Relaxed. Traditional-inspired.
And honestly?
It worked beautifully.
What we collected afterward turned into a gorgeous little hash bar that looked and smelled incredible.
We didn’t even bother weighing it.
Sometimes not everything needs numbers.
Some things are simply for the experience.
For the ritual.
For the future session.
For curiosity.
For enjoyment.
And this one definitely earned its place for later tasting sessions.
⸻
Final Dry Weight
After everything was trimmed, cleaned, and separated, the final dry flower weight from this single plant came to:
294.9 grams dry
Honestly?
We’re extremely happy with that.
Almost 300 grams from a single plant in this run is something we can absolutely appreciate.
Especially considering this entire project was:
* 12/12 from seed
* Minimal training
* Minimal intervention
* Natural structure
* Mostly observation and guidance
Just letting the plant express herself while giving her the right environment.
And she rewarded us massively.
⸻
Storage & Cure — Different Approaches
Once trimming was done, we started organizing the curing process using different storage methods.
This time we decided to split the flower between:
* Glass jars
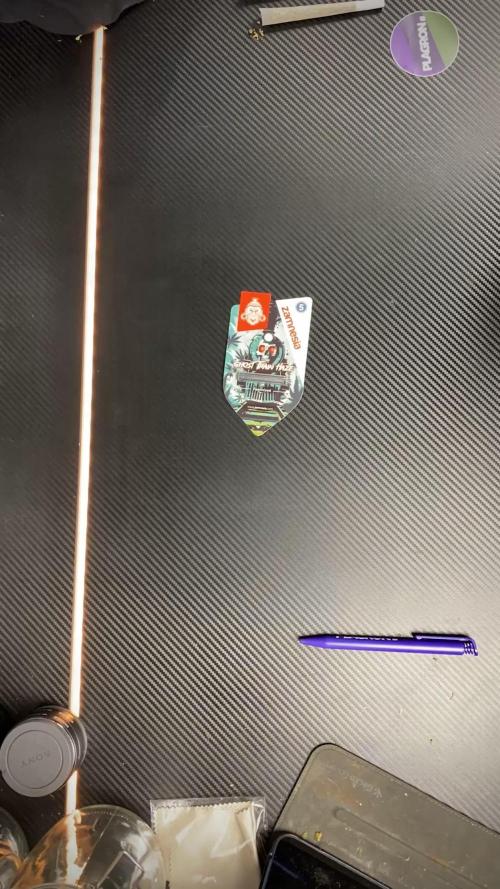
* Metal Zamnesia containers
* Grove Bags
Each one has its own purpose and philosophy.
Glass Jars
The classic.
Simple, reliable, proven for decades.
Perfect for manual burping and personally controlling the curing environment yourself. They also allow us to visually inspect the flowers easily during cure.
⸻
Metal Containers
The Zamnesia metal containers feel more protective physically and also help reduce light exposure completely.
They feel solid. Clean. Almost laboratory-like.
A very nice option for preserving flower while keeping things discreet and protected.
⸻
Grove Bags
These are probably the most modern approach we tested in this run.
The idea behind Grove Bags is that their “TerpLoc” technology supposedly regulates humidity internally while allowing gas exchange in a controlled way.
The theory is that they naturally maintain flower within the ideal curing range around:
58–62% RH
without constant burping.
So now we’re extremely curious to compare all three methods later during the smoke review phase:
* Does one preserve terpenes better?
* Does one keep the flower softer?
* Does aroma evolve differently?
* Does cure quality actually change?
We’ll definitely revisit this in Part 3.
⸻
The Frozen Plant — Flower Comparison
After finishing the main giant plant, we also trimmed and cured the material that came from the frozen/hash-focused plant from Part 1.
This was important for us because we wanted to compare:
* Flower from the “normal dried” plant
vs
* Flower from the plant intended mainly for extraction
And surprisingly?
The terpene profiles feel extremely similar.
Same family. Same identity. Same Ghost Train Haze soul.
Maybe slight differences in intensity or texture, but overall the profile remained very recognizable between both plants.
Which honestly gives us a very good feeling about the future hash quality too.
The frozen plant itself ended up giving:
58.5 grams dry
Plus whatever was already separated and reserved through the frozen material process itself.
So overall, absolutely worth it.
⸻
Macro Photography & Focus Stacking
During all this, we also continued working on our macro photography experiments.
Some of the photos shared in this update were actually focus-stacked images made from:
* 112 photos
* 96 photos
* 33 photos
For people unfamiliar with focus stacking:
Macro photography has extremely shallow depth of field. When you photograph trichomes closely, only tiny portions stay in focus at once.
So instead, we take dozens — sometimes over a hundred — separate images with different focus points and merge them together afterward in software.
The result is a final image where the entire flower or trichome field becomes sharp at the same time.
It takes time.
It takes patience.
But honestly, we love the process.
Because cannabis truly deserves to be appreciated up close.
⸻
Trimming Timelapses
We also recorded trimming timelapses so people can better see the workflow behind everything.
Not just the glamorous final nug shots.
But the actual process:
* separating branches
* cleaning flowers
* resin building up
* trim collecting
* the mess
* the rhythm
* the work itself
Because behind every beautiful cured flower, there are hours of patience nobody usually sees.
⸻
What Comes Next — Part 3
The next and final report will focus on:
* Full smoke review
* Cure evolution
* Drying process explained deeper
* Flavor profile
* Terpene expression
* Effects
* Overall experience with Ghost Train Haze
* Personal reflections after living with this cultivar
That final report will close the entire Ghost Train Haze journey properly.
⸻
Thank You
And as always…
Huge thanks to everybody who stopped by this journey.
To the breeders behind these genetics.
To the companies making nutrients, LEDs, gear, and tools possible.
To the platforms that allow growers to share their passion openly.
To the community members constantly supporting each other.
To the OG followers.
To the new followers.
To the silent viewers.
To the growers.
To the curious people.
To the skeptics.
To the lovers.
To the haters too.
If this grow made somebody stop scrolling for even a few seconds and appreciate the plant differently…
that already means something to us.
From grower to growers.
See you all in Part 3.
📡 DELETED @ 1K Please stay tuned.we never quit https://www.youtube.com/@TheDogDoctorOfficial NEW 🙏 Thank you for your patience and continued support.
FOR DISCOUNT CODES AND MORE JUST FOLLOW THE LINK https://website.beacons.ai/dogdoctorofficial
📲 Don’t forget to Subscribe and follow me on Instagram and YouTube @DogDoctorOfficial for exclusive content, real-time updates, and behind-the-scenes magic. We’ve got so much more coming, including transplanting and all the amazing techniques that go along with it. You won’t want to miss it.
GrowDiaries Journal: https://growdiaries.com/grower/dogdoctorofficial
Instagram: https://www.instagram.com/dogdoctorofficial/
YouTube: https://www.youtube.com/@dogdoctorofficial Deleted by Youtube - https://www.youtube.com/@TheDogDoctorOfficial NEW
Vimeo : https://vimeo.com/dogdoctorofficial Under construction stay tuned ⸻
Explore the Gear that Powers My Grow
If you’re curious about the tech I’m using, check out these links:
🔆 Lighting & Environmental Control
• Future of Grow — Advanced LED lighting technology
https://www.futureofgrow.com/
DISCOUNT CODE: DOG20
• Lumiflora — Under-canopy LED lighting
https://lumiflorade.com/
• TrollMaster — Environmental controllers and automation gear (past collaboration)
⸻
Genetics
• Zamnesia Seeds — Genetics used in this project
https://www.zamnesia.com/
⸻
🌱 Soil, Substrates, Boosters & Root Support
• Plagron — Substrates, bio mixes, and supportive products
https://plagron.com/en/
⸻
🎒 Storage, Curing & Preservation
• Grove Bags — Curing and storage solutions
https://grovebags.com/
⸻
📸 Photography Equipment & Tools
(Not sponsors, but part of my creative toolkit)
• Sony A6700
• Sony full-frame macro lens + few more
• Stacking photography workflow - learning
• iPhone (for behind-the-scenes shots)
We’ve got much more coming as we move through the grow cycles. Trust me, you won’t want to miss the next steps, let’s push the boundaries of indoor horticulture together!
As always, this is shared for educational purposes, aiming to spread understanding and appreciation for this plant. Let’s celebrate it responsibly and continue to learn and grow together.
With true love comes happiness. Always believe in yourself, and always do things expecting nothing and with an open heart. Be a giver, and the universe will give back in ways you could never imagine.
💚 Growers love to all 💚
📸 P.S. – The Eye Behind the Lens
All photos in this diary (for now — except for the ones showing the camera, which I took with an iPhone) are taken with a Sony A6700 paired with a Sony full-frame macro lens and a few more.
Photography is part of the story — it’s how we share the fine textures, the glow, and the quiet details that words can’t always capture.
I’ve also started experimenting with photo stacking — a technique where multiple images, each taken at a slightly different focus point, are layered together to create one perfectly sharp image from front to back.
It’s not digital enhancement or AI; it’s pure photography — a way to reveal the plant’s beauty in microscopic depth, from trichome to petal.
You’ll even see a few shots of "ghost me" capturing the shots — camera, lens, setup — because every grow deserves not just to be cultivated, but documented like art.
FOR DISCOUNT CODES AND MORE JUST FOLLOW THE LINK https://website.beacons.ai/dogdoctorofficial
NEW DISCORD - Official Server Invite Link : https://discord.gg/ksjAkA5T74
Likes
20
Share


@Alpha_Green
Follow
Scary mutations - yes, but I was once again allowed to learn and suffer so much... ;-))
But patience and love pay off. I can tell you that much. 😁
At the end of the third week, I decided to prune the two bulkier phenotypes. Finally, I wanted to make sure that the plant canopy of all 4 would end up as homogeneous as possible in the flowering.