


Likes
Comments
Share


Likes
1
Share

@Naujas
Follow
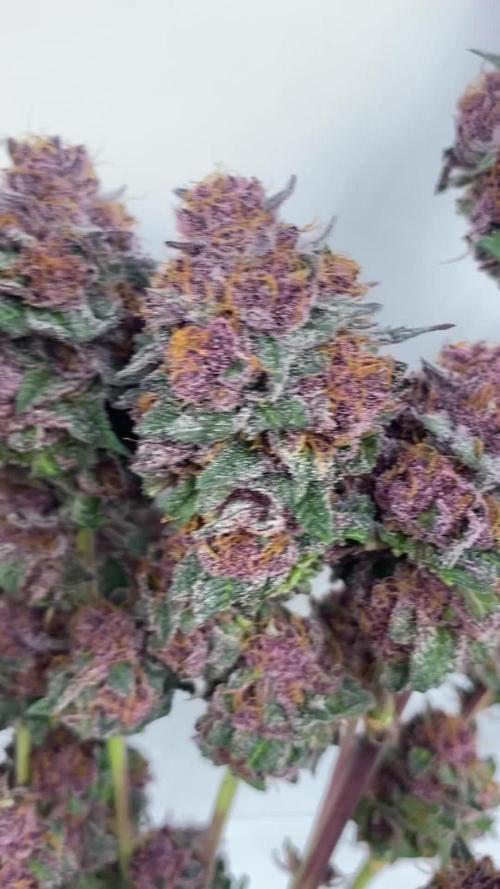
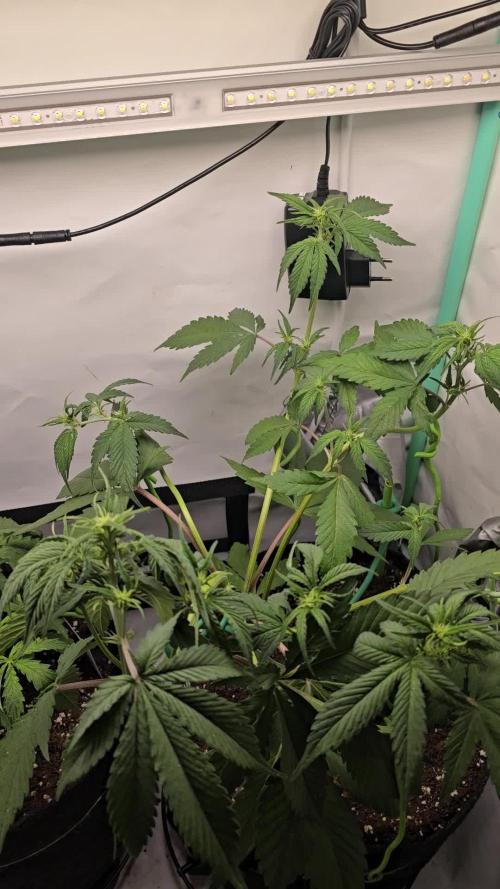
28 dienos!!! Prasideda žydėjimas;) Mergaitė auga - šią savaitę naudojau LST, nes ji pradėjo greitai kilti :) Taigi, viskas atrodo gana gražiai:) Pamatysime, kaip ji keisis :) Bet manau, kad ji bus graži, skani, stipri:) Sėkmės visiems.

Likes
17
Share


@HowtoBubatz
Follow
Week four of flowering, and the plant is looking amazing! 🌱
Trichomes have really started to cover the buds, giving them a nice frosty appearance.
There’s a lot of resin building up, and it’s exciting to see so many trichomes at this stage. The plant itself is still in great shape, with healthy, vibrant leaves and no signs of stress. 🌿✨
I’ve adjusted to the BioBizz week 5 feeding schedule, and it seems to be working perfectly. The plant is responding well to the nutrients, and everything looks on track for a great harvest. 🌸
I’m getting more excited as the weeks go by! Can’t wait to see how the buds will continue to fill out and develop in the next few weeks. 😁🌼
Likes
3
Share


@Earthsower
Follow
She is doing well with a lick of 300ml of nutrients the fuel dog is holding up so far with no leaf burn and healthy green leaves she stands at about 35cm

Processing
Likes
14
Share


@PlantGod
Follow
switched my light cycle and excited to see things take off
Hoping to keep things under control
Only budding 3 of the plants while the other one is still Vegging in another tent.
Probably toss it in next week
I tie them down constantly
LSD is beautiful
Green Gelato has grown wild
Royal Gorilla is very bushy
Hulk Berry has long strong Branches with minimal side branching...That is why I am vegging it longer
March 9th Everything is going awesome at the end of week 1 of flowering
-All plants are in 4x4 tent
-If anyone has any questions let me know


Likes
26
Share


@GuerillaGorilla
Follow
What a joy this grow has been.
She was a real beauty. Absolute joy to grow...strong branches but she likes to stretch a lot.
I knew wat to expect. I have grown Lemon Kush outdoors 3 times. The scrog this year was the perfect solution. I will not grow her again outdoors. This was my first time to see her finish. Seeing her flower this year, she just needs the warmth in the end. The climate here rarely offers that.
I must say the dense flowers are amazing also size and yield is incredible. Update about that later.
Trichomes were underdeveloped. I had to harvest early because of mould. The last 3 weeks of flower the temperatures were very low 10-15 C daytime and very very wet.
I believe this stunted the plants. They made a full stop in development and exploded again in the last week. 3 days of sun did more than the 2 weeks before.
Weather forecast were bad so big buds were harvested 25 september. We eventually had more sun than expected and bottom half was left until 2 october. That week made sooo much difference!!
Those bottom buds finally developed some nice trichomes and turned purple.
Of course I wish the big buds could have enjoyed the sunshine during that last week as well.
Most of you will know, being an outdoor grower...Every year is about compromises.
This year was so hot during growth and cold and wet in bloom that mould was unstoppable.
After all I am very pleased with this grow and cant wait to taste some of this.
Probably needs al long cure though to bring back that lemon scent.
Almost seems like all that the rain washed the scent right off her😪
Keep growing y'all!


Likes
4
Share


@Filiaes
Follow
26.05
Cleaned the Tank and changed the water. Beside that nothing special to say about that grow - everything is just beautiful and developing super well.
27.05
Removed some more Fanleaves to provide the lower buds with more light.
It's the middle of the blooming stage, since they should be ready within 70-80 days and are actually in day 32 after the light schedule was changed.

Processing
Likes
14
Share


@BatGuano
Follow
D19 - After planting her in soil, she just started to grow very fine.
Beast: Cats are instinctively attracted to this plant. Mine is always asking for it by standing in front of the door. I usually feed him during regular defoliation. :)
Likes
19
Share


@Paultemp
Follow
Hi all! 👊😊
Another week started ohh yeaahhh
I do foliar 3 times this week and i see pistil white change in orange
Smell very good pine and citrus :)


Likes
42
Share


@Gabarram
Follow
The Dr. has been vegging for full 8 weeks and on the 9th I switch to 12/12 . In the next few weeks she'll be stretching even more I guess. If she happens to stretch that wild as I have read, I'll have to struggle trying to stop her taking over my reduced grow room and I don't like to apply serious pruning after she has grown. Besides, my hypothesis is that as I chose a big pot, she might be growing aerially for a long time until the roots tell to stop.
Regarding fertigation, I apply once a day a solution 1.3-1.4 mS/cm EC (inflow) using Grow fertilizer alternating with Bloom fertilizer. I'm applying from today on a foliar spray to activate growth at this stage (this week and the two coming next).
Day 54 (05/11) fertigation Bloom fert 0.3 g/L, CalMax 1.3 mL/L, VitaMax 1mL/L, pH 6.1, EC 1345 uS/cm and Foliar spray. Iturned on the lights manually as I got up and saw the lights were out. She will have 4 additional dark hours today, but I wouldn't worry.
Day 55 today I did some work on rebel shoots and that's all!
Day 56 I fertigated with a Bloom fertilizer solution 1.3 EC inflow and 0.9 EC units run/off, I can increase the EC a bit higher until I reach 1300 uS/cm in the roots but as I see her growing fine and without deficiencies, I'll stick to this amount for precaution. Later I sprayed leaves with Foliar fertilizer just when the lights had gone off.
Day 57 Today Friday is vegetative fertilizer's day!
Day 58 happy Saturday to everyone be it autoflowering or photoperiodic! Thank God for your blessings. Today I had to replace one of the 50 W cob led but fortunately, lights are all shining now. She's been very shiny this morning too.
Day 59 I'll put her under 13,5 hours darkness a day.


Likes
2
Share


@Albanymedicinalgarden
Follow
Skywalker putting on tons of frost and seems to be happy with the status quo so no more compost teas for her. Starting to have a distinct Kush scent filling the tent now. In the future I’d probably LST this from the start to increase yields but other than some defoliation throughout, I haven’t done any training which has been nice.
Blueberry impressed me with the size of the buds starting to form. Signs of frost for sure. Not very aromatic yet at this point. Stem rub is a different story. She has been showing some signs of calcium/mag deficiency in some of the leaves which seemed to improve with top dressing/Recharge. Been drinking a steady liter minimum daily
Glueberry OG continues to explode in growth. I’ve done quite a bit of defoliation to keep tops exposed and it has bounced back quick each time. I can see why this would be a fun strain outdoors, as it is slowly taking up a solid 4 square ft of the tent. I may end up finishing this outdoors depending on its desire to consume the canopy space. Due to the longer flower period, I’ll keep up with compost teas to support all that growth. So far, it seems to be working
Week ended 7/20


Likes
37
Share


@Gardener_of_Goodness
Follow
This week has been a good one! Not too much more stretch just simply filling up both the spaces with foliage and swollen buds!
I’m now watering 6L every 3 days and she’s soaking it all up! Will feed strong for one more week then 2 weeks of flush :)
Dehumidifier turned on and set at 40%, ambient air temp dropped to 23/24 day time and 18 with lights off, air flow changed up daily to really help her.
Getting keen to harvest/cure/smoke and then put in the next round! 😊
I hope all my followers and readers are well and have great holidays! Keep growing, keep smoking and most of all keep smiling! Much love! 👌✌️👍💐💨😎
Processing
Likes
92
Share


@Penguin
Follow
Day 64. Another week on the calendar! Time is flying but also feels like an eternity. Still can't tell if there is any signs of light stress from swapping to the QB this late in the grow. I do think the bag seed in veg sharing the tent is possibly showing signs of trouble (https://imgur.com/a/9Sn0gEZ) and would love if someone reading this could take a look and let me know. Other than that, nothing new today, won't water again until tomorrow maybe the day after. I've noticed the environment in my tent has become very consistent since swapping out the blurple. Not sure if it's connected but the RH has dropped to a steady 44% ish and the temp never climbs over 25. Loving it so far!
Day 64 update, my loupe and PPM meter arrived. Tested the run off and found it was over 2200 PPM. Flushed her with around 5L of pH'd water, got the run off to 1000. Leaving it there for now as it seems to be a recommended amount for late flower. Will probably only give her plain water for the rest of her time, maybe one more light feeding, then continue to flush it down in the next couple of weeks. Took some test shots with the loupe but sadly I don't think the magnification is strong enough to clearly identify the stages of individual trichomes. Maybe I can play around with it when I take her out of the tent again but that won't be for some time. Let's see how it goes!
Day 65. It's almost been 24 hours since the panic flush. She seems to be doing fine other than showing stronger signs of yellowing in the fan leaves. Not sure if its something to worry about or part of the end of life fade? Tried to get a few different trich shots from various flowers but again, the loupe is probably not strong enough to accurately tell. Wondering whether I should try to treat the yellowing or leave it.
Day 66. The yellowing continues but at this point there is probably not much to do about it. Gave her a small feeding PPM'd to 300 to see if it helps get her over the finishing line. Tried checking trichomes and can't really tell if some are cloudy or all still clear. Definitely no amber yet though. Hoping for a couple more weeks at most before the chop! She puts off different levels of smell day to day as well. Was a bit more pungent today, very nice smelling.
Day 67. She hasn't lost as much leaf as I was expecting considering the last few days progress. Trichomes still look a while away from turning and mostly looking clear. Still has lots of white pistils too. Humidity has been a bit higher than I'd like since watering but I try to keep good air movement and a negative pressure in the tent which will hopefully reduce risk of bud rot. Smelling good but wish she'd have covered herself with some more trichomes!
Day 68. All the yellowing/dying leaves have given up and fell off. Not worried as I think I have spotted the first signs of amber trichomes on the main cola and one other. Would love someone to take a look and let me know!
Day 69 (nice). Going along fine. The fading seems to have slowed a bit and haven't noticed it spreading to the remaining sugar leaves. Definitely going to give her another 7 days and assess then if she needs to be chopped. Thank you to everyone who replied to my question regarding that. As someone said, if I had already started flushing, the timing was perfect, and luckily I had already been flushing her, so I will continue to do so. I gave her a heavy watering today with some runoff and I might do once more before she finishes? She isn't the frostiest bitch out there but she's mine and she taught me a lot. Hopefully some of what I've learned with her will transition well to photoperiods and the bag seed that is vegging next to her. I'll flip her into flower once this girl is done.
Day 70. All her leaves are starting to fade now. There are still a lot of white pistils that concerns me about the timing. I feel like the plant will fade and yellow before it fully matures. The trichomes still look the same to me but I need to get better close ups really. She doesn't seem too frosty in recent days, not sure if it's in my head or not though. Still, hoping for a chop at the weekend if she finishes up, otherwise I might be forced to due to how fast she is fading. I think I also see some purpling on the leaves? Is that from the temps or from the nutrients being used up?


Likes
142
Share


@MadeInGermany
Follow
Hey everyone :-).
There is not much to tell this week :) A few came to the flowering tent, 2 are still in the vegi phase for 2 days and then come last to the flowering tent :-)
The Blue Cheese and the Kosher Tangie Kush smell very good and how they should 😍👍
It will be difficult to choose 2 mums :-).
I wish everyone a nice week 👌 Let it grow


Likes
5
Share


@Brickleberry
Follow
July 5 - other crops on the lateral branches, growing strong every day 💚🔥
