


Likes
Comments
Share

@HoneyBlunt42
Follow
Day 90
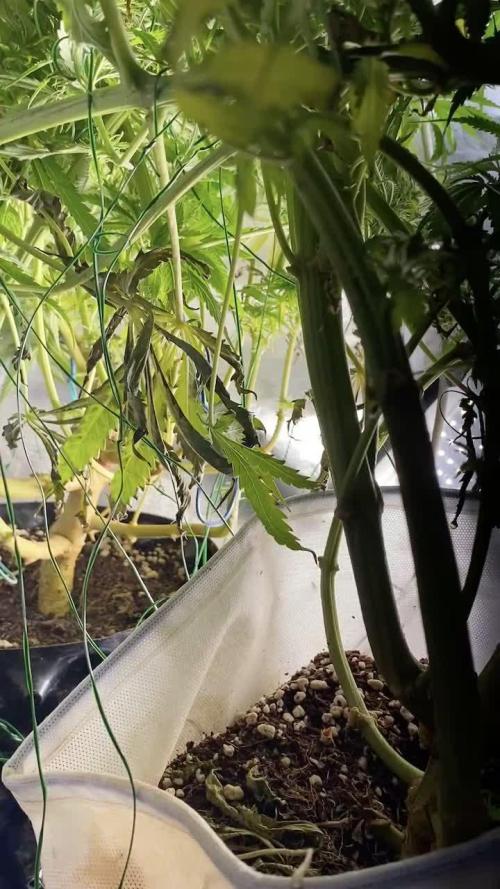
The Sativa plant is beautifully swollen at the top. I've watered it minimally for the last three days.
Today I'll mix up the solution and add a 1 g/l Bio Enchanter. It's alkaline (pH 8), so I'll first dilute 15 liters of the solution with 2 ml/l CalMag in the aquapot to 250 PPM. Then I'll lower the pH to 5.0, as recommended by the fertilizer manufacturer. After that, I'll dissolve a capful—one and a half liters of black powder. These 15 liters should be used within 24 hours.
My slightly drying bushes will appreciate a third of the pot's volume being watered.
The stems are showing red spots—it looks like I need to add 1-2 g/l Bio Bloom to the coco and mix 2-5 liters of the coco into the top layer. After bending and pruning, the plants feel stronger and healthier.
To correct the nitrogen deficiency, I'll also add a liter of Simplex Start Up 4 ml/l.
Day 95
They're doing well after moving to their new space. I didn't change the photoperiod to avoid stress. Yesterday, I didn't water them at all because they were experiencing water deficiencies. Today, I watered each plant 2 liters of solution, 10% of the solution before draining. I also added a weak concentration of Simplex Coco mineral fertilizer, 1 ml/l.

Likes
10
Share


@DeepRootsGrowTrees
Follow
ROYAL QUEEN CBG AUTO
ROYAL QUEEN SEEDS
Week #3 Overall June 19th-26th
Week #2 Veg
This week no issues she's growing well medical CBD grow so it's a all organic grow. Stay Growing!!
ROYAL QUEEN SEEDS
ROYAL QUEEN CBG AUTO

Likes
13
Share

@Homegrower309
Follow
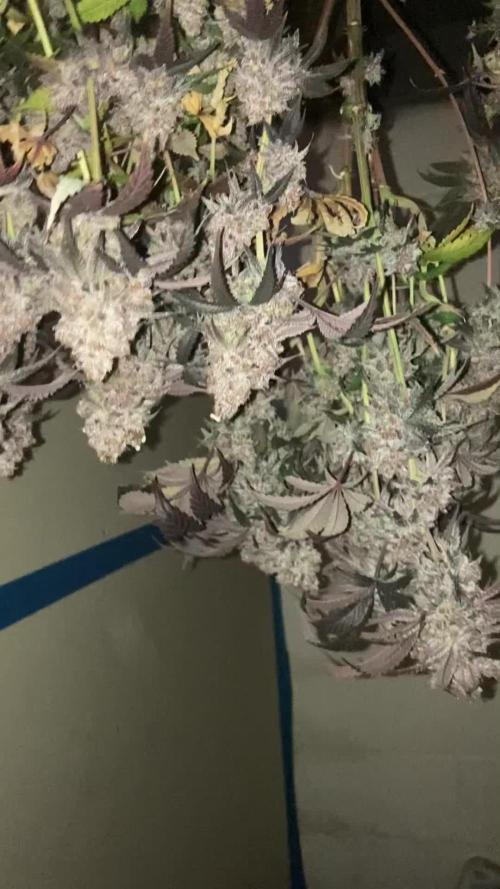
Sorry I missed a week…been busy. But thankfully they are finally done just in time for Christmas. These are some stanky dank flowers . I coukdbt be more happy with fastbuds photoperiod line up!!! Next time I wil fill the nets out more.

Likes
2
Share

@in_a_few_weeks
Follow
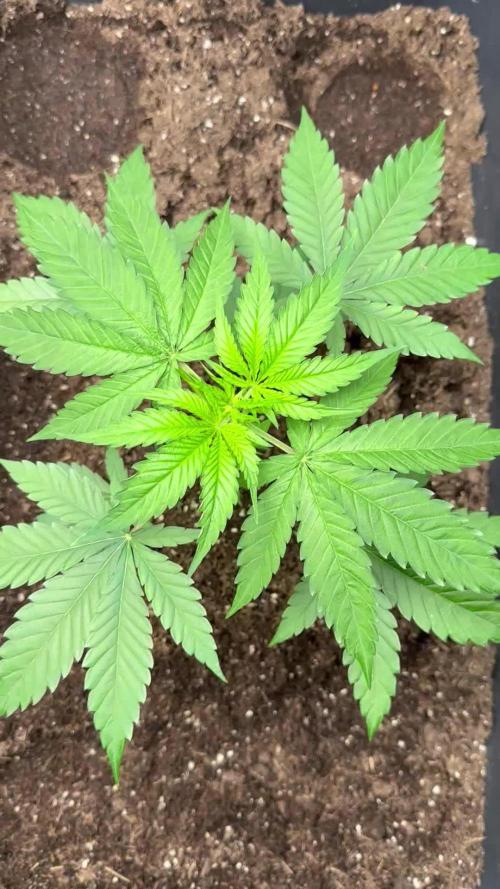
I seperated them now. The bigger one stays in the 90ltr Pot. The other got in a 13ltr pot. Later in 20ltr. Topping the smaller on in 1 or 2 weeks. Than LST and 12/12. Its a bit hot the next weeks. Have to look more after the plants. Both are really solid and growing good, none of them is small. Its just for the comparsion 👌🏼👶🏻👌🏼

Likes
49
Share


@Roberts
Follow
She has a sweet cookies and pine smell. Very frosty and should be a very calming smoke. I didn't have any major issues during the grow. Thank you Zamnesia seeds, and Medic Grow. 🤜🏻🤛🏻🌱❄️
Thank you grow diaries community for the 👇likes👇, follows, comments, and subscriptions on my YouTube channel👇.
❄️🌱🍻 Happy Growing 🌱🌱🌱
https://youtube.com/channel/UCAhN7yRzWLpcaRHhMIQ7X4g


Likes
294
Share


@StarLorr
Follow
Welcome to my Ðivine ØĠ Ķush diary.
In this diary:
Seeds: sponsored by Ðivine Șeeds
Media: Promix HP
Nutrients: Advanced Nutrients, Diablo Nutrients.
Light and Weather: Şun☀️and Mother Earth.🌎
___________________________
Feeding:
Tue 23Jul: 4L nutrients pH'd 6.5 and 4L water not pH'd
Wed 24Jul: 11L water not pH'd
Thu 25Jul: 4L water not pH'd
Fri 26Jul: 9L water not pH'd
Sat 27Jul: 4L nutrients pH'd 6.5 and 2L water not pH'd
Sun 28Jul: 10L water not pH'd
Mon 29Jul: 8L water not pH'd
*please note that most water only feedings are 2L at the time throughout the day in bottom saucer*
___________________________
What a beautiful summer that we're having. Just one day last week it was cloudy and colder and got some rain, rest of the week sublime weather.
My Ðivine Ladies are pre flowering and hopefully will be blooming soon, next week update should be FLO fingers crossed😄
______________________________
Kush Kush is doing well from her 88" inches tall, can't believe imma have to get my ladder to do some defoliation in a couple weeks😂
_____________________________
Øpi was found with a spider mites nest..squished the squatter with my thumb and index... all 3 Ðivine Gals got the spa treatment, soap insecticide
spray 2 litres each soaked them real good, before flowering it was a smart move😉
______________________________
Thanks for stopping by, likes and comments are appreciated!👊🏻😎
Keep on growin!
Keep on tokin!!!
😙💨💨💨💨💨


Likes
17
Share


@nonick123
Follow
En este caso es un diario un poco distinto...
Tengo en mi terraza (outdoor) una maceta de unos 25 litros, con sustrato reciclado de todos los ciclos hechos con BIOTABS este invierno pasado
Durante todo el invierno / primavera, he ido añadiendo a esta maceta los "restos" de estas macetas del indoor, cargados de vida, sustratos y materia orgánica
Cada vez que añadía sustrato reciclado, añadía / renovaba la capa de mulch (heno) para proteger la micro-vida
Además, ha estado protegido por un techo de metacrilato todo el invierno, para evitar que las lluvias torrenciales de mi zona se llevasen los nutrientes
He mantenido este sustrato húmedo con Agua RO
A principios de mayo, planté una tomatera (tomate canario) en esta maceta
Alrededor del 26 de mayo, decidí dejar caer aleatoriamente una semilla de Gorilla Z Auto que me regaló mi amigo StackFarms
Unos días después, nacía con fuerza y vigor una pequeña plántula! 😍💥
Esta maceta se mantiene hidratada con un sistema de riego por goteo (TEMU) muy ingenioso: Utiliza un gotero medico como se usan en los hospitales!
Este sistema ha demostrado (en mis pruebas) ser bastante consistente en el riego diario!
La maceta con la tomatera + Gorilla Z Auto se mantiene hidratada con 1 Litro de H2O diario (RO o agua declorada, depende como me pille)
A divertirse con este experimento!
🚀 FastBuds 15% DISCOUNT code "NONICK" 2fast4buds.com @fastbuds.official
💦 BioTabs 15% DISCOUNT code "GDBT420" biotabs.nl/en/shop/ @biotabs_official
🌱Substrate PRO-MIX HP BACILLUS + MYCORRHIZAE @promixmitch @promixgrowers_unfiltered


Likes
82
Share


@Drgreen13
Follow
What's happening growmies, hope you're well, in this diary I'm going to demonstrate that you can grow good quality bud at an affordable cost. If you have a look at the germination week you can see how much this grow cost me.... So this week this plant has doubled in size, wow. And all I've fed her is tomato food at half dosage. I'll increase her feed when she's in full flower mode.
My dog loves a munch on the leaves, he also helps himself to then if I leave any on the floor In my grow room 😱😜😂🤣
TO PURCHASE THIS AND MANY OTHER AWESOME STRAINS THEN VISIT www.zamnesia.com AND USE PROMO CODE GROWITGD TO GET 20% OFF YOUR ORDER, tell them the dr sent you.
Check back next week to see how this girls doing.
Thanks for stopping by as always.
Please check out my other diaries and feel free to leave a like, maybe even a follow and I'll be sure to check out your diaries to.
Drgreen13#6724 (discord)
Stay high, stay fly, #420everyday.
Likes
4
Share


@Altitonans_Fulmen
Follow
The thoughts shared in this journal are my own—a snapshot of personal understanding at the exact moment of writing. It is not intended as a reference of absolute fact, but rather as an exercise in ἐπίνοια (epinoia): an exploration of thought, intuition, and creative insight.
Epinoia(ἐπίνοια) is a Greek term meaning thought, intention, purpose, or conception, stemming from "mind" (nous) and "upon" (epi), representing the mind's reflective or creative process, used in philosophy (Aristotle, Gnosticism) and theology to discuss understanding and divine names, appearing once in the New Testament for the "intent of your heart" (Acts 8:22). It signifies the mind's operation to form ideas or designs, contrasting with raw data or innate perception, and in Gnosticism, it's an emanation of divine wisdom (Sophia).
"Φsis" is a stylized spelling of the Ancient Greek word φύσις (physis), which translates directly to "nature" or the intrinsic essence of a living thing.
Exploring the deep intersection of science, intuition, and creative insight often leads to breakthroughs that challenge our understanding of what is possible. When we approach high-performance cultivation not just as a hobby, but as an exercise in pushing a biological system to its absolute genetic ceiling, the results can transform from simple data points into profound proof of concept. Achieving a highly optimized environment requires a shift in mindset away from empty promises and directly toward verifiable proof, building true confidence through a detailed archive of past lessons and strategic adjustments.
This philosophy turns a standard space into a precise mass and energy balance equation, where every variable is managed to eliminate biological bottlenecks entirely. In a recent project four individual plants produced 344 grams, 280 grams, 445 grams, and 255 grams respectively, resulting in a total harvest of 1,324 grams, or 47.2 ounces, of dry product. Operating with a 600-watt light source inside a four-by-four footprint, this brings the final efficiency to an exceptional 2.21 grams per watt.
To put this in perspective, the standard traditional indoor benchmark has long been established at 1.0 grams per watt, while expert commercial operations target 1.5 grams per watt, and elite commercial systems push the envelope between 1.8 and 2.0 grams per watt. Reaching 2.21 grams per watt places the outcome squarely within the top 0.1 percent of global benchmarks, acting as a true statistical outlier that demonstrates what happens when flawless environmental parameters meet a cultivar pushed to its maximum potential. Reaching this level of mastery demands that we move past the common trap of the mirror fallacy, where the ego mistakes its own limited perspective for universal truth and views different ideas as personal threats. True progress requires curiosity and dismantling the illusion that our immediate viewpoint is the objective standard, shifting the focus instead toward how a system actually operates under the absolute laws of physics. In a high-performance setup, maximizing output is never about adding random additives or forcing growth, but rather about systematically removing the limitations that hold the organism back. By maintaining a perfect vapor pressure deficit, ideal root-zone oxygenation, and precise structural canopy training every single minute of the cycle, the plant is freed to express 100 percent of its DNA potential without any lingering genetic latency.
Managing a dense canopy inside a tight footprint presents the ultimate challenge of mitigating stagnant air and preventing moisture issues. Overcoming this bottleneck relies on a sophisticated synganic approach, which seamlessly marries the precise control of synthetic mineral inputs with the natural resilience of active organic living soil. This method transforms the room into a closed-loop system where the internal microclimate is entirely isolated from external weather fluctuations and pests. Rather than openly exhausting the atmosphere, the air is continuously recirculated, enriched, and scrubbed using 264-nanometer ultraviolet light.
The foundation of this thriving ecosystem is a comprehensive substrate composition designed to provide perfect aeration, structural integrity, and biological buffering. The primary media base integrates expanded clay aggregates, coir chunks, premium coco coir, sphagnum peat moss, horticultural perlite, vermiculite, pumice, and volcanic basalt rock. To continuously condition the soil and fine-tune mineral availability, the mixture is amended with agricultural gypsum, wollastonite, dolomitic limestone, basalt rock dust, micronutrient-rich volcanic ash, greensand, crushed seashells, biochar, and shungite. This mineral architecture creates an incredibly stable environment where active soil biology naturally prevents salt toxicity and ensures steady, reliable nutrition throughout the entire life cycle.
Living organisms within the substrate play a vital role in maintaining this delicate biological balance and breaking down organic material. Red wigglers continuously process organic matter into easily accessible plant nutrients while aerating the media; specialized predatory mites offer excellent biological control against common soil pests, and pillbugs excel at breaking down tough, woody elements. These biological components are further supported by a rich layer of organic amendments including high-phosphorus steamed bone meal, high-nitrogen dehydrated blood meal, fish bone meal, cold-processed kelp meal, dehydrated moringa powder, spirulina powder, and marine crustacean biomass rich in chitin. Combined with biological inoculants like mycorrhizal fungi, premium worm castings, and concentrated humic and fulvic acids, the entire system operates as a flawless biological transducer of light and energy.
Ultimately, shifting our perspective to view a grow space as a complete mass and energy balance equation changes the entire nature of agriculture. Success ceases to be a matter of luck or anecdotal habits and instead becomes the predictable result of meticulous design, patience, and the strategic elimination of failure. When science, biology, and engineering converge so harmoniously, we gain a deeper appreciation for the intricate natural systems that sustain life and growth. By sharing these detailed insights and refining our techniques, we can continue to unlock the absolute maximum potential hidden within the living world around us.
Comprehensive Substrate Composition:
1. Substrate Base & Aeration Media
Expanded Clay Aggregates (Hydroton Pebbles)
Coir Chunks & Horticultural Coco Coir
Sphagnum Peat Moss
Horticultural Perlite
Horticultural Vermiculite
Horticultural Pumice
Volcanic Basalt Rock
2. Mineral Amendments & Soil Conditioners
Agricultural Gypsum (Calcium Sulfate)
Wollastonite (Calcium Silicate)
Dolomitic Limestone (Calcium Magnesium Carbonate)
Basalt Rock Dust (Trace Mineralizer)
Azomite (Micronutrient-Rich Volcanic Ash)
Glauconite (Greensand)
Crushed Seashells (Calcium Carbonate Source)
Pyrolyzed Carbon Feedstocks (Biochar & Horticultural Charcoal)
Shungite (Carbonaceous Mineraloid)
3. Organic Nutrient Amendments
Steamed Bone Meal (High Phosphorus)
Dehydrated Blood Meal (High Nitrogen)
Fish Bone Meal (Phosphorus & Trace Calcium)
Cold-Processed Kelp Meal (Ascophyllum nodosum)
Dehydrated Moringa Oleifera Powder (Botanical Nutrient)
Spirulina Powder (Arthrospira platensis / Cyanobacteria Nutrient)
Marine Crustacean Biomass (Shrimp & Crab Chitin)
4. Biological Inoculants & Organic Acids
Mycorrhizal Fungi Inoculant (Endomycorrhizae / Ectomycorrhizae)
Vermicompost (Premium Worm Castings)
Humic & Fulvic Acids (Concentrated Humates)
Human Body
65% Oxygen (in all liquids and tissues, bones, and proteins)
18% Carbon (everywhere)
10% Hydrogen (in all liquids and tissues, bones, proteins
3% Nitrogen (in all liquids and tissues, proteins
1,5% Calcium (lungs, kidney, liver, thyroid, brain, muscles, heart, bones)
1% Phosphorus (urine, bones, DNA)
0,35% Potassium (enzymes)
0,25% Sulphur (proteins)
0,15% Sodium (in all liquids and tissues) (in terms of salt)
0,05% Magnesium (lungs, kidney, liver, thyroid, brain, muscles, heart)
Plant
Mother-nutrients: Carbon 47%, Oxygen 43%, Hydrogen 4%.
Macro-nutrients: Nitrogen 3%, Phosphorus1%, Potassium1%, Calcium1%, Magnesium0.5%, Sulfur0.5%.
Micro-nutrients: All the rest combined 1%
More energy, more blueprint.
Although CO2 is a naturally occurring gas that both humans and plants use, it is invisible and odorless and can be fatal at high-levels. If you’re supplementing carbon dioxide in your grow room, ensure there are no leaks in any CO2 devices and always use a CO2 monitor and alarm.
0.02% Life unsustainable
0.03% Life OK
0.04% Current ambient atmospheric co2
0.04%-0.1% =400-1000ppm standard indoor co2.
0.1%-0.2% = 1000- 2000 ppm (prolonged exposure: drowsiness).
0.2%-0.4% = 2000-4000ppm (Headaches, fatigue, stagnation, stuffiness, poor concentration, loss of focus, increased heart rate, nausea).
1% is toxic
5% is quick death.
"Dabo vobis quod oculus non vidit, nec auris audivit, nec manus tetigit, quod in cor hominis non ascendit."




Likes
17
Share


@ILoVeThiSpLaNt
Follow
Ultimi giorni per una pianta mentre altre due sono a seccare. Qua foto e video delle prime tre piante tolte. A settimana prossima 😊

Likes
13
Share


@GrandmasBoy2021
Follow
(12/2020) Day 18
Strawberry Pie has been doing great. I began LST training her three days ago. It was amazing to see the fast growth within the three days. The plant is looking very promising with many cola areas beginning to grow. I watered her yesterday with a half tablespoon of honey mixed within the 6.2 PH water. She seemed to like the watering and honey as she perked up afterwards. I will continue to LST the plant in a counter clockwise direction so that an even canopy creates.
(12/23/2020) Week 3!
I watered the Strawberry Pie also with 6.0 Phd water and a half tablespoon of honey melted in. I got the vibe she was thirsty. It is crazy to see the difference between three days of LST does.
Likes
11
Share


@Microsun
Follow
This strain has a very interesting high, I and my girlfriend did a test on her at about week 2 of cure and found she has a very sweet minty mango tinge, but a more of a minty tea smell with a bit of sour tinge once you crack that bud open to put it in the grinder. She smokes amazing all white ash and a very dense but romantic softness to her. At first I was bummed smoking this strain because knowing it only peaks at around 17% supposedly I did not expect a very strong bud already, but when I smoked her I got almost a very gradual increase after a few minuets of puffing almost like a euphoric wave was slowly rushing over my eyes and head like a tide coming in on a beautiful night after a long day at the beach. I felt quite sativa stoned with it growing in intensity in my face and eyes, then after I finished my joint I went inside for a glass of water and as soon as I sat down, it really hit me and my girlfriend right in the ass, I was couch locked and so was she, but in a very odd way, I was not indica deep, but I was more a good hybrid deep, a very relaxing eye and face buzz with quite relieving muscle tension I felt amazing, my body was so bloody relaxed! I felt just comfortable like a cozy blanket and a fire on a cold December day, hot chocolate in hand. This strain from start of smoke, to burn out was a very calm and needed high for me and my lady. We both burned out and slept like rocks, like someone had just given the worlds best massage in my brain and bones. I woke up the next morning feeling quite refreshed after that eye relaxing euphoric head high and my back and legs felt very relaxed and ready for a great day! So in my opinion! A good 6/10 for max potency but a 10/10 for flavour and enjoyment. Over all I give this strain a 8/10 in my books, a 17% is all I need and I’m betting she came out around that, of course without lab testing I can not prove that. But I love this strain and the high it gives, one single 0.5 joint got me fried, and the next day I finished off 3 bowls and went to fucking muchie land so he’ll yeah! Give candy cane a try!! Also! Sorry about the lack of info! I did not have a scale when it was in wet weight, I also had a whole half a plant chopped to branches and the big buds left on the plant to hang dry slow, so I was not able to get it on a scale until dried a week later due to my work schedule and having stores open as I’m in the shop and close as I leave.

Likes
4
Share


@Jaschkoo0
Follow
On Day 85 i mixed 6l of water with 20ml of Lab some melasse and some supervite and gave each plant 3l of it
On Day 87 i gave mixed 2l of water with 5ml of phospor plus some supervite and ec 0.8 ph 6.6. I gave each plant 1l of this thrue the underpot. Then i mixed 3l of water with 6ml of blüh boost some supervite 3ml of calmag and some alg a mic. I gave the left plant 1l and the right 2l of this solution.
On Day 89 i mixed 3l of water with some supervite and 3ml ofcalmag. And gave the left one 1l and the right one 2l.

Likes
2
Share

@TowersD
Follow
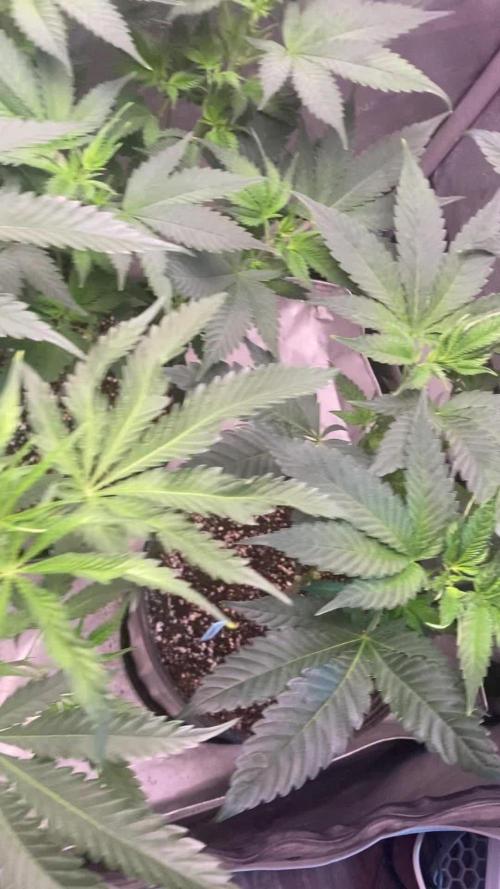
I put the plants under the Electric Sky 180 V2
I kept only 4 plants because one was growing really slow compare to the others and another turned out to be a automatic plant so i took it away as well.
I am keeping 2 phenos of the Nanaz x BBC and 2 ot the Humboldt Headband.

Likes
57
Share


@Wastent91
Follow
Eccoci ragazzi, scusate il ritardo ma purtroppo sono molto impegnato in questo periodo, è faccio fatica a stare dietro ai diari.. Apparte questo questa blue dream sta crescendo davvero molto imforma e vigorosamente! Ha già sfumature bluastre ed un odore speziato molto particolare! Ho tolto un po di rami inferiori che non prendevano abbastanza luce, ed ho provato a fare qualche clone, se questa ragazza si rileva come sembra un ottima genetica potente, in questo modo avrò delle sorelle identiche in forza e vigore che mi daranno un erba eccezionale nei prossimi cicli? Speriamo che attecchiscano! Per il resto tutto ok, sto seguendo la scheda di Terra Aquatica e si stanno rivelando degli ottimi nutrienti! Grazie a tutti voi che mi seguite, spero vi piacciono le mie ragazze quanto piacciono a me! P. S come potete vedere dalle foto è in corso una massiccia infestazione di tripidi, e nonostante le molteplici trappole che ho messo dappertutto, non riesco a liberarmene, anzi stanno sempre riproducendo di più e sinceramente sono un po' preoccupato, spero che il raccolto non ne risenta troppo.. Ho pensato di mettere qualche coccinella come predatore naturale ma per ora non è il periodo e ne ho trovata solo una che nn risolve di certo la situazione.. Grazie ancora buone fumate a tutti! 420 🍀🙏💪😸🌱🌿🥦🧑🌾
Likes
23
Share


@MadeInGermany
Follow
Hey guys :-) .
Today the plant was sprayed again with neem oil.
There weren't any more trips to be seen after the second application, but to be on the safe side, you did it again today get a cure.
That's why the beautiful dark shimmer on the leaves :-).
It was poured this week 1 time with 0.2 l because the roots are from clones should only spread in the substrate.
(For nutrients see table above)
The fact that the lady gets a very long time in the veggie phase I started topping for the first time today after taking the pictures.
in the coming weeks LST and will certainly be used topping a few times.
Otherwise everything was cleaned and, as always, everything was checked.
Have fun with the update and stay healthy 🙏🏻
👇🏼👇🏼👇🏼👇🏼👇🏼👇🏼👇🏼👇🏼👇🏼👇🏼👇🏼👇🏼
You can buy this Nutrients at :
https://greenbuzzliquids.com/en/shop/
With the discount code: Made_in_Germany you get a discount of 15% on all products from an order value of 100 euros.
👇🏼👇🏼👇🏼👇🏼👇🏼👇🏼👇🏼👇🏼👇🏼👇🏼👇🏼👇🏼
You can buy this strain at :
https://www.thegratefulseeds.com/shop/feminized-seeds/limited-edition/blue-javaz/
Water 💧 💧💧
Osmosis water mixed with normal water (24 hours stale that the chlorine evaporates) to 0.2 EC. Add Cal / Mag to 0.4 Ec Ph with Organic Ph - to 5.8 - 6.4
MadeInGermany
