


Likes
Comments
Share


@CervantiS
Follow
March 28
Diy Growbox: 60*60*160 cm
Light: 150w led
Light Cycle: 12/12
Soil: CocoPerlite in diy Hydrobucket
Extractor: 120mm PC vent Running 24/7
Dear Growdiary,
Day 110:
Drainwater 185ppm @6.23Ph
Fresh feeding 750ppm @6.05Ph

Likes
20
Share


@TiRobotProds
Follow
La semaine 4 de floraison annonce la production de résine, les plantes gonfle de plus en plus mais n'a pas atteint le pic florale, je continue le Méga pk jusqu'à la 6ème semaines tout en faisant attention de ne pas brûler les racines. Pk bloom bastic de la 6ème a 8ème . Flawless Finish (phase finale) 8ème à 9ème. Eau déminéralisée jusqu'à semaine 11.
-04/09 dernière défoliation enlever les têtes popcorn maintenant l'énergie sera mieux distribuer GROWERS clique et abonnés vous pas mal de connaissances a partager avec vous n'hésitez pas.
LoveUnityAndPeace

Likes
10
Share


@StickyFingah420
Follow
Extrema producción de tricomas de esta variedad! Gran parte de los frutos lo usaré para extraer rosin, su resina se ve ideal para este propósito.
Fragancia exquisita a ponche de fruta dulce, con notas ácidas y un fondo de especias.
Como mencioné anteriormente dejaré la parte de la reseña de efectos, sabores y sensaciones para cuando los cogollos estén secos y curados, por ahora solo puedo apreciar lo que mi vista y olfato me permiten captar.
Totalmente conforme por la calidad de estas flores y agradecido de los amigos de Sweet Seeds por la confianza.
Será hasta la cata entonces, buenos humos!

Likes
6
Share


@IamCy
Follow
Week 6...........
Getting frosty
Edit: on day 41,I already have amber but it's still packing on weight. I don't know what to do at this point.
Likes
5
Share


@GirlGoneWeed
Follow
Clones got transplanted into my organic recycled soil in solo cups and under the dome.
Under 300w LED QB dimmed at 50%
Watering with tap water. My live soil is packed with nutrient's and minerals so there’s no need to add nutes for now.

Likes
6
Share

@burnout
Follow
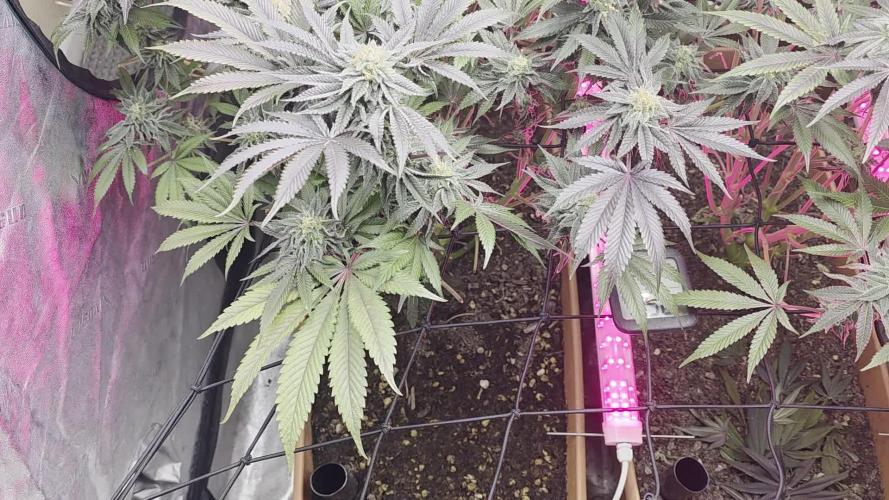
Flower day 49. Reduced light to 80%. Top watered one gallon each with half teaspoon recharge per gallon, stopping feed with build a bloom and ferment. Reservoir uptake has slowed down, added one gallon to each reservoir Peek at trichomes looks mostly cloudy. Will hopefully be harvesting in two weeks.


Processing
Likes
9
Share


Likes
20
Share


@French__flair
Follow
Enormous deficiency of cuttings during placement, I thought they were going to die...
Enorme deficiencia de los esquejes durante el ajuste, pensé que iban a morir...
Likes
130
Share


@Cyrusdavirus
Follow
Kannabia Seed , Sativa Dream
High everyone 👋 another week in the books and the ladies are looking pretty good 👍 I'm not sure on training for them yet but it's almost time to start 😆 this Sativa Dream has a bit of a mutation going but is still growing fast 😀 I'll have to decide what I'm doing very soon.
I received and installed the new UR45 from Mars Hydro they are UV-IR supplement light bars designed to fit the Fc6500 and Fc8000 I'm excited about having them in my growroom. Check out my Instagram if you want to see closer pictures of them installed.
Mars-Hydro.com discount code " Cyrus "
Thank you Mars Hydro and Kannabia Seed Company

Likes
1
Share


@GreenSunrise
Follow
flowers really packing on weight this week. I've had to tie up supports and stripped off quite a few of the older fan leaves. I've started the flush this week to go with the strain timings. any flush advice would be appreciated.

Likes
13
Share


@ernest_twwg
Follow
November 4th:
First day of 12/12.
Clones from this GDP mother. Decided to do a laid back run so some friends and clients can decide if they want cuts. I'm not shooting for a big yield, just enough to smoke with people and have my brother press some into live rosin.
They are under a Hortibloom Solux 800.
It's been water only, so far.
The clones are almost 2 months old, including the two week rooting time I give every clone to establish.
No control over heat and humidity, at the moment. My brother said he has a dehumidifier I can use, so that will help. I need to dig out my little electric heater, but can't manage to find it. I'm thinking I gave it away a while ago. Time to get another one, I guess.
I'll do an update at the end of this week. This is just to show where the clones are at this point in time so I can gauge progress and have it recorded.
November 11th:
The clones are filling out and looking great. It's officially the end of week 1 flower and everything is rolling right along.
Just water throughout the week.
Turned the light up 20%, so it's sitting at 60% intensity from now until nugs start stacking. I'm not sure if I'll be able to turn this light past 80% at all, to be honest. Especially if I'm not supplementing c02.
Got a heating source established and finally hooked a hose up to a water main. Now I don't have to lug around 5 gallon buckets full of water and it's amazing.

Likes
10
Share


@LoccoMotive
Follow
_______________________________________________________________________
Nun, mit 20-30g pro Pflanze habe ich mich dann ja wohl doch etwas verschätzt.
Es sind ziemlich genau 62g pro Pflanze an Trocken-Ertrag bei rum gekommen.
Leider habe ich vergessen nach der Ernte das Nassgesicht zu prüfen.
Insgesamt ist unser aller erster grow für mein Verständnis gut bis sehr gut gelaufen.
Mit 124G trocken Ernte kann sich das auf jeden Fall sehen lasen. Bin super happy.
Dazu kommt noch der Grow von meinem Bruder.
Hier kam insgesamt etwas weniger aber dennoch gute 110G bei rum.
Damit hätten wir ein gut, bis sehr gutes Gramm pro Watt Verhältnis von von 1,17 g/W.
Mit 4 Pflanzen, wenn ich das richtig verstanden hab.
Und wenn ich nur meine 2 Pflanzen auf einem halben m² mit der halben Leistung der Lampe von 100w rechnen würde.
Hätte ich ein noch besseres Verhältnis von sehr guten 1,24 g/W.
Dazu haben wir von beiden Sorten noch ordentlich Verschnitt mit überaus Trichomreichen Suggerleafs.
Der Grow lief für uns eigentlich sehr sehr chillig. Nur das Wetter war unser Feind.
Wir hatten bis jetzt einen eher ungünstigen, wechselhaften Sommer.
Teilweise bis zu 33° und 85% Luftfeuchtigkeit während der Trocknung.
Dann wiederum auch Tage oder nächte wo es wieder auf 22° runterfällt.
In den GroveBags zeigen die Hygrometer nach 2 Tagen immer noch nur etwa 53% an.
Das heißt wir konnten die Bedingungen nie optimal halten und es ist etwas zu trocken.
Gott sei Dank hatten wir aber weder Probleme mit Schimmel oder Schädlingen.
Man kann beide Sorten jetzt schon prima im Joint oder in der Bong rauchen.
Es ist weder kratzig noch schmeckt es irgendwie komisch. Im Gegenteil.
Mal schauen wie es nach dem Curen aussieht.
Zur Honey Peach Auto CBD von meinem Bruder:
Mein Bruder hat keinerlei Training betrieben. Nur sehr viel entlaubt.
Die beiden Pflanzen haben sich sehr unterschieden.
Aber beide haben sehr fluffige Buds produziert.
Die Wirkung ist eher milder und lässt einen Produktiv und Kreativ werden ohne super high zus ein.
Jetzt nach dem Trocknen reicht es eher Erdig mit ein Paar fruchtigen Noten.
Zu meinen +Speed Auto:
Ich habe nur LST angewendet. Und dazu mehrmals entlaubt.
Abgesehen davon das eine der beiden etwas größer wurde haben sich beide ziemlich gleich entwickelt.
Die Buds bei beiden Pflanzen sind sehr homogen und gleichbleibend gut, egal ob Headbud oder nicht.
Die Wirkung ist sehr ausgeglichen und stark genug um stunden high zu bleiben ohne abzuheben.
Der Geruch ist zimlich intensiv,sehr zitronig mit einem erdigen abgang.
----Nachtrag nach dem Curen----
Nach dem der Ertrag 2 Wochen in den GroveBags Curen konnten sin dsie wie erwartet etwas "Steiniger".
Riechen tuts wie am Tag der Ernte und erfüllt den ganzen Raum. Auch eher klassisch im Geruch.
Das High ist stark und ist sehr ausgeglichen zu Körper und Geist. Ohne dabei abzuheben oder down zu gehen.
Meine Headbuds sind zwar nicht die größten, aber im Vergleich gibt es sicher viele die weniger Glück hatten.
Wer eine kleinwüchsige, ertragreiche, robuste und relativ schnellwachsende Genetik sucht, ist hier richtig.
_________________________________________________________________________
Likes
37
Share


@MG2009
Follow
06/20/2018
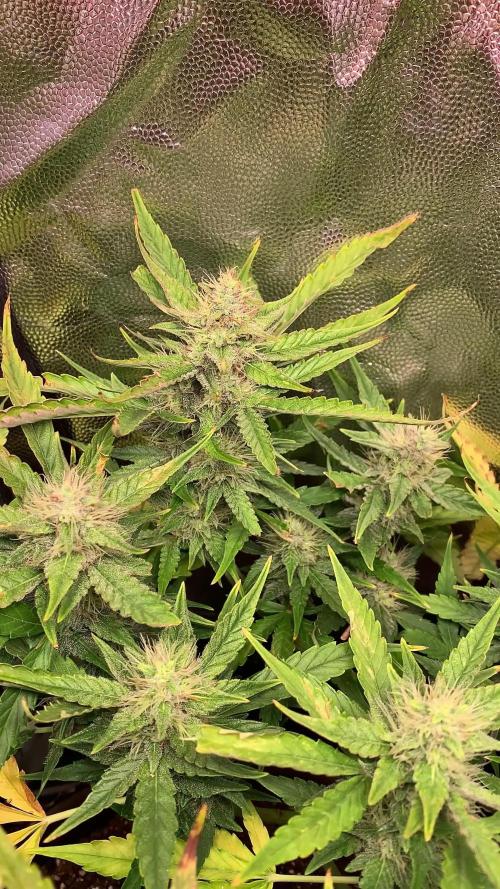
Did some supercropping on #1, Fimmed #4 she showing pre-flowers.
( #1,#2,#3) Not showing pre-flowers. #4 Fimmed because she gets stretchy 2-3 times veg height in my own experience.
06/21/2018
Longest day of the year today,applied potash last week, topdressed with Espoma tomato Tone tomato 🍅 3-4-6 with biotone


Likes
28
Share


@TrueNorth
Follow
-Strain: Purple Lemonade - Fast Buds
-Tent: 5x5 Gorilla Grow Tent
-Lights: Budget LED Grow Lights 2 x 250 Watt
LED Full Spec/Red Spec mixed boards
-Light Cycle: 18/6
-Soil: Fox Farm
-Air Circulation: AC Infinity Cloudline T4 Inline Duct Fan
WECLOME BACK GROWMIES! Week 9 here with our PURPLE LEMONADE by Fast Buds!
January 21, 2020 (DAY 59) - Hey there growmies welcome to a fat week of large colas and frosty nuggets! this thing is enormous. it is about 2.5 ft wide and about 3 ft tall from the floor she continues to drink 4-5L a day with all that nutrients and she eats and drinks it all blows me away. until the next time growmies!
DAY 59 - 01/21/2020

Likes
6
Share

@deseed_uy
Follow
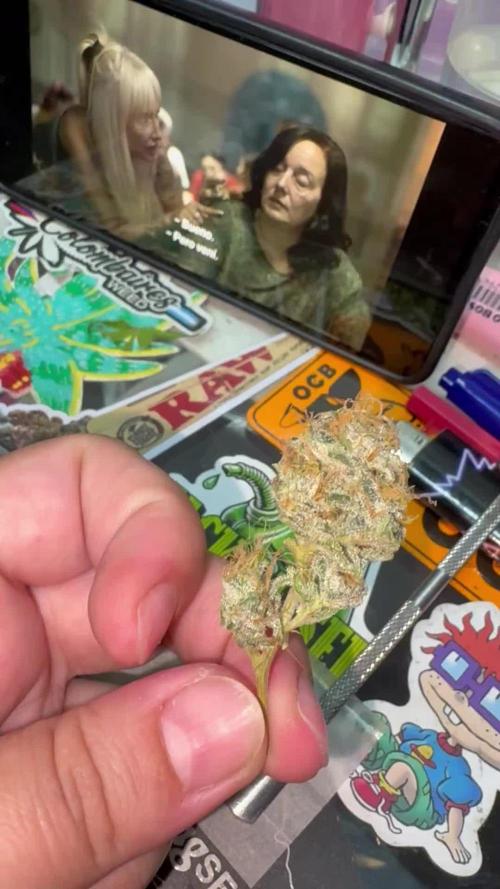
Semana 7🤩 ya a nada de la cosecha, dos riegos de flawless para cada una que vienen todas altas de ec y luego solo agua.
A la oreoz f3 la q tiene mas pistilos blancos la voy a dejar unos dias mas q a las otras. A esa fue a la unica que le di overdrive por eso esta desquiciada de peluca😼


Likes
4
Share


@Smokiebear_og
Follow
Hey friends, we have hit day 26!
Seemed like close to the right time to throw in some bloom nutes. I decided to add some carbs too. One pheno looks like it's budding already. Let's see how this plays out


Likes
7
Share


@OwlGang_Uk
Follow
Week 12 - Mehn Oh Mehn - The Purple Is Really Starting To Come In Now I Think Last Week’s Cold Temp Situation Really Unlock The Purple Characteristics. The Scent Is Very High And The Trichomes Are Mostly Clear With A Few Cloudy Showing. I Am No Longer Using Nutrients Because I Will Start The 2 Weeks Now Because You Don’t Want The Weed Getting Over Ripe Thats When The Scent Would Start To Face. So In Two Weeks Time I Will Have Mostly Cloudy With A Few Clear Or A Few Amber With Strong Aurora At It’s Peak. Tell me What You Guys Think In The Comments.
Processing
Likes
8
Share


@Order_66
Follow
Hay good week the flowers have started to bulk up a bit .I've stopped the take root and started a low dose of explode . I've been taking a few more leaves an I've tied down a couple of branches to let the light get in . Lots of tricomes some frosty leaves and getting sticky and smelly .
