


Likes
Comments
Share


@Piratebay
Follow
Comenzamos la semana de floración con una gran poda de bajos dejando estas con forma de palmera o Chupa Chups.
En el día de hoy le bajé dos horas al horario de vegetación de 18/6 a 16/8 en los siguientes días bajo dos horas así hasta alcanzar el 12/12 de manera gradual.
Hoy se aplicará un riego de vitaminas y entaizante.
17/3/26
Aquí seguimos con las pequeñas algunas mejor otras peor.. pero todas sanas.
Seguimos controlando el espacio de cultivo de la mejor manera posible.
Una ec 1350 un ph 6,2
Forman el esquema de alimentación de esta semana a partir de la siguiente pegaremos una subida gradual hasta llegar al tope de las niñas.
20/3/26
Seguimos con un avance espectacular!
Las niñas crecen de una manera espectacular!
Muy contento con los avances en este cultivo!
Esperemos que la floración sea igual de vigorosa ..
Pero ya sabemos que hay mil factores,que pueden alterar el producto final,aquí seguiremos mejorando con cada uno!
22/3/26
Seguimos en la línea en el día de hoy se dio un buen riego cargado de nutrientes para el crecimiento de esta fase de cambio a la floración los siguientes riegos ya serán más centrados en la floración con más fósforo y potasio en la solución.
Esta vez añadiré aditivos de mejorar la floración para hacer esta un poco más larga ya que busco un buen producto final con gran maduración.


Likes
11
Share


@Madman2020
Follow
Generative steering
Day 30 sprayed with Jas
Day 31 noticed spider mites

Processing
Likes
88
Share


@Lady_NugWitch
Follow
She can't drink enough. It's crazy. Solid growth, good stems and major defoliation for this girl.

Likes
2
Share


@LoganatorDude
Follow
I absolutely love to watch them grow! Especially that moment they hit their first growth spurt.
I started with RO water that is remineralized for drinking purposes. The ppm is only 18! My tap is 156! So considering they don’t need much water, I’ve been stealing some of our drinking water. The RO water starts at pH of 7. After I add the nutrients, ppm of 249 @ pH of 5.8 while soil is still sweet @ pH of 7
I think my days are off as a new week begins on the last day of the previous week. I am going to leave that for consistency.
04/21 - Noticing some possible nutrient issues with the Fruity Pebbles for several days now. Going to see what she needs. Up front I’m thinking maybe just a super small amount of Amino Acids with a little Epsom Salt. Maybe she is struggling to access the nitrates from the neem cake. IF it’s a issues with nitrogen. We will see. Maybe she would benefit from some extra calcium?… Any ideas are greatly appreciated.
Day 22 and I am noticing how these girls have been burning up a lot of potassium lately, dealing with the wind and sun 💨 ☀️, getting pushed around all day.
I plant to top dress with some Kelp Meal pretty soon.
Day 24 -> 4/22/22- a quote from the weather on today’s red flag warning and dust storm warning.
“ HAZARD...Less than a quarter mile visibility with damaging wind in excess of 60 mph. SOURCE...Satellite imagery. IMPACT...Dangerous life-threatening travel.”
I’m keeping the girls inside today.
Day 26, I was planning to check the runoff on some of these girls, especially the fruity pebbles, however I messed that up as I also top dressed WAY too much of the seaweed bliss. So I flushed with plain RO water at pH of 7 until there was only slight coloration in the runoff. I didn’t check the runoff as a lot has changed with all that flushing. So next watering/feeding I will make sure I check the runoff on multiple plants.
So the seaweed bliss with its 17 on potassium, seems to be the most likely culprit for why there is a bronze-ish color on the inside of the new growth. Hopefully a foliar feed of Epsom salts can correct the problem. Inside tent, lights on LOW. Noticing similar pattern in all of them to a degree, most noticeable in the fruity pebbles.


Likes
14
Share

@TrickzCutz
Follow
Servus Moin!
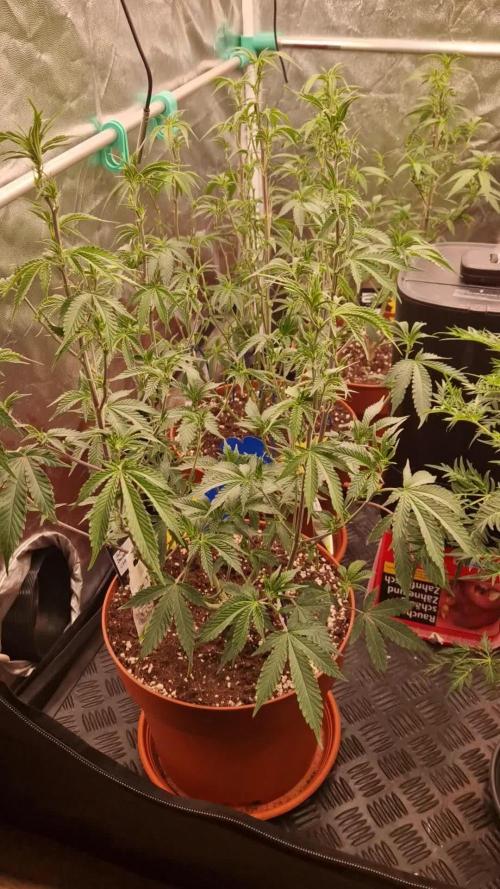
Die Super Double Cherry ist ein ganz schönes Wuchsmonster. Ich habe wieder einige Blätter entfernt. Ich hoffe die unteren Triebe stretchen noch ein wenig hoch.


Likes
20
Share


@Spudz
Follow
Day 70 — Cruising right along with the grow. Can’t say enough about the Sensi Bloom. I will definitely be using it for the next grow. Both Veg and Bloom. Buds are really filling on the short LB. Getting fat and sticky. Smell is really nice as well. Remind me of the pot from the 70’s. I’m starting to stress a bit about when to harvest. I don’t have a magnifying glass strong enough to see the trichromes. Is there another telltale sign the plant is ready? I’m starting to see the red hairs so is that an indication flowering is winding down? I still think I have a couple weeks, but will be watching them closely. Thanks for reading.


Processing
Likes
12
Share


@ELPIRATA
Follow
🙏
Ha comenzado la semana Nº7, Se han acentuado mas los olores en el cuarto de cultivo,
se logran apreciar diversos botones, Espero logren crecer de manera desmedida y robusta.
El día 20/06/2020 se han regado 3 plantas en macetas de 11 litros:
X2 Semillas Auto Lemon Kix= 1L [1MlBLOMBASTIC+1.5mlKnactive+5ml/L ATAGrowth-C+5mL ATAFlower-C+1mLAutoTop] PH 6.2(?) / EC= 1.84Tº=23
X1 Semilla Auto Tutankhamon= 1L [1MlBLOMBASTIC+1.5mlKnactive+5ml/L ATAGrowth-C+5mL ATAFlower-C+1mLAutoTop] PH 6.2(?) / EC= 1.84Tº=23
*El día de hoy se han regado 1 planta en macetas de 7 litros:
X1 Semillas Auto Lemon Kix#3 = 800 ml [1MlBLOMBASTIC+1.5mlKnactive+5ml/L ATAGrowth-C+5mL ATAFlower-C+1mLAutoTop] PH 6.2(?) / EC= 1.84Tº=23
*Se comienza a usar Bloombastic en semana 6, dia 42 (0.5 ml/Lt)
😈
Buenos humos!


Processing
Likes
13
Share


@Cheesefarmer420
Follow
Another week done, finished up week 6 of flowering, week 10 of the whole grow. The buds are continuing to fatten up, inching closer and closer to harvest. Noticed the first few Amber tricombs on some of the upper buds, going to be leaning off the big bud and switching to overdrive to help aid in ripening and the final bulk. I’d like the run them another 4 weeks giving them a full 9-10 weeks in flower. But will judge harvest on a near 45/55 or 50/50, Cloudy/amber tricomb production.
Likes
23
Share

@Radagast_
Follow
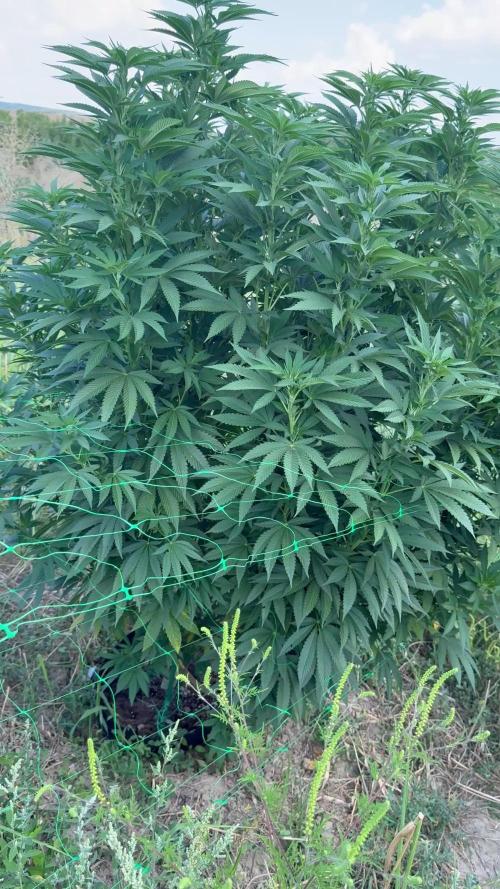
17.08.
Dos Si Dos 33# 1# Day 114#
Dos Si Dos 33# 2#Day 114#
2 days ago it was the end of the 16th week for the plants
They are getting close to flowering
Photos and videos are from yesterday
Stay High and Keep Growing!!!

Likes
54
Share


@MadeInGermany
Follow
Flowering day 69
since clock change
to 12/12
Hey guys :-)
It's slowly coming to an end 💚.
She gets another 2-3 days before she is put in the darkroom.
Watering was done twice this week with 1.2 l each.
I am really looking forward to the next update .
Have fun and stay healthy 💚🙏🏻
👇🏼👇🏼👇🏼👇🏼👇🏼👇🏼👇🏼👇🏼👇🏼👇🏼👇🏼👇🏼
‘Powered by GreenHouse Feeding’
Copy the link for 10% off all Nutrients 👇🏼
https://shop.greenhousefeeding.com/affiliate/MadeInGermany_PassionGrower
👇🏼👇🏼👇🏼👇🏼👇🏼👇🏼👇🏼👇🏼👇🏼👇🏼👇🏼👇🏼
You can buy this strain at :
https://www.amsterdamgenetics.com/product/choco-cheesecake/
👇🏼👇🏼👇🏼
Use the coupon code: madeingermany
for 10% on all Amsterdam Genetics seeds
Water 💧 💧💧
Osmosis water mixed with Cal/Mag (24 hours stale that the chlorine evaporates) to 290 ppm and Ph with Ph- to 5.8 - 6.4
MadeInGermany

Likes
12
Share

@ELPIRATA
Follow
13/05/2020 Ha comenzado una nueva semana; día a día aprendiendo del proceso, analizando las condiciones del clima.
+Se sigue apreciando el desarrollo lento de la #3AutoLemonKix, una diferencia notoria con sus hermanas, pero se seguira insistiendo 💪
*El día de hoy 18/05/2020 se han regado 3 plantas en macetas de 11 litros:
X2 Semillas Auto Lemon Kix= 500 ml[2mlKnactive+2mlDeeperUnderground+1ml/L ATAGrowth-C] PH 6.0 / EC=1.15 Tº=22 + Riego foliar [2mlxlitroKnactive+0.5MlDeeperUnderground]
X1 Semilla Auto Tutankhamon= 500 ml[2ml/LKnactive+2ml/LDeeperUnderground+1ml/L ATAGrowth-C] PH 6.0 / EC=1.15 Tº=22 + Riego foliar [2mlxlitroKnactive+0.5MlDeeperUnderground]
*El día de hoy se han regado 1 planta en macetas de 7 litros:
X1 Semillas Auto Lemon Kix = 250ml [2mlKnactive+2mlDeeperUnderground+1ml/L ATAGrowth-C] PH 6.0 / EC=1.15 Tº=22+ Riego foliar [2mlxlitroKnactive+0.5MlDeeperUnderground]
(Hasta el momento se esta ocupando Intraccion Pasiva + ventilador Pinza (Temperatura Controlada)
QUE LES PARECE ?


Likes
200
Share


@Ferenc
Follow
Day 65, 14th of November 2020:
Amazing week....
RQS Wedding Gelato does not strech a lot and pistils coming out nicely....
Original Sensible Seeds has amazing gentics they are so strechy except Black Ghost OG, rest of them crazyyyyyyy..... I also broke two of the sides from Gelato Original Sensible Seeds but fixed with tape and now all good lol 🤣🤣🤣
Pre flowers out and I really hope they stop growing lol.
I also noticed that the Original Sensible Seeds strains have nice purple colours of the fan leave's stem.
All the same fertilization happens every 2nd day with the mix above and ratio.
One more thing:
I set the lamp 15 minutes shorter to switch off earlier so they receive 11:45 of darkness. I would like to imitate the nature when longer nights come with time till the 4th week (when they will receive 13 hours darkness a day 15 minutes minus 4 times = 1hour) so every week 15 min longer darkness for 4 weeks and then back to 12/12 to have bigger buds from the 4th week....

Processing
Likes
38
Share


@growsmoke420
Follow
After Input from the Community I've Decided on NO Nutrients for a few Days to let Her Recover from Her Suspected Nitrogen Toxicity. If She Recovers like I Hope She'll get One more Feeding of Beastie Bloomz only before a Final Flush as I Suspect only a Few Weeks before She's ready to Harvest.
Likes
10
Share


@asstonmartian
Follow
Bushing out nicely! I probably should have adjusted the LST to allow them to grow taller but they were responding nicely so I kept them pinned and adjusted every few days. Finally started ph’ing the water to around 6. Water is tap, not measuring TDS or adding liquid nutes at this point.
The soils transplant was done with 50/50 mix of Natures Living Soil and soil, botto 1/3 of pot and remaining 2/3 soil.
Likes
7
Share

@ThatsmyGrow
Follow
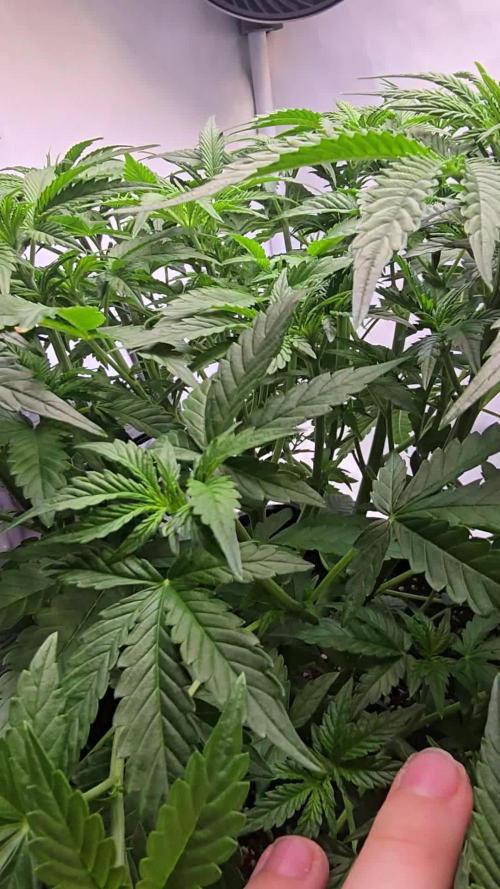
She is getting soo wide, like i topped her and use lst, but nope.
Its the nature grow of the super lemon haze, i love it.
We will see how big she is getting.
Likes
75
Share


@Dedon
Follow
The screen is almost full :D,
Today is the first 12/12 day, everythings seems to be OK, some leafs are yellow on the edge, but i guess it was because pH was fluctuating a lot. New leaf are ok, so i am not worry about that.
See you next week for update ;)
Edit : i add some temperature screenshot, we can notice when i change the water ^^^today for with new nutrient and yesterday to clean root and tank with FloraKleen ( 20ml for 10L )
Edit : 8/11 cut many leafs to expose buds to light
Likes
17
Share


@German_GrowLab
Follow
Einen wunderschönen guten Tag, liebe Grow-Community, und herzlich willkommen zur neunten Woche meines kleinen Outdoorprojekts!
Heute dann doch mal wieder an einem Montag :). Ich habe es nach dem Mary-Jane-Wachenden leider noch nicht nach Hause geschafft. Allerdings habe ich paar Bilder vorproduziert, um hier nicht mit leeren Händen aufzutauchen.
Ich bin die letzte Woche ein wenig durch die heimischen Wälder flaniert und habe den ein oder anderen Schatz bergen können. Aber alles der Reihe nach …
Da ich messbedingt nicht bei den Pflanzen sein konnte und das mit dem Gießdienst an Dritte abgeben mal so, mal so funktioniert. Dachte ich mir, man muss der Verdunstung und der damit einhergehenden Trockenheit etwas entgegensetzen.
Ich habe mich als kurz und knapp für eine Mulchschicht entschieden. Diese schützt nicht nur vor Austrocknung, sondern macht ebenso die obere Erdschicht für die Durchwurzelung brauchbar. Sie ist obendrein ein weiterer Schritt zu einem gesunden Bodennahrungsnetzwerk. Dieses wird durch die in dem auf dem Grünschnitt/Waldlaub enthaltenen Mikroorganismen (Protozonen, Wimperntierchen), welche durch das Belüften im Tank nochmals gefördert werden, noch einmal gestärkt. Last but not least führt der Mulch dazu, dass Schadorganismen das Einfallen in die obere Erdschicht erschwert wird.
Aber was ist drin?
Ähnlich wie schon beim Komposttee wird bakterienreiches organisches Material in einen Tank mit vorzugsweise Regenwasser gegeben und anschließend über einen gewissen Zeitraum belüftet (siehe Woche 5). Der wohl größte Unterschied zum Komposttee ist, dass wir eher auf das Material und nicht auf die Flüssigkeit aus sind. Dieses besteht zu ca. 90 % aus Grünschnitt (in meinem Fall eine Biokleintiermischung) und zu ca. 10 % aus Laub, welches ich in einem wenig bis gar nicht bewanderten Waldstück gesammelt habe.
Die richtige Platzwahl:
Bei der Platzwahl war mir wichtig, einen möglichst naturbelassenen Teil des Waldes auszusuchen, um eine Kontaminierung von bspw. Müll oder Hundeurin zu vermeiden. Ebenso habe ich nach Material Ausschau gehalten, welches schon Kontakt mit einem Pilzmyzel und dem ein oder anderen Regenwurm aufwies. Beides sind Indikatoren für ein gesundes Bodenleben.
Zum Schluss …
Nun einfach alles in einen großen Tank, Wasser drauf und Pumpe an. Belüftet wurde das Ganze für drei Tage. Danach das Material entfernen und luftig um die Pflanzen aus Ringen (leicht in den Boden einarbeiten). Um mit so wenig Waste wie möglich zu arbeiten, habe ich dann noch das Wasser gegossen. Dieses ist sehr reich an Mikroorganismen.
Aber nun (besser spät als nie) noch ein paar Credits:
Und zwar an Flo von Florganics, von dem ich das meiste Wissen um den Komposttee, die Erdmischung sowie auch das Mulchen bezogen habe. All die genannten Themen sind nochmal deutlich detaillierter auf seinem Yt-Kanal (Florganics) zu finden.
Noch ein kurzes Wort zu den Damen:
Soweit sehen alle sehr saftig und grün aus. Mit dem Toppen warte ich noch, bis ich wieder da bin. Alles in allem sollte am Ende doch ein wenig herauskommen (im Optimalfall 50 g/Person).
Das war’s für diese Woche. Euch nun einen schönen Restmontag und einen guten Wochenstart.
Peace


