




Likes
29
Share


@olli0420
Follow
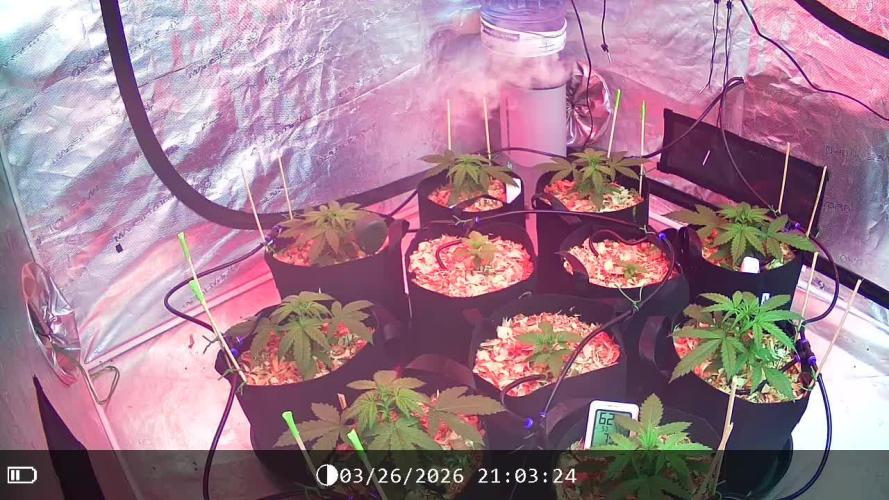
soo one was way more photogenic than the other 😅 also I know I put a lot of videos but I'm obsessed with this strain ok? it's amazing and I'm proud of me😁😁
oh and how DOPE is the timelapse? 🤯🔥🔥🔥🔥

Likes
6
Share


@IronGrower
Follow
Everyday on 12 i bring them to the balcony to enjoy the real sun. so just 3-4 hours the back inside because still very cold outside!
I made a miskate 1 week ago. i water them the flush water from my other Plants... then all girls was yellow. After flush with fresh water they getting better again!


Likes
9
Share

@GrowInBavaria
Follow
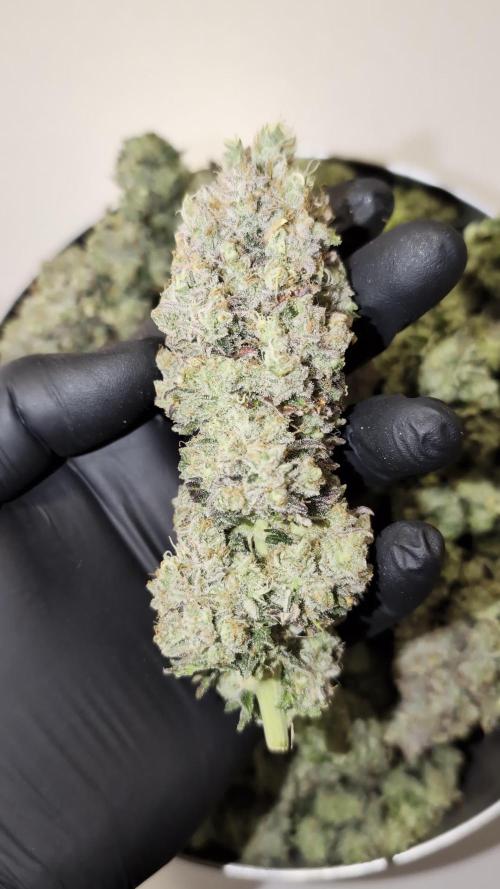
16.01.2026 – BT 75
Es wurde endlich geerntet. Die Trichome waren überwiegend milchig, des Weiteren ein geiler Mandarinen-Geruch, der aber nicht penetrant war. Das Ganze kam in DryFerm Bags und wurde 9 Tage getrocknet. Die RLF beträgt nach dem Eintüten in die Grove Bags aktuell 63 %, also optimal zum Curen. Ein abschließender Geschmackstest folgt dann!

Likes
15
Share


@Insaniac_0
Follow
Flower Week 6 Day 42 to 48 - 3/26 to 4/1
Stepped up my attention with these this week and hope I didnt let them go too far for a decent harvest. I defoliated for the last time this week and spotted more purple leaves. The buds are super dense so I have higher hopes than I did last week
Feed this week was 1.25 gallons 2 times. 700ppm total before add-ins. I used 400ppm Bloom concentrate mix (recipe week 5). Then I added 1ml/gal of CaliMagic (General Hydroponics 1-0-0) PH balance this week was 6.6
I plan to feed 1.25gal 2 times with 6.6ph and half nutes. This will also be the same for all remaining feeds before harvest. From this point Im simply watching for signs to harvest in the pistils, calyx, and trichomes

Likes
5
Share

@RakonGrow
Follow
+
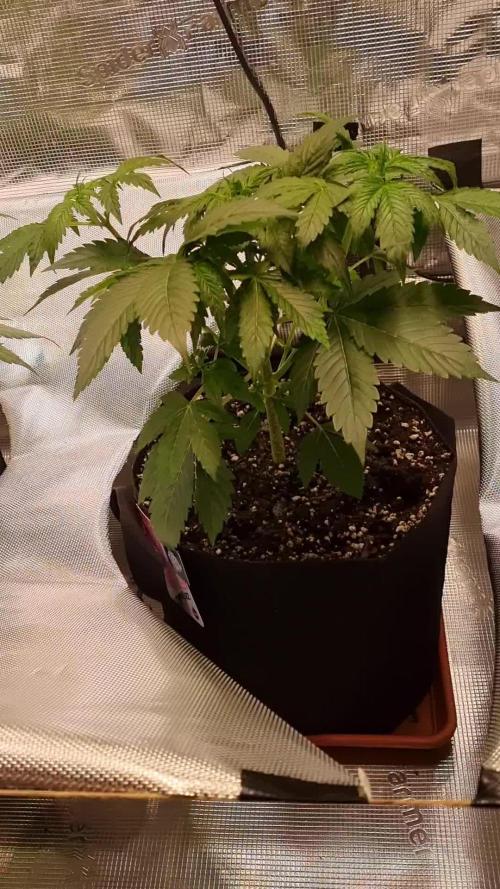
Day 37
2.0L bottle water EC 0.35 + 0.2ml/l CalMAg , 3.3ml/L Vega . PH 6.1
DIY Project fixed my Problem :
+ Top Values : 25.4°C ; 57%rH
+ Bottom Values : 23.0°C ; 64%rH
Day 34
3L bottle water EC 0.35 + 0.4ml/l CalMAg , 3ml/L Vega . PH 6.12
Day 32
1L bottle water EC 0.35 with 0.4ml/L CalMag , PH 6.10 . Reduce EC in some spots .
Build a shadow plane with reflective foil (diamnond tent foil).
my new light is large as hell , and heating all around lol . this DIY project should fix it .
Day 29
2.5L bottle water with 0.4ml/L CalMag 3.3ml/L Vega , PH 6.07
+

Likes
1
Share


@Cannerd
Follow
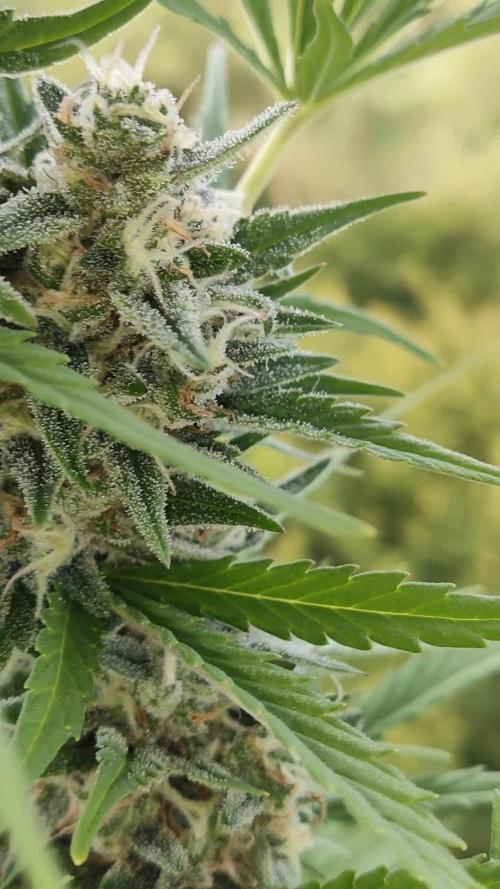
How ya doing mates?? Awesome week last week - all photos and logs have been added so be sure to check it out! This week is going great so far! I've switched to an early vegetative state nutrient system. As you'll see in the daily logs early this week, this bumps up the micro and grow nutes, and keeps the bloom at 0.6ml/gal. A quick note about last week - I'm unable to update the measurements, but please note that those nutrient amounts are measured in ml/gal, NOT ml/l.
Anyhow, this week I'm just waiting to get my order of diatomaceous earth so that I can make up another batch of soil. I'm still debating between topping this week before repotting or letting them take root in the new pots first. Decisions decisions lol. I think at the very least I'll clean up some of the lower growth to make sure the energy is being spent at the right places. I've been switching back and forth between just LST and mainlining in the past - but I think I really like the ease and cleanliness of mainlining. The draw back is the recovery time they take in the process haha.
UPDATE:
The D.E. has come in, and I repotted the girls this week. I mixed in about 1.5-2 cups D.E. for the whole pot, as well as some Bat Guano and Kelp Meal for micro and macro nutrients to use on dry cycles.
I've also included some photos of the mother plant to give an idea of what's to come! I've just started to flower it, which is the first time for this strain - so I'm pumped!
Day 15:
M.C. 01-21 After reviewing the last set of photos from last week, I figured I'd play it safe and dimmed the light back down to 25% strength. The mother plant is almost ready for flower, and I'm down some tents so she'll be taking this one over shortly. These photos were taken shortly after the lights went off, and they look quite happy! You can see some of the side branch developement in today's photo for MC-01. The pots are fairly dry now, and I've decided to move to the next stage in the nutrient regime. This kicks up the Micro and Grow nutes, while maintaining the Bloom amounts.
M.C. 02-21 A nice top photo for MC-02, you can really see the lighter green in this photo. Not to worry though, as these will darken back to a vibrant green as long as I give her what she needs shortly! The pots are fairly dry now, and I've decided to move to the next stage in the nutrient regime. This kicks up the Micro and Grow nutes, while maintaining the Bloom amounts.
M.C. 03-21 Look at that little leaf poking out from the 2nd node! Some slight yellowing you can see too, but again, not to worry. The new mix should rectify that. I've decided to move to the next stage in the nutrient regime. This kicks up the Micro and Grow nutes, while maintaining the Bloom amounts.
Day 16:
M.C. 01-21 Today is the day - for the mother! I've cleared out some space and moved plants around. So back out to the grow room these girls go! MC-01 seems much better today with the reduction in light. The 5th node is almost flattened out and the 6th coming through still. Most notably though, you can really see the work she's put into the side branches! The branches at nodes 2 and 3 are starting to produce more leaves - great sign! The new growth at the top is also a nice dark green. Added 500ml water to the tray.
M.C. 02-21 MC-02 seems to have liked the adjustment of light as well. She's got nice dark green growth at the top, and the little branches at the 2nd node seem to have a full leaf! Added 500ml water to the tray.
M.C. 03-21 The photo from today is cool, because you can see how close MC-01 & 03 are, even though there's almost a full node difference. MC-03 is stretch out a bit to compete with her sister for the light haha. She's also put some more effort into the side branches that you can see. Added 500 ml water to the tray.
Day 17:
M.C. 01-21 I figured a video would be the best way to illustrate the changes today! They've been back in the grow room under the Veg dedicated light for a day now and seem to be loving it! MC-01 has its' 5th node out, splitting the 6th node, and I can JUST see the 7th node coming in. I don't think they'll get too much more height, as you can see that the side branches are starting to stretch now! She's definitely going to be well tangled in the roots by the end of the week when I hope to repot her.
M.C. 02-21 MC-02 is doing great despite the difference in height! You'll notice the side branches stretching out at nodes 2 & 3. The pots are also still fairly wet at their center, so I'll hold off on water most likely. At least this clone will have time to root more while we wait for the supplies!
M.C. 03-21 MC-03 also has great side branching! If you take a look at the group photo from today, you'll see that both MC-01 & 03 are practically the same height, but MC-03 snuck in there by the stretch haha.
Day 18:
M.C. 01-21 My order of D.E. came in last night, perfect timing! As you can see, her roots have fully reached the bottom, and have started to migrate upwards with the water that's absorbed. The soil was a little dry for my liking, which made things a little difficult/dusty but still no mishaps! Watered around the root-zone before covering with more soil to keep the gnats down.
M.C. 02-21 Not quite as much lateral root growth as MC-01, but still plenty enough for a repotting! Her soil was a little dry as well. Ideally I should have given them a light misting from the top of the soil and let is drip down to keep the dusty bits together haha.
M.C. 03-21 Nice and thick root growth, no issues with repotting, and strong stalk. The extra spacing in the nodes may prove to be helpful during the training phase.
Day 19:
M.C. 01-21 Some nice top shots today as they slowly get acclimated to their new homes. Once I see them push out a new node, I'll probably top them. This is to make sure that they're taking to the new pot without causing any extra stress before they can take it. Today I watered them with an early veg nutrient. I like to stay cautious with nutrient boosts since they're in soil - not to mention the added nutrients from the repotting.
M.C. 02-21 Top shots for the girls today. Not much change, but also no immediate signs of shock either, so I'll take it.
M.C. 03-21 You can't really see it in this angled shot, but the small branch at the second node is coming along nicely! I think the girls are happy that they each have their own tray not haha.
Day 20:
M.C. 01-21 Definitely noticing some slow changes to the top nodes when comparing the pictures from the previous day. The leaves are slowly starting to separate, and I'm not noticing too much yellowing yet which is good. Watered with 500ml water to keep water migrating upwards to meet the roots.
M.C. 02-21 Not noticing much change in this girl today, but that's okay. She's most likely focusing on the root developement instead which I can't complain about! Watered from the bottom.
M.C. 03-21 Maybe seeing some separation in the top leaves, however more notably are the small branches at the 2nd node that you can see better here. Still a bit of stretching with them as they get longer. I might even keep them on for clones later on. Watered from the bottom.
Day 21:
M.C. 01-21 Looks like she gained some distance last night, as the top node is now above the fan leaves, unlike 2 days ago. I'm really getting eager to top them, as I don't want them to waste too much time and energy growing tissue that I'll just end up cutting off. I'll be bumping the nutrients up starting next week to keep the progress going, moving to a mid-veg stage shortly. I'm going to let things dry up tonight for a fresh boost of water tomorrow to give it a dry cycle as the pot is still a bit heavy.
M.C. 02-21 MC-02 really worked hard last night it seems, as she almost completely flatted out her top leaves! I think she's ready for a topping, but I'll let her benefit from the headstart and let the other two catch up and root before. dry cycle for her tonight as well.
M.C. 03-21 MC-03 was busy last night too and is now slowly flattening out the top node as well! Maybe tonight they'll have enough progress to go topless afterall haha. Dry cycle in prep for watering tomorrow.
Likes
11
Share


@Budking420
Follow
This weeks been hot and dry. I've been doing everything I can to keep humidity up. I havent been feeding as much but lots of watering. Some defoliation but not very much. The bud sites are plentiful & numerous. The top sites have long pistols so I expect her to have large swelling buds. The strawberry gorilla seems to crave lots of sunlight so to say so keep the LED near max for best results! Check back next week to see just how fast she grows & remember its 4:20 somewhere!!!!

Likes
5
Share


@Budhunter
Follow
Week 10 is been magical.. Sour D is showing really good smell, different one.. similar with one I smoked from the streets.. plant is a bit smaller than gelato just beside it but man, they both are reaching the stars.. my biggest plants ever.. so far Barneys farm is showing really good genetics in my hands.. let’s gooo
I will cut off silicon and big bud from next week on 👍🏼👍🏼👍🏼
Likes
8
Share


@Fast_Buds7272736
Follow
Week 10 – Ready for the final stretch
Most of the pistils have turned brown, with only a few white hairs remaining – a clear sign that harvest is approaching fast. The buds have bulked up nicely, becoming denser and stickier, covered in a frosty layer of trichomes.
The aroma has intensified, leaning towards a sweet, fruity profile, likely enhanced by the Bud Candy. The foliage looks healthy, and I performed a light defoliation to improve airflow.
At the beginning of the week, the plant received its final feeding: a mix of Green Sensation and Bud Candy in 2 liters of distilled water. That was followed by a dose of Flawless Finish. From now on, only pH-adjusted water will be used until harvest.
Processing
Likes
4
Share


@Andres
Follow
she grows outdoor ... without any relevant information ... only her vegetation is slow ... it's autumn ... and the sun is not very strong ...
Likes
14
Share


@Mr_Terps
Follow
🔥GrowDiaries Report: Sleepy Joe von Anesia Seeds – Start der Blüte unter 630W LED
Der Grow mit Sleepy Joe von Anesia Seeds ist gestartet, und die Pflanzen zeigen schon jetzt ihr Potenzial. Nach einer stabilen Wachstumsphase geht es jetzt in die Stretch-Phase der Blüte. Das Setup mit 630W LED sorgt für optimale Lichtverhältnisse, und das Zelt ist bereit, die nächsten Wochen Vollgas zu geben.
---
Setup & Start der Blüte
Beleuchtung: 630W CMH – perfekt für dichte Buds und starke Trichomentwicklung
Zelt: 120x120 cm – genug Platz für die Damen, um sich zu strecken
Nährstoffe: Advanced Nutrients (Grow, Micro, Bloom) + CalMag
Lichtzyklus: Umgestellt auf 12/12 für den Start der Blüte
Temperatur: Stabil bei 24-26°C (Licht an), 18-20°C (Licht aus)
Luftfeuchtigkeit: Runter auf ca. 50%, um Schimmel vorzubeugen
---
Pflanzenentwicklung & Stretch-Phase
Direkt nach der Umstellung auf den 12/12 Lichtzyklus zeigt Sleepy Joe ein ordentliches Stretch-Verhalten. Die Internodien-Abstände bleiben dabei schön kompakt, was für eine kräftige Blütenbildung spricht. Der 630W CMH Strahler liefert das perfekte Lichtspektrum für diese Phase, was die Pflanzen dazu anregt, ordentlich in die Höhe zu schießen und gleichzeitig die Basis für dichte Blüten zu legen.
---
Nährstoffstrategie mit Advanced Nutrients & CalMag
In der frühen Blütephase kommt jetzt Advanced Nutrients Bloom ins Spiel, ergänzt durch CalMag, um den erhöhten Bedarf an Calcium und Magnesium durch die starke Lichtintensität abzudecken. Die Pflanzen reagieren gut auf die Nährstoffzufuhr, das Blattgrün bleibt satt und kräftig.
Tipp: In dieser Phase genau auf Anzeichen von Nährstoffmangel achten, besonders Magnesium und Kalium sind jetzt gefragt.
---
Erste Blütenansätze & Ausblick
Nach etwa einer Woche Blütezeit sind die ersten Blütenansätze zu sehen. Die Spitzen der Pflanzen bilden feine, weiße Härchen, die sich in den kommenden Wochen zu den dichten, harzigen Buds entwickeln werden, für die Sleepy Joe bekannt ist.
Mit der 630W CMH-Beleuchtung und der richtigen Nährstoffstrategie sieht es nach einem vielversprechenden Grow aus. Die nächsten Wochen werden zeigen, wie gut Sleepy Joe das Setup annimmt und wie sich die Blüten weiterentwickeln.
---
Wichtige Keywords für Grower:
Growshop Tipps
Anesia Seeds Erfahrungen
630W LED Grow Report
Advanced Nutrients Anwendung
CalMag für Cannabis Pflanzen
Indoor Growing mit Growlight
Beste Nährstoffe für Cannabis
Blütephase starten mit Anesia Seeds
Stretch-Phase optimieren
Grow-Report für Anfänger und Profis
---
Bleibt dran für das nächste Update, wenn die Blüten richtig an Fahrt aufnehmen. Happy Growing! 🌱

Likes
9
Share


@Dthebudguy
Follow
Estimate she’s done in week or so looks great beauty smell and rock hard buds

Processing
Likes
1
Share


@CityFarmer
Follow
Hello everyone,
Even tho I've been busy around the house this week, I took a few minutes and transplanted these into 5 gallon fabric pots, get them going early in some super soil. Lets see how they turn out. Ill have better picture's for you guys next week...
See you guys next week...


Likes
25
Share


@XperencdGmanXG
Follow
this should be the last week of vegetation. Flowering should be starting soon. Seems like no end to this drought we are suffering from in Southern Ontario.
Likes
2
Share


@YOREEL
Follow
Environment is good.
My aim is to get these into their tent in the next two weeks.
Good luck all!
Stay safe!
Track ID - Three 6 Mafia - Swervin (feat. Mike Jones & Paul Wall)


Likes
16
Share


@OrganicPower
Follow
Week 6 flower, half way there! Buds are starting to fill in now and getting some decent frost. A couple of tops are getting more light than others, and fattening a bit more and looking real nice. It looks like there is some purple starting to come out at the tops. She is strong and will go as fast as the soil and environmental conditions will allow her to. Hand watered in Gaia Green Soluble Seaweed Extract 0-0-17, otherwise water drip is running on same schedule. Just using straight tap water that sits in a 30 gallon reservoir with a submergible water pump running 24/7 breaking surface and aerating water. Water comes out the tap @ 7ph and less than 15ppm. So I don’t do nothing to it, I drink it:) Thanks for the view 🤜 Have a great week!

Likes
12
Share


@growking123
Follow
There asking for more water now. I was feeding 250ml every 3rd day as seedlings now I will up it to 350ml every watering until they need more.
