


Likes
Comments
Share

@JVKdopegrow
Follow
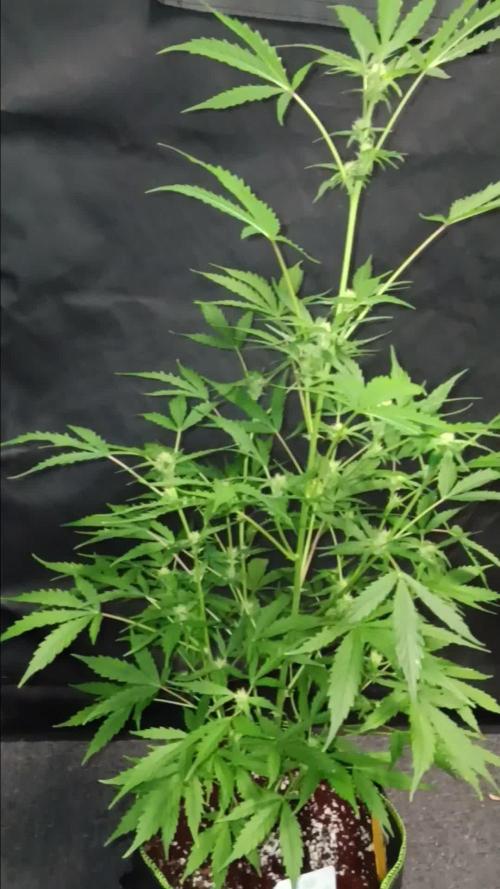
The stretch continues! She is tall and lanky with some pretty flowers. I have concerns she will outgrow my light at this rate but so far another really easy grow.
Likes
78
Share


@Nebula420
Follow
I really liked FastBuds genetics.It’s a pleasure to grow Blackberry.
Thanks to FastBuds, Growdiaries team, and thank to everyone who follow my grow report, love u all, Peace!😘

Likes
22
Share


@burnout
Follow
Cold snap past few days and my furnace is struggling to keep up, day temps around 75 F night 65
Video is overexposed, shows size difference between a 5 gal fiber pot and 10 gal SIP. 2/3 of the fiber pots did not stretch well, can see the one that did stretch in the back hiding.

Processing
Likes
37
Share


@TheIceCreamParlour
Follow
Day 49 - 14th Day of Flower
I'm starting to really enjoy this part of the grow. That said the amount they have stretched is crazy! My lights are maxed out height wise and they are only just 18" above the tallest colas so I really hope they finish up stretching soon.
Nutes: I added PK13/14 for fridays feed and they seem to have responded really well to it. They have been fed every other day as they aren't quite drying up in 24 hours.
One thing I have noticed this week is the smell! They have become incredibly pungent. Everytime i go in the tent I have to change my clothes as they just smell so much. The fan leaves around the bud sites are becoming sticky!
I have taken the smallest one out to photograph this week. It was sick when i got it as cutting so wasn't topped as early as the others. That said it seems to have grown into a really nice shape and has lots of buds developing.
No problems really this week. Just a bit of mild light burn which I kept on top of. They will have 1 more defoliation this week and then I'll leave them be.

Likes
3
Share


@IQuSX
Follow
Hi, topman!
We had stopped this report, because this plant was in frozen. We reloaded them 15 days ago and growing now every day…
Also, we remaining 3 weeks to change light on 12/12.
Check this report every week and we dont stop working in.
Thank you for your time, and see you!

Likes
50
Share


@Igrowneil
Follow
Hey so the girls finished the end of week 6 looking super happy again 😊 this hasn't been easy this run watering I've had quite a few mistakes on my part overwatering though giving the girls an extra day between watering seriously helped under LEDs .
The girls are growing amazing and some girls are in the ending stages of there flowering cycle putting on weight and growing dense buds , at the moment the girls scout cookie's is gonna be finished for week 8 dead on and is ultra dense , something I've noticed with these girls , thicker stems , more support , denser flowers and overall general health seems really improved moving away from the HPS , going to start some on Terra aquatica RIPEN for thoes colours coming to the end of flower 🌼
This week I'm able to describe weather they taken there indica hybird or sativa genetics also weather growth is going well or bad depending on specific strains . All girls are now in flower so there colours are starting to show in one of the dosidos having nice purple buds 💜
Girl scout cookie's
Amazing growth from the smallest plant is nearly at harvest with massive dense nugs its truly a little freak of a plant displaying the purple leaves underneath
The other girl scout cookie's is doing amazing and was left to grow normally the other in LST went hermi on me 2 weeks previously which was a sure disappointment being my biggest plant at that time but growth seems great on this strain for harvest times although plants are smaller than I normally get the yeild might surprise us at the end 😀
Gorilla glue
Sporting a solid structure and vigour like I've only ever seen on anything containing gorilla glue genetics and going into late flower now , one plant is seriously feeding a high level of nutes , greedy beware and make sure to keep plenty of everything at hand for max growth . Some leaves are starting to show slight defenices alothough im not worried as towards end of flower this plant is ģonna look seriously cool
Runtz 🚫
Girls are gonna be the biggest yeilders thanks to thoes skittles and hybird gentics coming from this strain donating its sativa high yeilds to this plant , two are late flower one is still stretching and is the biggest girl in the room by number of leaves and size , these strains end LST to provide enough space and light for these girl to promote there best traits . Feeding these girls are modest and not overall big feeders so it's not bad growing for beginners these girls will need to get a good few of there fan leaves removed to promote airflow and heat exchange
Dosidos
Girls are starting to pick up now , one has even rewarded us with out of this world purple buds 💜 I love my purple 💜
Growing well under LST although they has a slow start they seem to be picking up so heigh and I do reckon I'll get at least 28 grams a plant
Lemon haze
I've always misjudge the sativa strains as uncontrollable for a small room but I've been mistaken as these are looking to be good yeilder
Blueberry
Very tempermental, this is such a hard strain to keep happy in general it's been a pain in the arse ,
Headlight kush auto
These are the same very tempermental and a decent strain but doesn't have great vigour like the ZAMNESIA seeds seem to be looking great and growing amazing these girls would need another run but at the moment I'm not happy about overall growth

Likes
8
Share


@WeeDay420
Follow
Good joob thank you seeeeeee youuuuuuuuu next week wait check like i love smoking weed everyday 😃😍🤪😋😜

Likes
4
Share


@Growedbypepper
Follow
Vemos al flor cada vez más desarrollada y pomposa aun estamos iniciando esperamos tener una buena cosecha 🙏🔥
Likes
4
Share


@Barcelona_Farmers710
Follow
Explosión de resina!!! Una genética que no me deja de sorprender un olor brutal a cítricos y su olor a Haze un gustazo pra la vista y el paladar sin duda esperamos impacientemente el dia de degustar este manjar!! Espero que os guste Salut y força al canut Farmers!🍁

Likes
27
Share


@Stickybudz420
Follow
7 weeks now she’s a real beauty this lemon, plenty of bud sites on her now as she’s just coming into flowering now think this one might be a late bloomer!! Hope you enjoy the pics 🍋🏝️Just had my ACL reattached so might struggle to keep up with my diaries 😪🤞

Likes
223
Share


@Tropicannibis_Todd
Follow
💩Holy Crap We Are Back At It And Loving It💩
Growmies we are at DAY 42 and she's just killing💀it👌
The Gorilla Punch Is Amazing 👏
👉We are in full flowering mode for the stretch 👈 OG 👍 GP 👍 the AF was the hold out but shes finally went into Preflower 👈
So Shit , I gave them just a tad to much nutes at the start feeding 👈 But I have since fixed it
So I'm still doing some low stress training 🙃 and some defolation 😳
Lights being readjusted and chart updated .........👍rain water to be used entire growth👈
👉I used NutriNPK for nutrients for my grows and welcome anyone to give them a try .👈
👉 www.nutrinpk.com 👈
NutriNPK Cal MAG 14-0-14
NutriNPK Grow 28-14-14
NutriNPK Bloom 8-20-30
NutriNPK Bloom Booster 0-52-34
I GOT MULTIPLE DIARIES ON THE GO 😱 please check them out 😎
👉THANKS FOR TAKING THE TIME TO GO OVER MY DIARIES 👈
Likes
31
Share


@Canna96
Follow
Hey now, I hope everyone is having a great weekend. The Strawberry Banana is doing well, I am just doing some LST every couple of days, and she is just starting to stretch. She is still feeding on silica, cal mag, and maxi grow veg nutes by GHE. She seem to be loving this Medic Grow Spectrum X, which I am now running at 70% and also running the UV/IR bars for 1 hour before lights off. I also did a light defoliation this week to allow some airflow and her to focus more energy on the upper branches.
I will continue to with LST and veg nutrients until the vertical growth stops, then I will transition her to flower nutrients, and change her lighting to the red spectrum. Not much to do this week except watch her stretch and some light LST>
Thanks for stopping by, Stay Safe and Blaze On!!! 💪
Website: https://medicgrow.com/
https://growdiaries.com/grower/medicgrowled
Likes
20
Share


@eldruida_lamota
Follow
Como estáis familia? Yo flipando y es que todo lo que provenga de cheese me encanta, farm cheese del banco genofarm, repleta de polen,parece los Pirineos en pleno enero cuando nieva.
Es una cepa increíble el problema que le veo es su olor penetrante, apesta enserio es muy fuerte su olor, seguimos alimentándola con advanced nutrients quitamos todos los adictivos menos overdrive y la base sigue dando caña y si no mirar su color.
Todo este proyecto e de agradecerlo a mars hydro que sin ellos no es posible este proyecto, enserio este led es bomba.
Ph controlado , humedad por debajo de 50% temperatura entorno a 27 algo alta pero no hay problema alguno.
Muchas gracias a todo el equipo de mars hydro de nuevo, agrobeta que aunque no participen los productos en el diario si van hacerlo en un futuro, y gracias a vosotros que sin grow diaries y sin todos vosotros usuarios , tampoco es posible, así que gracias, muy buenos humos 💨💨💨.

Likes
144
Share


@DevilsBud
Follow
New week for my new Fam
Very happy what i have growing now
It's again multiple different strains.
Mix off spices is never a bad thing hé
All growing Great nothing to complain and not a lot to say so far 👌🏻
20/2/22
All are now in there 0.3l pots and will stay there for until i see roots sticking out and finally will be transfer to 11L ore 15L pots will see will be adding
mycorrhiza mix 🤜🏻 to transfer we going to blow this grow up into the sky
And remember just grow weed and stop growing bullyish behavior
visit www.marshydro.eu
for your best gear and use the PROMO CODE: DEVILSBUD
Some info about the Marshydro FC-4800
Superb Quality LED Chips: The whole light is composed of 1206 pcs Samsung lm301b and Osram 660nm chips. More than two times as many LEDs are used to drive the grow lights at low currents and to avoid overdrive. Quality is guaranteed and efficiency is up to 2.8 μmol/j.
Even PAR Distribution and High PPFD Output: The multi-light bar design and the densely distributed light chips enable the LED grow lights to achieve the optimum PPFD required for plant growth over the entire effective coverage area.
Specifically Designed Spectrum: To ensure even plant growth, blue and red light are enhanced on the basis of a full spectrum combination. Not only does this accelerate plant growth, but it also improves the yield and quality of the plants at the same time.
Dimming Daisy Chain Function: The dimming function saves on electricity costs and enables brightness from 10% to 100% for the different stages of plant growth. A single master light can connect up to 30 lights in a daisy-chain system.
Business LED Grow Light: The light's wavy heat sink dissipates heat quickly and the IP65 waterproof allows the light to operate in humid conditions. 180° collapsible feature for easier installation. All these features provide favorable assistance for commercial cultivation.
And some tent info
●【Lock All Light Insid】MARS HYDRO Grow Tent Interior is made of diamond mylar. Non-toxic to the environment, no harm to plants. High-quality 1680D canvas being double stitched, (ALL OTHERS BRAND grow tent is 601D canvas) which is tear-proof for perfect light locking, No light leaks or rips at all.
●【Durability Grow Tent】Stable Metal corner adapters and poles are the trustful supporters of the tent. No rusting nor paint-falling. Quick easy tool-free installation. Carries strong heavy-duty SBS zippers, double layer lining to create a light-proof seal.
●【Easy Observation of your Plants】Special peeks window made by double layers of cloths. Observe the growing conditions of your plants without opening the tent and avoid disturbing plants. The peek window also serves to dissipate heat and ventilate air.
●【Removable Tray Keep Clean】The package includes a removable waterproof floor tray to hold soil and fallen leaves. The tray can be taken out easily to wash. Removable and water-proof makes cleaning easy.
●【Good Ventilation&Fast Assembly】 Circular double-sleeved vent holes with adjustable nylon strap for air circulation by exhaust fan, ducting, carbon filter, or reflector. Better allows proper light, heat, and airflow. Quick tool-free installation. Reinforced by a sturdy metal frame to ensure security and stability, supports up to 140lb. Perfectly safeguard your plants to thrive even in winter


Likes
22
Share


@herbalistssword
Follow
Alright, another week. Ladies looking well.
Defoliated the Sugar Mama and Fastberry mid-week they took it well.
Ran out of Neem Oil last week and noticed a couple of small bugs flying around, no idea what they are so ordered some more neem oil and some stickies.
The other girls are all doing well, they are drinking much less than usual, I had a bunch of alfalfa seeds lying around so sprinkled them around some of the plants.
Upped the feed as they seemed to need it. EC is now going from a base of .6 to 2.4


Likes
11
Share

@Count-Dooku
Follow
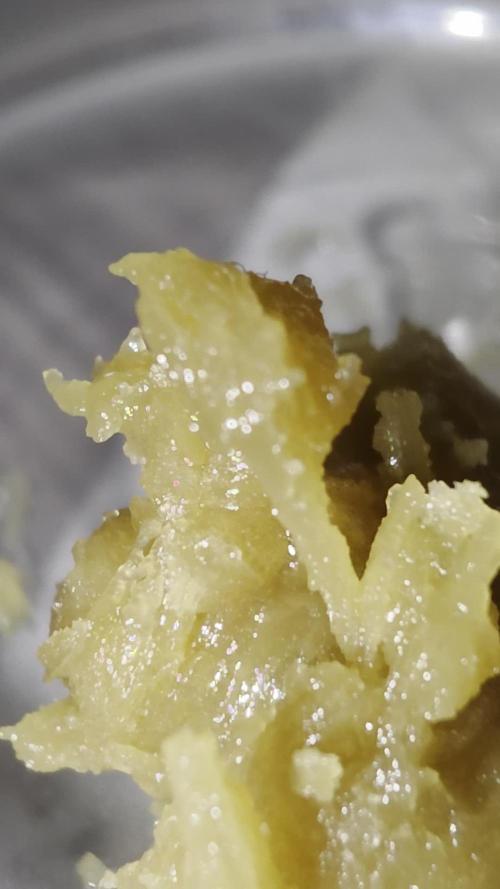
Frosty as heck but small buds, I might run it again with no lst and see if it gives bigger buds. Easy trimmer.


Likes
13
Share


@Oyziphar
Follow
This week wasn't as bad as last week 😊 Nights were cold 😰, but not to much rain 😿 and a few hours of sun 😍
Temperatures in the greenhouse were medium : during the day 20°C 💀; min temp 3.5°C ; max temp 31,7°C 😤
Cookies Gelato has turned completely purple 👍👍👍
I defoliated the plants 😙 and had to remove budrot (especially in the Cookies Gelatoes)😨
I took the prettiest Cookies Gelato outside for a photo session in my garden 😍
Probably these will be the last pictures of the plans, before harvesting ! 👍😄


Likes
15
Share

@NoProbation4Weed
Follow
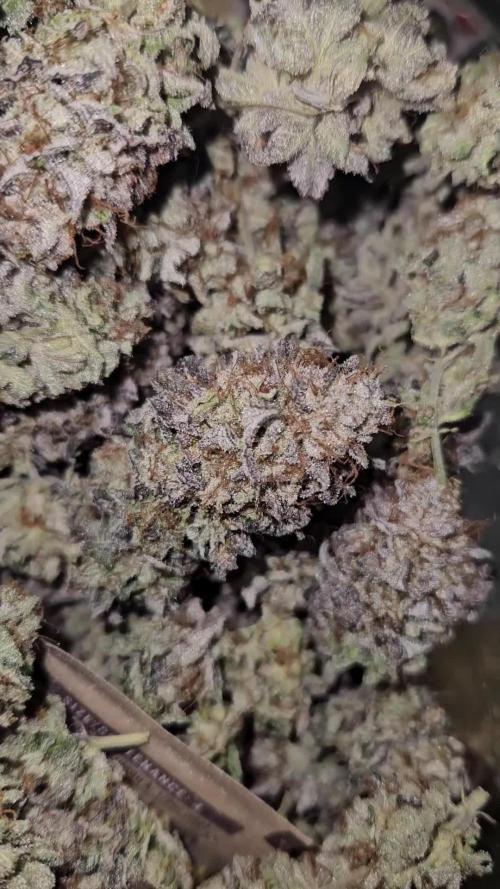
last 3 days no watering and last 48 no light.
drying conditions are RH 50% and temp 14°C.
very intense smell like cookie dough with gassy fruitnotes to it. Not the biggest yielder but definetly loud!

Likes
62
Share


@Tuki3
Follow
Pequeña actualización! Recien arrancando la semana 4, pero para que vean lo contenta que está con el nuevo panel quantum board! tremenda!!
Ahora si! se pueden observar muchos mas pistilos, y comienzan a aparecer nuevos olores, de todas maneras mucho olor a verde 😅.
Cuando instalé el panel lo tenia a 10cm de distancia, pero pense en alejarlo así les llega un poco mas al resto.
