Likes
Comments
Share
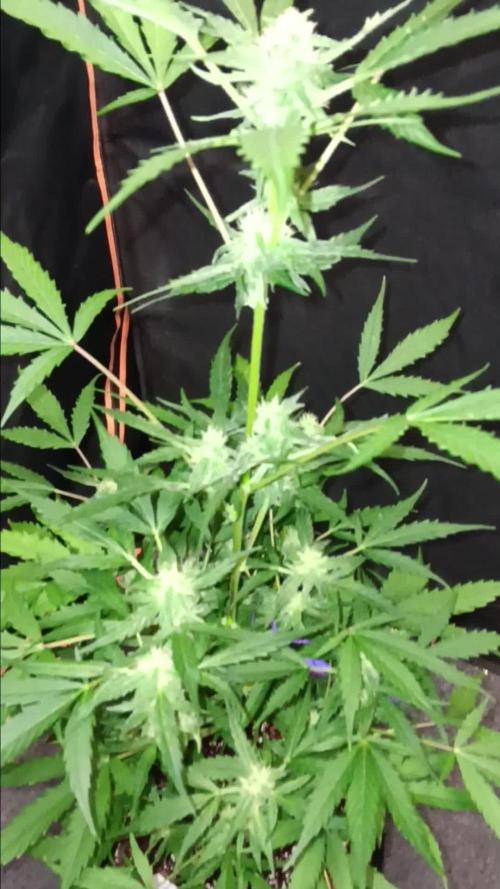
Blooming! I really enjoy this stage. These buds already have some color to them so I am hopeful they turn out well. A bit more growth all around as she puts her effort into the flowers.
Likes
5
Share
@SlamFM
Follow
11/2/24 - Start of Week 9 11/5/24 - Swapping out Bulky B for Full Tilt. The fruity smell is starting to come out but "fruity" as in it smells like a real fruit. -2ml Cal-Mag -1.5g B1 -1.5g B2 -2g Full Tilt in 1 gallon water
Likes
7
Share
This week, I started defoliation and tying down. So far, no signs of pistils. The smell is beginning to emit. PPM remains at 1000, and the pH is 5.8. While waiting for the harvest, I'm enjoying the last Rosin I made.
Likes
4
Share
📆 Semana 5 El stretch ha finalizado en la mayor parte del cultivo y la energía se concentra en el engorde de los cogollos. La genética de floración más rápida muestra ya flores más compactas y resinosas, mientras que la de dominancia sativa mantiene un desarrollo algo más progresivo, aunque continúa ganando volumen y formando nuevos sitios florales. El consumo de agua y nutrientes alcanza uno de los puntos más altos del cultivo, por lo que mantener una nutrición estable y un clima controlado será clave para sostener el desarrollo de ambas plantas. ⚡ EC: 1.9 💧 pH: 6.2 - 6.5 🌡️ Agua: 21°C 🌫️ Humedad: 40–45% 💡 Intensidad: 1050–1100 PPFD 🔥 Nota de cultivo: Comienza la fase de engorde. Aunque cada genética avanza a su propio ritmo, mantener la estabilidad en el riego, la nutrición y el ambiente permitirá que ambas expresen todo su potencial. Seguimos creciendo fuerte 💪!
Likes
44
Share
**Encontrarás la traducción a español al final de la descripción** From/Desde: 10/05/19 || To/Hasta: 16/05/19 From day/Desde día: 78 || To day/Hasta día: 84 You can find the Money Maker Diary here: ** Podéis encontrar el diario de las Money Maker aquí:** https://growdiaries.com/diaries/25667-gorillamakingmoney-gorilla-vs-money-m -----IMAGES & VIDEOS----- 5 - HomeMade Organic & Cheap CO2 generator (more info in week summary) 9, 10, 11 & 12: The bud on the right is a Gorilla one, the buds in the left or/and in the middle are Money Maker ones. 15 - Same Gorilla plant buds, one affected by CO2 in the roots and the other not. -----WEEK SUMMARY----- The smell is more sweet and intense every day, friends that came home turned them eyes into crystals when they see this little babys. The size isn't awesome, but the high ammount of buds full of crystals plus the strong sweet aroma makes them awesome. Buds are growing and fattenning very very well. This week i added a boost of HomeMade CO2, i never measured the results of this invention so i can't give CO2 measurements. This method is widely used in home aquariums and there is where it comes from. For those interested i'm going to write here more detailed instructions. The 4 liters i've made will last for about 2 weeks. ---NEEDINGS--- - 250 ml Bottle - 6~10 l Bottle - 400 g Sugar / l water - 1 Envelope of organic baker's yeast / l water (CHEMICAL WILL NOT WORK) - 3 mid plastic tubes 40~50 cm - 1 short plastic tube 5~6 cm - 4 tube adapters - Hot glue to seal adapters The process of creating CO2 is simple, mix water, organic yeast and sugar in a bottle, and the sugar will free CO2 in the process of fermenting to alcohol due to the yeast. 1. Make a hole in the center of the big bottle cap, insert an adapter and secure it with hot glue 2. Make 3 holes in the small bottle cap and glue the other 3 adapters 3. Link both caps with one of the mid tubes and insert the other tubes on free adapters 4. Insert a short tube in the bottom of the small cap in the adapter that came from the big cap 5. Watch the Video!! -----WATERING CALENDAR----- Plants are beginning to drain the pots a bit faster so from now on i will raise the water ammount on each watering day 0.25 l. 11/05/19 - 1,5 l with All week nutrients -(Nirvana & Blombastic) also Big Bud half dosed @ PH6.4 & 2 E.C. 14/05/19 - 1,5 l with Bud Candy, Big Bud, Nirvana, B52, Bud Factor-X, Sensizym & Blombastic @ PH6.4 & 1.5 E.C. *****ESPAÑOL***** -----IMÁGENES Y VÍDEOS----- 5: Generador de CO2 casero, barato y orgánico (más info en el sumario semanal) 9, 10, 11 & 12: El cogollo que sale a la derecha es de una Gorila, el de la izquierda y/o el de en medio son de una Money Maker 15: Dos cogollos de la misma planta, uno afectado por CO2 en las raíces y el otro no -----SUMARIO SEMANAL----- El olor es más dulce e intenso día a día, los amigos que vienen a casa a verlas se quedan ojipláticos al verlas. El tamaño no es una maravilla, pero la gran cantidad de cogollos llenos de cristales añadido al aroma que entra por las fosas nasales las hacen increíbles. Los cogollos crecen y engordan de maravilla. Esta semana he añadido un boost de CO2 casero, nunca he hecho mediciones de los resultados por lo que no puedo darlas. Este método es ampliamente usado en peceras caseras y de ahí saqué la idea. Para aquellos interesados dejo aquí instrucciones más detalladas. Con los 4 litros de agua que he preparado yo da para unas 2 semanas. ---NECESITAMOS--- - Botella de 250 ml - Botella de 5 a 10 litros - 400 g de azúcar por litro de agua - 1 sobre de levadura de postre orgánica (LA QUÍMICA NO FUNCIONARÁ) - 3 tubos de plástico de tamaño medio 40~50 cm - 1 tubo de plástico de tamaño pequeño 5~6 cm - 4 adaptadores para los tubos - Cola caliente para pegar y sellar los adaptadores El proceso de generar CO2 es simple, mezcla agua, levadura orgánica y azúcar en una botella, y el azúcar liberará CO2 en el proceso de fermentación a alcohol. 1. Haz un agujero en la tapa de la botella grande, inserta un adaptador y séllalo con cola caliente 2. Haz 3 agujeros en el tapón pequeño y haz lo mismo con los otros 3 adaptadores 3. Conecta los 2 tapones con uno de los tubos y conecta los otros 2 tubos a los adaptadores restantes 4. Conecta el tubo pequeño en la parte libre del adaptador del tapón pequeño que viene del tapón grande 5. Mira el vídeo -----CALENDARIO DE RIEGO----- Las platas comienzan a secar los tiestos un poco más rápido, asi que de ahora en adelante incrementaré 250 ml de agua adicionales en cada riego. 11/05/19 - 1,5 l con todos los nutrientes semanales -(Nirvana & Blombastic) BigBud mitad de dosis @ PH6,4 & 2 E.C. 14/05/19 - 1,5 l con Bud Candy, Big Bud, Nirvana, B52, Bud Factor-X, Sensizym y Blombastic @ PH6,4 & 1,5 E.C.
Likes
3
Share
Great strain, would recommend. Nice smoke/vapor, friends love it, stupefying and euphoric, no heavy couch lock like heavy indicas. Taste great in The Mighty vaporizer, citrus with a hint of pine.
Likes
9
Share
Another good week for these plants. They all seem very happy and they have started to focus more on bulking up the flowers. They are starting to smell amazing and I'm getting anxious to see these flowers develop over the next few weeks.
Likes
56
Share
January, 14th. Girsl Start Week 4 of Flowering on Sunday To big Time inbetween the last Update, Iam alittle early this Week The Kush Ladies doing well The left Plant stopped stretching and concentrates in Flowering The drinks and eats like a Champ The right Plant is still shooting, and turns yellow at the bototm leaves.... She need alot of N......... So I have to feed her daily to prevent more yellowing, The left Plant is around 55 cm the big one is 80 cm high....... I hope she stops soon Goals for this Week: Keep the Plants happy, watching the feeding of the Right Plant Sunday January, 17th. Little Update Right plant popped out ( overnight=?().. some serious Flowers The left Plant too. Still stretching I continued the Feeding. These Girls are Hungry!!!! Both ladies looking very happy
Likes
4
Share
@Ensign420
Follow
|»» LOG DISCLAIMER: Not intended as a grow guide. Grow log entries are usually posted 3 weeks later and are for my learning reference. ««| Introduction - Week 17 Summary - Ensign's log, stardate 17553.9, Another incredible week in the garden! First week of flower and already my best grow cycle yet! Wow these girls can stretch! Did not expect the canopy to double in size! By the end of the week, had to super-crop the top growth. Buds are also starting to swell up and everything looks really healthy. Ca-Caw! Let’s go ladies! Decided to reset the veg garden. All mother plants were cycled out and pots were reset and re-amended. Transplanted the Heady OG and TKO clones which are looking healthy and vegging along beautifully! Also transplanted the spare Heady OG clones. Still need to transplant the original mother clones into solo cups. Still have lots to do! Onwards to next week Ensign! [START OF WEEK 17] ========================================================== ---------- [ 4x4 MAIN TENT ] ---------- Heady OG BX1 #1 [Round4 ~Wk10] - WEEK 17 - Full Bloom Wk1 TKO [Round2 ~Wk15] - WEEK 17 - Full Bloom Wk1 ----------- [ 3x3 VEG TENT ] ------------ TKO - WEEK 00 - Transplant Garlic Budder OG#2 - WEEK 10 - Cycle-Out Heady OG BX1 - WEEK 00 - Transplant Gorilla Goat #2 - WEEK 10 - Cycle-Out 08/11/25 → 08/17/25 This Week's Estimated Goals ---------------------------------------------------------------------------------------------- DLI: ~20 mol/m²/d PPFD: ~463 μmol/m²/s VPD: ~1.0 kPa This Week's Meter Readings & Averages ---------------------------------------------------------------------------------------------- Light On/Off: 19:00 - 07:00 | Wattage: ~326.5W [LV04] Distance From Canopy: ~7”, 9” DLI: ~26.40 mol/m²/d PPFD: ~611 μmol/m²/s VPD: ~0.61 kPa Soil %: [48.6, 48.1, 29.4, 52.3, 43.3, 44.7, 45.3, 44.9] ========================================================== Day 01 - Monday - 08/11/25 - Total Days: 120 ----------------------------------- Daily Averages ~[+01:00] - Temps: 83.5°F [28.6°C] - Humidity: 83.9% - VPD: 0.64 kPa - Soil %: [45, 49, 30, 53, 44, 48, 46, 43] ----------------------------------- - [+00:19]: Night check on the 4x4 tent. --- Ca-Caw!! Looking great my ladies! Wow the garden is thriving and I’m definitely vibing! --- Both Heady OG (BX1 #1) and TKO are both starting to crown with more pistil hairs! --- Ooo yea! The 14in canopy space between the two nets is completely full!! Wow! --- Also upward growth has slowed down, but top growth is still growing through the top scrog netting. A few tops may even need super-cropping if they get too close to the grow light. --- First week of flower is looking better than ever! High-grade! Let’s go! --- Need to start the under-canopy pre-flower defoliation soon, but will wait a few more days for the stretch to completely stop. - [+00:22]: Checked the Ecowitt soil moisture sensor data: ------------------ [ 4x4 MAIN TENT ] --------------- ------ 53% - [CH01 FT » G30 - Heady OG BX1 #1] ------ 49% - [CH02 FB » G30 - Heady OG BX1 #1] ------ 25% - [CH03 BT » G20 - TKO] ------ 51% - [CH04 BB » G20 - TKO] ------------------ [ 3x3 VEG TENT ] ---------------- ------ 43% - [CH05 BL » GR7 - Garlic Budder OG#1] ------ 46% - [CH06 BR » GR7 - Garlic Budder OG#2] ------ 44% - [CH07 FL » GR7 - Gorilla Goat #1] ------ 42% - [CH08 FR » GR7 - Gorilla Goat #2] --------- Veg: 38% - 45% | Flower: 45% - 55% --------- General: 30% [Dry] «| 45 - 60% [Moist] |» 70% [Wet] - [+00:24]: Checked the 3x3 veg tent. --- Wow even the veg garden is looking great and healthy! --- All mother plants are still recovering, but wow growth looks great! Since healthy is looking really good, may not need to do a full mother plant cycle out. Might just swap out two (Gorilla Goat #2 and Garlic Budder #1) while preserving the genetics as clones. --- Also still researching tissue culture and eventually plan to take my first explant cuttings into subculture. --- Anyways! --- Need to water both Heady OG and TKO clones. Let’s go Ensign! - [+00:27]: Here are the starting initial watering ranges: ------ Heady OG BX1 » 261.4g → 301.2g ------ TKO » 240.9g → 301.4g --------- General Solo Range: [Dry] «| [Initial Cup Weight] + ~55-100g |» [Wet] --- All cups were last watered 3 days ago. --- Took the starting weight of both clones before watering, ------ Heady OG BX1 weighed 243.9g ------ TKO weighed 243.9g --- While on a scale, --- Gently misted the straw mulch of both cups with RO water. --- Focused on the straw and sprayed as evenly as possible. --- Misted 10-20 sprays. Waited a moment, then misted again. --- Made sure to reference the watering weights. --- Repeated this process for both cups. --- There was no runoff. - [+00:58]: Took the saturated weight of both clones after watering, ------ Heady OG BX1 » 355.3g ------ TKO » 361.2g --- Marked the final wet weight on the back of each cup. Also marked the watering date on the front. --- Placed both phenos back into the tent. - [+01:02]: Checked on the propagation dome. --- Nice! All mother plant cuttings look green and healthy! --- Both Heady OG cuttings also look healthy and not droopy! --- Misted the top growth with RO water. - [+01:07]: Checked the humidifiers. --- Tanks are still full and no leaks found. Day 02 - Tuesday - 08/12/25 - Total Days: 121 ----------------------------------- Daily Averages ~[+01:00] - Temps: 83.2°F [28.4°C] - Humidity: 83.3% - VPD: 0.66 kPa - Soil %: [50, 49, 33, 53, 42, 44, 43, 42] ----------------------------------- - [09:40]: Quickly checked on the 3x3 veg tent. --- Wow the veg garden is looking beautiful and healthy! --- Mothers are all definitely going to be alright and am still determining what to do about this cycling process. --- Clones are looking healthy and need to be transplanted soon. --- Cuttings are looking green, but stalks are turning purple with anthocyanin. Will change the water tonight. - [19:05]: Night check on the 4x4 tent. --- Ahh yea! Looking beautiful my girls! Growth is still stretching and more tops are making it through the top netting! --- More tops are showing pistil crowning and bud sites are staring to form. --- Not much to do right now while I wait for the stretch to stop. --- Ca-Caw!!! Let’s go ladies! - [19:36]: Checked the Ecowitt soil moisture sensor data: ------------------ [ 4x4 MAIN TENT ] --------------- ------ 48% - [CH01 FT » G30 - Heady OG BX1 #1] ------ 48% - [CH02 FB » G30 - Heady OG BX1 #1] ------ 35% - [CH03 BT » G20 - TKO] ------ 54% - [CH04 BB » G20 - TKO] ------------------ [ 3x3 VEG TENT ] ---------------- ------ 42% - [CH05 BL » GR7 - Garlic Budder OG#1] ------ 44% - [CH06 BR » GR7 - Garlic Budder OG#2] ------ 43% - [CH07 FL » GR7 - Gorilla Goat #1] ------ 43% - [CH08 FR » GR7 - Gorilla Goat #2] --------- Veg: 38% - 45% | Flower: 45% - 55% --------- General: 30% [Dry] «| 45 - 60% [Moist] |» 70% [Wet] - [19:40]: Checked the 3x3 veg tent. --- Wow these mama’s are recovering beautifully and Heady OG and TKO clones look great! - [19:41]: Took all 4 cutting cups out of the tent. --- These spare mother cuttings need the water to be refreshed. - [19:42]: Made a simple PVC rig to hold the mother cuttings. --- Earlier in the day, --- Using spare 1in PVC, cut four 1.25in pieces. Sanded and hot glued each piece together. Then wrapped the rig in spare garden support wire to make a handle. Marked the names on each tube with painter’s tape and a marker. --- Okay! --- Filled a clear solo cup with 1.5 cup of RO water. - [19:45]: Placed the rig which fit snug and just above the water line. Great! --- Placed the mother cuttings into to the cup making sure to group the phenos appropriately. - [19:55]: Placed the cup into the tent and onto the floor rack. --- Added a third drip tray and placed the cutting in the middle. --- The PVC rig should make water changes a bit easier. I hope. --- Anyways! - [19:57]: Checked on the propagation dome. --- Ahh yea! The cuttings are all looking beautiful! --- Did not mist the top growth and only refreshed the air for a few minutes. --- For this rooting cycle, going to leave the vents fully closed for longer. - [20:02]: Checked the humidifiers. --- Tanks are still full and no leaks found. Day 03 - Wednesday - 08/13/25 - Total Days: 122 ----------------------------------- Daily Averages ~[+01:00] - Temps: 83.2°F [28.4°C] - Humidity: 84.3% - VPD: 0.62 kPa - Soil %: [49, 48, 25, 51, 40, 42, 41, 43] ----------------------------------- - [+00:35]: Night check on the 4x4 tent. --- Ca-Caw! Looking beautiful my girls! --- Wow the netting is full and healthy! --- Both Heady OG and TKO are perky and soaring upwards with more vertical growth! --- Still waiting for the stretch to stop before I try to defoliate. --- Keep on growing ladies! - [+00:39]: Checked the Ecowitt soil moisture sensor data: ------------------ [ 4x4 MAIN TENT ] --------------- ------ 45% - [CH01 FT » G30 - Heady OG BX1 #1] ------ 48% - [CH02 FB » G30 - Heady OG BX1 #1] ------ 27% - [CH03 BT » G20 - TKO] ------ 49% - [CH04 BB » G20 - TKO] ------------------ [ 3x3 VEG TENT ] ---------------- ------ 40% - [CH05 BL » GR7 - Garlic Budder OG#1] ------ 41% - [CH06 BR » GR7 - Garlic Budder OG#2] ------ 40% - [CH07 FL » GR7 - Gorilla Goat #1] ------ 40% - [CH08 FR » GR7 - Gorilla Goat #2] --------- Veg: 38% - 45% | Flower: 45% - 55% --------- General: 30% [Dry] «| 45 - 60% [Moist] |» 70% [Wet] --- Swapping out the soil sensor really seems to have affected the moisture levels for TKO, but going to leave everything as is for now. --- Anyways! - [+00:43]: Checked the 3x3 veg tent. --- Mother tent is looking great! --- Veg growth is recovering and looking good! --- The extra mother cuttings could be healthier, but not bad for just RO water. --- Both the Heady OG and TKO clones need to be watered! - [+00:47]: Here are the starting initial watering ranges: ------ Heady OG BX1 » 261.4g → 301.2g ------ TKO » 240.9g → 301.4g --------- General Solo Range: [Dry] «| [Initial Cup Weight] + ~55-100g |» [Wet] --- All cups were last watered 3 days ago. --- Took the starting weight of both clones before watering, ------ Heady OG BX1 weighed 245.9g ------ TKO weighed 231.4g --- While on a scale, --- Gently misted the straw mulch of both cups with RO water. --- Focused on the straw and sprayed as evenly as possible. --- Misted 10-20 sprays. Waited a moment, then misted again. --- Made sure to reference the watering weights. --- Repeated this process for both cups. --- There was no runoff. - [+01:11]: Took the saturated weight of both clones after watering, ------ Heady OG BX1 » 360.7g ------ TKO » 365.1g --- Marked the final wet weight on the back of each cup. Also marked the watering date on the front. --- Placed both phenos back into the tent. --- Plan to transplant both tomorrow! - [+01:16]: Quickly checked on the propagation dome. --- Looking great and all cuttings are looking green! --- Both Heady OG clones are slightly starting to yellow (can also see a root on the one on the left). Will do a proper root check tomorrow. - [+01:19]: Checked the humidifiers. --- Tanks are still full and no leaks found. Day 04 - Thursday - 08/14/25 - Total Days: 123 ----------------------------------- Daily Averages ~[+01:00] - Temps: 83.3°F [28.5°C] - Humidity: 84.3% - VPD: 0.63 kPa - Soil %: [49, 48, 31, 52, 40, 39, 43, 40] ----------------------------------- - [+09:47]: Quick morning check on the 4x4 tent. --- Looking great in the veg garden! --- Both Heady OG and TKO clones are looking healthy and more than ready for a transplant. --- Mothers are recovering, but have decided to cull and cycle the tent out. --- The veg tent is getting cluttered. --- Since lights are about to turn off, going to wait until the next day cycle (in ~6 hours) before cycling out the mother plants. - [16:44]: Okay! Time to start the mother cycling process. --- After the culling, will also top dress each pot. - [16:59]: Took the floor rack, floor fan, clones, and cutting out of the tent. --- Will transplant both Heady OG and TKO clones before watering. - [16:01]: Using a basic hacksaw, --- Cut the base of each mother and mulched the entire plant. - [17:21]: Done! --- Mulched all mother plants into a paper bag. - [17:34]: Time to top dress the first pot! --- Starting with the front right pot, --- Disconnected the auto watering system. --- Took the pot out of the tent and placed it on the floor. - [17:59]: Removed the rootball. --- Temporarily removed the soil sensor and swapped the AA battery with a new one. --- Also temporarily removed the straw mulch. --- Tilled and removed the larger roots as well. These will be added back later as part of the mulch. --- Continued until the top 5-6 inches of top soil was loose and soft. --- The soil moisture felt great and smelled earthy with no foul odors. --- Also glad to find worms in all pots! - [18:03]: Time for the soil amendments! --- Top dressed: ------ 1/4 cup of Kashi Blend ------ 1/2 cup of Craft Blend ------ 2 cups of BuildASoil Worm Castings --- Sprinkled each amendment evenly. --- Using my fingers, gently tilled the amendments into the top few inches of soil. --- Also dug and loosened the center area. Made sure the area was deep enough for a solo cup and had some of the top dressing mixed in. --- Dug a hole and placed a solo cup into the center of the pot. --- Made sure the sides of the cup were tucked in and each cup has drainage holes. - [18:24]: Placed the larger roots as mulch. Spread the roots evenly. --- Placed the original straw mulch on top. - [18:33]: Placed the Ecowitt soil sensor back into the pot. --- Also re-connected the drip-ring rig. --- Set the pot aside for later. - [19:36]: Repeated this process for each pot. --- Alright all pots have been reset! --- Time for a bit of cleanup! - [19:53]: Cleaned the tent floor. --- First sweeped and removed the larger leaf debris. --- Then sprayed the floor with distilled water and let it soak for a bit before wiping with paper towels. - [22:48]: Placed all pots into the tent and connected the drip-rings to the auto-watering system. --- Also placed the floor fan back. --- Ca-Caw! Time to transplant both Heady OG (BX1 #1) and TKO into the (7-gallon) pots! --- Let's go! - [22:59]: Gently removed the left two solo cups from the fabric pots leaving perfect holes. ------ Sprinkled 1/4tsp of Great White into each hole, --- Dusted the sides of the hole. --- Also sprinkled a bit around the top soil. --- Great! Time to transplant! --- Going to start with TKO since she is going to be in the back left quadrant. --- It’s been a day since her last watering. --- To loosen the rootball from the cup, I gently squeezed the sides before pressing the bottom upwards. --- Vulcan-gripped the base of the plant and flipped her upside down. - [23:09]: TKO easily dropped straight out of her cup! --- Nice! Roots look healthy and white! --- Did not break up the rootball. - [23:15]: Gently placed her into the pre-inoculated hole (back left quadrant). --- Pressed and evened out the top soil. - [23:22]: Repeated this process for Heady OG (front left quadrant). --- Looking great my ladies! --- Okay! Time to water the new mothers and re-amended pots! --- Since most of the time these girls will be receiving straight RO water, going to water in a diversity of microbes to start off the initial breakdown process. - [23:57]: Filled a pitcher with 8 cups of RO water, ------ Added 1/16tsp of Quillaja Saponaria Extract ------ Added 1/16tsp of Beauveria Bassiana Plus ------ Added 1/8tsp of Recharge ------ Added 1/4tsp of Horticultural Aloe ------ Added 1/4tsp of Horticultural Coconut ------ Added 1/2tsp of Mycrobe Complete ------ Added 1/2tsp of WDG3000 Extra Strength BTI - [+00:04]: Mixed the solution before pouring 2 cups straight into a pump sprayer. --- Misted the solution onto the straw mulch of the back left pot. --- Tried to avoid spraying the solo cups. --- Repeated this process for each of the pots in the veg tent. --- Misted the straw mulch evenly. - [+00:22]: Done with the tent reset! --- All pots are fully re-amended and clones have been transplanted! --- The tent is ready for another veg cycle! - [+00:25]: Checked on the propagation dome. --- Growth is looking great! --- Heady OG cuttings have probably both rooted, but will leave them in the tray for a bit longer. The Heady OG (BX1 #1) mother is clearly going to survive and the genetics has been preserved. So going to wait to transplant the extra cuttings into solo cups at the same time. --- Did not mist the top growth. --- Opened the right side vent. Now only one vent is open. - [+00:27]: Oops! The extra mother plant cuttings still need to be placed into the tent. --- Earlier in the day, refreshed the RO water. --- Also while culling the mothers, took a few more cuttings from each to root in the cup. - [+00:35]: Instead of using the floor rack, decided to place the cup of cuttings on top of the propagation dome. --- Placed the cup on top of an upside-down drip tray. Since these cuttings don’t need a lot of PPFD, hoping the in-direct bounce lighting will be enough. - [+00:42]: Quickly checked on the 4x4 tent. --- Ca-Caw! Woah these ladies are still stretching! --- To my surprise, Heady OG has stretched taller than TKO and may need to be super cropped soon. --- This grow cycle is starting to get pretty wild! Let’s go ladies! - [+00:47]: Checked the Ecowitt soil moisture sensor data: ------------------ [ 4x4 MAIN TENT ] --------------- ------ 53% - [CH01 FT » G30 - Heady OG BX1 #1] ------ 48% - [CH02 FB » G30 - Heady OG BX1 #1] ------ 26% - [CH03 BT » G20 - TKO] ------ 51% - [CH04 BB » G20 - TKO] ------------------ [ 3x3 VEG TENT ] ---------------- ------ 55% - [CH05 BL » GR7 - Garlic Budder OG#1] ------ 56% - [CH06 BR » GR7 - Garlic Budder OG#2] ------ 58% - [CH07 FL » GR7 - Gorilla Goat #1] ------ 62% - [CH08 FR » GR7 - Gorilla Goat #2] --------- Veg: 38% - 45% | Flower: 45% - 55% --------- General: 30% [Dry] «| 45 - 60% [Moist] |» 70% [Wet] - [+01:06]: Checked the humidifiers. --- Tanks are still full and no leaks found. Day 05 - Friday - 08/15/25 - Total Days: 124 ----------------------------------- Daily Averages ~[+01:00] - Temps: 83.0°F [28.3°C] - Humidity: 84.8% - VPD: 0.60 kPa - Soil %: [49, 48, 31, 53, 49, 50, 51, 52] ----------------------------------- - [22:25]: Night check on the 4x4 tent. --- Wow growth is still continuing to stretch! --- Heady OG’s tops are getting sort of close to the light, but going to continue to let her grow. --- TKO is still filling in the second layer and staying relatively squat. Nice! --- Regardless, the canopy is looking better than ever! - [22:39]: Took the weekly general PPFD readings. ------ Heady OG (BX1 #1) was around 611 μmol/m²/s which gives a DLI of 26.40 mol/m²/d under a 12/12 light cycle (at ~326.5W). ------ TKO was around 469 μmol/m²/s which gives a DLI of 20.26 mol/m²/d under a 12/12 light cycle. - [22:57]: Took the weekly height and light distance measurements. ------ Heady OG (BX1 #1) was about 47" tall. ------ TKO was about 45" tall. ------ Heady OG (BX1 #1) was about 7" away from the grow light. ------ TKO was about 9" away from the grow light. --- Wow Heady OG is getting pretty close to the grow light. Will need to super-crop the taller tops soon. - [23:07]: Checked the Ecowitt soil moisture sensor data: ------------------ [ 4x4 MAIN TENT ] --------------- ------ 46% - [CH01 FT » G30 - Heady OG BX1 #1] ------ 48% - [CH02 FB » G30 - Heady OG BX1 #1] ------ 30% - [CH03 BT » G20 - TKO] ------ 54% - [CH04 BB » G20 - TKO] ------------------ [ 3x3 VEG TENT ] ---------------- ------ 47% - [CH05 BL » GR7 - Garlic Budder OG#1] ------ 47% - [CH06 BR » GR7 - Garlic Budder OG#2] ------ 48% - [CH07 FL » GR7 - Gorilla Goat #1] ------ 49% - [CH08 FR » GR7 - Gorilla Goat #2] --------- Veg: 38% - 45% | Flower: 45% - 55% --------- General: 30% [Dry] «| 45 - 60% [Moist] |» 70% [Wet] - [23:09]: Checked the 3x3 veg tent. --- Wow the veg garden is looking clean and the new mothers are growing along beautifully! - [23:10]: Quickly checked on the propagation dome (in the 3x3 veg tent). --- Cuttings look great! --- Did not mist the top growth. --- Refreshed the RO water for the spare mother cuttings. - [23:17]: Checked the humidifiers. --- Tanks are still full and no leaks found. Day 06 - Saturday - 08/16/25 - Total Days: 125 ----------------------------------- Daily Averages ~[+01:00] - Temps: 82.6°F [28.1°C] - Humidity: 85.1% - VPD: 0.58 kPa - Soil %: [49, 48, 26, 51, 45, 46, 47, 48] ----------------------------------- - [07:56]: Quick morning check on the 3x3 veg tent. --- The new mother garden is looking beautiful and growth is healthy and perky! --- Grow strong my girls! - [19:45]: Night check on the 4x4 tent. --- Holy Cannoli! The tent is getting full! --- Heady OG and TKO are raging with growth! The middle of the canopy is completely full and wow growth looks healthy! --- Nodes are also starting to swell with bud growth! --- Ca-Caw!! Let’s go ladies! - [19:56]: Checked the Ecowitt soil moisture sensor data: ------------------ [ 4x4 MAIN TENT ] --------------- ------ 47% - [CH01 FT » G30 - Heady OG BX1 #1] ------ 47% - [CH02 FB » G30 - Heady OG BX1 #1] ------ 24% - [CH03 BT » G20 - TKO] ------ 50% - [CH04 BB » G20 - TKO] ------------------ [ 3x3 VEG TENT ] ---------------- ------ 44% - [CH05 BL » GR7 - Garlic Budder OG#1] ------ 45% - [CH06 BR » GR7 - Garlic Budder OG#2] ------ 47% - [CH07 FL » GR7 - Gorilla Goat #1] ------ 47% - [CH08 FR » GR7 - Gorilla Goat #2] --------- Veg: 38% - 45% | Flower: 45% - 55% --------- General: 30% [Dry] «| 45 - 60% [Moist] |» 70% [Wet] - [19:56]: Checked the 3x3 veg tent. --- Mothers are looking incredible! --- Growth is healthy and perky! Nice! --- Both the Heady OG and TKO moms are looking happy and growth is looking healthy! --- The spare cuttings on top of the propagation dome are looking great! Glad the low PPFD levels are enough for cutting growth. Refreshed the RO water. - [20:00]: Checked on the propagation dome. --- Cuttings are looking beautiful and growth is looking green! --- Yea both Heady OG cuttings can clearly be planted into solo cups, but going to wait a bit longer. - [21:32]: Checked the humidifiers. --- Tanks are still full and no leaks found. Day 07 - Sunday - 08/17/25 - Total Days: 126 ----------------------------------- Daily Averages ~[+01:00] - Temps: 82.5°F [28.1°C] - Humidity: 85.3% - VPD: 0.57 kPa - Soil %: [49, 47, 30, 53, 43, 44, 46, 46] ----------------------------------- - [08:06]: Quickly checked on the 3x3 veg tent. --- Veg garden is looking great! --- No flooding, and no gnats! Great! --- Mother plants, rooting clones, and spare cuttings all look healthy and green! - [19:20]: Night check on the 4x4 tent. --- Woah! These ladies blew up with growth! --- Ooo yea! Looking both healthy and the canopy is completely stacked! --- Both Heady OG and TKO are still stretching upwards! TKO is staying relatively shorter, which is great because I have no way of training the back area. Heady OG is now a few inches from the light! --- Ca-Caw! Time to super crop! Let’s go! - [19:46]: Gently pinched and trained the taller branches down a good 10-11 inches. --- The canopy looks a lot more even now. Looking great my girls! - [19:55]: Checked the Ecowitt soil moisture sensor data: ------------------ [ 4x4 MAIN TENT ] --------------- ------ 52% - [CH01 FT » G30 - Heady OG BX1 #1] ------ 47% - [CH02 FB » G30 - Heady OG BX1 #1] ------ 29% - [CH03 BT » G20 - TKO] ------ 53% - [CH04 BB » G20 - TKO] ------------------ [ 3x3 VEG TENT ] ---------------- ------ 42% - [CH05 BL » GR7 - Garlic Budder OG#1] ------ 44% - [CH06 BR » GR7 - Garlic Budder OG#2] ------ 45% - [CH07 FL » GR7 - Gorilla Goat #1] ------ 45% - [CH08 FR » GR7 - Gorilla Goat #2] --------- Veg: 38% - 45% | Flower: 45% - 55% --------- General: 30% [Dry] «| 45 - 60% [Moist] |» 70% [Wet] - [19:58]: Checked the 3x3 veg tent. --- Looking great my ladies! Both mothers are vegging along beautifully! --- On top of the propagation dome, the spare mother cuttings are looking great! --- The rooting cuttings are looking good too! --- Woah! Yea, both of the spare Heady OG clones have visible roots from the top. --- Was planning on waiting, but need to transplant now! --- Ca-Caw!! Let’s go Ensign! - [20:24]: Took 2 old solo cups (bottom corners cut for drainage) and labeled each cup (Heady OG BX1). --- Partially filled each with some fresh (dry) BuildASoil 3.0 potting soil. --- Made sure that the soil was well packed. --- Misted the dry soil with a bit of RO water (~3 sprays each). - [20:36]: Inoculated each cup with Great White mycorrhizae along with a bit of Beauveria Bassiana. ------ Sprinkled 1/64tsp of Beauveria Bassiana Plus ------ Sprinkled 1/16tsp of Great White --- Time to plant! --- Could have transplanted earlier, but wanted to wait for the new cuttings to root, but oh well. - [20:41]: Root check! --- Wow both Heady OG and TKO’s roots looked white and healthy! - [20:43]: Placed each clone into the solo cups. --- Made sure each cup had enough room for more soil. - [20:47]: Inoculated each Coco Coin with Great White mycorrhizae. ------ Sprinkled about an 1/16tsp of Great White onto each Coco Coin. --- Made sure to get the top and sides evenly. - [20:58]: Gently filled each solo cup with more soil. --- Completely covered the top of each Coco Coin and made sure to tuck the sides fairly snug with soil. --- Evened out the top soil. Each Coco Coin is about 1/4-1/2 inch below the top soil. - [20:59]: Added some BuildASoil Organic Straw Mulch to the top. --- Using the small straw bits at the bottom of the bag is great for solo cups. --- Time to water! - [21:15]: Filled a measuring cup with 2 cups of RO water. ------ Added 1/64tsp of Quillaja Saponaria Extract [60] ------ Added 1/64tsp of Beauveria Bassiana Plus ------ Added 1/16tsp of Horticultural Coconut ------ Added 1/16tsp of Horticultural Aloe ------ Added 1/8tsp of Mycrobe Complete --- Mixed and poured the solution straight into a spray bottle. - []: Took the dry soil weight of each pheno before watering, --- To make waterings easier, marked each clone with A and B. ------ Heady OG BX1 A weighed 237.7g ------ Heady OG BX1 B weighed 244.4g --- Marked the starting weight on the back of each cup. --- While on a scale, --- Gently misted the straw mulch of each cup. --- Focused on the straw and sprayed as evenly as possible. --- Misted 5-10 sprays. Let it sit for a minute, then misted again. --- Repeated this process until each cup weighed at least 300g --- There was no runoff. - [21:40]: Took the weight of each pheno after watering, ------ Heady OG BX1 A weighed 300.3g ------ Heady OG BX1 B weighed 305.6g --- Also marked the wet weight on each cup. --- Placed each cup on top of the fabric pots on the right side of the tent (under drip trays). --- Done! - [21:43]: Back to the propagation dome. --- Misted the top growth with RO water. Also misted the lid. --- Then closed all air vents. --- Placed the spare mother cuttings back on top of the propagation dome (also refreshed the RO water). --- The clones on the pots seem sort of stressed. - [21:55]: Covered each clone with a clear solo cup. --- Misted each cup with distilled water (~2 sprays). --- Secured each cup with a bit of painters tape. - [22:19]: Checked the humidifiers. --- Tanks are still full and no leaks found. --- Another grow week done! --- Need to transplant more rooted mother cuttings next week into solo cups. --- Also need to clean-up the under canopy in the main tent. --- Onwards to next week Ensign! [END OF WEEK 17]
Likes
14
Share
May 1st - pH 6.0, PPM 1280, 2.6 EC, 79/70f, 35% humidity - Water change, added purpinator since I found it on sale, plant seems happy from this past week, great sign. :) May 2nd - pH 5.9 -> 6.2, PPM 1380 -> 1260, 2.5 EC, 80/69f, 36% humidity - adjusted pH, likes to read a bit higher than usual according to my pH strips (~.2ish I believe), added a bit of distilled water, PPM was a bit high when testing this morning no idea why though. The plant seems O.K. May 3rd - pH 6.3, PPM 1350, 2.7 EC, 77/68f, 55% humidity - I started to add humidity to the cabinet to keep temps down and to help during flowering, I've got it outside the cabinet plugged into a humidity inkbird set to 60% RH and it'll allow it to fall 12.5% before turning back on. (Not trying run it 24/7) May 4th - pH 6.2, PPM 1350, 2.7 EC, 79/72f, 57% humidity - The plant is chilling, notice maybe some yellow spots on some fan leaves, if this continues I will turn off the humidifier, as that's what happened last time... Also raised the lights again, I wonder how big this one will get. May 5th - pH 6.1 -> 6.3, PPM 1280, 2.6 EC , 77/73f, 50% humidity - upped pH a tiny bit, added water to lower PPM May 6th - pH 6.5 -> 5.9, PPM 1350, 2.7 EC, 75/72f, 42% humidity - adjusted pH and added a little bit of water May 7th - pH 6.1, PPM 1600, 3.2 EC, 78/68f, 44% humidity - bucket is low on water, didn’t want to add a whole thing just to change it tomorrow, will start with more water (3.5gal) and add more water throughout the week compared to this week, I have started to experience clawing, possibly due to nitrogen toxicity, hoping to fix this upcoming week. And a noticed a few tiny rust spots on leaves randomly on the plant (not like it’s just fans or just old or just new growth, it’s sorta spread? Hoping it’s calmag?) Plant looks nice otherwise
Likes
Comments
Share
Welcome to Flower Week 3-4 of Divine Seeds Auto White Widow I'm excited to share my grow journey with you all as part of the Divine Seeds Autoflowering Competition 2025. It's going to be an incredible ride, full of learning, growing, and connecting with fellow growers from all around the world! For this competition, I’ve chosen the Feminized Automatic strain: Auto White Widow Here’s what I’m working with: • 🌱 Tent: 120x60x80 • 🧑‍🌾 Breeder Company: Divine Seeds • 💧 Humidity Range: 50 • ⏳ Flowering Time: 58 Days • Strain Info: 20%THC • 🌡️ Temperature: 26 • 🍵 Pot Size: 0.5l • Nutrient Brand: Narcos • ⚡ Lights : 200W x 2 A huge thank you to Divine Seeds for allowing me to be a part of this amazing competition and Sponsoring the Strains. Big thanks for supporting the grower community worldwide! Your genetics and passion speak for themselves! I would truly appreciate every bit of feedback, help, questions, or discussions – and of course, your likes and interactions mean the world to me as I try to stand out in this exciting competition! Let’s grow together – and don’t forget to stop by again to see the latest updates! Happy growing! Stay lifted and stay curious! Peace & Buds!
Likes
3
Share
I veg them for 10 weeks. The two on each end are Blue Dream, the back left is Purple Urkle, the back right is Grandaddy Purple, and the one up from in the middle is Wifi OG.
Likes
15
Share
~ FASTBUDS TESTER #2201 ~ Well friends, here we go on another 'canna-venture' together! The grow room has had a complete remodel and some upgrades done to it including brand spanking new 4x8 and 4x4 tents and a Trolmaster Hydro X controller along with a new Control Panel. This tester strain is one of six tester strains that FastBuds has graciously provided me with and I'm looking forward to seeing what this girl has to offer when she's grown to her full potential! One drawback of 'testers' is I have little to no information on it other than its number and that it's an autoflower... 🤪 But, it's ALWAYS a blast growing them for me because not knowing a lot allows me to just concentrate on the essentials: Light, Environment, Water, Nutrients and possibly a bit of LST... not complicated, just basics like keeping a constant temperature and RH in the tent at a level that gives a good VPD, watering when almost dry and maintaining proper light levels according to their stage of growth. ____________________________________________________________________________________________________________________________________________________________________________________________________________________________________________________________________________________________________________________________________________________________________________________________________________________________________________________ ~THE SETUP~ ~Initially seeds were lightly scuffed, then soaked for 3 hours in 78℉ distilled water after which they were transferred to moist paper towels laid out in a Jiffy Pellet plastic starter tray with lid. Underneath the tray was placed a Mars Hydro Heat Mat with Controller that was set to 78℉ where they stayed until their tap roots emerged. ~Planted into Jiffy Peat Pellets that were hydrated with distilled water warmed to 78℉ with a 7.0 ph. ~Once roots emerge from the Jiffy Pellet they're transferred to their fabric pots. ~Grown 100% organic in a 4g Gronest fabric pot and a 3g fabric pot by Wraxly filled with Mother Earth 70/30 Coco/Perlite medium and initially amended with Dr. Earth 4-4-4 / Earthworm Castings / Dr. Earth Flower Girl 3-9-4 and Coast of Maine Stonington Blend Organic Plant Food 5-2-4. ~19/5 light cycle for the entire run with supplemental UVA added during flower. Lights are controlled by a Trolmaster Hydro X controller set for a 15min Sunrise/Sunset simulation. ~Top dressing every 3-4 weeks with slow release dry amendments and Earthworm castings. ~Straight water ph'd @ 6.2-6.8 when needed and bi-weekly Compost Tea's. ____________________________________________________________________________________________________________________________________________________________________________________________________________________________________________________________________________________________________________________________________________________________________________________________________________________________________________________ Weekly Updates: 12/15- Here we go into the second week of veg for the FastBuds Tester #2201 girl and she's certainly on a roll! When I checked on her today her medium was still moist so I'll let her go and check her tomorrow. Basically at this point in the run all I have to do is make sure her medium doesn't dry out, fill the humidifier and watch her grow! 🤩 12/17- Yesterday I watered her and increased the amount to roughly 0.25g of de-chlorinated water with 3ml/g of Botanicare Silica Blast (added to begin to help strengthen her branches) and then ph'd to 6.4 @ 74℉. I've also increased the output of the HLG 650R's to 35% which equates to about 230w at the wall which, of course has raised the temp's in the tent so I've also begun to run the A/C unit in the grow room which is keeping the temp's now at 75℉ in the tent. The RH is running around 75-78% RH giving a VPD of .67-.74 which I'll take! 😁👍 Other than what I've mentioned above, all I did was fill the humidifier with distilled water and watched her grow! 🤩 12/19- Today I watered her with 0.25g of de-chlorinated water with 3ml/g Fish Head Farms Fish Sh!t and 1 tsp/g Unsulfured Molasses added which was ph'd to 6.3 @ 74℉. I'm now watering through the bottom, filling the drip pan and letting the plant draw up the water into itself. I am also watering from the top, but only just enough to moisten the medium. She is really starting to take off now, a sure sign her roots are beginning to get well developed, and I'm thinking of going ahead and topping her in the next day or so. 12/21- Well, yesterday I went ahead and topped this girl! Hopefully she won't stress out over this and starts shooting out those secondary branches. Today I watered her with 0.25g of straight de-chlorinated water which was ph'd to 6.3 @ 74℉. I gave about 3/4 of it into her drip pan so she can draw it up into her medium, the rest I applied to the top of the medium just to moisten it. Well there's two weeks of veg behind us now, Week Three of vegetation is beginning and she should really start to take off! 😍👍 😎💚 Thank you for checking out my passion in life! Please visit as often as you wish and I hope you enjoy this journey as much as I know I will! Grow Strong! 💪😎🤙
Likes
16
Share
Last week of veg for the Fast Version B from super sativa seeds club. We added 1 more biotabs to the soil, we also added some startrex and some silicium Flash!! 1 more week and we flower both, version A and B
Likes
24
Share
Plants on left are nearing harvest, flipping the Slurricane. Cleaning up under canopy and light defoliation/leaf tucking as needed for light penetration
Likes
27
Share
@ohserp
Follow
So far so good. Got some pre flowers coming in and everything is growing pretty steady. Increased nutrients this week so gonna keep an eye out for anything funky.
Likes
19
Share
@creichs
Follow
Switched to my 5 gal pots now, dumped 6L of water into each plant to get the pH back down still waiting for them to dry out a little before the next watering which should be less so next week will have water amounts Height is for the holy punch again. Power flower is still around 1.5"
Processing
Likes
10
Share
Likes
37
Share
@RFarm21
Follow
Hello growmies! 25/08 - Alimentação Royal Gorilla # 1 : CE = 1,39; pH = 6,3 O gráfico representa a nutrição da RG#1 misturada com 2,5L de água. 25/08 - Alimentação Royal Gorilla # 2 (2,5L): CE = 1,33; pH = 6,1 -BioGrow - 3ml; BioBloom - 5,5ml; TopMax - 2,5ml; BioHeaven - 6ml; Activera - 5ml; 25/08 - Alimentação Queijo Royal # 1 (2L): CE = 1,36; pH = 6,2 -BioGrow - 3ml; BioBloom - 6ml; TopMax - 2ml; BioHeaven - 6ml; Activera - 6ml; 21/08 - Alimentação Queijo Royal # 2 (2L) - CE = 1,54; pH = 6,3 -BioGrow - 3ml; BioBloom - 5ml; TopMax - 2ml; BioHeaven - 6ml; Activera - 6ml;