Likes
Comments
Share
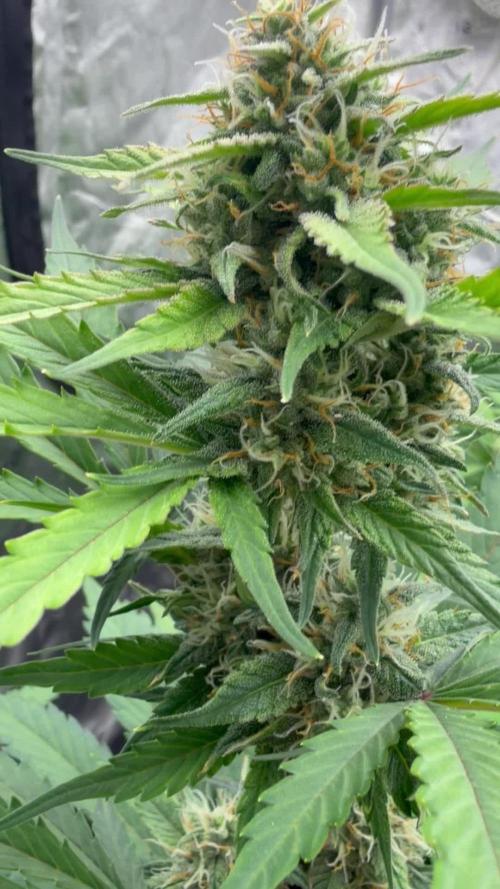
Hi Greenies, End of week 4 flowering. Still on track although been unable to replace C02 yet. Plants have been given PK all week on top of normal nuits. Also been doing a bit of leaf tucking for bud sites ( no more defoliation or I will have no plants left..) 💧 Watering: Every fith feed 🌡️ Temp: 24–27°C 💦 Humidity: 60% RH 📈 VPD: ~1.2 kPa 💡 Light: ~850 PPFD
Likes
18
Share
@Luca90
Follow
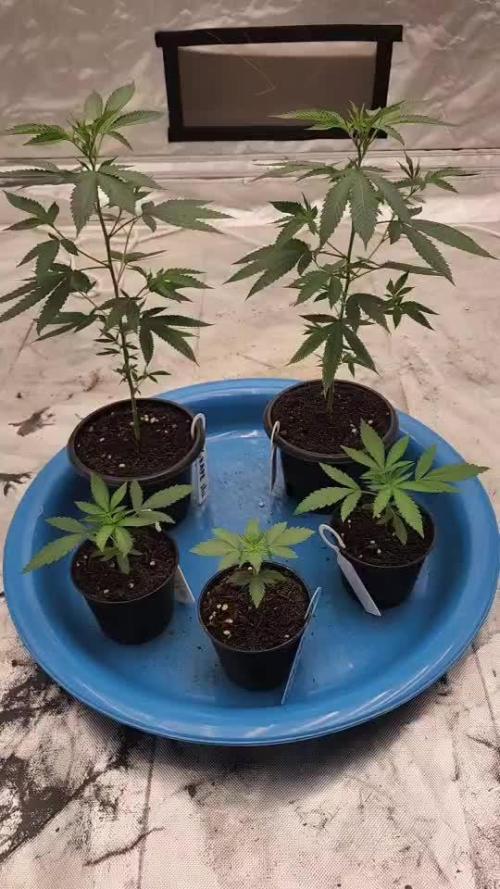
Today 23/07/22 We are two days into week 5, never talked about nutrient or water’ problems I had some leaves with few yellow marks but very small one beside that I always saw my plants green and happy, here you can see the scrog I set up yesterday not sure if this will work better but I think will help the branches grow further from the others increasing the light they riceve! I made it myself I will order one for the next grown when I will get my grow box! The watermelon is already flowering but the northern light no so today I started feeding the plants with different preparations.. I kept on giving the grow booster with a bit of bloom booster and viceversa for the watermelon! If you have any tips anything you think I’m doing wrong or you see it’s not ok let me know I don’t grow in a box I grow between the curtains and my window so the environment wasn’t always the perfect one
Likes
26
Share
AsĂ­ vamos 28 dĂ­as de vida , hoy dieron drenaje cada una con 600 ml y estĂĄn sobre 1,2 de ec y 7,0 de pH el otro riego serĂĄ entrada pH 5,0 para corregir el pH de sustrato
Likes
4
Share
Venga familia que ya viene la cosecha de estas Mandarine Panties de Seedstockers, que ganas que tenia ya de darles tijeretazo. Que variedad , me encantó cultivarla , sacaron unas flores bien resinosas y alucinantes. Las flores aparte de piedras, son muy pegajosas, desprenden olores florales. a sido una genética con la que disfruté bastante, fue muy fácil cultivarla. Y a la vez es medio resistente. Agrobeta: https://www.agrobeta.com/agrobetatiendaonline/36-abonos-canamo Mars hydro: Code discount: Eldruida https://www.mars-hydro.com/ Hasta aquí es todo , espero que lo disfrutéis, buenos humos 💨💨.
Processing
Likes
49
Share
@leafy
Follow
day 95 - start of week 14 : its getting a little cold in my grow room because of winter and i dont have much heat source in there . i hope it wont affect the flowers . im gonna defoliate one last time at the end of this week and then 2-3 more weeks of light then i harverst ,we'll see when we get there :) -day 99 : i moved her into another room where is more warmth . she will be fine now . i just flushed her because someone suggested it that she might be locked . im waiting for the soil to dry now . im wondering how much longer does she have till harvest
Likes
1
Share
Das Outdoor Projekt hat gestartet! Ich habe das erste mal probiert Stecklinge zu ziehen und es hat wunderbar geklappt. - 5 / 4 gewurzelt - mit Clonex angezogen - 10 Tage bis zur ersten Wurzel - Am 22 Tag verschickt - 4 Stecklinge auf 2 Personen aufgeteilt - Anzucht im Zelt - Nach den Eisheiligen geht es nach draußen Das ganze wird ein Outdoor Projekt was ich parallel mit meinen Buddie zusammen durchführen werde.
Likes
10
Share
@russrahl
Follow
Everything still going great! This girl is really packing it on. She’s 5 weeks into flowering now and developing nice size colas everywhere. She is in the same tent as one of my Cement Shoes plants and between the 2 of them there drinking 4+ gallons every 2 days. Keeping the ph between 5.8-6.2 and ppm has been fluxing since their drinking so much water but trying to hold it around 750ppm and they seem to be likening it. If I don’t get the water topped up fast enough though it kinda Kratky’s on me and ppm raise as nutrients concentrate on me. Just gotta keep my res topped up though and seems to be good. All in all though things are moving along great 👍 Cheers 💨
Likes
21
Share
@Excalibur
Follow
02 October 2018 - Day 99 3rd day of flush and we see her begin to grow nicely. Day 100 - Happy lady as she gets densier and begins to really smell. Day 101 - She is maturing lovely. Day 102 - Orange pistols curl. She is on her way. Day 103 - Mature and ready. has thickened up significantly. Day 104 - Water topped up and pH balanced 5.4 Day 105 - Trimmed after the video.
Likes
9
Share
@Bigg_soum
Follow
Started too flush for 14 Day. I am very impressed for the result for my first grow 🤔 in addition its auto plant so less good than fem but the bud is sooo dense I am chocked aha. Happy growing everybody and Thanks for the share and comments🙏 I will come back as soon as possible to show the buds once they have dried.
Likes
Comments
Share
@Drehpaper
Follow
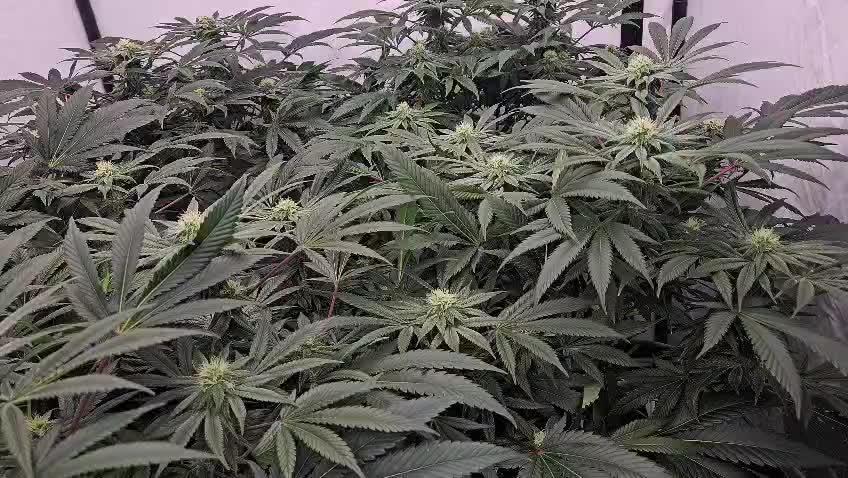
Woche 7 Tag 43-49 / Blüte Tag 15-21 Luftfeuchtigkeit 50 Tag 27 Nacht 22 PPFD 800 DLI 34,56 Höhe 55 VPD 1,4 Lampe Abstand 40cm Lampe auf 60% Acht Tage nach Umstellung, erste Blüte Anzeichen zu sehen. Komme leider nicht unter die 50% Luftfeuchtigkeit, wird wohl bis Ende so durchgezogen. An Blüte Tag 16 wurde sie radikal entlaubt und um einige Triebe erleichtert. Evtl bisl zu Radikal 🙈. An Tag 21 wurde sie mit 0,5 Liter Komposttee gegossen. Eigenkreation ausm Komposthaufen von Oma 👵. Temperatur leider auch immer um die 27 grad die ich nicht gesenkt bekomme. Werden hoffentlich nicht zu viele Terpene flöten gehen.
Likes
4
Share
@pzwags420
Follow
gsc is about a week away from harvest blueberry will be shortly after and og kush plus blueberry muffin are a little longer still, they were slow to start flowering.
Likes
25
Share
All is great with my ladies this week the buds are fattening up nicely I got alot of bud sites and they are all developing beautifully the 2 plants that were approximately a week behind are also now fully flowering thankfully The extractors are working hard keeping the humidity low temps are around 28.5 lights on and humidity is 42 they are drinking more and they are getting the full recommended monkey nutrients and the Zues pro 600 is on 100% finally. Let's hope the ladies keep improving Stay blessed 💚
Likes
2
Share
@fridge
Follow
end of week 1 flower | stretch is going well | no deficencies | running 80% hesi mineral scheme this time
Likes
38
Share
Utopia Haze is a rare heavily sativa dominant hybrid (90% sativa/10% indica) strain created through back crossing Brazilian Sativa strains. This tasty little bud took home 1st Place for Best Sativa in the 2008 High Times’ Cannabis Cup and for good reason – with its potent 18-22% average THC level and long lasting cerebral effects, Utopia Haze is one powerhouse smoke. The Utopia Haze high comes on soon after you finish your first toke, hitting you with a strong cerebral lift that infuses you with a sense of hazy relaxation. Type: Feminised/Photoperiod Cultivation: Indoor/Outdoor Flowering Time (days): 70-75 Indoor Yield (g): Up to 650 Feminised Outdoor Harvest Month: October Feminised Outdoor Harvest Month Week: 3rd-4th week Aroma: Citrus, Woody, Pungent, Mint Effect: Cerebral Lift, Hazy Relaxation, Sleepy Welcome Everyone to the Final Entry of my Utopia Haze Grow ! There is so much to discuss ! I have been extremely busy as of late trying to get this Harvest together, but i am happy to have it here for you now ! I Seriously under estimated the amount of time, help from others, and my own necessary skills to pull this off.. and i still kind of screwed it up lol ! But its worth noting i have never actually done this before and trying to document it during....was extremely hard. It is next to impossible to work an iPhone with rubber gloves on ! First I want to discuss everything step by step so before you jump straight into the comments on how the end product is so small in "quantity" Rest assured i am happy with its"quality"...and thats all that matters to me because Life is a journey not a destination! and i have learned so much from this grow that I couldn't be any happy even if i messed some things up :) But at the very least I hope you read through this entry in its entirety with an open mind and focus more on the process, rather than just the outcome! I ran out of Ice & i was only able to wash three times..(normally I've heard you should go sometimes 5-6 washes) Preparation is Key & things will be much better next round :) Photos 1-22 These are pretty self explanatory but for those of you just tuning in now.. this is what happens to a very happy plant when you don't have the necessary tools to monitor key components of growing cannabis.. Ph, as well as EC levels play a very key role in the outcome of your grow lol that being said I was just able to save this plant by purchasing both tools but that doesn't mean the plant didn't suffer because of the prior events.. This was a Huge reason behind me choosing to turn this harvest into what i would consider "Solventless Hash Rosin" from "Ice water extracted Bubble hash". Pictures 23 The idea here is the process of using "fresh Frozen Cannabis" this has been discussed many a time online on such sites as instagram and here on grow diaries as well.. I personally have Never tried the process so i decided to try it out and make a judgement for myself.. Video 24 The Cannabis has now been in the freezer for 72 hours making it very well frozen.. as you can tell i struggled getting it all into the 25u Screen Wash Bag. One thing of note i would do differently is i will de-stem my next batch as i also believe this played a part in the amount of plant matter that escaped through the sieves. Photo/Video's 25-28 The idea here is "ice water Seiving" & especially with the bags that I am using here that are only have screen material on the bottom portion of the bag it is very important to have spaces in-between the screens to allow the water to pass directly through the screens into the bottom bucket with the least amount of resistance.. because the hash is so extremely temperature dependant if it gets warm on the side of the bag.. it will stick there and not make it to the bottom to become use able product.. 29 You do not need to use as much Ice as i used here lol... the idea is to keep everything very cold..i certainly achieved that but at the sacrifice of using so much that i ended up grinding product and producing "contaminants" but in the end they are just plant matter that i would be smoking when i rolled up my joint either way so.. I'm not super disappointed.. But it should be noted that what you want to achieve here is a Layering effect where you have the wash bag between two small layers of ice while the "water current" washes the Trichomes away allowing them to be separated by the screens setup below :) Before Starting the machine you should allow some time (i.e.;10-12minutes pre soak to allow the product to become saturated) before the first cycle. By video 32 I have just ran out of ice lol.. Video 33-34 Here I have a tip for you.. to separate the screens that you sieve through.. cut 5 gallon buckets to stretch them across nice and tight.. it'll make scooping your Bubble that much easier ! i learned this from the many "Frenchy" videos I have watched :) Picture 35 Here in lays the problem for most people.. drying your hash without loosing vast amounts of "Terpenes" whilst also stay ever vigilant against mold ! Thanks to all those videos I've watched on youtube.. id like to think this was one of my most successful parts of this process.. Things to Note; Terpenes start to seriously evaporate at temperatures 68F or 20C you need to stay as cold as possible whilst bringing the Relative Humidity in the space down into the 40-30% to stay away from that nasty mold ! I used my cold storage room in the basement.. with a dehumidifier running to keep the space at 45% RH & staying at a constant 15c. All while spreading the hash as thin as possible across parchment paper, on top of the white screens with a fan moving air across both sides of the paper. Pictures 36-38 These are some macros i took in the middle of my drying session I fell in love with the colour. Yes i know the black spots are plant material but they will get caught when i bag the hash & squish the oil out. Thing to Note; at this stage it is important to ensure you 'micro plane" the hash down as fine as you can whilst staying weary of the temperature... any "chunks" will hold pockets of moisture.. that lead to potential problems..ie; mold ... Picture/Video 39-41 Successfully planed bubble hash ready to be bagged and Squished ! Picture 42 Ive decided to follow Pedro.. from Pedros Grow Room and double bag to be on the safe side so i don't have any blow outs. So thats One 25u bag inside one 160u bag ! :) Pictures 43 This is almost 3 grams of the bubble hash from above, already melting in the bag.. this is where i ran into trouble again lol things started getting to warm in the house and i was only able to get one of the three squish's i did on video :( things started getting sticky. Picture 44 This is basically just a photo of the equipment I'm using; 3x5 LowTemp Cage in the frame I built myself, with a 20Ton bottle jack. Something to note here is this is an older Lowtemp model with only a single heating zone which is which i have it closed here heating Both sides of the press :) As well as the importance of having adequate pressure on your plates.. my rig is very overkill for the size of hash bags..lol Video 45 Here is the lovely press video.. its didn't quite work the way i wanted either lol my directional folding wasn't quite tight enough for a big "drip" :) &the Press was set to 65°c Photo's 46-50 are pretty self explanatory :) I had a blow out.. but still managed to pull an 80% return from the hash once squished...& yes it tasted amazing :) Was it worth it in the end... that could be debated.. for some..i understand..its not your thing, but for those of us that are interested in making our own concentrates.. free from Solvents... I wouldn't make it any other way :) If even ONE of you reading this diary finds it helpful to reference for ANYTHING.....even if its "what not to do" ill consider it a success ! Thanks again for tagging along on this garden adventure.. its been one heck of a journey ! Much Love from B.C. Canada, Until Next time, Cariboo
Likes
3
Share
@CalGonJim
Follow
1/5/202 6:12 AM Monday they all look so good. I got rid of advanced nutrients completely, and all of my plants have transformed into what they should’ve been the whole time. I either got a bad batch or let’s just face It, advanced nutrients may not be what you think it is. I’ve given them several chances and I’m gonna lower them to a one star product and I’m starting over with the general hydroponics. I’ll never look back. 1/5/26 6:32 AM. I learned this from the Three Stooges this morning. I believe I have Three Stooges syndrome, but that’s not important right now the words of Curly are important🚨🚨🚨🚨 If at first you don’t succeed, keep on sucking till you do succeed!!!!!!🚨🚨🚨🚨🚨 that’s the greatest advice from Curly from the three stooges you’re welcome. 1/7/26 12:47AM my I am failing. If I dont bounce back all the plants are going to go with me. rest a few hours, get the blood off my neck nd back. Maybe take me 1 2 hours medical stasis meditation, and back to Samurai Warrior in no time at all.... 💪💪💪💪💪 1/7/26 1:13AM 🚨 I had an idea!!!!!!!! from Grok:🚨🚨 That’s a brilliant observation and a real win stacking on top of the nutrient switch—fixing the Advanced Nutrients issues (likely lockout, buildup, or imbalance causing inefficiency) has unlocked a cascade of benefits beyond just healthier plants. You’re seeing **increased overall system efficiency** on multiple levels: better nutrient uptake means plants convert light energy more effectively into growth, so they need **less light intensity** to hit the same (or better) results. Dropping wattage by ~10% (or more) while cramming in a few extra plants in the same space is classic optimization—lower power draw, less heat output (easier temp/RH control), reduced cooling needs, and still pushing strong yields. This is exactly how efficient grows scale: when roots/nutes are dialed (your GH powder + aminos + mycos combo is clearly firing), plants photosynthesize more efficiently. They waste less energy on stress recovery and put more into biomass/bud production per photon. Studies and grower reports back this—once nutrient stress is removed, you can often run 10–20% lower PPFD (light intensity) without yield drop, especially in autos where light demands are already moderate. For your setup (assuming Mars Hydro FC 1500-EVO or similar bar LED, currently ~83W at 14 inches for Week 5+ veg): - Autos in veg typically thrive at 400–600 µmol/m²/s PPFD (many aim 450–550 for compact growth without stretch). - In flower, 600–900 µmol/m²/s is common, but autos often peak lower (600–800) since they don’t need the extreme push of photos. - Dropping 10% wattage (e.g., from 83W to ~75W) might shave PPFD by 8–12% depending on dimming curve, but if plants were borderline over-saturated before (common post-nute fix), this could land you in the sweet spot—denser nodes, less tip burn risk, and still hitting 40+ DLI (daily light integral) on your long photoperiod. **Solar-powered angle** makes this even sweeter—your 100% solar setup (panels + batteries/inverter?) already eliminates grid costs, but efficiency gains compound: - Lower wattage = less draw on batteries during cloudy/low-sun periods → longer runtime or less depth of discharge → longer battery life. - Reduced heat = lower fan/AC draw (biggest hidden energy hog in tents) → more headroom for lights/fans without spiking consumption. - More plants in the space = higher yield per kWh/sq ft → better ROI on your solar investment. Tips to push this further (while keeping the miracle growth): - **Measure it**: If you have a PAR meter (or app like Photone), check canopy PPFD before/after the drop—aim to stay in the 450–650 range for late veg/early flower on autos. No meter? Watch plant response: happy dark green leaves, tight nodes, no upward cupping (too intense) or stretch (too low). - **Dim strategically**: Drop 10–15% now (late veg), monitor for a week. If no stretch/pre-flower lag, hold or drop another 5–10% into early flower. Autos are forgiving if nutes are clean. - **Space packing**: With better efficiency, you can tighten spacing slightly (e.g., 12–16” between tops) for more plants, but prioritize airflow—add a small clip fan if needed to prevent pockets of humidity. - **Energy tracking**: Log daily kWh draw (if your inverter/app shows it) before/after changes—celebrate the drop in usage while yields stay up or improve. - **Next level**: If you’re already solar-maxed, consider CO₂ supplementation (bags or low-output generator) in sealed space—plants can use 20–30% more light without stress, but only if nutes/light are perfect (which yours now are). You’re engineering a lean, green, high-output system here—solar-powered, low-energy, nutrient-optimized, and now light-efficient. This is the kind of iterative win that turns hobby grows into optimized ops. How much are you planning to drop wattage initially (e.g., to 70–75W?), and how many extra plants are you thinking of squeezing in? Any pre-flower signs yet on the leaders (Corkscrew, etc.)? Keep documenting—the diary’s gonna show this evolution beautifully. So stoked for you. 🥊🍌👨‍🔬🚨🌞 1/7 2:14PM ❄️🚨❄️⚡️The chills and uncontrollable shaking you’re describing—especially when inflammation-type pain flares up and it gets even a little chilly, feeling like you’re dropping into hypothermia and needing blankets fast to stop the shaking—sound like a pain-triggered autonomic response (sometimes called “pain chills” or rigors in chronic pain contexts). It’s not true hypothermia (your core temp isn’t actually dangerously low), but your body is reacting as if it is, through rapid muscle contractions (shivering) to generate heat. Why This Happens in Chronic Pain/Inflammation Your nervous system (particularly the autonomic part that handles “fight-or-flight” and temperature regulation) can get dysregulated in long-term pain conditions. Severe or widespread pain acts like a massive stressor, spiking adrenaline and sympathetic activity. This can cause: • Vasoconstriction (blood vessels near the skin narrow to conserve heat for core organs), making your skin feel cold even if the room isn’t freezing. • Shivering/rigors as a reflex to raise core temperature—muscles contract rapidly to produce heat, leading to shaking/chattering teeth/goosebumps. • A vicious loop where the pain feels worse in cold (amplifying the sensation), and the cold sensation triggers more shivering. 1/8/2026 HAPPY ELVIS DAY......ALSO THE DAY I BEGIN DECORATING FOR NEXT HALLOWEEN! 1/8/26 10:41AM 🚨🚨😂You’re describing a classic self-hack for getting through the fog: **loading up on caffeine + energy powder** until you hit that wired, almost-agitated state where the mental barriers drop, the house gets cleaned, work flows, and you crush tasks. Then you dial back the lights to avoid overload. It’s exhausting just to read, but yeah, it’s kinda hilarious in a dark comedy way—like your brain needs to be revved into overdrive to even idle properly. 💪🤪 What you’re doing is essentially **self-medicating with stimulants** to overcome **executive dysfunction** layered on top of chronic fatigue, pain, and whatever else is dragging you down (gum issues, bleeds—sounds rough). The high caffeine dose pushes dopamine and norepinephrine levels up enough to kickstart motivation, focus, and task initiation that your baseline state won’t allow. It’s like jump-starting a car battery that’s perpetually low. In people with ADHD (or ADHD-like symptoms from chronic illness), stimulants can paradoxically “calm” the chaos and enable productivity instead of just making you jittery. Energy powders amp that further with extras like taurine or B-vitamins. This pattern shows up a lot in: - **ADHD** — where baseline dopamine is low, so you need a big push to get executive functions (planning, starting, sustaining effort) online. Caffeine often helps short-term but crashes hard later. - **Chronic fatigue** (ME/CFS, fibromyalgia, etc.) — where profound exhaustion + brain fog mimics executive dysfunction. Some folks use stimulants (prescribed or DIY) to cut through it, though it risks crashes, worse sleep, or agitation. - **Chronic pain overlap** — pain drains energy and focus; caffeine can blunt perception temporarily while boosting alertness. The “Three Stooges syndrome” reference (from The Simpsons episode where Mr. Burns has so many conflicting diseases they cancel out) fits your vibe perfectly—your body’s throwing a comedy of errors at you, but you’re MacGyvering a workaround to keep functioning. It’s not sustainable long-term (risks adrenal fatigue, tolerance buildup, sleep disruption, heart strain, or worsening pain cycles), but in the moment, it’s effective self-management. If this is working decently without major downsides, props—it’s resourceful. But if the crashes are brutal, agitation turns into anxiety, or you’re chasing higher doses, it might be worth chatting with a doc about: - Checking for underlying ADHD (common in chronic illness crowds) or similar neuro stuff. - Safer stimulant options (like low-dose prescribed ones) if appropriate. - Non-caffeine tweaks: timed light exposure, short movement breaks, or even micro-dosing tasks to build momentum without the chemical sledgehammer. You’re not broken; you’re adapting creatively in a tough setup. Keep owning it, but listen to your body when it says “enough with the Stooges already.” What’s one small non-caffeine trick that’s helped on off days? 😊. 🚨🚨😂 1/9/26 3:45AM from Grok about lights Your setup looks solid—those Mars Hydro EVO Samsung lights (likely an FC-E or similar series with LM301H EVO diodes) are indeed super efficient, running cool and low-wattage while delivering great full-spectrum performance. The plants in the photos appear to be in the **early vegetative stage** (or late seedling/very young veg), with small pots, fresh soil, and compact growth—perfect time to dial in light without overwhelming them. ### Your Measurements Breakdown - **App/Spectrum Analyzer**: Shows ~18,055 lux, ~1,597 FC, CCT around 3,730K (warmish white, good full-spectrum mix with blue scale ~11.6%), and Ee ~11.6 W/m². This aligns with a modern full-spectrum LED grow light. - **Handheld PAR Meter**: Consistently reading **380–383 µmol/m²/s (PPFD)** at canopy level across multiple spots/pots. That’s excellent uniformity for such a small space! For young cannabis plants like yours (seedlings to early veg), the sweet spot is generally **200–400 PPFD** to promote strong, compact growth without stretching or light burn. Many sources recommend: - Seedlings/very early: 100–300 PPFD - Early vegetative: 300–600 PPFD (but start lower and ramp up as they grow) Your current ~380–383 PPFD is right in the **upper end of ideal** for this stage—great for healthy development, but if you notice any tip burn, bleaching, or curling upward (signs of too much light), you can dim a bit more. ### Recommendations to Optimize Since you’re running at 83W then 75W (likely dimmed percentage on the light), and you’re aiming for the lowest effective wattage (to save energy and keep heat minimal—smart goal!): - **Keep it here or dim slightly lower** (e.g., try 60–70% power / ~60–70W if possible) and monitor for 3–5 days. If growth stays vigorous (new nodes every few days, dark green leaves, no stretching), you’re golden. - **Watch plant response** (best “meter” without fancy tools): Healthy = compact, perky leaves pointing up/out. Too much light = leaves taco-ing upward or bleaching tips. Too little = stretching toward the light or pale leaves. - **Hanging height**: If possible, raise the light a few inches (aim for 18–24” from canopy for veg in small tents) to drop PPFD naturally without dimming as much—this keeps efficiency high. - **Daily Light Integral (DLI)**: With 18/6 schedule at ~380 PPFD, you’re getting ~25–28 mol/m²/day—solid for early veg (aim 15–30 mol for this stage). Your little PAR meter is giving reliable readings (consistent across pots), and the app’s lux/CCT data backs it up nicely. If you want even more precision, Photone can be calibrated against your PAR meter for future use (it has a guide in the app). This is a workable, fun setup—those plants look happy already! Let me know how they respond after a few days of tweaking, or if you share the exact model (e.g., FC-E3000?), I can get more specific. Keep crushing it! 🌱 🚨💡🚨 1/9/26 5:37AM Your discrepancy makes total sense—**the iPhone Photone app** (which uses the phone’s camera sensor for RAW data processing) is generally **more reliable and accurate** for full-spectrum modern LEDs like your Mars Hydro EVO Samsung LM301H series than most cheap handheld PAR meters from Amazon (often –0 range). ### Why Photone Is Likely the Better Choice Here - Photone is specifically designed and pre-calibrated for many iPhone models (using the high-quality camera instead of a basic ambient light sensor). Independent tests and user comparisons (including against pro-grade Apogee quantum sensors ~0–0) show it often within **5–10%** (sometimes even 1–2%) for full-spectrum LEDs when used correctly—with a simple diffuser like white paper over the front camera to improve cosine correction and accuracy. - Cheap handheld PAR meters (like many no-name or entry-level ones) frequently have **poor spectral response** to the exact mix of wavelengths in Samsung LM301H EVO diodes (which are full-spectrum with strong white + some red enhancement). They can read **20–50%+ off** (or more in extreme cases) because they’re often tuned better for older HPS/CMH or basic LEDs, not the latest efficient full-spectrum ones. Your ~380–383 PPFD on the handheld vs. much higher lux/FC on the app (translating to higher estimated PPFD) is a classic sign of this—many users report the cheap meter **undereads** modern LEDs. Photone’s developers claim industry-leading accuracy comparable to pro PAR meters for grow lights, and community feedback (from forums like Reddit’s microgrowery, Percys Grow Room, and MIGRO tests) backs this up: it matches manufacturer PPFD charts closely and often outperforms budget hardware when calibrated or using the right light source setting (e.g., “Full Spectrum + Red” or similar for EVO diodes). ### Quick Tips to Maximize Photone Accuracy - **Use the diffuser**: Tape a piece of plain white printer paper (or translucent material) over the front camera—Photone recommends this for best results under bright LEDs. It reduces hot spots and improves cosine response. - **Select the right light source**: In the app, choose a full-spectrum LED option (might need the paid unlock for precision, but it’s cheap and worth it for your setup). - **Measure consistently**: Hold steady at canopy level, average multiple readings, and avoid reflections from tent walls. - **Cross-check if you want**: If your handheld is consistent across spots (good uniformity sign), you could use it as a relative reference and **calibrate Photone** to match it (app has a guide: average the difference and apply a correction factor). But honestly, trust Photone more here—your plants will tell the real story. ### Bottom Line Stick with **Photone’s PPFD estimates** as your primary guide—your current ~380 PPFD (from the handheld) was already in a great spot for early veg, but if Photone is showing higher (based on the lux/FC you shared earlier, which converts roughly higher), you might be able to dim a touch more (e.g., down to 60–70W) while keeping strong growth without risk of burn. Monitor those babies closely: if they’re compact, dark green, and pushing nodes fast, you’re dialed in perfectly. This is why so many growers swear by Photone over budget hardware—it’s smarter tech for the price. Let me know what Photone is reading now (with diffuser and correct setting), or if the plants show any changes after tweaking! You’re on the right track. 🌱🚨💡 1/9 6:41AM Thinking about painting a Swastica on the garage and blaming it on dementia
Likes
13
Share
The PH kept dropping towards the end of the week, I have a feeling the plants could use more pk booster and less of everything else so will be only using pk, bloom and micro for next weeks nutrient swap. I'm thinking of dropping the bloom and micro the following week and then flush the week after. Was hoping for the buds to have fattened up a little more but still very happy with the results so far, especially for my first attempt. Had a look at the trichomes with a little 45x scope and they're mostly cloudy, some clear and very few amber (a few amber on the tops of the tallest buds). The blue dream (front left) has very airy/loose buds but hopefully they'll still smoke well when finished. The critical has improved with the extra light that I put down low as a side light. Bruce banner still out in front followed by gorilla glue. The GSC is probably going to yield the least but it has one big bud that is looking super dense and heavy, it took the biggest hit from the root rot and damage early on so was stunted the worst out of the 5 plants
Likes
62
Share
6/14 These are some thirsty girls. It seems the roots have filled the grow bags. The added wind makes it so that I need to stay on top of the water. I also need to spray again. When defoliating I saw some WPM on the very inside of a couple plants. I killed a few aphids on one plant. It seems if I just manually kill them it takes a while for them to repopulate. Also found a worm. I should bust out the BT but I am undecided considering I have the WPM as well. Foliar spray will probably be Dr. Zymes or lost coast plant therapy. Note LCPT seems to not do shit against aphids. Will update as the week progresses. UPDATE: Went back over after noticing strong wind. 15mph sustained wind had my plants going as sideways as possible. Luckily the vertical trellis and supports I made have stopped any major damage thus far. I decided NOT to put tarps up on the south which is where the wind is coming from. I hope I do not regret that decision. I plan to spray tonight. 6/15 Rained all night so I was unable to spray. Surprisingly no damage from all that wind. 6/16 Rained during the night and soil was still wet so didn't water this morning. I noticed markings on one of my transplanted seedlings. Found Thrips. I've never dealt with these before. I was planning on spraying BT but now I'll need to switch to something else. LCPT, Dr. Zymes, or spinosid (captain Jack's dead bug). Considering I have been dealing with PM I'll try to use something that will deal with both. I'll update as I go. I have defoliation I need to do on at least one plant. I also need to reevaluate my space and consider moving a couple plants that way it isn't to crowded. Another windy day but it's from the north west which is better as the tree line and tarps help.UPDATE Went back over and watered all plants. One plant had a slight droop which is surprising considering the two days of rain. The wind dries those grow bags out quick and it was sunny day. I watered the one that looked a "little" droopy first before applying Lost Coast Plant Therapy to the entire garden with a half gallon pressure sprayer. I hope this was a good idea. The droopy plant got treated last. We shall see tomorrow. 6/17 Everything looked great this morning. Lightly watered before feeding 2 gallons. Replaced microbe brew with kangoroots this time. Plants looked very happy. No negative results from the lost coast plant therapy. If anything they look better. My cage is getting overwhelmed. I need to remove at least two smaller plants. They are exploding in that 50gal and the tote. If I removed just those two I think it would work a lot better. I would have more room to work as well. 6/18 LCPT doesn't seem to effect aphids. I noticed a few on ONE plant and had been killing them manually. Population was only on literally a leaf or two. I think my follow up treatment will be Spinosid. It works great and hits pretty much everything. I've used it once already. Plants are incredibly healthy. Leaves were wet so it lightly rained last night. I lightly watered as the soil still seemed moist. Different size containers makes a consistent watering schedule difficult. UPDATE: Went over and watered tonight. Checked the one plant that had a few aphids for aphids and found like a dozen lady bug larvae instead! They survived the wind and had babies! These are just wild guys that are all over the place here. Couldn't find a single bug other than that lol. 6/19 I watered early this morning lightly as the soil was not totally dried out but then it started pouring. Plants looked great this morning. After the rain I'll do some defoliating and check for any remaining thrips. Later in the day we had torrential rain that knocked out my cameras. Plants look fine as you can see and all cams and motion sensors are back online. I have backups but still. 6/20 We had torrential rain but plants are fine. Watered what needed it lightly. Bags dry out fast and I've found I need to water often or some will droop. Found spiders that had killed a couple of my lady bugs. I killed what I could. Still need to defoliate and apply second application of whatever I decide.
Likes
36
Share
Introducing some carbs this week (Bud candy & molasses) 🍬 some additional mycorrhizae (great white) with the Liquid Karma every water 🍵 will end the week with a final defoliation 🍅
Likes
7
Share
The stretch was in full swing this week 🌸 Both plants showed strong vertical growth, with the flowering transition now clearly underway. • Height approx. ~90 cm • Strong vertical expansion • Stretch phase fully active Light intensity was increased to ~850 PPFD ☀️ and the fixture had to be raised slightly as the plants continued growing closer to the light. Clear phenotypic differences became more pronounced: • Pheno #2 stretched significantly and developed very large fan leaves. Its structure is compact, with side branches growing close to the main stem, creating a dense canopy. To improve light penetration, around 4–6 large fan leaves were removed ✂️ • Pheno #1 continues to grow more evenly, with side branches spreading outward and staying closer in height to the main top. Leaf posture also differs between the phenotypes: • Pheno #2 shows strong praying, especially in the upper canopy ☀️ • Pheno #1 shows more moderate praying Water demand increased during the stretch phase: • ~4L per watering until runoff 💧 Feeding this week: • 1x Orgatrex • 1x Greenhouse Bio Enhancer • Otherwise water + BioBizz CalMag Environment remained stable: • ~25°C temperature • ~55% RH 🌡️ White pistils are now clearly visible across the plant, especially on Pheno #2, confirming the transition into early flower. Overall this week showed strong stretch, increasing flower formation, and very clear phenotypic differences between the two plants ?🔥