Likes
Comments
Share
@trustno1
Follow
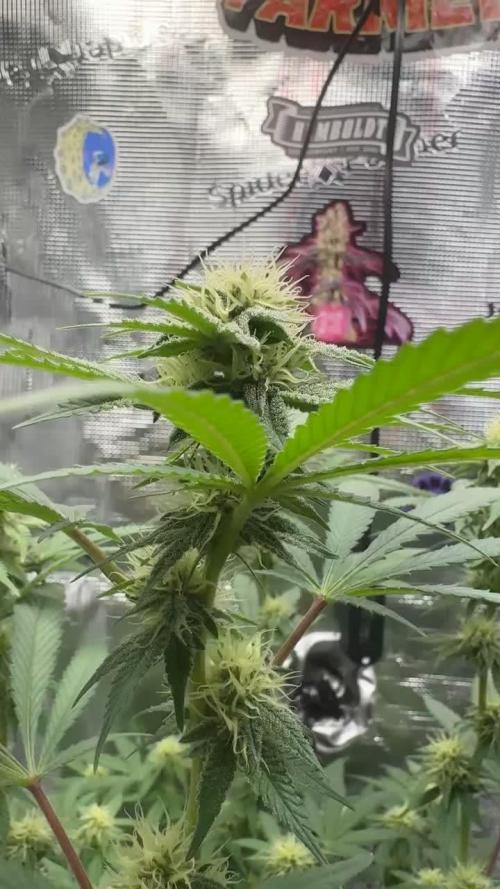
Hi 👋 BlĂŒte Tag 62 Langsam aber sicher stapeln sich die BlĂŒten. Die ersten Stigmen sind braun und die Harzproduktion lĂ€uft auf Hochtouren. Sie hat sich wirklich zu einer Schönheit entwickelt. Der Zitrus Geruch ist noch vorhanden und ein Nadelwald Duft ist auch erkennbar. Ich freue mich auf die nĂ€chtes Wochen. Gruß M.
Likes
2
Share
@JKennedy
Follow
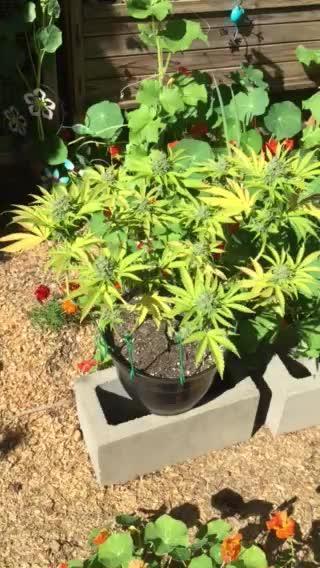
The stretch for 2 plants in particular went crazy on the left it’s a super skunk On the right it’s a sweet cherry kush. I’m still wondering if I really need to defoliate a little bit.
Likes
11
Share
Hey everyone its the final week for this beauty.what a pleasure to grow she was and i will grow this strain again for sure. She drinks a whole lot less then before and the trychomes are turning amber and the rest are milky so she will be cut some where on the end of this week. I will update you guys and girls with the final dry weight and some pics of the dry buds. Thank you rqs for this amazing strain. See you all soon✌
Likes
35
Share
đŸ€—đŸ€—đŸ€©đŸ€©đŸ˜đŸ˜đŸ”„đŸ”„đŸ’ȘđŸŒđŸ’ȘđŸŒđŸ€ȘđŸ€Ș This girl is pretty! 😍 And smells sooo good!! Today is day 77! She’s been getting straight water for over a week and she’s almost ready to harvest! đŸ€© She didn’t get very big but she seems thick! (And would be a perfect!! Wedding bouquet! 😘🙃) On Sunday I pulled the center of the plant open some and it was pretty green in there so trying to give that part some more time! Other then that, we are super excited to see how she taste! đŸ˜‹đŸ€©đŸ˜ Check me out and show some love on Instagram @greengirl420mipotfarm and our other grows @mi.pot.farm here on grow diaries & Instagram đŸ€— đŸ”„ đŸŒČ puff puff passs 💹 💹
Likes
33
Share
@BudXs
Follow
Keepin it real through week 2. Off to a slow start, but no big deal, room will be pumping soon. In soilless mix until WELL established root mass and then into coco dutch buckets
Likes
21
Share
@CBTreee
Follow
This grow for a lot of attention on IG and I appreciate everyone’s support so much!!!
Likes
14
Share
@Naujas
Follow
79 days!!!!! and the harvest is already harvested :) The whole growth until week 6 went very well, then the girl got a little worse, (I think it's my mistake, which I described in previous weeks), but besides all that she managed to ripen perfectly, matured stiff flowers, full of shiny sticky trichomes with a very, very sweet aroma ;) 210 gr of wet buds, I also collected a lot of sugar leaves from which I will make bubble hash :) I can't wait to taste it :) this is my first trip with Sweetseeds Looking at the flowers I understand that I will definitely repeat it :) I will leave more feedback after the smoke review:) good luck to everyone.
Likes
7
Share
@Andres
Follow
We will see the process of it ... nothing to report for now ...
Likes
7
Share
In Tamara her 13 week I prepare her for the Harvest in the next week. Only water no nutrients and lower light. Her night is 2 hours longer. And she 
 she start with purple her flowers
 what a present. I hope the Trichome Check next week will Call Harvest 😉
Likes
41
Share
Sweet Seeds Cream 47 grow 2020. Sweet Seeds Cream 47 was finally run and she was a great experience

.as always there was something to be learnt here but in the end these girls were super frosty and finished super fast! Done in 8 weeks Veg and you keep ALL the trim for further processing😊 Stayed under 30” for height and can fight off many issues including pests and temps

as well as cracked stems and broken branches😊 I believe I ordered these in 2018 after my first experience with Sweet Seeds and Gorilla Girl photo. I was so impressed I had wanted to try something else from them. Then I don’t know what happens
..something else newer or possibly more interesting at the time comes along and you push this seed pack to the back. For some reason AK47 has been the strain I have played with a couple variants of and these girls finally had their chance. The seed pack I have has a date stamp of 2016

.not a worry Growmies, seen lots of other growers popping 10 year old genetics from seed and thy will still work out fine. Just sharing a little reminder that its about storage

.I keep mine in a sealed container in a different fridge in a dark spot😊 As an example, these were 4 years old and I got two girls from my three seeds
..works for me😊 Beginning the diary

during germination everything is rosy and you are going to set things on fire!!!!!! Germination started on July 11/20 with two seeds. First one came up from coco 7 days later on July 18 and C472 was actually the third seed and was put into a rapid rooter on July 19 and came up from coco on July 23

.that left us with C472 actually being 5 days behind C471. Quick note
.C472 was a bigger girl at the finish line even though she was 5 days younger and being grown in the 3 gal pot vs the 5 gal pot. Typical photoperiod process and went to solo cups and then to 1 gal and then a final upsize to either a 3gal or 5gal. I put one in each. At the start of this diary I wanted to focus on seeing the difference in yield between a 12L and 20L pot and is it worth the extra media and nutes? Well things change and you have to go with the punches😊 Early veg and building root mass

..come one girls, lets see some snow white roots!!!! The girls were grown in 90 – 80% coco and 10 - 20% Perlite

..COVID made many things hard to get here and there this past year and I believe and I even had to use some Vermiculite as I couldn’t get perlite. As in the previous couple of grows I battled pH drift in this run as well. Quick note

.I am now mixing my media with 65% coco, 25% peat, 10% perlite and the current run is doing very well for both autos and photos

pH is holding at 6.1 in media rather than damn 7.2 a couple of weeks later, may consider dropping peat a little next run to 20% or 15% and increase the coco by the same percentage to see the impact😊😊😊 By the end of 7 days they had a whopping 1 set of single blade fan leaves out and the thought of a second set of leaves. Then by the end of 14 days they really rocked and we had a set of 3 blade leaves out and a sliver of green forming the first set of 5 blade fan leaves

..on fire they were😊😊😊😊 With the girls facing an 8 week veg, I was in no rush. At the end 21 days they were roughly 7” tall and it was time for their first upsize to a 1gal pot. They were finally transplanted on day 23. C471 had a better root development that C472 and she was slightly bigger so was eyed as the pheno to get the 5 gal pot in the future. Usual Mycorrhizae added to the holes and in the pots and further microbes to supplement the girls. Need the roots to more plentiful than what they currently are. The girls loved the extra room and week 5 saw good growth as side branching developed and the leaves became bigger

on course! Late veg and forming a canopy for flower

SCROG or not?????: Weeks 4 and 5, plus the start of 6, the girls continued to flourish and grow in 1 gal pots. Being feed a couple of times a week they continued to progress. The girls had reached a little of 10” tall and it was time to top them. Not sure about LST or SCROG at this point, I knew they had to fill half the tent, so I went a head and topped the girls on day 37 between the fourth and fifth nodes. The girls grew a little different shaped fan leaves and they were more “pointy” and long in growth

and long lateral growth fan leaves. She wanted to grow laterally on her own
..bonus! The girls reacted will to the toping over the next days and kept a solid growth. This strain has tight node spacing and will not grow into 5’ monsters like the Gorilla Girl strain they were grown beside. Finally at day 50, Sept 6/20, the girls were given their final home and transplanted a last time. C471 with more vigorous growth was given the 5 gal pot to fill with roots while C472 was designated the 3 gal pot. I finally decided that a SCROG was going to be the answer because the other girls in the tent will need to be kept tied down. Problem was that these girls won’t stretch much but the other girls will

how the hell to SCROG that situation otherwise you have nodes 12” taller than others and creates a tough canopy to give the correct amount of light??? Solution was to put C47 girls on boxes and rise them up. Took a guess at the potential height difference in the strains and figured I should plant at least a 12” riser of some type. It actually worked out not to bad

they were coming through the top of the SCROG first but as they grew things balanced out between the strains😊 In week 9 the girls took off and we finally had a good canopy to start flower with

all the girls were down low and touching all sides of the tent and each other. Getting them ready to SCROG I decided to perform LST for a couple of weeks and ensure the branching grows to the side and not straight up. They formed 4 main tops on each girl and the side branches were thick. Bud Ignitor added to the feed in week 9 and we are ready

.lets change the light and watch the explosion Baby 😊😊😊 Still only positive thing happening in the grow to this point!! Flower time and filling up the tent with sticky buds


my F@#%ing tent is too small for the girls: Okay Growmies

we are on fire, all 4 girls are growing with pistols popping, branches bent everywhere and put in the first layer of the SCROG

..right on!! Soon reality sets in and the fictitious Gremlins arrive to F my grow and actionsâ˜č Getting ready for putting the net and decided to cut to low branches from C471 as they just don’t have any thickness to them. Concern was that she was now down to 6 main branches on her
..don’t break any!! Mid week I check the tent in the morning and there is a damn fan laying on top of C471!!! That’s no good but shit happens, no visible damage to the plant
..or the fan😊 So we get through week 1, IPM spray done and net is in, and moving into week 2 of flower my heart stopped when I noticed a huge crack in the main stem of C471

WTF??????? So on day 12 of flower I am looking at two girls with cracked main stems
..one C47 and one Gorilla Girl

WTF everything is the same, why did this happen for no apparent reason? Answer - - - - usual “grower F-up”

.I topped the girls to close to the lower node when done and I should have the scissors up against the node above and left a larger “nub” on top

I had them against the node below when I cut and little to no nub left on top!!!! Once they were trained a bit and started growing harder, the stem didn’t have any more strength and cracked right in the middle of the main stem! Learning point

remember to always leave a good piece of stem at the top when using scissors

hasn’t been an issue for me in the past when “pinching” tops as they develop, this was thoughâ˜č So what to do now they are doing awesome????? Well, that is why I support Grow Diairies and continue to use the site outlining my grows

I asked for help and other opinions about what happened😊 Sure enough within hours, I had some input from fellow growers, thanks again @Mr_Motalovah who pointed out quickly what I had done because they had shared about what has happened to them in the past

thanks a bunch for the input Growmie
.you rock!! Now that I know what I screwed up, we vaped a bunch of bud and put on the MacGyver Hat and fashioned some supports and ties out of a pool noodle, zip ties, tape, and more weed😊 Tied the girls up and kept the area moist for a week! She never did weld right back together at the crack because it was too major and at a high stress point for the branches. I feel this certainly contributed to C471 not being as big a yielder as I am sure she should have been. So now we are getting back on track, forget all the other shit of the last two weeks, stay positive and lets rock this grow😊 There was lots to be positive about as the second lay of SCROG is in, the girls are 20” tall and looking happy with leaves up. She has some huge fan leaves and starting to really show some trichomes already! Right on Sweet Seeds

they are pulling through and doing awesome now! Problem I am now having is keeping the air movement in the tent as these four girls are killing it and I am out of room. If I don’t help with more room or air movement, the yield and quality of the bud will suffer

they will finish and all is good but there will be lost opportunity. I really struggle to grow 4 plants in a 3’ x 3’ tent. I am always out of room and can’t get the light down as low as I want. This grow is a perfect example of that. Not to mention how to cool them off and reduce light intensity when ripening in the last two to three weeks?? I need a bigger freaking tent
.finally bit the bullet and ordered a 4’ x 4’ tent for flower. Will then have a 4’ x 4’ for photos and keep one of the 3’ x 3’ for autos. Through week 3 of flower and going now Baby, just waiting on a new tent😊 Late flower and watching them buds swell

no worries now, let the deficiencies fly!!!: Now in week 4 of flower and the girls are getting very big. The trichome production has kicked in and they are looking happy everyday at this point. Tips up everyday and they are loving the light and feed at this point. Chugging along and feeling like we will feed them though week 6 and flush for weeks 7, 8, and 9 and take down about day 62 or so. Feed moved into Big Bud and silica going to keep the stems strong so they support the bud weight. Her nodes have stacked very well and for week 4 she is chunking out nicely! The girls are pretty dark green now at this point and looking healthy. Again, buds are big and they are frosty
..the grow is going very well. New tent finally arrives in week 5 and we move the girls to a new home with more room for air and light penetration lower on the branches. Had to cut the girls out of the SCROG and added bamboo to the other strain being run with these girls. Since C47 was not very tall, they were not supported. So feeling that everything is good and we are moving forward. Like I say, feeling good, but I think the girls had their issues in weeks 5 and 6 and I didn’t really pick up on it. They had battled high pH through the grow, again why the media change this run, and it seemed to stall the girls. I think I was so focussed on the success of the Gorilla Girls that I didn’t really pick on the fact these girls were slowing down. At any rate, they looked very good and frosty and still eating so we kept going, there were even resin rails beginning to form on fan leaves and they are 24” tall😊 LST helped to keep them short, along with topping. She is showing that she will make hash people happy!!! Awesome trichomes for this stage of growth
..excited as hell! We move into week 6 and start working on some flushing. She is dark now and concerning. Her hairs are starting to red here and there and I am seeing some colour in the buds. She smells of a strong floral or something that almost “stings” your sinuses
..sorry for description but it was good strong smell. Flush should have begun at the start of this week, six. Instead, it was not given until week 7, almost too late at this point. She had slowed down her drinking and was not uptalking much anymore. Her buds looked beautiful but her leaves were dark. Yup
..F#$% I missed her and she will not finish with the colours that she should. Not much you can do at this point. She was given Flawless Finish twice and roughly 7 days of plain watering before darkness. Then on November 8, Day 51 the girls went into darkness

..the trichomes had matured and it was time. This strain should have stopped her feeding at the end of week 5 and keep the water only for up for 2.5 weeks idea and colours should pop on her

.not one week like I didâ˜č After two days of darkness the girls looked gorgeous and faded a little more than when they went in

right on. The buds are beautiful with the light colour of purple on some calyxes and red hairs in there. Frosty as all heck and sticky like crazy😊😊😊 Harvest, dry, cure and smoking Cream 47 from Sweet Seeds

..is she Sweet Smoke?? Remembrance Day was harvest for the girls. They ran their 53 days and its time to cut them down. It was a little surprising to see that C472 had better bud production that C471 since she was the slower grower. At the same time, it was not surprising as C471 had her stem split and this impacted her yield because of a challenge getting the amount of nutrients she wanted up the stem. She made it to the finish line though and was still making me smile at the end😊 can’t ask for much more than that really! Again, I wanted to compare 3 gal vs 5 gal but this diary simply didn’t work out that way. (one should also use clones for a better test of this and not seeds but its all good because I was just having fun😊) I hope that my pictures show her level of trichome production as very good to excellent. She has a lot of crystal in her buds and they are sticky. They hung for 10 to 12 days, took a couple of days to finish his time, and went it jars. I kept ALL fan leaves and of course sugar leaves

.in the freezer right now waiting for the next edible or hash run

grower bonus😊 not to mention the crazy good kief in the tray from trimmings you can enjoy as the grower😊 Full Melt Hash!!! The yield was not the largest for this girl and you can see that in the pictures by the amount of leaf in the buds. They didn’t swell right up

again going back to weeks 5 and 6 in flower I suspectâ˜č This is my smoke and I am not worried about yield to be honest. Therefore, even though I only pulled a couple of ounces from each girl

.its primo smoke! The lung expansion is huge and takes my breath away for a couple of seconds as well😊 One dab the size of a rice grain for light weight friend and he was sleeping on the couch 15 minutes later😊 Anyone have insomnia issues?? She is a strong one but with my crazy tolerance she is a nice day to evening smoke for me. That will wrap it up for this grow and Cream 47 for 2020. Have a few ounces to enjoy plus still have another seed to keep the dream alive😀👍 Should have cloned her........there are so many options though👊 Still, would love to have ran her again knowing that she is done at the start of week 8 and hit the flush properly. On to the next one though. She was indeed Sweet Smoke!!! Cheers @Sweet_Seeds another one you should be proud of😍😎👊
Likes
Comments
Share
@OGFTb
Follow
All the beans have popped, the base camp are well on there way I just included it into the journal entry but they are rounding 50/60 days
Likes
8
Share
Likes
19
Share
Week 8, Things smell heavyđŸ€€ Watered NL's 2L with 0.5ml/L Bloom and 3ml/L Topmax. Sb1 got 2L with 0.5ml/L AlgAMix, 0.5ml/L Bloom and 0.3ml/L Grow. Sb2 got 1.5L same Bloom and AlgAMix. (Day 50) Checked NL 1, give her about 6 days to harvest. Ph was to low on her, did too much Training and bad Environment. Learnd very much, thank you little buddy Waterd NL's 1.5L Water (PH 6.5) Sb got also 1.5L but with 0.5ml/L alg and topmax ( Day 52) very worried about SB 2 Flushed her today, should do this earlyer runoff ph was about 5 Sticky Beast back on track lets call her đŸ‘Œâ€â™‚ïž NL'S trichomes getting more milky, not so far from yielding✂ (Day 56) gave both Northern lights 1500ml and Sticky beast#1 1000ml Water. Ready for week 9? (Day 57)
Likes
10
Share
J'ai pratiquer sur elles la dĂ©foliation extrĂȘme qui consiste a enlevĂ© les grosse feuilles nourriciĂšre pour permettre une meilleure penĂ©tration de la lumiĂšre et de la circulation de l'air voyons ce que cela va donner au prochain Ă©pisode growers.
Likes
21
Share
@OGTrauma
Follow
Feeding was through water , with the exception of barrier as dosed as spray as flowering hasnt boomed yet and the auto one one is quite coordinated on time with this ones on the bright side. Controlled height through intention is more for damage control became a closer purpose like scrog net and clips to give branch directions easier, that use make me now that understand how optimize better with them at future , and truly purposed as getting all the ladies good illuminated : how much good are really doing the side lights , as the net itself marks the lack of penetration of the top lights my niggas. :)
Likes
56
Share
Bonjour Ă  tous les padawans et les maĂźtres jedis Pour cette semaine 3 au jour 19 ma plante fais 21 centimĂštres et son septiĂšme noeud apparaĂźt je dĂ©cide donc de pratiquer un LST sur ma plante. Pour ce j'utilise du fil de fer galvanisĂ© que je plante directement dans le substrat en faisant attention de ne pas endommagĂ© les racines car n'oublions pas que ce qui pousse dessus pousse aussi dessous. Jour 17 je pulvĂ©rise du une solution composĂ© d'une cuillĂšre Ă  cafĂ© de savon noir mou (marque briochin) diluĂ© dans un demi litre d'eau en prĂ©vention d'Ă©ventuels nuisibles. Pourquoi le savon noir mou ? Savon noir : quelle utilisation pour le jardin ? Le savon noir est un produit naturel dont les propriĂ©tĂ©s nettoyantes sont connues depuis l'AntiquitĂ©. UtilisĂ© pour l'entretien de la maison et pour les soins corporels, ses vertus antibactĂ©riennes et insecticides en font un alliĂ© prĂ©cieux pour le jardinier bio. Le savon noir est fabriquĂ© Ă  partir de potasse et d'un corps gras de type huils vĂ©gĂ©tale comme l'huile d'olive, de lin ou de maĂŻs. Produit naturel et biodĂ©gradable (s'il ne contient pas d'additifs, comme cela peut-ĂȘtre parfois le cas), c'est un trĂšs bon produit nettoyant, pour les sols, la cuisine, la vaisselle, le linge, etc... TrĂšs polyvalent, il est Ă©galement Ă©conomique, comparĂ© aux multiples dĂ©tergents classiques du commerce. Le savon noir se trouve sous forme de pĂąte molle et brune ou sous forme liquide, diluĂ© avec de l'eau. C'est du savon noir liquide dont on se sert gĂ©nĂ©ralement au jardin, car son utilisation est plus simple. Il s'achĂšte dans les magasins bio ainsi qu'en grandes surfaces ou jardineries. Attention : la recette du savon noir de mĂ©nage et celle du savon noir utilisĂ© en cosmĂ©tique ne sont pas forcĂ©ment les mĂȘmes ; les savons noir de mĂ©nage (multi-usages) peuvent contenir davantage de potasse afin d'amĂ©liorer le pouvoir dĂ©graissant (irritant ou dessĂ©chant pour la peau), voire mĂȘme certains additifs chimiques. Au jardin, ce sont en prioritĂ© les propriĂ©tĂ©s antiseptiques et insecticides du savon noir qui sont utilisĂ©es. Le savon noir liquide est utilisĂ© pour lutter contre les pucerons, les cochenilles, les araignĂ©es rouges, les aleurodes, les psylles et autres thrips. C'est un insecticide de contact ; il tue les larves et nettoie le miellat qui englue les feuilles. La recette de l'insecticide Ă  base de savon noir (mou pour ma par marque briochin) est simple Ă  rĂ©aliser : une ou deux cuillĂšres Ă  cafĂ© de savon noir mou (briochin) diluĂ©es dans 1 demi litre d'eau tiĂšde (dilution Ă  5 %) ; une fois la prĂ©paration refroidie, pulvĂ©risez-la sur les plantes atteintes, en prenant soin de ne pas oublier l'envers des feuilles. À renouveler 1 Ă  2 fois si nĂ©cessaire, pour ĂȘtre totalement dĂ©barrassĂ© des indĂ©sirables. Comme il est de mise pour la plupart des traitements, ne pulvĂ©risez pas la solution Ă  base de savon noir en pleine journĂ©e, sous le soleil (ni sous la pluie !) ; procĂ©dez le matin de bonne heure ou patientez jusqu'Ă  la fin de journĂ©e, lorsque les tempĂ©ratures sont en dessous de 20°C. Jour 18 Je corrige mon LST suivant la pousse de ma plante ... Pour ma par c'est la maniĂšre dont je procĂšde mais petit rappel de la technique du LST Quand commencer Ă  appliquer la technique LST ? De nombreux cultivateurs commencent la manipulation dĂ©s que les plantes possĂšdent entre 3 et 6 nƓuds ou une paire de feuilles. Durant cette premiĂšre Ă©tape de la croissance, le tronc encore flexible est pliable sans risque qu’il ne se casse, mĂȘme si au fur et Ă  mesure du dĂ©veloppement de la plante il sera de plus en plus difficile de le plier. Nous pouvons continuer Ă  guider la croissance des branches durant toute la culture, mĂȘme durant la floraison, ce qui pour cette Ă©tape reprĂ©sente un grand avantage face Ă  la taille, qui n’est pas du tout recommandĂ© une fois que la formation des tĂȘtes commence, cela stressera en effet la plante, ce qui aura pour effet de retarder la rĂ©colte. Comment appliquer la technique de guidage LST Si nous sommes prudents, la flexibilitĂ© naturelle des fibres du cannabis permet de plier leur tronc et branches avec une relative facilitĂ©e, mĂȘme durant la floraison des plantes. En utilisant une corde fine, nous pouvons accrocher la pointe de la plante Ă  la base du pot par exemple ou Ă  un tuteur que nous aurons plantĂ© dans le substrat. Nous plierons le tronc avec prĂ©caution et nous le fixerons avec la corde, Ă  partir de lĂ , nous pouvons augmenter progressivement la tension de la corde, chaque jour un peu plus, jusqu’à obtenir la position souhaitĂ©e. Soyez attentif Ă  la rĂ©action de la plante, essayez de ne pas appliquer trop de pression sur la corde et rappelez-vous que la flexibilitĂ© des branches peut varier d’une plante Ă  l’autre. Pour obtenir de meilleurs rĂ©sultats, il suffit de suivre quelques rĂšgles simples. Pour commencer, nous devons choisir une corde fine mais pas trop pour ne pas blesser les troncs au fur et Ă  mesure qu’ils grandissent et qu’ils deviennent plus gros. Nous pouvons utiliser des crochets en plastique souple ou de n’importe quelle autre matiĂšre flexible pour Ă©viter d’endommager les plantes. SpĂ©cialement en intĂ©rieur, utiliser des cordons en plastique de couleur (voir les diaries de @Silky) est trĂšs pratique pour voir facilement les accroches et faciliter le travail au milieu du rĂ©seau formĂ©s par les cordes, les tuteurs, les mailles ou les supports que nous aurons dans la culture. Bien entendu, en culture extĂ©rieure et surtout en guerilla nous ferons juste le contraire et nous utiliserons des matĂ©riaux de couleur qui n’attirent pas l’attention pour que notre jardin reste discret. Pour stresser les plantes au minimum, la mieux est de rĂ©aliser ces manipulations le soir ou juste aprĂšs que les lampes en intĂ©rieur s’éteignent, ce qui leur permettra de se remettre durant la nuit. Normalement, le jour suivant nous pourrons observer comme les pointes des branches que nous avons pliĂ©es se dressent de nouveau vers le haut Ă  la recherche d’une source de lumiĂšre. Que la force soit avec vousđŸ’Ș
Likes
Comments
Share

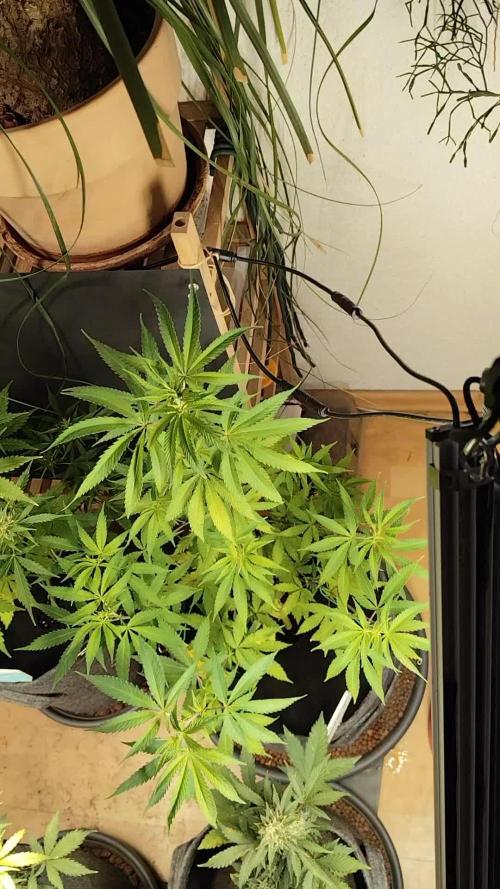
Sono passato dal 75% al 100 % di dimmer, Marshydro depp red 18 ore ccese Marshydro uv 10 minuti ogni ora per 18 ore
Likes
13
Share
@XanHalen
Follow
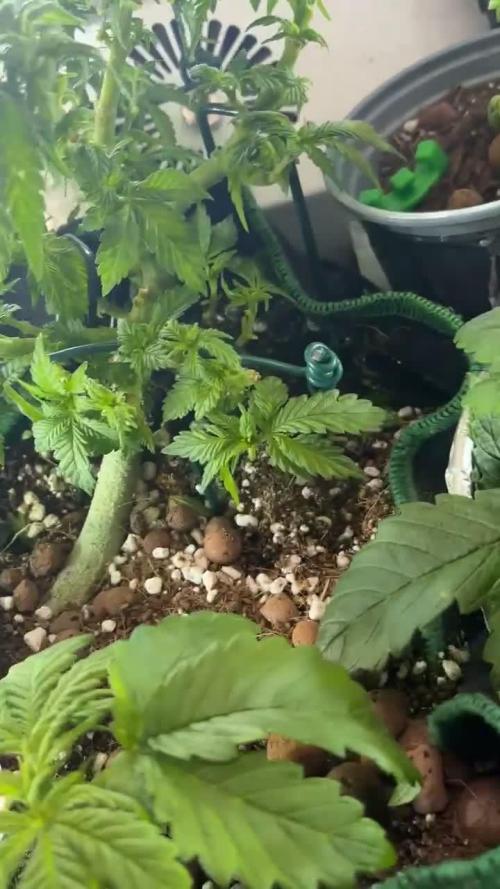
Mar 24: Watering till runoff now... runoff ppm was 2500+... Will be using very mild nutes to flush over 1 - 3 feeds... or until I am near my input. Mar 26: Continuing to use 650ppm feed with bloom focus, 2L per plant gives 15% runoff... Runoff ppm is still very high... I wanted to check pH of runoff but the color is so vibrant i cant use the pH drops to view color, need to get a pH probe. Plants are thriving, no issues at all. the extra fan fixed the post-water droop. One plant is bushy and has the most bud sites, One is the smallest but has the most uniform structure, this one has the biggest buds and thickest stalk, One is about in the middle of the 2. Mar 29: one of these girls gets droopy early when its time for water, thought the canopy was too high so i tied down some more, no cigar... gonna try increasing calmag, if that doesent work im going to reposition in the grow box to a side instead of middle, may not need the upper end ppfd...