
Likes
Comments
Share


@DogDoctorOfficial
Follow
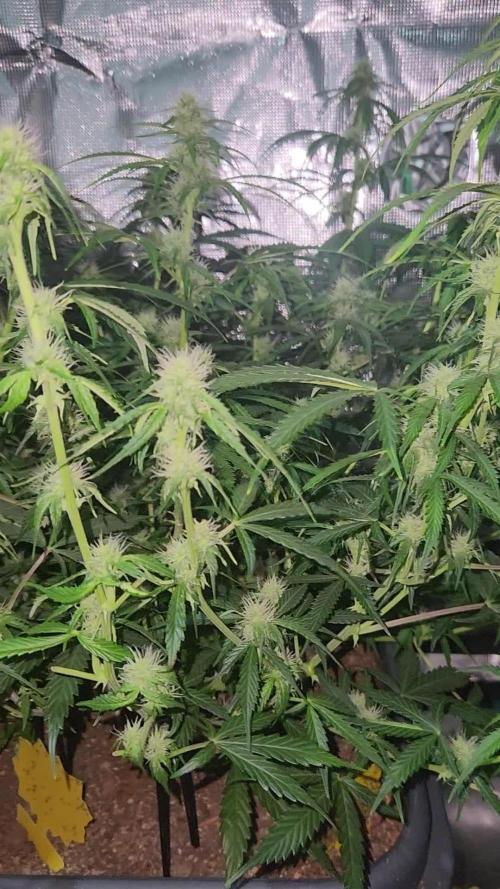
Week 13 from seed — or as we like to call it here, around Week 9 flower on this 12/12 from seed run — and the Frozen North is fully living up to its name. Outside may be rain, but inside the tent it feels like a snowstorm made of resin. Animal Mints is absolutely covered, from the tops to the sugar leaves, and every day the flowers seem to gain a new layer of frost.
This week is a very calm but very important phase. We are not “pushing” plants anymore. No heavy feeding, no forcing, no chasing numbers. Just water with Pure Zym, observation, patience, and allowing the plants to naturally finish their cycle. Last week we transitioned into this enzyme-and-water-only approach, and honestly, the reaction has been beautiful. The plants are still drinking, still swelling, still stacking weight, while the fade slowly begins to paint the leaves with those late-flower colors we love to see.
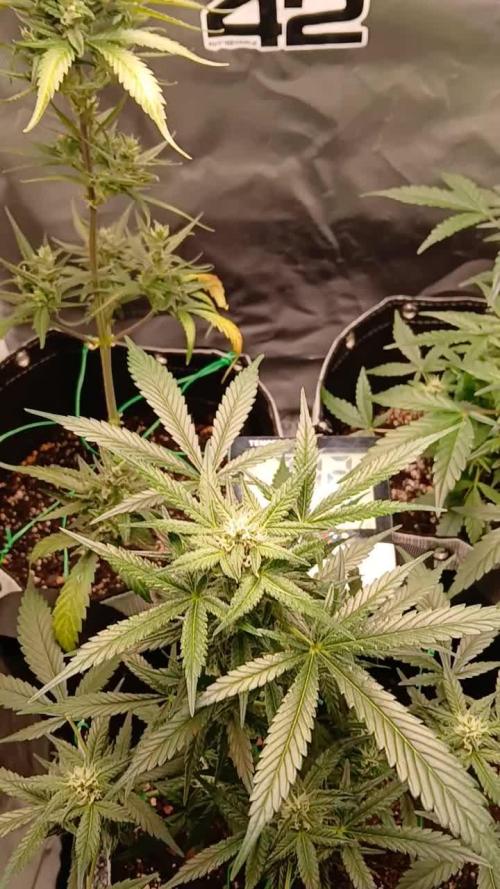
And this is exactly why these plants look different from many traditional grows. From the beginning, this run followed a simple philosophy: let the plants work efficiently instead of endlessly forcing growth. 12/12 from seed creates a very unique structure and rhythm. The plants stay more focused, more direct, and instead of wasting time building oversized vegetative structures, they channel energy into dense flower production early. The result is a room full of productive spears, compact stacking, incredible resin coverage, and surprisingly efficient use of space and light.
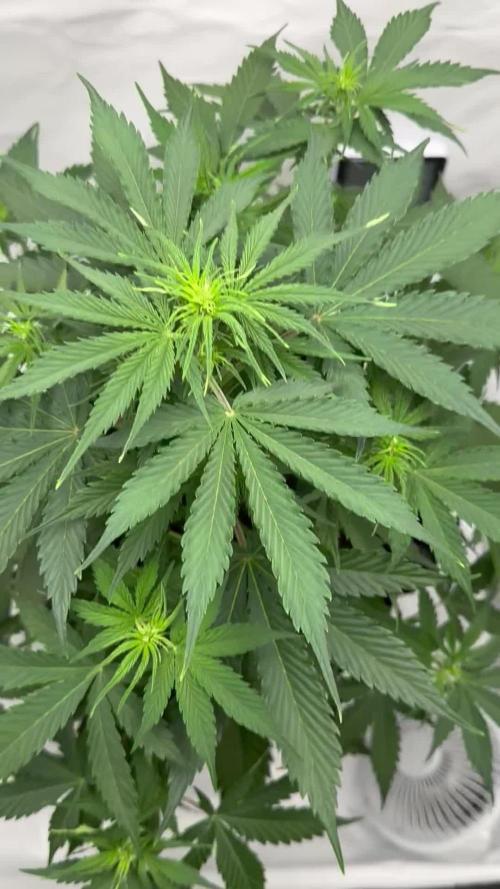
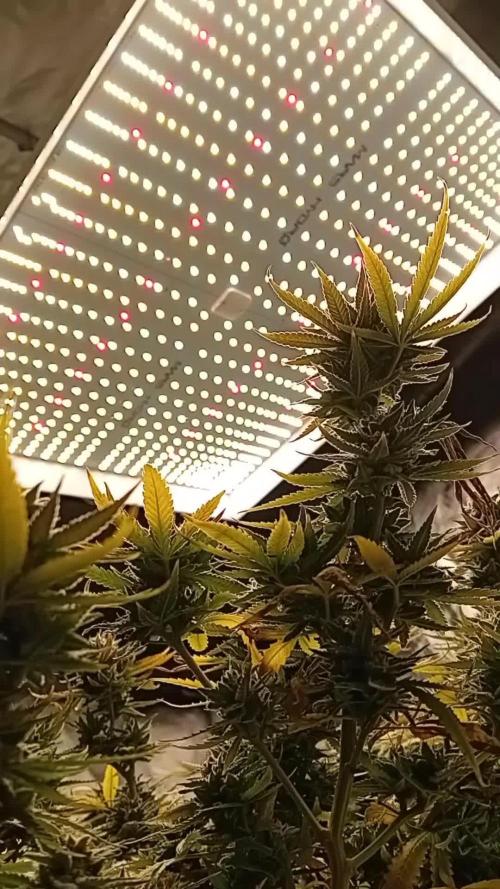
Morphologically, they really tell the story of the run. Tall but controlled structure, clean vertical development, excellent penetration, and flowers forming all across the plant instead of only at the top canopy. The under-canopy lighting deserves special mention this week because the lower and middle sections are performing way above expectations. Despite a few small LED burns on buds that grew a little too ambitious and got too close to the light, the overall effect has been amazing. Lower flowers are dense, frosty, and actually worth keeping instead of becoming forgotten popcorn. That alone says a lot.
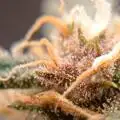
This stage now becomes almost meditative. Every day is inspection day. Checking flowers carefully for bud rot, airflow issues, hidden moisture pockets, stress signs, or anything unusual. Thankfully, everything is looking healthy and stable. Buds are getting harder, heavier, and more resinous by the day. Some pistils are already turning orange and brown, calyxes are swelling beautifully, and trichomes are slowly starting their transition. Right now we still see a lot of clear heads, with only a few amber trichomes appearing here and there. The goal remains the same: waiting for that beautiful mostly-cloudy window before making the final harvest decision.
And honestly, this is where patience matters most. At this point, harvest timing is no longer measured in weeks on paper, but in daily plant evolution. Maybe next week becomes harvest week. Maybe the one after. The plants will decide. For now, they are still packing weight, still evolving, still teaching.
Environmentally, temperatures may not follow the “perfect textbook grow chart,” but the plants clearly did not read the textbook either. They are happy, praying, resin-heavy, and productive. Sometimes the best approach is simply reading the room instead of forcing strict VPD perfection. Stable plants matter more than perfect charts.
The macros this week also tell an incredible story. Frost coverage is reaching extreme levels, trichome stalks standing tall, resin heads clustering together like tiny crystal forests. Some of the close-up shots almost stop looking like flowers and start looking like another world entirely. This is one of those weeks where photography becomes part of the grow itself. Bringing plants into the studio, documenting the late-flower transformation, capturing the fade, the resin, the imperfections, the beauty — all of that becomes part of preserving the journey.
And finally, massive thanks to everybody involved in this run and in this journey overall:
Zamnesia for the genetics.
Plagron for the support.
The sponsors and equipment partners.
Grow Diaries for providing the platform.
The community following since day one.
The new growers arriving every week.
The experienced growers sharing knowledge.
The skeptics, the lurkers, the silent supporters, even the haters — everybody crossing paths here contributes something to the energy of the project.
From grower to growers: thank you for being here.
Now we keep observing, keep learning, keep respecting the process, and let the Frozen North finish writing its legend.
📡 DELETED @ 1K Please stay tuned.we never quit https://www.youtube.com/@TheDogDoctorOfficial NEW 🙏 Thank you for your patience and continued support.
FOR DISCOUNT CODES AND MORE JUST FOLLOW THE LINK https://website.beacons.ai/dogdoctorofficial
📲 Don’t forget to Subscribe and follow me on Instagram and YouTube @DogDoctorOfficial for exclusive content, real-time updates, and behind-the-scenes magic. We’ve got so much more coming, including transplanting and all the amazing techniques that go along with it. You won’t want to miss it.
GrowDiaries Journal: https://growdiaries.com/grower/dogdoctorofficial
Instagram: https://www.instagram.com/dogdoctorofficial/
YouTube: https://www.youtube.com/@dogdoctorofficial Deleted by Youtube - https://www.youtube.com/@TheDogDoctorOfficial NEW
Vimeo : https://vimeo.com/dogdoctorofficial Under construction stay tuned ⸻
Explore the Gear that Powers My Grow
If you’re curious about the tech I’m using, check out these links:
🔆 Lighting & Environmental Control
• Future of Grow — Advanced LED lighting technology
https://www.futureofgrow.com/
DISCOUNT CODE: DOG20
• Lumiflora — Under-canopy LED lighting
https://lumiflorade.com/
• TrollMaster — Environmental controllers and automation gear (past collaboration)
⸻
Genetics
• Zamnesia Seeds — Genetics used in this project
https://www.zamnesia.com/
⸻
🌱 Soil, Substrates, Boosters & Root Support
• Plagron — Substrates, bio mixes, and supportive products
https://plagron.com/en/
⸻
🎒 Storage, Curing & Preservation
• Grove Bags — Curing and storage solutions
https://grovebags.com/
⸻
📸 Photography Equipment & Tools
(Not sponsors, but part of my creative toolkit)
• Sony A6700
• Sony full-frame macro lens + few more
• Stacking photography workflow - learning
• iPhone (for behind-the-scenes shots)
We’ve got much more coming as we move through the grow cycles. Trust me, you won’t want to miss the next steps, let’s push the boundaries of indoor horticulture together!
As always, this is shared for educational purposes, aiming to spread understanding and appreciation for this plant. Let’s celebrate it responsibly and continue to learn and grow together.
With true love comes happiness. Always believe in yourself, and always do things expecting nothing and with an open heart. Be a giver, and the universe will give back in ways you could never imagine.
💚 Growers love to all 💚
📸 P.S. – The Eye Behind the Lens
All photos in this diary (for now — except for the ones showing the camera, which I took with an iPhone) are taken with a Sony A6700 paired with a Sony full-frame macro lens and a few more.
Photography is part of the story — it’s how we share the fine textures, the glow, and the quiet details that words can’t always capture.
I’ve also started experimenting with photo stacking — a technique where multiple images, each taken at a slightly different focus point, are layered together to create one perfectly sharp image from front to back.
It’s not digital enhancement or AI; it’s pure photography — a way to reveal the plant’s beauty in microscopic depth, from trichome to petal.
You’ll even see a few shots of "ghost me" capturing the shots — camera, lens, setup — because every grow deserves not just to be cultivated, but documented like art.
FOR DISCOUNT CODES AND MORE JUST FOLLOW THE LINK https://website.beacons.ai/dogdoctorofficial
NEW DISCORD - Official Server Invite Link : https://discord.gg/ksjAkA5T74

Likes
81
Share


@SwedenX
Follow
Hi.
it was another week in bloom. she is eighty-four days old now. this is the last update before harvest because now she is ready to be harvested. have checked the trichomes every day and now they are perfect. became two weeks of flush. I am so happy with this plant did not have any worries at all, and can recommend everyone to try this strain. she smells absolutely wonderful, deep citrus, pine, and sweet mango.
thank you @Fast_Buds for having such outstanding genetics! tomorrow she will be cut down.
thank you for stopping by.
and have a green Christmas

Likes
Comments
Share
@Bobbo94
Follow
10th week, the smaller Strawberry G was already harvested. 5 grams dry weight. Twig snap two days ago I was out smoked it. Head buzz, Strawberry taste was light and delicious. High lasted about 4 hours. I have a habit of harvesting with hardly any amber so the potency is at its peak.
Likes
11
Share


@TheThiccBud
Follow
Today was the day I gave the plants the last nutrient cocktail 💤 next week i'll only give you water to rinse the plants😙 But the smell of this beauties are awsome i love the toxic smell from the amnesia but you can smell the sweet Bananna too but the amnesia is wayy stronger XD😊

Likes
112
Share


@PEAKYPLANTERS
Follow
hi to all, masters and beginners!
welcome to a new week of cultivation with the peaky queen
let's cook these flowers a little more to make sure they have more powerful effects and to make the lower part develop well
stay up to date!!
we will begin by removing some of the excess nutrients in the soil and then giving only water on the next round 😎👽


Likes
46
Share


@Crwfz1
Follow
She's doing damn great starting to die off tho I think I let pH get a little too high but it's good she'll pull out ajdusting for it she's almost done gonna havrest slightly early I normally prefer about 20 percent amber trics gonna check with microsope end of the week nugs are absolutely hard as rocks this bàbby is gonna go out with a bang that's for sure ! Soon to start diarie on my other two babies I got on the side

Processing
Likes
5
Share


@blacknpearl
Follow
Soil is drying a lot better now because of the improved airflow.
nov 15. megacrop 1.06gr/litre ph'ed at 6.05. about 250 ml
nov 18. megacrop 1.06gr/litre ph'ed at 6.05. about 250 ml
nov 20. megacrop 1.06gr/litre ph'ed at 6.3. about 400 ml
nov 20. LSTed against the net in the back. Changed the LED position and upped it to about 75% from around 50%

Likes
142
Share


@MadeInGermany
Follow
Hi everyone 🤗
This week the two Kosher Tangie Kush were harvested by Amsterdam Genetics 😍.
extremely good phenotypes. The blue cheese pheno 2 and 3 were placed in the darkroom according to the video.
These were harvested yesterday, from which the pictures will come in the next update :-).
All others need 2-3 weeks.
I wish you lots of fun with the diary, stay healthy 🙏🏻 and let it grow 🌱


Likes
4
Share

@MaltaHerbman
Follow
Last few weeks of the Dank Berry she filled house with smell 😘.
So far she done very good and is easy to grow.As all anesia seeds she like nitrients.
Waiting some more before flush as buds are still getting fatter.

Likes
4
Share


@Regulator3000
Follow
In the past week the buds have bulked up a lot. Almost doubled in size. Everything is moving along smoothly and I’m excited to see what happens. I’m hoping they keep bulking up they way they have been. Should be about time to flush.
Likes
62
Share


@Santica_Garden
Follow
So apart from the really low yields.... Which I expected from 80% Indica dominant strains just not that low considering how dense the Budz were. But I can say my growing skills have been consistently improving and it is showing with each grow.
With these ladies I should have definitely put them in a 12Litre pot or smaller and still would have gotten the same results if not better. So I lesson learnt for future grows..... To take into consideration the size pots I'm using on the strains I'm running! 👍🏾
But in all very great smoke, even more excited for the next rows that I have coming with the improvements I will be making. 👍🏾🌱💚
Another thing I will say is that I will be putting more effort into how I document my harvest for you guys.... More pictures, better videos showing off the Budz.... Not many pictures because I done smoked it all 😅😅🔥🔥🔥 but still I want to do better for you guys, I want to give people the best view/review of the strains that I run... The information will help someone that decides they might want to run this strain in the future!
Any questions guys just ask away 👊🏾😎


Likes
12
Share


@Bryankush
Follow
Probabilmente il topping del ramo apicale non è stata la migliore cosa per me, mi servirà di lezione per la prossima estate.


Likes
39
Share


@Belverde
Follow
Plants really very resistant and above all resinous..
I'm sorry not to have even posted the vegetative phase, it will be for next time..
With them I used a substrate filled for about half with light-mix
cocomix
perlite
humus
guano kalong ( bloom)
mycorrhite ..the upper part only Light-mix with perlite coconut.. In the vegetative phase I gave them only the root juice the few nutrients already present in the light-mix..
The light that I used is a 205w Black-dog phytomax 2-200..
The total of the light must be subdivided as well as their two also another Peyote C.
n ° 2 LSD autoflowering (for the whole first month of flowering)
n ° 3Cookies Kush (in the last two weeks)..
So the final weight in flowers has probably been affected enough ...but the quality is the quantity of the resin and it was really exceptional ..
Vaporizer test (mighty / ghosmv1) 180/185/190 °..taste on the classic line of kush, but with sweet notes of vanilla, coffee in mix with an earthy and pungent base, but not persistent..
Very good ...
Relaxing effect but not by "locking sofa"..
Mind quite clear and focused..like good kush ..
Of Critical has taken a lot in the structure of the plant, but also a little bit in the flavor with some fresh" notes "referable to some fruit like mango / lemon, just a pinch..
I think it is suitable for making extractions..
With secondary peaks and resin-laden leaves I will most likely make a coconut oil, to eat alone or in a mix where I happen to be..
Strain recommended for everyone ..
Excellent for beginners..
Thanks for reading..
🙏🌱😊
Likes
37
Share


@Rob96
Follow
Cut net down this week and had a reshuffle around, dos si dos was a lot taller so move lights up and put other 3 plants on top on boxes to level top as much as i can
Had to do a little late trimming to help airflow down low and just give a little more breathing space as suffered with a little rot on my first grow luckily not too bad though but fingers crossed none at all this time, i managed to avoid it on my secone grow so hopefully will be ok
Plant looks strong and healthy, had no issues so far plenty of tops cant wait to see it fatten up
Likes
7
Share


@Jeromearound
Follow
Banging ! Good grow still have 3 girls too chop and they are bigger !!! I’ve killed it