
Likes
Comments
Share

@DogDoctorOfficial
Follow
Before starting this harvest chapter, I want to apologize once again for not uploading everything directly into the official harvest and smoke review tabs.
GrowDiaries has been struggling a little with very large uploads lately, and with the amount of photos, videos and information involved in this Ghost Train Haze harvest, I decided to split everything into multiple parts to make sure nothing gets lost or broken during upload.
And honestly… this plant deserves the full story.
So welcome to Part 1 of the Ghost Train Haze harvest. 🌱✨
Before talking about harvest itself, let’s do a quick recap of how we even arrived here.
This was another 12/12-from-seed run.
No traditional vegging.
Very little manipulation.
Minimal training.
Mostly just letting the plants naturally express themselves while guiding environment, airflow, watering and light intensity carefully around them.
Instead of forcing the plants into a shape, the goal here was to let them grow naturally into the PPFD and into the environment themselves.
And wow…
Ghost Train Haze really showed personality during this run.
Most of the attention naturally went toward the massive main plant everybody keeps seeing in the photos — the giant colorful spear covered in fading reds, dark purples and swollen flowers — but there were multiple plants in this room, and in this harvest report we’ll finally start talking about all of them and the different directions they took after harvest.
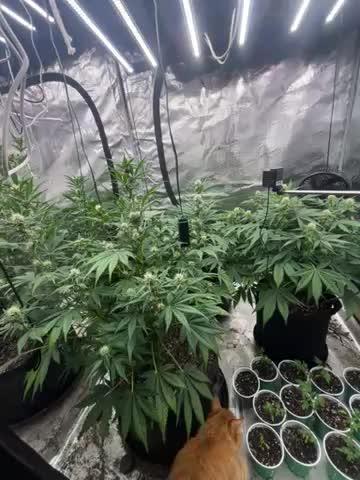
By Week 14, the room looked absolutely incredible.
The fading on these plants became something special.
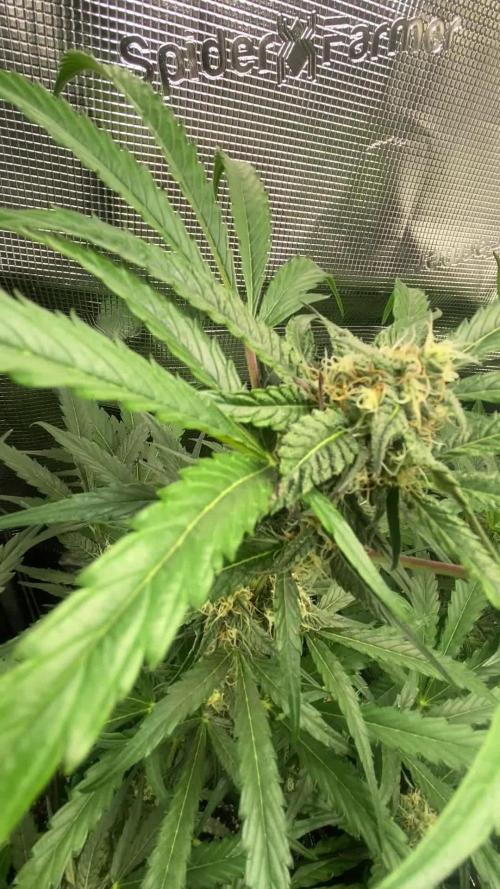
Deep reds.
Dark purples.
Almost black tones in some areas.
Golden fading leaves.
Heavy trichome coverage.
Color spreading through the sugar leaves and surrounding flower tissue.
One of those harvests where the plants almost stop looking real.
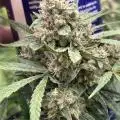
And underneath all those colors:
extremely heavy flowers.
Dense.
Massive.
Sharp aromas.
Long spears everywhere.
The branches became so heavy during late flower that support was absolutely necessary. Yo-yos were holding branches constantly, helping prevent collapse under the weight of the flowers.
And the moment the supports came out during harvest…
everything opened and leaned downward immediately under its own weight.
That alone says a lot about the size and density of these flowers.
There are photos in this report where I’m holding entire plants, and honestly, seeing them outside the tent really puts scale into perspective. It’s one of those plants that instantly makes you imagine how unbelievably huge she could become outdoors in native soil with unrestricted root space.
Harvest day finally arrived, and from there the project split into two different paths.
Some plants were harvested whole and hung for traditional drying.
Others were fully broken down, every single flower removed from the branches, vacuum sealed into bags and immediately frozen for ice-water extraction work.
And this is where things start becoming really interesting.
Because this report is not only about harvesting flower.
It’s also about exploring different post-harvest directions and understanding why growers process material differently depending on their goals.
The flowers selected for traditional drying will continue their journey in Part 2, where we’ll focus much more deeply on drying conditions, moisture management, branch snapping, trimming and curing.
But for now…
let’s talk about the frozen material and ice-water extraction. ❄️
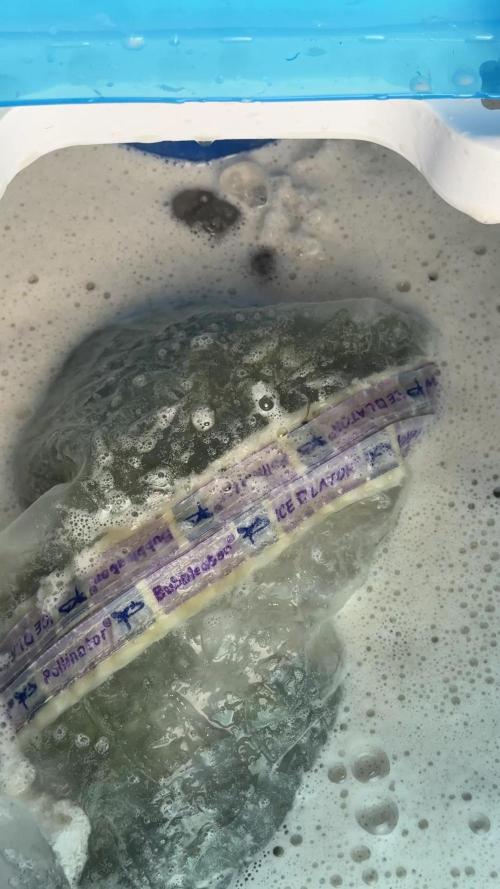
After harvesting, the flowers destined for washing were separated carefully and placed into vacuum bags before going into the freezer.
Freezing fresh material helps preserve volatile compounds, terpene expression and trichome integrity while preparing the flowers for ice-water extraction.
And no — this is not simply “throwing weed into ice.”
There’s actual science and technique behind this process.
Before washing, the frozen material is combined with ice and extremely cold water, ideally close to 0°C. The goal is to make the trichome heads brittle enough to detach cleanly while keeping unwanted plant contamination as low as possible.
At the same time, the flowers need time to fully soak and rehydrate slightly before agitation starts. This helps reduce excessive breakage of plant material during washing.
And then comes the wash itself.
The bubble washer machine agitates the mixture gently, allowing trichome heads to separate naturally from the plant material and suspend inside the cold water.
From there, the water passes through a series of filtration bags with different micron sizes.
25 micron.
45 micron.
73 micron.
90 micron.
120 micron.
160 micron.
220 micron.
Each size captures different grades and sizes of resin heads and contaminants.
We are not using every single bag configuration during this run, and we’ll go much deeper into grading, collection quality, drying and final results later in the series. But since this report already includes videos and photos of the process itself, I thought this was the perfect moment to explain what ice-water extraction actually is — and what it is not.
This process is not about adding anything.
It’s about separating what the plant already naturally created.
Water.
Ice.
Agitation.
Filtration.
Patience.
That’s it.
And honestly…
watching these resin-covered flowers moving inside ice water almost feels hypnotic.
The harvest itself may be finished…
but the real post-harvest journey is only beginning now.
This report will continue in the next update very soon because there is simply too much material, too many photos and too much information to fit properly into a single upload without risking GrowDiaries crashing or losing content again.
Part 2 will continue deeper into:
the drying process,
environmental control,
trimming,
flower handling,
and the continuation of both post-harvest paths.
And eventually, Part 3 will close the circle with curing, smoke review, flavors, extraction reflections, effects and final thoughts.
As always, thank you to everybody following this journey.
To Zamnesia for the genetics.
To Plagron for the nutrition.
To all the gear keeping this room alive day after day.
To GrowDiaries itself.
To the community.
To the longtime followers and OGs.
To the new people arriving every day.
To the curious ones.
To the silent supporters.
To the lovers.
To the skeptics.
To the haters.
To everyone who stopped by, even for a moment.
Thank you for being here. 🌱
Part 2 coming very soon. ✨
📡 DELETED @ 1K Please stay tuned.we never quit https://www.youtube.com/@TheDogDoctorOfficial NEW 🙏 Thank you for your patience and continued support.
FOR DISCOUNT CODES AND MORE JUST FOLLOW THE LINK https://website.beacons.ai/dogdoctorofficial
📲 Don’t forget to Subscribe and follow me on Instagram and YouTube @DogDoctorOfficial for exclusive content, real-time updates, and behind-the-scenes magic. We’ve got so much more coming, including transplanting and all the amazing techniques that go along with it. You won’t want to miss it.
GrowDiaries Journal: https://growdiaries.com/grower/dogdoctorofficial
Instagram: https://www.instagram.com/dogdoctorofficial/
YouTube: https://www.youtube.com/@dogdoctorofficial Deleted by Youtube - https://www.youtube.com/@TheDogDoctorOfficial NEW
Vimeo : https://vimeo.com/dogdoctorofficial Under construction stay tuned ⸻
Explore the Gear that Powers My Grow
If you’re curious about the tech I’m using, check out these links:
🔆 Lighting & Environmental Control
• Future of Grow — Advanced LED lighting technology
https://www.futureofgrow.com/
DISCOUNT CODE: DOG20
• Lumiflora — Under-canopy LED lighting
https://lumiflorade.com/
• TrollMaster — Environmental controllers and automation gear (past collaboration)
⸻
Genetics
• Zamnesia Seeds — Genetics used in this project
https://www.zamnesia.com/
⸻
🌱 Soil, Substrates, Boosters & Root Support
• Plagron — Substrates, bio mixes, and supportive products
https://plagron.com/en/
⸻
🎒 Storage, Curing & Preservation
• Grove Bags — Curing and storage solutions
https://grovebags.com/
⸻
📸 Photography Equipment & Tools
(Not sponsors, but part of my creative toolkit)
• Sony A6700
• Sony full-frame macro lens + few more
• Stacking photography workflow - learning
• iPhone (for behind-the-scenes shots)
We’ve got much more coming as we move through the grow cycles. Trust me, you won’t want to miss the next steps, let’s push the boundaries of indoor horticulture together!
As always, this is shared for educational purposes, aiming to spread understanding and appreciation for this plant. Let’s celebrate it responsibly and continue to learn and grow together.
With true love comes happiness. Always believe in yourself, and always do things expecting nothing and with an open heart. Be a giver, and the universe will give back in ways you could never imagine.
💚 Growers love to all 💚
📸 P.S. – The Eye Behind the Lens
All photos in this diary (for now — except for the ones showing the camera, which I took with an iPhone) are taken with a Sony A6700 paired with a Sony full-frame macro lens and a few more.
Photography is part of the story — it’s how we share the fine textures, the glow, and the quiet details that words can’t always capture.
I’ve also started experimenting with photo stacking — a technique where multiple images, each taken at a slightly different focus point, are layered together to create one perfectly sharp image from front to back.
It’s not digital enhancement or AI; it’s pure photography — a way to reveal the plant’s beauty in microscopic depth, from trichome to petal.
You’ll even see a few shots of "ghost me" capturing the shots — camera, lens, setup — because every grow deserves not just to be cultivated, but documented like art.
FOR DISCOUNT CODES AND MORE JUST FOLLOW THE LINK https://website.beacons.ai/dogdoctorofficial
NEW DISCORD - Official Server Invite Link : https://discord.gg/ksjAkA5T74

Likes
32
Share


@MadeInGermany
Follow
Unfortunately, I had to find out that my account is used for fake pages in social media.
I am only active here on growdiaries.
I am not on facebook instagram twitter etc All accounts except this one are fake.
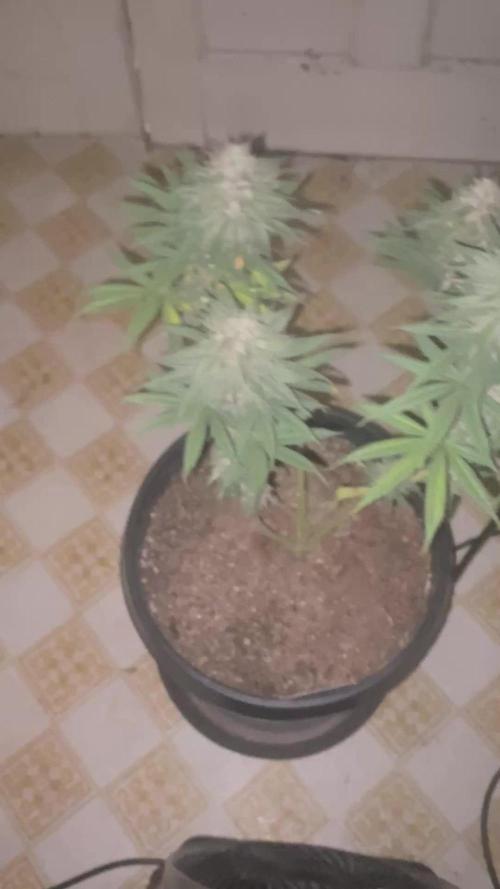
Flowering day 20
since time change
to 12/12.
Hi everyone 😃.
The lady continues to develop very nicely :-).
The buds get thicker and look tastier 😅.
This week it was poured 2 times with 1.2 l each time.
The tent was cleaned and everything checked for functionality.
Have fun and stay healthy 🙏🏻
You can buy this Strain at :
www.Zamnesia.com
Type:
Runtz
☝️🏼
Genetics:
Zkittlez x Gelato
👍
Vega lamp: 2 x Todogrow Led
Quantum Board 100 W
💡
Bloom Lamp : 2 x Todogrow Led
Cxb 3590 COB 3500 K 205 W
💡💡☝️🏼
Soil : Bio Bizz Coco
☝️🏼
Nutrients : Green House Seeds Company Powder Feeding Bio
☝️🏼🌱
Water: Osmosis water mixed with normal water (24 hours stale that the chlorine evaporates) to 0.2 EC. Add Cal / Mag to 0.4 Ec Ph with Organic Ph - to 5.8
Likes
26
Share


@Hansgrube
Follow
😎 Weekly Update: The plant has growth to 70cm height at day 36 :)
🔪 Most of defoliation and lollipoping has been done - trying not to stress the auto too much.
🌹 LST Update: I do branch a day - so I began 5 branches training by now.
Weekly thought 💭 : I think I do not know much about auto's - considering to do some HST, the upper leaves are really big, watery and makes a lot of shade.
I took very little off. Do you think its ok to remove them all?
😮 Day 38 Update: She has grown 10cm / 4" in 48 hours. I hope she’s done stretching because I have no power left to lift my lights every other day 😷
Day 36: 69Cm/27.1" ---> Day 38: 79.5 Cm/31.3" 💥 🥊
First cloning attempt ever seem to be a success :)
P.s
She drinks almost a gallon per day - never seen anything like that before. Luckily I am using DWC otherwise I would never dare to water one gallon every day.
See you next week - Stay tuned 💥 😝

Likes
11
Share


Likes
18
Share


@emanresU
Follow
Edit from 19th May. Literally 00:09
Pre-Flowering.
Fat Banana looks like Hermie.
Royal Critical = clean pre-flower.
Edit from 19th May. 16:26
Fat Banana had balls sack and pistils growing all over the place. I nuked everything that had balls on it. I left only top node with pistils.
Royal Critical is full of pistils, no balls.
Now I wish I had photoperiod seeds instead of automatics. I would give Critical 1 extra week in veg. She is around 10-15cm smaller then Fat Banana.
I switched the lights back to 400W.
Edit from 20th May. 14:45
I think 32C is maximum what these plants can handle. With 600W I was reaching 34C on some top leaves and that could possibly turn the Fat Banana into hermit (she was the tallest). I open the tent a little (front doors), I put big-ass fan on second gear blowing strong wind through the mesh-window of a tent. I put the lights straight up to the ceiling, I literally can't put them any higher.
Fat banana is now 58cm tall and around 80cm away from the light.
Royal Critical is now 41cm tall and around 100cm away from the light.
50% Humidity
28C under the canopy/on the ground under the leaves
31C Air temperature.
Fat Banana fan leaves temperature: 28.5C
Fat Banana center/middle of the plant: 30.9C
Royal Critical fan leaves temperature: 27.5C
Royal Critical center/middle of the plant: 27.8C
NOTE: Royal Critical ugly/yellow leaves have higher temp: 29-30C
The rest of small plants range from 28 and 32C
Surface area/soil temperature DRY: 35C
Surface/Soil temp. WET/SHADOW: 28-29C
That pistol/laser for checking temps was solid purchase. I can see back of my tent is more hot then other areas. Will do more Temp-Checks in the future.
I also deleted few things from "Condition" tab because one day they are correct, the other something change and the info is not accurate anymore. I'll update info here in edits.
~~~~~~~~~~~~~~~~~~~~
Farm Control Sheet
Date: 20th May 2024
Time: 16:57
Tent status: Side doors little bit open. Both windows fully open. Fan blowing air on second gear outside the tent, West window. Fan insides on full.
Lights power: 400W
Lights schedule: 18/6
Humidity: 50%
Dry soil temp: 35C
Wet soil temp:
28.5C
Fan leaves temp: 28.5C
Center of the flower temp: 30C
Stem temp: ~32C
Air temp. Inside tent: 30-32C
Air temp. Outside tent: 25.5C
Air temp. Outside house:
21C
~~~~~~~~~~~~~~
Farm Control Sheet
Date:
21th May 2024
Time:
15:53
Tent status:
Side windows full open. Front doors 75% open. Big-ass-fan on second gearwest window.
Lights power:
400W
Lights schedule:
18/6
Humidity:
50%
Dry soil temp:
36C-38C in front // 38C-40C in back
Wet soil temp:
Fan leaves temp: 28-29C
Stem temp: 29C
Air temp. Inside tent: 31C
Air temp. Outside tent:
26C
Air temp. Outside house: 20C
Details:
Smol plants growing stronk! They have little bit crumbled leaves cuz of heat I guess.
32C @ 50% RH is max for my setup.
Edit from 22th May. @ 13:10
Nothing changes. Plants are happy and praying to their god ( me ofc :) )
Same temps
Same RH
I watered them yesterday after long days/weeks of dry season (cuz of FuckYouGnats).
Edit from 23th May. @ 11:40am
Same temps or even a bit lower then in last two days. I like it. I closed 85% of windows in tent (door fully closed) to create negative pressure that's gonna suck out the hot air. It seems to work better than what I did yesterday.
Today I gave them second dose of nematodes. There is really very little Fungus Gnats around now. Sometimes, occasionally one or two "teenagers" or "baby" Gnats would fly out from bottom of pot or top of the soil after watering but that's like nothing comparing to what I had at the beginning.
Shit-ton of yellow-sticky-tape does the job as well, just put it everywhere you can.
/ What I'm singing to Lady Banan?
https://www.youtube.com/watch?v=OZEddFi1W8k
/ What I'm singing to Lady Banan?
Edit from 23th May @ 2pm
So I'm reading about VPD now and I think, this is what is happening in my tent right now. High temps but RH at right levels makes the plant comfy in that zones.
Right now plants sitting at 30.6C @ 55% RH
So I'm sitting at 1.27 VPD? If I could lower my temps to 29C and keep RH at 55% that would be 1.20 VPD (which would be perfect)
N o t B a d R o o k I e
Edit from 24th May @ 11:24 am
So in last 3 days the temperature outside my house is dropping + raining. So that means I have perfect VPD in my tent now. We are sitting at 30C @ 50-55% RH. Most plants have praying leaves, even Lady Banan stops being moody and just start fucking flowering like it should. Finally. But I can see she wanna grow even more upwards, like wtf, this is not 3 meter tent, its only 2.2m, chill the freaking out Lady Banan... Im gonna have literal forest if the rest of Bananas would grow like that.
As you can see I'm kinda happy with the grow now. Fungus Gnats still present but under control. Yellow Sticky tape, especially under the mesh window, the tape is catching fuck-ton of these motherfuckers.
Few days ago I did "Very Light Stress Training" with Royal Critical. So I basically just tackle the fan leaves in the way, where, when fan leaves are growing bigger, they push the side branches more to the outside (apologize for my English but you can check out the pictures and see what I mean). So she is training by her self, alone, with the power of nature = and it works, she is opening more and more every 2 days.
Edit from 25th May @ 21:53
Yoyoyoyoyoyo! So my ADHD and Bipolar kicks in so Idgaf about temps, its colder, around 29C @ 45%
They got a lot of fresh air today, I was "luchting" today.
I think I had to water them today but... Will do tomorrow morning.
I'm thinking about Pimpology classes for myself, for better communication with the bitches, you know what I mean... They ain't thickening up if they aint stressing!
Edit from 26th May. Sunday. 7am
DOUBLE DROP
NEVER STOP
LET THAT BEAUTY POP
69
PLANT SIZE:
BANAN = 72CM
CRITICAL = 65CM
😎

Likes
11
Share

Likes
4
Share


@Organic473
Follow
So far she looks promising...I am extending her light hours with the solar power light. We are at the end of the rainy season heading into dry season.

Likes
26
Share

@G_Germination
Follow
Buds are starting to get chunky still Got a lot of growth to go … I also oxygenated my feed but we starting to see them mature


Likes
4
Share


@Drtomb
Follow
Just starting day 14 of flower. Plant has been trimmed occasionally. Taking any Sucker branches that stray from the main stem by more than 2". Ill begin to be more choosy on the branches removed. Almost ready to set autopilot.. Just one more week folks!

Likes
44
Share


@Papablob
Follow
16/05 Plus d'essuie-tout pour moi. J'ai eu des problèmes avec.🤬 Les mouchoirs en papier, après déboires et réflexions, me semble moins toxique.🤞 jusque là tout vas bien.😅
Encore merci à RQS pour c'est super graines et désolé pour les 2 mortes empoisonné par de l'essuie-tout "BIO".😨 il m'a couter 4 graines avant que je comprenne..🤬
Royal queen seed
https://www.royalqueenseeds.com/56-f1-hybrid-cannabis-seeds
Likes
23
Share


@adam_pawloski87
Follow
This week has been great ,today is day 78 and the girls are just doin their thang , 1 looks ready for flush already and the rest look about another longer then flush for them aswell,, can’t wait to see how these girls finish out over the next couple of weeks 😍!! Y’all keep them eyes peeled an stay tuned for next week! Peace love an positive vibes to y’all Cheers.💨💨💨


Likes
44
Share


@BB_UK
Follow
Well she’s in flush and I’m hoping for a great finish with some beautiful fades! She smells of sweet fruits and a deep smell of dank defiantly an OG dominating! Can’t wait to start her sister blackberry OG got my new tent now thanks to my sponsor! So will have more room to grow my plants properly! Under my 2x TS1000’s

Likes
15
Share


@Mrs_Larimar
Follow
2022-11-21
Those Plants are frosty like winter.
holy moly
I got 4 female Plants and 2 Phenos
One is shorter, the other one larger, but both are fantastic frosty
tomorrow i show you the ones in the Urban Chili, thses Pics are fro My Floweringroom
Iam using the urban Chili 2.0 and the urban Chili 3.0
the biggest Difference is the Light
the urban Chili 3.0 has 20 watts more
https://urbanchili.eu/en/growbox-specification/
All Plants look fine, lets see what the next Week brings.
so far so good
Likes
18
Share


@Mr_weed_pt
Follow
One more week..the buds are looking great and the smell is really sweet…


Likes
6
Share


@greenbeans420
Follow
Noticed PK deficiency in leaves so added 2 tablespoons on happy frog Bone Meal and 2 tablespoons on Down to earth...
Week 9. Plants liked the added PK but damage was dealt plants getting a heavy flushing.