


Likes
Comments
Share

@UDUDUDUDU
Follow
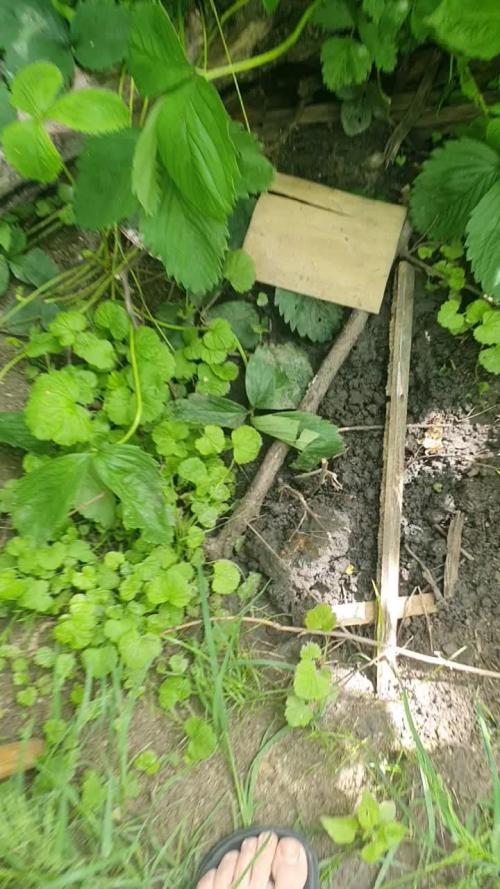
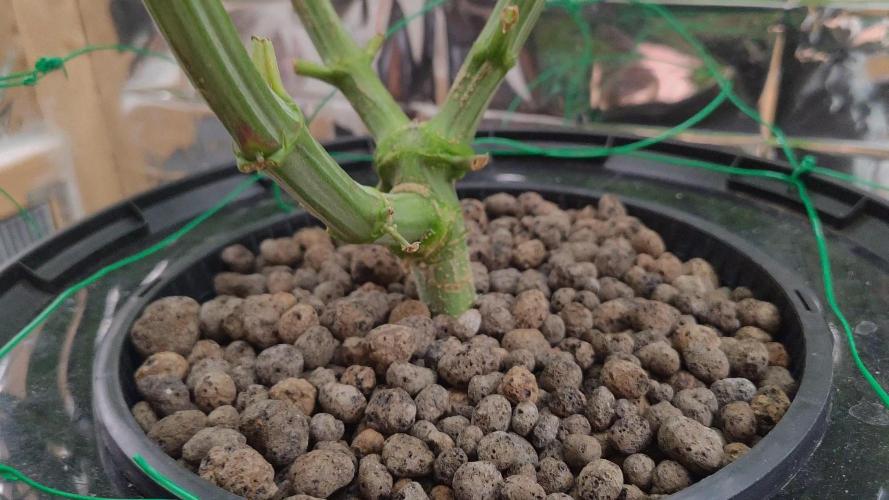
it got eaten by slugs after a heavy rain' now itz DeaD
YaY.
What did I learnt from all this ? I am an Idiot.
I actually thought all those twigs would keep de slugs off.

Likes
Comments
Share

@Northern_Ent
Follow
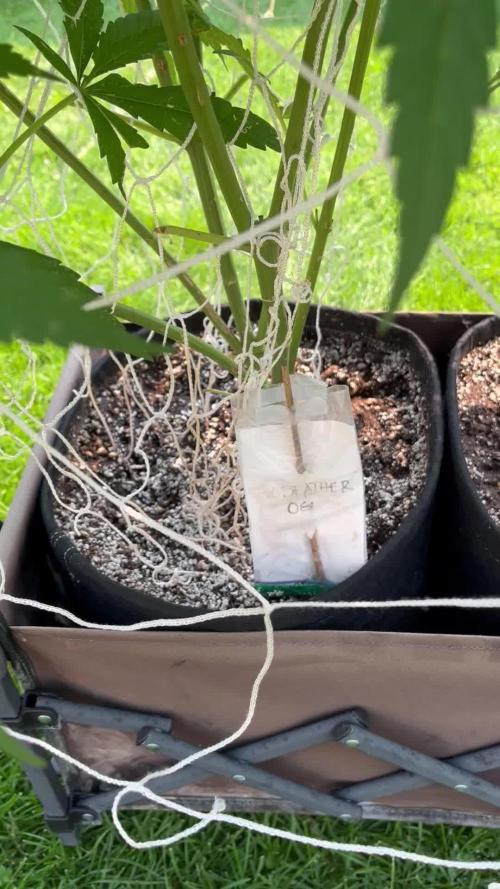
Aug 1: doing great. Added another scrog net and clipped it to the lower net that is tied off with 500 g weights to gently hold things apart to let sunlight in. I guess I’m aiming for a hemispherical shape because I have two plants in the wagon.
Had hail net out for an hour. Brief hard rain but no hail this time.

Likes
3
Share

@AcidBurn_41
Follow
17.09.25
BT#19
Servus ✌️ zusammen
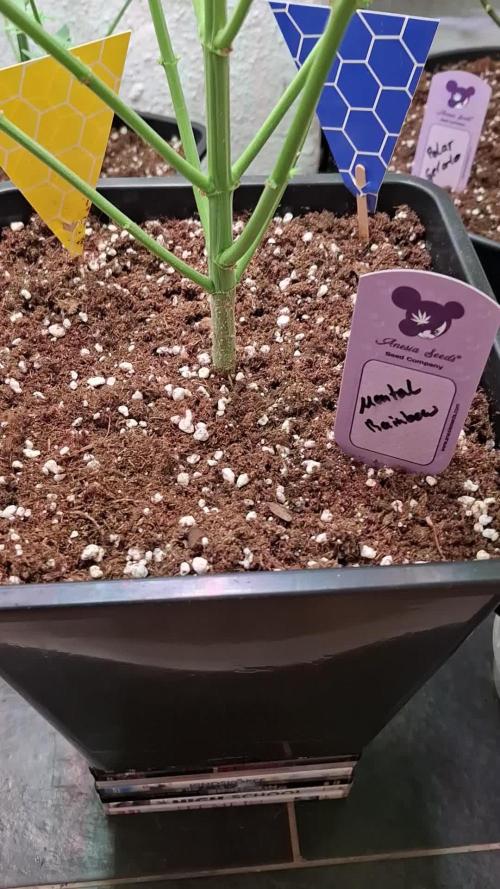
Einen Wunderschönen guten Abend 😁 die Mental Rainbow legt eine Performance an den Tag.
Die Stigmen werden immer mehr die Lady ist in der Blütephase angekommen .
Der Hesi Blüh Complex steigt um 1ml pro L der Hesi TNT Complex geht runter um 1ml/L
Dann gab es heute noch Hesi Boost 2ml/L.
Der PPFD wert liegt Aktuell bei 600 der PH wert im Medium wie Gießwasser 6,5.
Wünsche allen ne gute Nacht bis nächste Woche zur selben Zeit.
Stay High and chill 🙂
Mögen all eure Ladys Gesund und prächtig wachsen und euch mit schmackhaften Stuff versorgen 🤟
■■■■■■■■■■■■■■■■■■■■■■■■■■■■■■■
17.09.25 BT#19
Hello ✌️ together
A wonderful good evening 😁 the Mental Rainbow is putting on a performance.
The stigmas are getting more and more and the lady has reached the flowering phase.
The Hesi Bloom Complex increases by 1ml per L, the Hesi TNT Complex goes down by 1ml/L
Then today there was Hesi Boost 2ml/L.
The PPFD value is currently at 600 and the PH value in the medium and irrigation water is 6.5.
Wish everyone a good night until next week at the same time.
Stay high and chill 🙂
May all your ladies grow healthy and splendid and provide you with tasty stuff 🤟

Likes
92
Share


@DogDoctorOfficial
Follow
Week 7 Flower Report – The Masterpiece Garden Unfolds
🌱 Introduction
Welcome back to the most thrilling chapter of our journey yet! Week 7 of flower is here, and the garden has transformed into a paradise of unique beauty and diversity. Every plant has its own personality, showcasing the results of all the hard work, dedication, and love poured into this run. Let’s dive into the details and celebrate these girls like never before—because they deserve it!
🌸 Plant-by-Plant Breakdown
Papaya Zoap
The rebel queen of the garden, aiming for the stars with her towering structure. Her dense, frosty white nugs sparkle like diamonds, and her leaves are fading to a stunning yellow hue—a clear sign she’s ready to shine. Her aroma is captivating, leaving no doubt she’s going to be a showstopper.
Gorilla Melon
Standing tall as the second in command, this beauty is all strength and vigor. Her vibrant green foliage cradles thick, frosty buds that exude a fragrance worthy of her name. A true contender for the title of MVP.
RS11
This one’s a frost factory! Long, elegant buds dripping in trichomes, with leaves gracefully fading to yellow as she transitions toward the finish line. Her balanced stature and impeccable structure make her a dream to cultivate.
Green Papaya
The frostiest of them all, her sugar leaves are curling under the weight of so much resin. Every glance reveals a shimmering coat of trichomes that’s hard to believe. If frost were a competition, she’d already have the gold medal!
Mandarin Squeeze
Dark and mysterious, this beauty stands out with her rich, deep green tones and impressively dense buds. Her flowers feel like rocks, and her aroma hints at a citrusy explosion waiting to happen.
Punch Pie
What can we say about this heavyweight? Her large, dense buds are jaw-dropping, and her presence in the tent is commanding. She’s proving to be a genetic masterpiece, delivering beyond expectations.
🌞 Environmental Mastery
This week, we’ve begun the slow decline of PPFD to 750, keeping reds and UVs strong while easing back on whites—a calculated move to guide these girls into the final stages. The room’s stats speak volumes:
• Temps: 27.8°C with RH at 64.8%.
• CO2: 800 ppm for consistent growth energy.
• Reservoir: PH 6.16, TDS 791, temp 21°C.
• Soil Stats: TDS 669, temp 22°C.
Even the fun facts are worth noting: leaf temps are ranging between 26.6°C and 24.2°C, while the LED bars are holding steady at 38°C, and the ICL-300 at 35.6°C. Aero Fan at 23°C and the filter output at 24.7°C highlight the precision and control in this room, all thanks to the incredible TrolMaster ecosystem.
💧 Feeding and Nutrient Update
Our transition from organic minerals to a solo mineral approach has been a game-changer. These girls are thriving! Here’s the recipe this week:
• System Clean: 0.25 ml/L.
• RO Water Conditioner: 0.8 ml/L.
• All-in-One Liquid: 1.75 ml/L.
• K-Boost: 0.5 ml/L.
• Regulator: 0.15 ml/L.
This blend is bringing out the best in each plant, delivering unparalleled frost, density, and aroma. The stability of the pH, thanks to minerals, has made life simpler while pushing the plants toward peak performance.
🌟 Reflecting on Progress
It’s a joy to walk into this room and witness the results of months of effort. Each plant is delivering on its promise, and the smells, colors, and trichome production are truly next-level. The journey has been demanding, but the rewards are sweeter than ever. The curiosity to see how they finish is at an all-time high!
💬 Shoutouts and Community Love
As always, massive gratitude to the sponsors that make this possible:
• TrolMaster for precise environmental control.
• Aptus Holland for top-tier nutrients.
• Cannakan for their unwavering support.
• Pro-Mix Soil for a robust foundation.
• Seed Banks for the incredible genetics.
To the Grow Diaries community, our followers, lovers, haters, and everyone in between—thank you for being part of this journey. Your engagement fuels the passion to keep growing, learning, and sharing.
📣 Call to Action
If you haven’t already, check out our YouTube and Instagram for exclusive content and updates. Don’t forget to hit that like button, subscribe, and ring the bell so you never miss a beat. Join us for the next episode, where we’ll dive into super-cropping and give the room another round of defoliation as these girls keep reaching for the finish line.
Let’s keep growing, learning, and celebrating this beautiful process. 🌱✨
Growers Love,
Your Grateful Gardener
Discount Codes so you can save big on your next check out 💚💚💚
Kannabia - DOGDOCTOR 30% off
SeedsmanSeeds - DOGDOCTOR 10% off
CannaKan- DOGDOCTOR 15% off
terpyz.eu - DOCTOR 15% off
The Neutralizer - PORKIT5-DOG 15% off
Fast Buds - DOGDOCT 15% off
As always thank you all for stopping by, for the love and for it all , this journey of mine wold just not be the same without you guys, the love and support is very much appreciated and i fell honored and so joyful with you all in my life 🙏
With true love comes happiness 💚🙏 Always believe in your self and always do things expecting nothing and with an open heart , be a giver and the universe will give back to you in ways you could not even imagine so 💚
Friendly reminder all you see here is pure research and for educational purposes only
Growers Love to you all 💚💚💚


Likes
Comments
Share


Processing
Likes
1
Share


@lightmixcookies
Follow
Day 1:
- 1ml terra grow, 1ml pure zyme, 0.5ml power roots. 1L solution / 3 Plant
Day 2: no water
Day 3: 1,3L / 3 Plant
Day 4: no water
Day 5: 1,3L / 3 Plant
Day 6: no water
Day 7: no water
Likes
5
Share


@GermGrowFox
Follow
Ich freue mich auf den nächsten run und werde mein Zelt + Equipment desinfizieren.
Nachdem dieser run nach 12 Wochen nicht gerade glücklich geendet ist, dürstet es mich nach einem erfolgserlebnis

Likes
11
Share


@Ninjabuds
Follow
Blackberry moonrocks the leaves on both the seedlings have a very distinct look definitely different than the average leaf really pointy and 1 of the 2 seedlings sits praying 100% of the day. I think that one is really going to be a winner.
Last grow I overwatered and had to toss them because growth got stunted and a bunch if fungus knats got to the soil. This time I'm trying promix potting soil wish I had tried promix hp but the store close by isn't a hudro store and that's what they had. So this time I'm being very cautious with the watering I'm only useing a spray bottle I'm currently giving 45 spray per solo cup every few days when it dries out. This promix soil seems to hold water decent so the 45 spray there is 0 water coming out the bottom the cup yet. Here soon I think I'm going to double the amount of spray to 90 and start letting the soil get dry dry before watering again. Probably will hold off on any nutes quite yet.
I'm going from 24/0 to 20/4 light schedule this week. There getting to the point they won't strech as much is 4 hrs of darkness and I'm rasing the light intensity a little it's been around 150 I'm upping it to around 175. Most likely by the end of the week I'll probably be pushing 200 or close. Hopefully I can get them into the big tent soon
At this stage I like to alternate having the fan blowing on them I feel it gives them time to recover and get stronger instead of wind stress. Also every few days I will turn the plants so they are facing away from the light making them grow back towards the light I fell it makes them stronger

Likes
2
Share

@MerekKutil
Follow
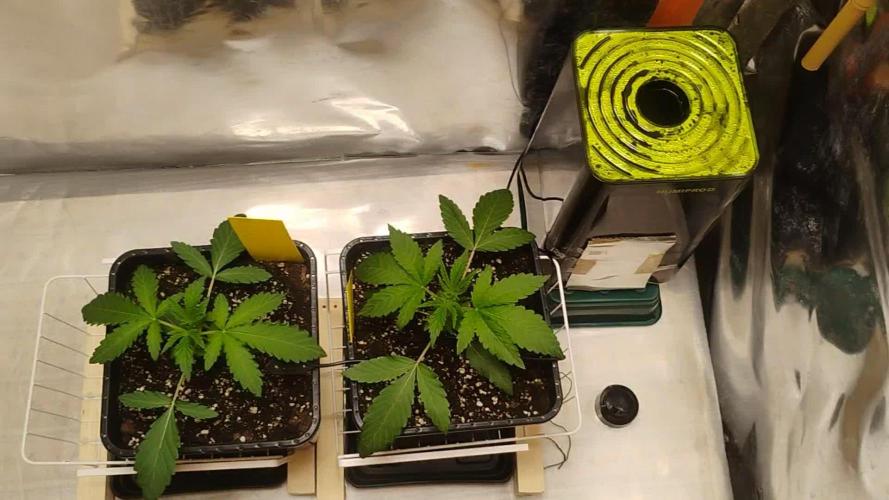
Zdravím všetkých nadržaných pestovateľov. Toto kolo som zatiaľ veľmi spokojný defčatá sú spokojné a netrpia zatiaľ nedostatkami tento 3 týždeň ich bude čakať veľká zálievka 2.2 L Hnojky ostávajú 2ml na 1L, našiel som chyby a Vitamax musím dať na 1ml na liter.Jednej sa darí veľmi dobre a rastie rýchlejšie, samozrejme Ph zostáva na 5.9. Čakám, aby substrát preschol a môžem Hnojiť, pri zalievaní sa snažím postupne liať a nie všetko naraz ako nadržaný 15 ročný cápek čo má péro ako Eiffelova veža. Pridal som výrobené košíky na odtok do podtacky. Vidím mierne krútenie taco listy dal som silnejšie svietiť svetlo a je možné, že som ich popálil ale pri 2.2 L zálievky som dal Vitamax 2ml na 1l čiže som dal veľa ťažke listy môžu reagovať aj na veľa vitamaxu Plus popálenie.Čakám ako to bude ďalej. Defčata , keď už dovŕšia 20 dní svojho života zvýšim PPFD na 400 μmol/m2. Držte palce zdravý kutil.
Processing
Likes
7
Share


@Kushizlez
Follow
Day 31 - 38
(Day 32) I’m going to lower the humidity in the room to 55-60.
Still no bananas but I’m still quite worried about #3 fully popping and ruining my whole crop. Since there is a good chance it’s going to herm, I’m going to give it with a small feeding today and watch it like a hawk this week.
I think the boost actually made a decent difference in #5 from last week. I’m seeing slightly fatter main colas but that could just be from less topping/smaller plant or less nitrogen. I’ve decided to push my luck and give a boost to each plant. These things just aren’t filling out like they should. They look like they are on day 23 not 33. I’m going to top dress 3 tablespoons of 1-4-2 Destiny launch and later tonight I’m going to water in a low strength feeding of 0-0-15 kelp extract.
I’m going to give a final heaping tablespoon of nature’s pride bloom to #5 so it can stretch to the end.
I’m also going to lower the lights by a few inches. The tallest cola is now about 13 inches away and the rest of the canopy is at about 18–24. If I see signs of light stress I’ll raise it back up but I’m sure it could use the extra light on the lowers.
(Day 33) I’ve been reading that bigger plants just take longer to mature and that’s probably why my plant hasn’t fully filled out or is about a week behind. I still could have done a better job defoliating some of the smaller larf branches on the bottom which just robs the good branches of energy. The more I think about it, the more I think I did a very poor job of defoliating the middle canopy. I’m still seeing lots of larf and small buds on the inside not getting much light. I’m still really worried about herms after finding that branch so I don’t want to stress them anymore. Removing suckers now is pointless. I missed my window of opportunity and now I have to deal with it.
I’m going to slide an old DVD player underneath #6 to bring it up to canopy level. It’s lower buds are definitely not getting enough light.
(Day 34) Ever since lowering the light, the canopy has gotten a few degrees warmer.
I’ve noticed the buds don’t feel as sticky on top compared to the lower tucked branches that feel almost wet with resin. Outdoor weed grown in my climate will never reach the temperature where it degrades resin luckily.
(Day 36) The buds are definitely swelling but not to the degree I want. Call me picky but I prefer my nugs as chunky as possible. I’m seeing lots of pistils but not much nug matter. Ive heard too many pistils can be caused by the overuse of alfalfa, kelp and seaweed extracts because of the natural PGR’s in them. I’m definitely going to reduce the amount of that stuff I use next round. I hope I’m just wrong and this tent is going to really fatten up this week but I have my doubts.
(Day 37) A purple fade is starting on the underside of every plant except the bush who still is super dark green still. Last watering I got a nice amount of runoff so I’m just going to leave her until the end. I’m seeing a bit of yellowing on #5. I’m going to give it one final full strength feeding plus some rock dust and oyster shell tomorrow and that’s a wrap for nutrients. I might as well hit everything else with a final low strength 0-0-15 too.
(Day 38) I’m amazed at how much this stuff smells compared to my last round. It smells very earthy and floral with a hint of pine. Definitely not that gassy smelling pine but more of a sweet pine.
Processing
Likes
45
Share


@AsNoriu
Follow
Day 135. Girl stinks a hell, cant move her to smaller tent and my new fan is delayed, so is new diary.
Still in doubts what to do, dont want to postpone next run deep into summer, too hot at mines ...
Day 137. Girl was moved to new home, humidity was at highest 50, hope during night i wont get bud rot, have no outfan still...
Day 138. Girl was fed with last nutes, from now just phed water, hope she will last 3 weeks minimum.
Have a feeling that she dont like it, but got humidity in mid 40ties maybe we will make it ;)
Day 140. After filter instalation i created negative presure, plus inside fan moved air and tent was too small for this girl, her walls were breathing, so one head rubed heavily, all glued to flat ;))
Had many budrot cases and they were starting from a lot smaller incident, prevention is the key, plus i want to try out that stinky beuty ;)


Likes
39
Share


@NuttyYeti
Follow
It has been a journey but I'm happy it's over. Would have liked it to go another week or 2 but I'm happy with what I got. She smells like cotton candy and I can't wait for a taste. ☺️🤤

Likes
3
Share


@PrinceOfHerbs
Follow
The plants are growing very well, the flowers already look very compact and many pistils are forming.
The plant was extremely lollypopped.
The Bullz Eye had unfortunately twittered minimally and 3-4 pollen sacs had already opened (under the net) these were all removed as well as nearby flowers
Flowering day: 21


Likes
6
Share


@DrJekyll_MrKush
Follow
This week marked a serious shift. The main colas are swelling fast, and you can clearly see the difference compared to last week. Structure is tightening up, buds are stacking, and weight is starting to show. The side buds are finally coming in, building up volume after a slower start.
I’ve cut back on the heavy PK (Boom Nutrients) and switched to Overdrive by Advanced Nutrients for the next week. The idea is to push the final stretch without overfeeding or stressing them out.
What’s wild is how Medusa F1 seems to change overnight—this strain really doesn’t play around in late flower. In just the last two weeks, the visual progress has been drastic.
Space is still a big question mark. Running 7 plants in a 90x90 tent is tight, but airflow and light coverage are holding up for now. The big question is whether it’ll translate to actual yield or just look impressive.
So far, so good. Let’s see if these girls can fill out the tent and make it all worth it.
Likes
21
Share


@Wicked_Stix
Follow
The end of week 1 has arrived. We all know how it goes. Just playing the waiting game. At this stage these girls are just working on building their root system. The roots should be hitting the reservoir in the bottom of the buckets soon then they should take off. Got the water pumping and the lights beaming 24 hours a day. Running a low dose of maxigro. Keeping the ph around 6. Will probably be topping them around day 12. Would be amazing if I can get them ready to switch to flower at the end of week 3. But for now I'm just going to check on them 420 times a day hoping they don't die. Might be back next week if they are alive. Happy growing!

Likes
55
Share


@pifflestikkz
Follow
Day 64
05/07/24 Friday
Start of week
Big feed today 4L pH 6.2 only 20% run off.
So I have done final LST on her, I'm proud of what she has grown into over this veg period.
What a BEAST 🙌💪🤯💚
I'm allowing this week to be final veg week before I flip her.
She has so many tops I'll count them and add to diary tomorrow ✌️💚
Day 65
06/07/24 Saturday
The day after LST, she has bounced straight back 💪, she's a damn beast 👌
Picture update
Day 66
07/07/24 Sunday
Watering with De-chlorinated tap water, pH 6.0 and added cal-mag 7ml for 5L.
No run off but bottom of fabric pot is lovely and moist so will leave it there today 😁
Day 67
08/07/24 Monday
De-chlorinated tap watering today 5L with DyNoMyCo. Hoping this will help root zone uptake more nutrients during flush- we will see.
Updated short video
Day 69
10/07/24 Wednesday
Feed today! De-chlorinated tap water pH 6.0. did a 3L run through had about 1ltr run off due to high humidity this week, she never needed it I guess. But just wanted something to pull fresh oxygen through substrate.
She's getting so damn big, have to flip her tomorrow else she'll never fit under 600w hps in tent 🤦♂️😍

Likes
1
Share


@bigsmoke42069
Follow
Week 6 of flowering 10/23/24
Changed nutrients to fit week 6
Buds are getting even bigger and thicker.
Defoliated a little.
Noticed a PH of 4.8 in runoff, same as the late stage of flower in my previous grow.
After lowering feed EC, CalMag on max strength, flushing with 0.8ec nutes for 3 days in a row, nothing changed and PH stayed the same.
Read in a forum thread about constant low PH in the rootzone when growing in coco.
Got great info about CEC, water, nutrients and little chemistry from a detailed explanation. (https://www.icmag.com/threads/recurring-problem-with-low-ph-in-coco.338385/page-2#post-10843765)
Flushed plants with tap water + calmag, PH 6.5.
Used 120L total for 4 plants in 2 days.
1st day: flushed after lights on, did not water until 2 hours before lights off and flushed again.
Runoff PH went up a little, but not to the correct range.
2nd day: flushed after lights on and checked runoff EC + PH, of each plant.
Fortunately, PH got corrected to 5.8, and I returned to automatic watering 4 times a day (with 10%-20% runoff).
Thoughts:
In the last grow, I thought I had a problem because of salts buildup in the media with constantly low PH in late flower.
I didn't fully correct the problem till chop day.
Same problem here in the same stage of flower without the salt buildup.
After reading every forum I could find about the problem, I understood that my bloom nutes were the main problem because of their chemical composition.
The coco ability to exchange ions lead to the low PH in the rootzone.
It got worse quickly because I did not use any tap water with the feedings, so the PH could swing easily and drastically without resistance.
After I looked online for the T.A. feeding chart, I saw they used TriPart Grow till week 7 of flower, the Nitrogen type they are using will up the PH.
CocoForCannabis chart that I'm using, has not enough nitrogen to combat the bloom nutes PH down effect in flower.
It gets even worse with RO water because there are no minerals that can resist PH down.
Now I'm using 30% tap water with rest RO water, T.A. TriPart feeding chart with calmag and silica.
Hopefully I have corrected the problem for the rest of the grow.
It wasn't easy, because there were lots of variables that worsened the problem quickly.
Now I'm checking runoff PH and EC daily.
Update on next week :)

Likes
4
Share

@GnomesAndStones
Follow
🌱 Another fantastic and eventful week! She is still growing very strongly and loves life, but the Gorilla Cookies outgrew her tent and started some hermit crab action, leading to the Strawberry Lemonade taking home in the 50x100 cm grow closet.
In order to fill out the rectangular instead of square grow space, i supercropped her. First time using that technique but it already looks like a success. The stems partially split vertically, but i taped them shut until she fully recovers.
Day 45
💧 Topped up the bucket with 4 L and setting it to 1000 ppm with preflower ratios (0,8 ml/l row and micro, 0,6 ml/l bloom).
Day 47
🌱 Migrated to the grow closet and got supercropped.
💧 Filled the reservoir up with 2 L. Same nutrients as on day 45.

Likes
21
Share


@JohnnyBlaz3
Follow
Shes close!! lol I think I might be missing a week oh well lol she is the plumpest auto in the tent of the 4 by far!!! she lookin thiiiickkkkkkk. shes got about 5 giant colas, lots of trichs and stanks real good!!! indoor and outdoor have their own goals but this is obviously alot higher quality than outdoor! The next update could quite possibly be the harvest 😎
Likes
17
Share


@eldruida_lamota
Follow
Venga familia que ya viene la cosecha de estas finta F1 de ZamnesiaSeeds, que ganas que tenia ya de darles machetazo, me estaban dando muchos quebraderos de cabeza.
Las flores no son para nada llamativas, una variedad más cruzada con rudelaris, que para mi gusto es perder el tiempo y el dinero invertido en cultivar cosas así… no merece la pena en interior, el ratio de gramo watio se me quedó en 0.5 , de los no peores resultados que tuve en los últimos 5 años.
a sido una genética con la que no disfruté nada cultivarla, es complicada, es bastante sensible.
Las plantas en sí se quedaron enanas y para nada fue lo que esperaba, me recordaron a las autos que plantaba en el 2012…
Agrobeta:
https://www.agrobeta.com/agrobetatiendaonline/36-abonos-canamo
Mars hydro:
Code discount: EL420
https://www.mars-hydro.com/
Hasta aquí es todo , espero que lo disfrutéis, buenos humos 💨💨.
