
Likes
Comments
Share

@GrahamTheGrower
Follow
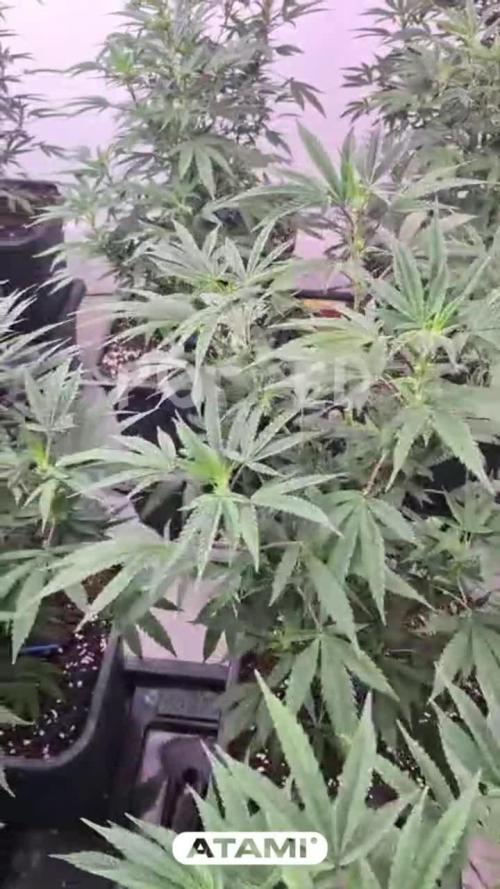
It's all happening right now. Instead of putting energy into roots, vegetation, and foliage, the plant is driving everything straight into the flowers. The acceleration in growth is absolutely astounding.I dialed up the Bloombastic to 1.5 ml/L, turned the lights down, opened the doors and windows, and let the fresh air flow through. Now I'm just letting nature do her thing.

Likes
18
Share


@Diips
Follow
d.57 - looks alright, had to do some lst and adjustments to level out the height
gave an additional biotab.
move my big fan, below the plant, in an effort to push the moisture upwards and out, which resulted in me being able to raise the lights further up.. my plant is way over the average height of is genetics, thanks to biotabs 🌞.
fastbuds said it would have an average height of 70-100 cm, and ny plant is closing in on the 80 cm and she keeps going ^^. and people say that autoflowers cant be main lined, well i believe this grow proves it.
achieved darker folliage in the bottom, so i believe that we are on the right track. hopefully the deficiency levels out.
day 62/63 gave an additional biotab so we are at 6 total. day 63 i gave 10 ml bio pk with the watering.

Likes
153
Share


@StarLorr
Follow
Welcome to my Banana Purple Punch diary.
🍌💜🤪💥🥊
In this Diary:
Seeds: [420 Fast Buds]from my growmie Tropicannibis_Todd 👊🏻😎
Media: Pro~Mix HP Open Top Grow Bag, Connect.
Nutrients: Green Planet Nutrients,
2 Part Dual Fuel starter kit.
RealGrowers: Recharge.
Diablo nutrients: Ripping.
Feeding :
Tue 19Mar: 2L Nutes/Recharge pH'd 6.5
Thu 21Mar: 2L Nutes/Recharge pH'd 6.5
Sun 24Mar: 2L Monster K pH'd 6.5
___________________________
Getting chunkier and heavier, lower branches are burgundy... i can see the finish line🏁👀a couple more laps😎
___________________________
Thanks for stopping by, likes and comments are appreciated.👊🏻😎
Keep on growin!
Keep on tokin!!!
😙💨💨💨💨💨
Likes
17
Share


@Solarcradle
Follow
Dec 26 @8pm/End of day 16: LST Begins and one top leaf defoliated for light penetration
Dec 26 @10pm: Turned bloom lights off (cobs) and left veg lights on. Lowered lighting to 12". Giving her a short break from the heat and time to stretch while I LST her. Her humidity levels are up around 54-60% with cobs off and humidifier running.
Dec 27 @4:20pm: Turned veg and bloom lights back on and left light at 12".
Dec 27 @9:30pm: Watered her with 2.5L at a PH of 6.56, soaking the whole pot through for the first time. PH runoff was 6.79. Defoliated another leaf for light penetration.

Processing
Likes
5
Share


@sercultiveta
Follow
35 dias de actividad en el indoor, foto periodo de 20 horas de luz y 4 de oscuridad


Likes
3
Share


@MotasKush
Follow
4.week of flower... the formation of flowers are increasing and the first trichomes appear.. cool and happy healthy plants i love my girls. Grow Your Own!


Likes
33
Share


@Roberts
Follow
Jack Herer is growing really slow. The nutrition was initially too strong. I think she just grew into it. Hopefully she makes a lot of growing progress soon. I can't do much but wait at this point. Thank you Athena, and ILGM. 🤜🏻🤛🏻🌱🌱🌱
Thank you grow diaries community for the 👇likes👇, follows, comments, and subscriptions on my YouTube channel👇. ❄️🌱🍻
Happy Growing 🌱🌱🌱
https://youtube.com/channel/UCAhN7yRzWLpcaRHhMIQ7X4g


Likes
2
Share


@Olduffybastard88
Follow
Really up with the bio bozz fees was showing signs off under feeding there hungry girls ans just keep guzzling away I'm.so happy how these f1 are turning out there bigger and better than I ever expected tbh so over the

Likes
21
Share


@Bread_n_Buds
Follow
I love Sweet Seeds for the incredible variety of possibilities it offers and F1 or FVs that are, I am practically a sort of autoflowering that you have to send in bloom with the classic passage 18> 12 typical of photoperiodes. What purpose does it serve? Be the lovers of the topping have already understood me, the autoflowering are difficult to work as well as almost all flourish too early for this technique. Send in bloom whenever you want to make topping and have a very fast bloom of 6 weeks. In fact she's the only fast and it's much later than anything so much that I started the booster.
Feeding >>> Plagron Alga Bloom 4ml / lt + Green sensation 1 ml / lt
Likes
25
Share


@Cannabis_King
Follow
Sorry about the missing weeks this is overtime season at my day job lol but all is well and plan on harvesting on the next update the girls smelling great very dense frosty buds I can't wait to try them out

Likes
7
Share


@KannaKullektiv
Follow
Hiiigh friends 🙌
Welcome to the last week. 🍀
She is harvested, dried and cured. An amazing taste for sure! 🍑
See you next run 👋
Arturo for KannaKullektiv
🙏
Likes
26
Share


@XperencdGmanXG
Follow
Well, these girls are well on their way into bloom. They are really stacking it on since the addition of the worm castings. I strongly suggest everyone use worm castings in your soil mixes, even if you are using salt-based nutrients.

Likes
8
Share


@Mo_Powers
Follow
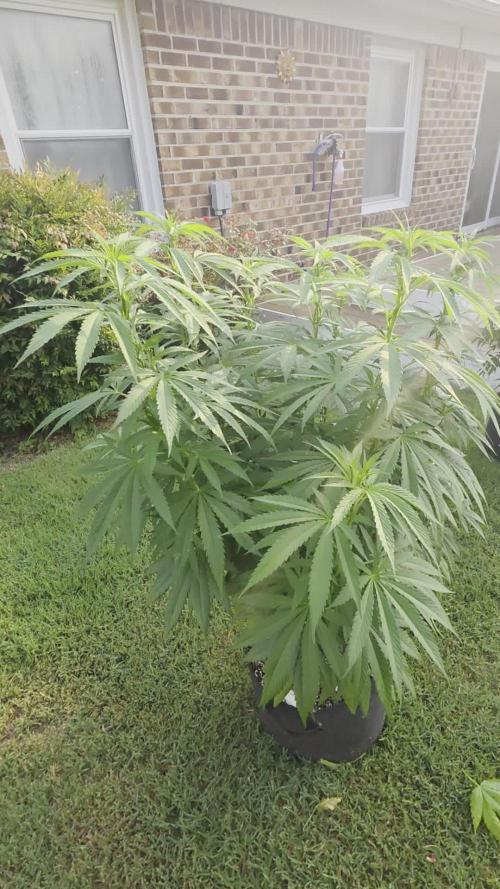
summer is slowly coming to germany. this beautiful plant is growing tall and bushy. at the beginning of the week she showed her sex. harvest is planned for the end of october or mid november. so there is still plenty of time for it to grow. it is vigorous and healthy.😋✊
Likes
5
Share


@MotherNaturesSon
Follow
good with training and strong genetically. good for extracts. medicinal potentials include fatigue, tension, and stomach pain. my grow style seems to minimize ‘cheesy’ terpenes in favor of amazing tropical sweetness. cheers


Likes
2
Share


@FEBREZE
Follow
Studio54 – Original DeepEast x WizardTreez Cut aka RS54
Sunset Sherbert x OZ Kush#54
Tag 35 der Blütephase wurde etwas Entlaubt. Die Buds sind schon ordentlich dick geworden und fangen an zu Purplen.
Likes
43
Share


@valiotoro
Follow
Hello everyone 😎
Week 3 of flower for the Cherry Cola auto from Fast Buds 💥
She grew fast with a beautiful green color,for the nutrient 4ml/L terra bloom & 1ml/L power buds from Plagron
Spider Farmer SE-7000 70%
Have a nice day 😋