


Likes
Comments
Share

@Danger_Mouse
Follow
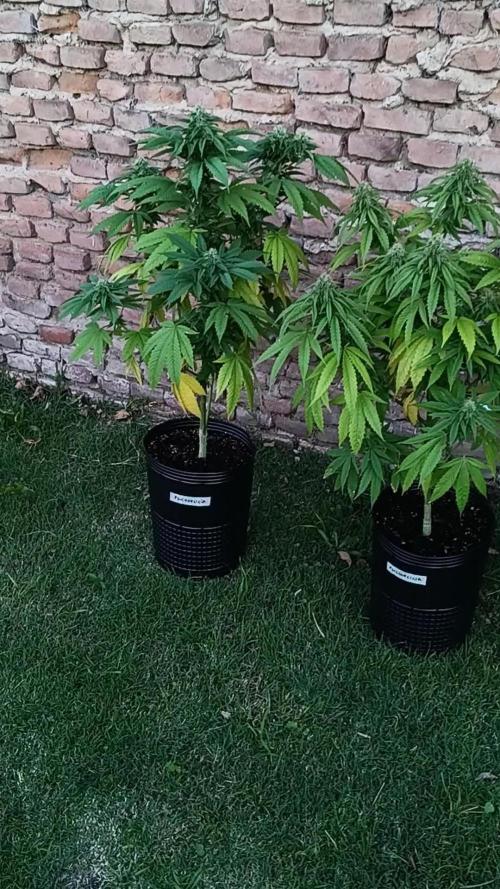
Continuan 6h en exterior (con sol directo), y el resto del dia en indoor, con 6 horas de LED 480W.


Likes
3
Share


@Dysons12
Follow
Day 7 i I transplanted the seedlings in jiffy’s to the DWC basket water level was “just” touching the bottom of the basket which meant there was 1mm- 2mm air gap between the water level and the jiffy’s. The high pressured air in the water to spit when air was released at the top which kept the bottom of the jiffy moist which had minimal roots showing to the exterior of it.
Day 7-13 I originally had 7.5 litres of water that was to the bottom of the basket. I replaced the water on the 13th which meant the water was changed after 6 days at such an early stage I will regularly change the water in the buckets. You can change every 7-14days but I am taking no chances.
I refilled and added nutrients on Day 13 which was yesterday. And the plants are doing really well and are a nice VEG green colour. Hard to tell on the pictures with the light colour but you can see their progress.
When I replaced the water this week I put 6.5L of water in each bucket With nutrients PH’d as close to 5.8 as possible. Some varied from 5.72 - 5.9. I have noted these on each bucket so that I can check if one does better than the others or shows deformities or stress I can amend it to match the others but hopefully not in such a close proximity of 5.8ph with an EC of 700+-
The roots are now showing in every pot with the longest being some 6inches.
The new Wakyme grow light is top notch so far with VEG button on only. Anyone contemplating buying one it cost me £99.00 from amazon and so far is performing just how I would like.
Humidity has been taken care of with a cold air intake fan which is pulled from another area of the building of a cooler environment.
Temperatures are spot on where I want them but I do allow a 2degree +- allowance but it does change back to its original temperature quickly enough.
5 more speed bud germinated and 2peyote critical feminised photoperiod germinated.
Crystal candy XL auto ordered x10
Gorilla glue, Pineapple Express and Cali Kush waiting in the wings. I have these already
If I can be anymore help to anyone let me know. Your diaries are helping me and hopefully I can provide the same to you




Likes
7
Share


@ledgrowers
Follow
got some nute burn from switching to synthetic to organic. organic nutes are stronger than I thought and you only have to water with plain water. things going well wrapping up this harvest next month


Likes
29
Share


@Greenthumbguru
Follow
She's comming along just nicely
nice tall branches with stacked bud sites who knew I'd make it dis far
its alot of work trial and error it's like a full time job tending to my girls
I defol her and the green crack better air flow. And light penetration
Likes
17
Share


@m0use
Follow
This was a fun project that was a few years in the making and a year later to see if they would last a season for this upload to happen. Before any of this I would bike aorund town grabbing up all the old Ikea solid pine bed slats that I could find and storing them in the basement. I have a lot of wood down there, any size worked as long as I have enough of them. The hot days to find them were the first and last of the months because that's when people where moving in/out. I also kept an eye on the free section on local online classifieds as well. The entire purpose of this was to recycle as much off the streets as I could before buying anything to finalize the project. In the end I only bought sealer, screws and some takeaway/beers. All the wood was 100% free and salvaged off the streets of Toronto saving it from the dumpster bin.
After collecting all the slats for about 2 years I was playing aorund with them on how I wanted to make this work. I had previously done a little project like this before but I messed it up and the boxes where crap. did not last longer then 2 seasons, they where thin and shallow as well could not grow much of anything in them. I Was talking to my friend who is renovating their house and we brainstormed some ideas on the boxes, I found some designs I liked online and said lets make something like this out of what I have here. We tossed out a few of the design features when looking at them as it would have been wasted wood and extra work not needed. If I had more wood them maybe it could have been an option but simple was the name of the game. They taught me what I needed to know like how the miter saw and sander worked, plus all the other tools I was using. They did help out with a table saw and creating the triangle support joints in the corners, They used some pine left overs they had while making a staircase indoors. I did not feel up to the task of using a table saw given all the relatives I know who have lost a finger to them.
In the end we decided the design would be three boards high and take an alternating pattern on corners. layer one short, layer 2 long, layer 3 short. Went with a galvanized and painted deck screw so it can take the weathering. Ran into some problems like making everything level as some of the boards were warped and other ones had undesired aspects like knots and tacky sticker goo I could not remove. So I used them for the base that will not been seen so much. Clamped everything down and called it a day.
Once it was all done and over with, I then brought them back home from my buddies work garage and started to seal them. I went with a boiled linseed oil as its a food safe option should the wood degrade into the soil I will plant in them. I will need to reapply it to the boxes year after year but the main coat is the most important one and I put it on 3 layers with a good dry in between coats. the inside of the boxes that where coated did not degrade at all as the sun did not hit them so it will not need a new coat just the outside. Overall the end result was very impressive for myself, I've never taken a woodworking class ever and It was a near perfect outcome for me. Heavy Duty Planter Boxes for all my gardening needs. I made a last min decision to add in a plastic liner to preserve the wood even longer and stapled that into the frame. it has held up quite well and may need replacing end of 2nd or 3rd year out in the sun. Used a thick moisture wrap plastic with UV protectors in its formula.
Lets see what I can grow in them this year!
m0use's haus of projects - garden box edition
Likes
161
Share

@Schnabeldino
Follow
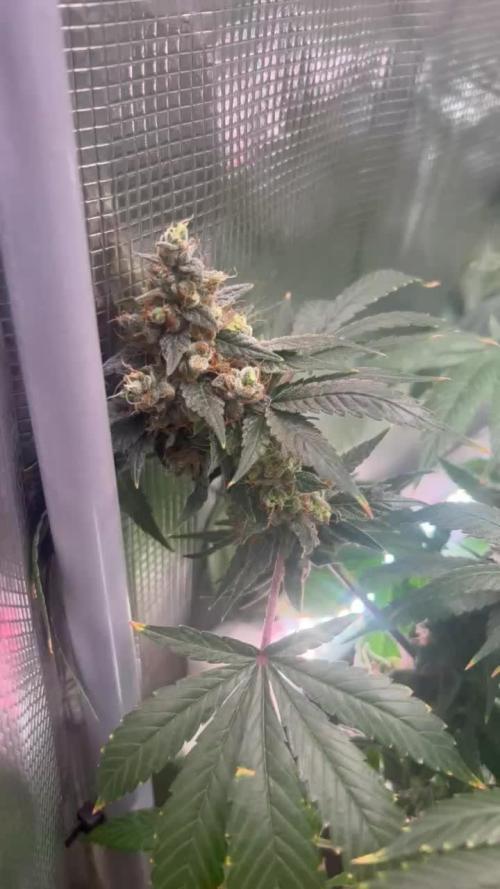
📅 Week 14 | Days 99–105 📅 🌼🌸🌺 Flowering phase 🌼🌸🌺
Day 105 🌞
🔸 Poison Envy is now entering the final phase of flowering. The buds appear even more compact and harder than last week, with a dense layer of sparkling, predominantly milky trichomes. The first few amber-colored heads are now visible—a clear sign that harvest time is approaching. The scent is now extremely intense: now even more strongly overlaid by the sweet and spicy berry note, which now seems almost syrupy ripe.
🔸 The humidity remains stable between 50–55% thanks to the constant use of the dehumidifier and maximum circulation fans. Unfortunately, next week will be very warm, with temperatures reaching 30°C for sure—I think that sucks, but what can you do?
🔸 I gave it some more nutrients and watered it for the second time, but only with water... I think it's had its last week.
📈 Current Conditions
🌡️🔆 = 27-28°C
🌡️🌜 = 21°C
💨 VPD = 1.4
💨 Humidity = 55%
🔦 PPFD = 900 µmol (12/12)
🔦⌚ DLI = ~38
🛠️ Setup (unchanged)
💡 Lights: 2 x Sanlight Evo 4-120 @ 90%
⛺ Tent: 120 x 120 x 180
🍯 Pot Size: 18 liters
🌱 Medium: Bio-Bizz Light Mix
💊 Nutrients: Advanced Nutrients
💧 Water: Tap water (EC 0.5)
Likes
15
Share


@LittleBigTrees
Follow
Put them both into 10ltr pots at the end of last week.
The sun hasn't been about to much so they haven't done much but they are getting taller and stretching a bit.
I've got more seeds but will probably take cuttings from these two as they will be more mature and must be closer to showing sex 👍

Likes
4
Share


@GODAXE
Follow
27.08.2024
D48 since cutting,
lady starting to bush like their mother, as i did nt have place for 8 massive bush in the tent i proceed to some pruning and set some bud clip.
overall look
GBC #1
16 inch, flowering
GBC #2
16 inch, flowering
GBC #3
16 inch , still in veg, 😰
GBC #4
18 inch, full bud mod 😍
GBC #5
18 inch , full bud mod 😍
GBC #6
19 inch, flowering
GBC #7
20 inch, start flowering👍
GBC #8
18 inch, flowering
i will not weekly uptade, but keep you tuned

Likes
2
Share


@MrDoubleHaze
Follow
Strain Links Oben : Super Lemon Haze
Strain Oben Rechts : Break Pad Breath
Strain Mitte : Auto SFV OG
Strain Unten Links : Lemon Orange
Strain Unter Rechts : Velvet Moon


Likes
11
Share


@GorillaZativus
Follow
Videos:
10 días despertando , transplante 12 días , algunos sistemas radiculares y despertando post transplante .
🌱Solución de riego a micorrizas :
Mycochum y luego riego completo cuando despierten .
Ocupamos granular y great white en polvo para transplante , mitad y mitad.
Ph: 6,0
Ec: 0,7
🌱Solución riego a foleo 1 hora antes que despierten :
1 litro : proactive 5,0 ml y knactive 2 ml.
Ec : 0,5
Ph: 6,0
🌱Sumamos alfalfa alrededor de los tréboles
👑Actualización Jardin 18-19 días .
⌛️Videos :
🎥18 días , con hambre y sueño.
🎥19 días antes de dormir
🎥19 días despertando post foleo y post preventivo de tierra de diatomeas , listas para transplante en 1 semana .
🌱Solución foleo 2 litros :
knactive + proactive (4,0 ml ) y ( 0,8 de proactive ( melazas , quitina , etc ) Y sumamos preventivo después que se secó el foleo.
Ec : 0,4
Ph: 6,1
🌱metimos amarres al central y full lst .
Likes
33
Share


@LouShott
Follow
8/10/2018
Day 15 - ppm=605 ph=5.6 Temp=27.6c-26.0c
Day 16 - ppm=605 ph=5.6 Temp=26.4c-25.6c
Day 17 - ppm=613 ph=5.6 Temp=27.3c-26.7c
Day 18 - ppm=623 ph=5.5 Temp=27.6c-22.8c
Day 19 - ppm=630 ph=5.5 Temp= 27.4c-22.6c
Day 20 - ppm=640 ph=5.4 Temp=28.0c-23.6c
Day 21 - ppm=652 ph=5.6 Temp=27.6c-22.8c
I havent had to do much with her at all this week, she looks healthy and ppm of nutrients is rising nicely there is about 10l of feed left of the 20l reservoir so i will probably top it up next week at some point.
Check out the time-lapse of the week, turn the volume up 👌👍
Likes
19
Share


@Dutch_Grower
Follow
Few lower leaves turned yellow, i gave them some more nutes with water. Everything is okay now.
Every friday around 7 pm new upload.
Don't forget to like (helps with the algorithm)
Thank you, have a nice one!


Likes
51
Share


@cheetah844
Follow
She's been the bushiest plant so far. I'm excited for this girl.
I topped and defoliated every plant. I'm trying to form them into canna-bushes. Hopefully I'm doing the correct training procedures to make them all grow that way both indoors and out.

Likes
5
Share


@prebiancagrower
Follow
Hi people, how are you all????
Week 7 here, and all is good with the plant, I did some defoliation to keep the airflow, and I got a ScrOG to open the plant a little bit to get more light.
I am very happy with the results until this stage, is a whole new world for me :-)
Thank you for following me.
Peace and love!
:-)
Likes
40
Share


@nijuana
Follow
Let's harvest ! Let's dry 💚 this was a good week like usual , it was the flushing and final week


