Likes
Comments
Share

@SplishSploosh
Follow
TOTAL COST : 138£
-
Electricity usage - £8
Buying the Grow lights - £54
Buying the Nutrients - £45
Buying Pots (x3) - £16
Tools - £5
Soil - 10£
I should say I had the nutrients for over 2 years so I’m using the price for that initial purchase. They were used in all my other gardening endeavours such as tomato's, strawberries and chillies, I had great results with BAC and Nutrigrow but they are somewhat pricey. You might find some cheaper alternatives if that figure puts you off.
-
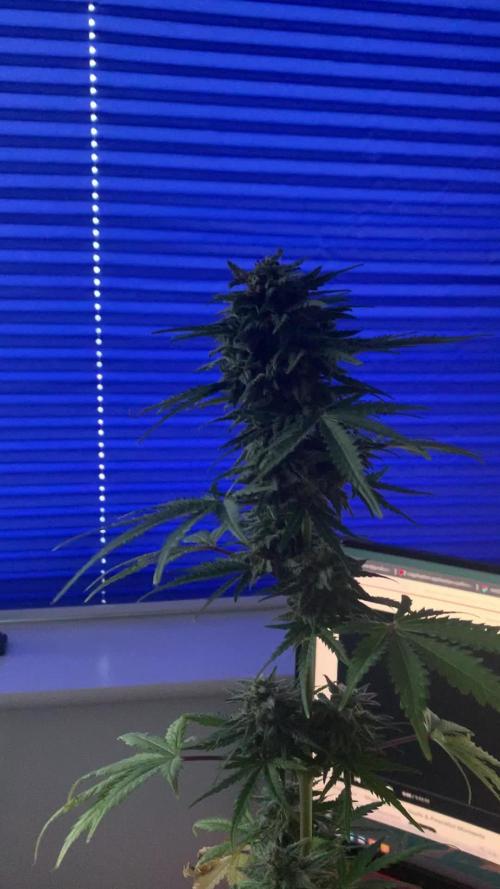
31/05/26- This plant blew my expectations, from seed to harvest she was amazing, developing faster than expected at all stages, with keep in mind very limited resources, still she was a productive, over achiever and definitively one of my best grows of all time!
But harvest day is upon us, her tricomes are in that sweet spot for Milkey/small amounts of amber! So Now is the best moment to harvest!
It’s always a bit emotional but I like to play some calm peaceful music like a final concert dedicated to the plant right before I put her to sleep! And start drying her.
I like to make use of all the leaves brewing them into a tea. I’ll update the dry weight later!
03/06/26 - This is great I got the dry weight back and got 10grams of dry sticky amazing weed, this is better than I initially expected, I had in mind that I would be lucky for 8 grams! But now I'm curing it and developing those terpenes flavours which should enhance the experience! This is modest quality and I couldn’t be prouder

Likes
24
Share


@TerpTurtle
Follow
So loud the air taste like strawberry shortcake haha terps are super rich they stay on you, Kush as cologne!
Likes
6
Share


@Naujas
Follow
My house is full of sweet chocolate and fruit aroma:) her flowers are full of shiny trichomes :) the girl only bloomed for 57 days, but she is already ready, maybe her flowering sped up in my grow box, high temperature 33°, because of that under my arm my light was set to 85%. From the first days, the girl showed fast and healthy growth:) I made a timelapse video, but unfortunately due to problems with the SD memory card, it takes 3-4 days at the end of the video, besides, my tent is too small for that :D I also made bubble hash from sugar leaves myself :) I tried Zamnesia seeds for the first time - I hope that someday this seed bank will offer me its products to try again :) thank you all. you were together :) good luck with the growing.

Likes
28
Share


@Felloffthegrid420
Follow
Cut all the tops I have to say no matter what in house has came throw for me I’m so thankful for this year more pictures coming soon

Likes
39
Share


@DogDoctorOfficial
Follow
Time to clean up this 2309, she still is my fav hope she enjoys her haircut hihihi
Man she love it , next day she was back on to her praying mode <3<3<3
Tester 2309 is by far my favorite from day one, not only because i like the number but because from a early age she spoke to me like non of the others did, and now, man i mean now she is by far the one showing bigger trichomes production and her smell, i mean is so strong for the time being, she is an herbal mix with flowers and some spicy notes, this for now she is evolving day by day, just amazing, she took the defoliation like a big girl and with the week coming to an end her resin production levels and it all i mean ... <3 <3 <3
added defoliation edited video , hope you guys have fun <3 <3 <3
As always thank you all for stopping by, for the love and time you guys spend on my stuff, i fell blessed and humble, many thanks to you all <3<3<3
Genetics - Fast Buds Tester 2309
Ligth - LUMATEK ZEUS 465 COMPACT PRO
Food - APTUS HOLLAND
#aptus #aptusplanttech #aptusgang #aptusfamily #aptustrueplantscience #inbalancewithnature #trueplantscience #fastbuds #dogdoctorofficial #growerslove
With true love comes happiness <3 <3 <3 Always believe in your self and always do things expecting nothing and with an open heart , be a giver and the universe will give back to you in ways you could not even imagine so <3 <3 <3
All info and full product details can be find in can find @
https://2fast4buds.com/ wen released
https://aptus-holland.com/
https://autopot.co.uk/
https://lumatek-lighting.com/
Have a bunch more diaries going on, fell free to drop by and say hi dont be shy <3 <3 <3
<3 <3 <3 Growers love to you all <3 <3 <3

Processing
Likes
Comments
Share


@Godbody
Follow
Feeding: Brown Sugar, Vinegar, Epson Salt, Blueberry Water, Braggs Amino Acids, Fish Water, Kelp, Alfalfa, Sea Bird Guano Gumbo
Likes
3
Share


@AustinRon
Follow
Week 8 - Flower Week 4
Lemon Jeffrey by IRIE Genetics (14 Starts for 8 Finishers)
63-70 Days Flower (9 - 10 Weeks)
Seeds Wet: Monday 14 May 2023
Harvest Date Range: [ 2023-08-11, 2024-08-21]
Weeks Observations
- Local weather conditions have been unseasonably HIGH Humidity. First time in 3 years am unable to reduce to standard levels. Dehumidifier being installed today.
- Today is the 21st day since flip - we’ve experienced bolt since week 1, up to 5” in a day
Start of week:
- Dates: [2023-07-10: LJ2Q 57:F:4:1, 2023-07-16: LJ2Q 63:F:4:7 ]
End of Week:
- Plant Height Range: [ 30, 44, in]
- Water/Day/Plant: [ 720, ml]
EnvironmentalCurrent:
- Scotoperiod: [ 12, hrs] # 1900 - 0700 + 24
- LightIntensityPeak: [ 975, µMol/m2/s ]
- DailyLightIntegral: [ 42.1, Mol/m2] # Target: < [ 40, Mol/m2/day]
- LightDistance: [ 12, in] # Despite SuperCropping (Bending & Twisting), we’re wishing 12” of the Light at End of week
- TempAvg: [ 77.5, °F]
- RH: [ 66.9, %]
- VPD: [ 0.85, kPa] # Achieved Ideal ‘Early’ - need to bump to 1.05 to 1.1
- FeedwaterPerPlantPerDay: [ 720, ml]
- FeedwaterPerDayTotal: [ 5760, ml] # 1.5 Gal/Day
- EC: [ 2.0, mS]
Environment NOTES:
- Because room temperature overnight is 68°F, we need to
1. Nightly (2200) CLOSE AC VENT to Grow Room
2. Daily (0700) OPEN Vent to Grow Room
- Goal is to maintain TENT & CABINET TEMPERATURES OVERNIGHT
- RULE
- CLOSE Room Airflow during ‘Daylight’ periods(2030 - 0700) When on Flipped Schedule (Night LIGHT/Day DARK)
- OPEN during ‘Nightime’ Period (0700 - 2200)
Objective
- 8 Plants, Single Colas, Sea of Green
SOP:
- WEAR CLEAN GLOVES FOR ALL SEED OPERATIONS
- CLEAN All Instruments before use
- Light Strengthveg := 100 + (#nodes * 100)
- Light Strengthflower := [ 1000, 600, µMol/m2/s]
- Scotoperiodveg := [ 1300, 1900, 6, hr]
- Scotoperiodflower := [ 0700-1900, 12, hr]
Environment
- Mid Flower (2 Weeks) (Week 8-9) (F4-F5)
- Temp: 78-82°F
- VPD: 1.1 ± 0.1
- Photoperiod: 12/12
- Light Strength: 930 µMol/m2/s
- EC: 2.3
- Late Flower (Week 10-14) (F5-F9)
- Temp: 78-80°F
- VPD: 1.2 ± 0.2
- Photoperiod: 12/123
- Light Strength: [930, 850, µMol/m2/s]
- EC: 2.1 # Week 9-11
- EC: 1.4 # Week 12
- EC: 1.1 # Week 13
- Finish (Week 14) ( F10)
- Temp: 78°F
- VPD: 1.3 ± 0.2
- PPFD: 750 peak
- Resin Bloom ONLY
- EC: 0.8
Rooted Leaf Hydro 1.7 - 1.9 EC (Half RLA,Hydro Chart, EC to Targets):
- Primer A: [ 8, ml, gal]
- Primer B: [ 8, ml, gal]
- Silica Skin: [ 4, ml, gal]
- SLF-100: [ 5, ml, gal]
- PhotosynthesisPlus: [ 6, ml, gal]
____________________
Mon 10 Jul 2023 # Flower 4
LJ2Q 57:F:4:1
- W/ Dehumidifier Installed, our Environment is now …
Tue 11 Jul 2023
LJ2Q 58:F:4:2
Refill Res
- [x] 6.5 - 7 Gal
- [x] Primer A&B: [ 8, ml, gal], [ 80, ml]
- [x] Silica Skin: [ 4, ml, gal], [ 40, ml]
- [x] Photosynthesis+: [ 6, ml, gal], [ 60, ml]
- [x] SLF-100: [ 5, ml, gal], [ 50, ml]
- [x] Dr. Bohners: [ 10, drops]
- [x] ECRange: [ 1.9, 2.0, mS]
- [x] TempReservoir: [ 60, °F]
Wed 12 Jul 2023
LJ2Q 59:F:4:3
Thu 13 Jul 2023
LJ2Q 60:F:4:4
Friday 14 Jul 2023
LJ2Q 61:F:4:5
Sat 15 Jul 2023
LJ2Q 62:F:4:6
- Plants per Feed Line: 4
- Feedwater per Line per feed (FPL): 120
- Feedwater per event (FPE): [ 480, ml]
- Events per day (EPD): 12 # Hourly Fertigation During Lights ON
- Feedwater per day: FPE X EPD: 480 x 12: [ 5760, ml, day]
- Mix 2 Gallons @ 75% Strength (Medium Chart, FW 3)
- Primer A: [ 7.4, ml, gal], [ 15, ml]
- Primer B: [ 7.4, ml, gal], [ 15, ml]
- CalMag Fuel: [ 3, ml, gal], [6, ml]
- SilicaSkin: [ 3, ml, gal], [ 6, ml]
- Lush Green: [ 3, ml, gal], [ 6, ml]
- Root Anchor: [ 3, ml, gal], [ 6, ml]
- Peak Bloom: [ 3, ml, gal], [ 6, ml]
- Resin Bloom: [1.5, ml, gal], [3, ml]
Sun 16 Jul 2023
LJ2Q 63:F:4:7


Likes
Comments
Share


@Forgotten_souls
Follow
Start these by mistake, wasn't quite prepared or set up correctly, these are being grown in a two by four budget

Likes
4
Share


@JayKane33
Follow
This week I began to remove fan leaves. Looking back I wouldn't do it at this stage again. The plants did well for being so young and growth wasn't stunted but esthetically next time I'd like to have more leaves at this stage.

Likes
20
Share


@Bread_n_Buds
Follow
Our Zamnesia autoflowers have been on their journey through the magical flowering period for a while now, this is the second week of flowering considering that autoflowers still flower spontaneously some sooner than others but all around the 3rd-4th week. .
---- The general environmental conditions are good, the heat has increased a bit more but for the first weeks of flowering it is not a big problem, let's remember to never exceed 27 degrees centigrade in the last 4 weeks to avoid compromising the quality of the flowers. If necessary open the growbox but never let it exceed 27-30 degrees
where 30 is already a lot. The positive thing is that as soon as the lights go out the change is already somewhat visible and as autumn progresses we will also improve. The humidity is fluctuating but we try to control it with two dehumidifiers when necessary, pushing both of them possibly not into the growbox but directly into the room. (I dehumidify the room and the air in the growbox should also be dehumidified)
--- This strain is another important name of the old school. The Zamnesia elves noticed that I am gray and surely thought that I am a lover of old flavors. In fact, if I taste the original Northern Light I immediately go back to Amsterdam in the 90s early 2000s. And this happens to me with the cheese when I find it, with the Blueberry that broke my legs on arrival once, with the Skunk and SuperSkunk that were the first Dutch things that arrived in Italy. Wow what memories. Terpenes also do this, they leave well-defined memories thanks to smells and flavors. It grows vigorous and strong, old school strains are super stable, we know. AH there is a second twin that I have not shown you yet that in my opinion, judging by the leaf, is the closest to the Classic Northern Light. A strain to go to bed peacefully, they used to say.
--- Fertilizer program - The fertilizers are always Plagron and I am following the table that I generated on the site depending on the chosen substrate. Create your own card and follow it, never be presumptuous my friend as I have been in the past, follow the card and look at the plants, not all need the same amount of fertilizer. We have come to the time to give a good dose of iron in the first weeks of flowering, already of race life not sprayed but mixed with fertilizers. We then added the power buds to stimulate the birth and development of the flowers.
---- https://plagron.com/it
- Power Roots - 1ml/l
- Alga Bloom - 4 ml/l
- Pure Zym - 1 ml/l
- Sugar Royal - 1ml/l
- Vita Race - 5 ml/l
- Power Buds - 1 ml/l
--- The dehumidifier now runs between 50% and 55%
--- The 100% Organic pack by Plagron can be found on Zamnesia at the link: https://www.zamnesia.io/it/11457-pla gron-easy-pack-natural.html
// Strain Description // Born from the rib of a classic, Northern Lights Automatic is a weed from the past, but with a futuristic update. This feminized version sees Northern Lights hybridized with a ruderalis to create an extra sweet variety, that all fans are sure to love. Growers can expect abundant results in just 9 weeks, from seed to harvest! -
- Get a seed of this fantastic strain --- https://www.zamnesia.io/it/3324-zamnesia-seeds-northern-lights-automatica-femminizzato.html
- Soil and Fertilizers entirely organic --- https://plagron.com/en buy on www.zamnesia.io
- Growbox and air sistem --- https://www.secretjardin.com/
- Light — P2000 - https://www.viparspectra.com
- Music and sound --- I made my girls listen to 432hz frequencies and music from www.radionula.com
- Z --- You can find these seeds, much more from the world of cannabis, mushrooms and an incredible series of accessories and gadgets on the reference site not only mine but of many growers ---- https://www.zamnesia.io


Processing
Likes
10
Share


@UrbanFog
Follow
The plants grew well this week, as did all the clones. Any extra rooted clones have been planted outdoors as a further experiment.
We moved all the clones into a Veg room. Even though the large room is not in flower and still also in veg, we had to separate the plants due to lack of space. Also setting up for mother, clones and SOG in the future.
The plants were defoliated and training continued. There are 2 weeks of Veg left hoping to have some very large plants for flowering.
Aiming for large flowers.


Likes
8
Share


@Leafy420
Follow
I was high and somehow meshed up the weeks i just continue counting even do the days dont add to the weeks
Day 25
They are looking wunderbar
I removed the humidifier cause they seem to hold there own
Soil is getting bit drier so tomorrow i will prepare the water and day 26 the get there second feed
Day 26
The soil was completely dry So gave them 700ml each 2ml/L
Day 27
they look nice and bushie so did some more LST, soil is dry again!?
Day 28
Soil bone dry So gave them 1L, 2ml/L of each nutrients
800ppm 6.05 ph
Had a lil bit off run off, just enough to do a test
Ppm bit high on 2 im the 1200-1300ppm
And on the other 2 around 1000
I think in 3 Day's i give the 2 just ph water and the other just a lil bit
Likes
36
Share


@MadeInGermany
Follow
Info:
Unfortunately, I had to find out that my account is used for fake pages in social media.
I am only active here on growdiaries.
I am not on facebook instagram twitter etc All accounts except this one are fake.
Have fun with the update.
Hey everyone :-)
The growth this week is very nice :-)
This week I will give her some time with training to recover and then I will continue next week 👍.
Otherwise, as always, the tent was cleaned and the humidifier refilled.
Have fun and stay healthy 🙏🏻👍
You can buy this Strain at
https://www.barneysfarm.com/blue-cheese-34
Type:
Blue Cheese
☝️🏼
Genetics:
Blueberry
X
Original Cheese
👍
Vega lamp:
2 x Todogrow Led
Quantum Board 100 W
💡
Bloom Lamp :
2 x Todogrow Led
Cxb 3590 COB 3500 K 205W
💡💡☝️🏼
Soil :
Bio Bizz Coco
☝️🏼
Fertilizer:
Green House Powder Feeding
☝️🏼🌱
Water:
Osmosis water mixed with normal water (24 hours stale that the chlorine evaporates) to 0.2 EC. Add Cal / Mag to 0.4 Ec Ph with Organic Ph - to 5.5 - 5.8


Processing
Likes
4
Share


Likes
3
Share

@PhinolaGreen
Follow
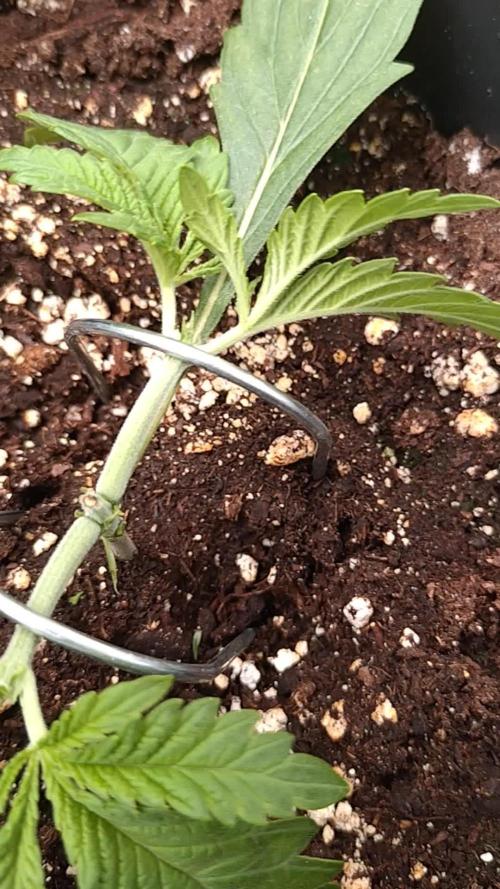
3. Woche
Alle wurden mittlerweile 2x getoppt, jetzt dürfen sie sich erstmal erholen und dann schau ich ein paar Tagen nomma nach 😊


Likes
5
Share


@Ninjabuds
Follow
My gas tax plant is looking absolutely incredible right now. It's got these massive buds that are super dense and have this awesome dark color to the leaves. I'm so excited to see how it turns out when it's finally ready to be harvested. I've been checking the height, the thickness of the stem, and the density of the buds to get an idea of how much longer I have to wait. I think I might start flushing it soon.
The past few weeks have been so beautiful, watching the plants grow and change. It's amazing how something so small and fragile can turn into something so strong and vibrant. Now that they're getting ready to bloom, it feels a little bittersweet. I'm so excited to see the finished product, but I'll definitely miss having them around while they're growing.
Likes
5
Share


@RoyColt
Follow
Always R.O Water
Watering the plant 3 times for per week
1st Watering with nutriens.
2st Watering with nutriens.
3st Watering with only R.O water & CalMag
LAST FLUSH DAY 112

Likes
96
Share


@squalino
Follow
La Samouraï
Variété & Breeder : Hokuzan par World Breeders
Date de germination : 9 septembre 2026
Âge : 42 jours (Semaine 6)
Taille : 51 cm (+8 cm cette semaine)
❤️❤️❤️❤️❤️❤️❤️❤️❤️❤️❤️❤️❤️❤️❤️❤️❤️❤️
Climat & Climatologie :
Humidité : 60%
Température : Jour 25°C / Nuit 21°C
Lumière : 75%
❤️❤️❤️❤️❤️❤️❤️❤️❤️❤️❤️❤️❤️❤️❤️❤️❤️❤️
📅 Journal quotidien (Jour 37 à 43)
Jour 37 : Aucun apport en nutriments.
Jour 38 : Séance de palissage (LST).
Jour 39 : Aucun apport en nutriments.
Jour 40 : Aucun apport en nutriments.
Jour 41 : Aucun apport en nutriments.
Jour 42 : Aucun apport en nutriments.
Jour 43 : Aucun apport en nutriments.
❤️❤️❤️❤️❤️❤️❤️❤️❤️❤️❤️❤️❤️❤️❤️❤️❤️❤️
📝 Descriptif
La plante s'est développée de manière magnifique pour atteindre 51 cm ! Les branches secondaires ont profité à merveille du dernier palissage pour s'épanouir et combler l'espace. Le feuillage est splendide, d'un vert éclatant, sans la moindre trace de carence ou de stress. La structure générale est dense, vigoureuse et parfaitement prête pour la suite.
❤️❤️❤️❤️❤️❤️❤️❤️❤️❤️❤️❤️❤️❤️❤️❤️❤️❤️
💡 Saviez-vous que...
Le Tengu et les gardiens des champs de chanvre !
Dans le folklore japonais, les Tengu sont des créatures légendaires mi-hommes mi-oiseaux aux longs nez rouges, réputées pour être des esprits protecteurs et redoutables de la nature sauvage et des montagnes. Autrefois, les conteurs de légendes affirmaient que ces esprits puissants rôdaient autour des cultures de chanvre traditionnelles (Taima) pour écarter les démons errants et punir les curieux irrespectueux. Une légende parfaite pour l'ambiance mystique d'Halloween ! 👺🌿
❤️❤️❤️❤️❤️❤️❤️❤️❤️❤️❤️❤️❤️❤️❤️❤️❤️❤️
Un grand merci à World Breeders pour la qualité exceptionnelle de cette génétique Hokuzan, et un immense merci à tous les lecteurs et abonnés qui suivent fidèlement cette aventure ! 💚🌱