
Likes
Comments
Share

@Hempcules
Follow
WEEK 8
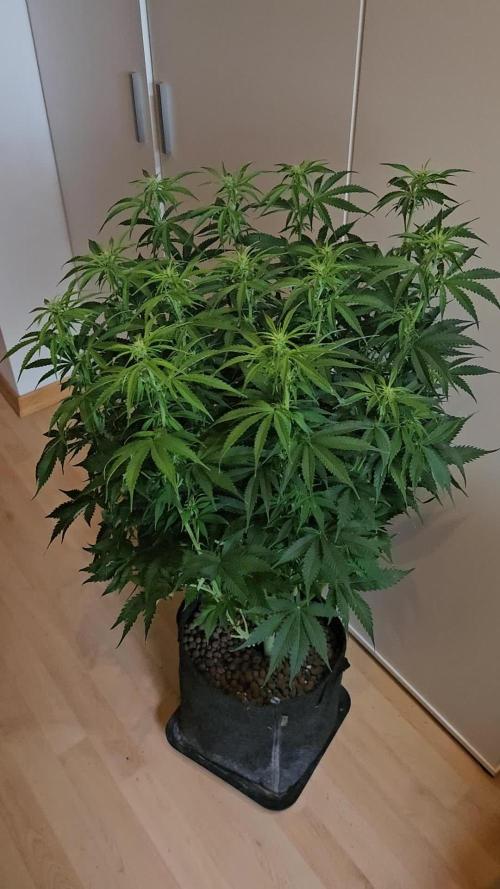
In this week, the plant has grown enormously again. It has gained 20 cm in height and is becoming bushier and fatter. 🙂
Due to the massive number of shoots, I already had to cut out quite a lot. It has kept its beautifully even canopy. Right now, it’s a true beauty.
The stem is now almost 2 cm thick, which indicates excellent root development.
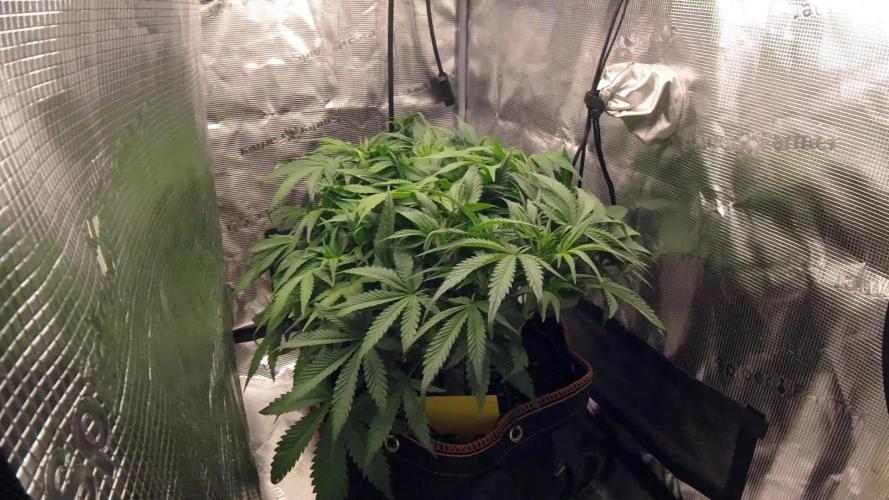
Starting next week, it will also get a better spot under a larger lamp in my number‑one tent.
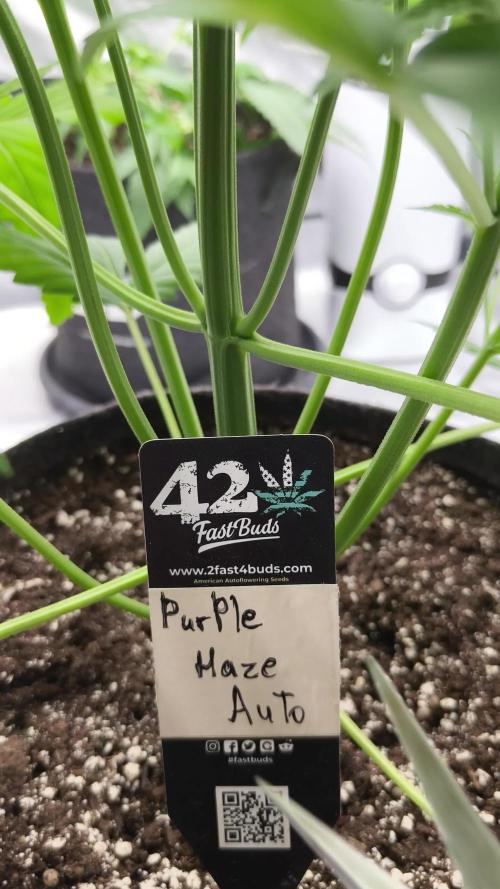
I can still only say that I am absolutely thrilled with this Genetics. However, there is at least one other phenotype that flowers earlier and doesn’t grow quite as bushy, but instead taller. That one is also excellent. I hope the flowering phase will be just as good as everything so far. If so, this will be a fantastic result. 💚
PPFD: 750µmol/m²/s
Water: 2x water 1x nutrient solution
Vpd: 1,4Kpa

Likes
4
Share


@GeminiCQC
Follow
I didn't happen to weigh this one went as I don't do a whole plant dry. I got real impatient, and it was looking decently cloudy with a little bit of amber as well. Still smells like starburst.

Likes
38
Share


@TheCannaProphet
Follow
--------------------------------------------
~DUTCH PASSION OUTLAW AMNESIA~
--------------------------------------------
Outlaw Amnesia is a top quality old-school Amnesia Haze dominant Sativa that will appeal to both beginners and connoisseur growers alike. She is 80/20 Sativa/Indica with around 20% THC and is a cross of our Super Haze with a very special clone of Amnesia. The high is powerful and fast with a clear uplifting sativa high and a strong Haze accent. The taste is fresh, sour, strong and old-school Hazy. Outlaw will stretch more than most, she can triple in height during bloom, and grows well with the SCROG method.
Although she can be harvested as early as 9 weeks, a full 12 week flower period may be required for best taste, yield and high. She grows well in all grow mediums with perhaps the best yields in hydro where yields of up to 500g/m2 are possible, classifying this as a high production variety.
*description credit to Dutch Passion
OUTLAW AMNESIA (DUTCH PASSION) FEMINIZED DATA SHEET
Breeder: Dutch Passion
Genetics: 20% Indica / 80% Sativa
Parents: Super Haze x Amnesia
Flowering Time: 11-12 weeks
THC: 20%
Yield (Indoor): 450-500 gr/m²
Height (Indoor): 50cm
Available as: Feminized seeds
Flowering Type: Photo-period
Sex: Feminized
*Specified by breeder when grown under ideal circumstances
--------------------------------------------------------------------------------------------------------------------------------------------------------------------------------------------------------------------------------------------------------------------------------------------------------------------------------------------------------------------------------------------------------------------------------------------------------------------
THE SETUP:
~Planted into Jiffy Peat Pellets that were hydrated with de-chlorinated water with SuperThrive added then ph'd to 6.0 @ 80℉
~Grown 100% organic in 10g fabric pots with Mother Earth 70/30 Coco/Perlite medium amended with 2tbs/g of Down To Earth 4-4-4 / 2 cups/g of Earthworm Castings / 1tbs/g of Dr. Earth Flower Girl 3-9-4, 1tbs/g of Dr. Earth Bat Guano, 3/4 cup of Down To Earth Azomite and 1 tsp/g Down To Earth Fish Bone Meal.
~24hr light cycle during Germination / 19/5 light cycle for Vegetation and 12/12 for Flower
~Straight water ph'd @ 6.2-6.8 when needed and weekly Compost Tea's.
__________________________________________________________________________________________________________________________________________________________________________________________________________________________________________________________________________________________________________________________________________________________________________________________________________________________________________________
WEEKLY UPDATES:
10/4- Week Eight of flower is here and we're 3-4 weeks from wrapping up with this girl!
Her flowers are continuing to bulk up and are covered in glistening trichomes. She appears to be starting to fade which is exactly what I'm hoping to see, meaning that she's just about used up the nutrients in her medium.
I watered today with 1.5g of de-chlorinated water which was then ph'd to 6.6 @ 72℉ turned her pot and shot a few pictures of her.
And lastly, I have to address the 'elephant in the room'. Yes, it looks like she's got some seeds in her flowers. She's in my 4x8 with seven other ladies and, unbeknownst to me, my Do Si Dos #33 developed some male flowers that were EXTREMELY small and well hidden. As a result, she got fertilized. This happened so late into flower that I decided to go ahead and finish her out. My hopes are that I get some viable seeds which should be an interesting F1 cross between these two.
10/6- Today I watered her with 1.5g of her usual straight de-chlorinated water that's ph'd to 6.5 @ 72℉ and turned her pot.
She's just starting to fade, is still stacking her flowers, bulking up and has an incredible amount of trichomes which I'm beginning to monitor daily.
10/8- The routine of watering every other day continues like clockwork. Yesterday was a 'no water' day and I did a basic check over of the plant, removed a couple of yellowed lower leaves and turned her pot.
Today she got the usual 1.5g of straight de-chlorinated water that's ph'd to 6.5 @ 72℉ and had her pot turned. I've also begun to check her trichome development with a digital USB microscope to try to identify the ideal harvest time which, according to the breeder, will be here in around three weeks +/- but nothing is cut in stone so I'll let the trichomes determine when she's ready...ya never know, could be a lot sooner! 🤪
10/10- Well, Week Eight has come, gone and has been a trial once again of my patience with this 11-12 Week cultivar!
She's so freaking frosty that I've wanted to chop her several times but, I know from experience, good things come to those who wait... then wait a bit more. I anticipate that she's not going to make the 77-84 days in flower 'suggested' by the breeder for best taste/yield and will probably go closer to the 9 weeks +/- which is the minimum recommended flowering period for this strain, but we'll have to see what her trichomes have to say!
I've cut the wattage back on the HLG 650R to 500w at the wall now to simulate the way that sunshine becomes weaker as fall approaches due to the lower angle of the sun in the sky. This helps outdoor plants to know that winters on the way and they need to hurry up and complete their life cycle. Cutting the wattage back creates the same effect on the indoor plants, especially when coupled with lowered temperatures in the tent.
I have also noticed that her water uptake has slowed. After her heavy watering on the 8th, her pot still had some weight to it and she was looking great so I went ahead and skipped watering her today, watering her tomorrow at lights on with her usual.
Next week promises to be exciting so don't forget to check in! Harvest time is right around the corner and I'm getting stoked to see the results! 😎🙏💚
~Thanks for stopping in! This epic run is in the home stretch with harvest fast approaching...Stay lifted and be Blessed! 😎🙏~

Likes
38
Share


@Silverback_Guerilla
Follow
8/10:
Seeing great growth now..lots of branching. I actually fed them yesterday, but didn't update...several have popped some pistils and pretty much the rest are about to, and I'm out of bat guano, so I went ahead and gave them Open Sesame so they'd have more P available over the next several days.
8/11:
I rearranged the garden a little. Moved all four #10's to the right side, the #4's are mostly in the middle...very branchy..the others, mostly to the left are the #2's and maybe a #3.
The big plant on the lower left is an auto, as is the runt, and the plant at lower right. The "fern-looking" plant is actually a Jacaranda Tree (blue fern tree)...it's about to get kicked out...
8/12:
I did a little training on some of the bushier #4's today. I don't have much space to work with, but I was able to do a little to encourage a race for apex dominance.
There were enough pistils on them that I decided to switch the week to "Flowering."
8/13:
I fed them today with ONE and added Open Sesame, Silica, Signal, and Sweet & Sticky.
I sprayed them all with Axiom (Harpin proteins) and Boom Boom Spray right at dark.
8/14:
BAM! They are poppin pistils left and right now...lotsa lovely little cotton tops.👍
8/15:
Day 15 since the flip to 12/12..good progress. The #2's and #10's are stacking up and stretching pretty well and the #4's just keep bushing up.

Likes
8
Share


@Chucky324
Follow
Hello. This is the end of week 13 and the beginning of week 14 of veg.
Didn't report last week because I was still harvesting the 13 plants of Captain Future. Just put the last plant into the curing bags last night.
Each plant is getting 2 gallons of rainwater every 4 days or so. Did some branch topping and light defoliation this week.
OK ... Ready for flowering ... Going to turn them over to flowering tonight or tomorrow. Take out the lights and close up the tent at 8 pm.
Open it back up at 8 am and repeat. Found a couple of seams that need stitching in a few places to make it totally dark. I'll do that tomorrow.
There's a 15 gallon reservoir in the tent too. I'll fill it on Sun with flowering nutrient and if I spray a couple of minutes a day, it lasts a week.
Then on the seventh day I clean it up and make more nutrient for the coming week. I'll hand water when the pots seem dry.
Works good ... last year I got about 2K from 6 plants ... so ... We'll see how it goes this year.
Plant #1 smells wonderful. Soft Lemon with some sweet Papaya in there too, and is sticky when I'm working with it. Nice Plant.
OK. Keep Growing Straight.
Chuck.

Processing
Likes
5
Share


@FlyHighhh
Follow
Gaat goed ga volgende week in de bloei zetten . Heb wel 2 achterblijvers maar dat groeit wel bij hoop ik 🤔🤔

Likes
11
Share


@Kirsten
Follow
23.2.25:
I watered with approximately 1.5 ltrs per plant. I mix 6.5ltrs of dechlorinated water PH'd to 6.4. This time, I only added Ecothrive Biosys to the water because I have just top dressed the soil.
Adding anything extra right now would probably be overkill and result in toxicity from too many available nutrients.
I defoliated minimally mostly Do-sì-dos, Watermelon, and Pink Mist. Due to the scrog net, it's about all I can reach 😅
I've moved the plants to increase space for Gorilla Cookies 🍪 and Bubble


Likes
11
Share


@AestheticGenetics
Follow
3/26/25
day 63 since 12/12
around day 56 since first pistils. Shes supposed to go a full 9 weeks. the top buds are peppered with amber but a couple nodes lower and theyre possibly not all the way cloudy. i was planning on chopping today but im not sure if im still going to. I may do 24 hours of darkness and see how it
3/28/25
chopped at day 65 after 24 hours of darkness


Likes
18
Share


@VI_Cannabis
Follow
June 28 - They are doing great, We switched to the recommended amount of nutrients for flowering, Also 2 air stones I ordered have come in so now those are on 24/7 with the nutrient water in a 5 gallon bucket.
June 29 - Still just growing away, I am still feeding roughly 3L per plant of nutrient water every 24-36hr depending on how dry they feel.
June 30 - Totally forgot to take pictures/videos today. I gave them there daily watering and they are still just growing away. They are in flower now I believe!
July 1 - Awesome to see this amount of progression. Tons of hairs and a decently even canopy. There is a small smell coming from in the room!
July 2 - Again I forgot to take pictures, But as always they are still just growing away. so far so good!
July 3 - Tons of growth and they are starting to become uneven. I don't have a ton of time so I think I will leave them for another week before doing some LST or HST. Tons of colas forming, lots of hairs and they are starting to have a heavier smell! So far so good!
July 4 - Same thing as yesterday, still growing away, Ive turned the lights up to 100% now and I have removed the SF-1000 as I needed it for another project! (be sure to check out my other diary's which I will be uploading today!
Likes
109
Share


@MadeInGermany
Follow
Hi all 🤗
She continued to do very well this week 😍.
On June 28th she was placed in the flowering tent, where she now has a light duration of 12/12 h.
I am very curious to see how it develops in bloom, and what a smell will end up blowing through the tent 😍.
She still has enough nutrients left, so I will probably only give Green House Powder Feeding again in 2-3 weeks :-). I wish you all a lot of fun with the diary, stay healthy 🙏🏻 and let it grow 🌱🍀
You can buy this Strain @
https://greenhouseseeds.nl/
☝️🏼☝️🏼☝️🏼☝️🏼☝️🏼☝️🏼☝️🏼☝️🏼☝️🏼☝️🏼☝️🏼☝️🏼
Green House Seeds Company Cup 🏆
Type:
Wonder Pie
☝️🏼
Genetics:
Wedding Cake x OG Kush
👍😍
Vega lamp: 2 x Todogrow Led
Quantum Board 100 W
💡
Flower Lamp : 2 x Todogrow Led
Cxb 3590 COB 3500 K 205 W
💡💡☝️🏼
Earth: Canna Bio
☝️🏼
Fertilizer: Bio Grow Feeding ( GHSC ) , Enhancer ( GHSC ) , Bio Bloom ( GHSC)
☝️🏼🌱
Water: Osmosis water mixed with normal water (24 hours stale that the chlorine evaporates) to 0.2 EC. Add Cal / Mag to 0.4 Ec Ph with Organic Ph - to 6.0


Likes
574
Share


@TOTEM
Follow
Okay, she’s still stretching (and she loves techno music as you can see 👅), but she definitely slowed down. Of course she’s not gonna fill all the grid, as I expected. What a pity! Now I just want her to grow a little more, especially those colas at grid level. If they don’t grow a little, I’ll get the worst colas ever!
I’ve just bought a 600W COB panel with 6 Cree CXB3590 (3500K). It should be delivered next week! Can’t wait to try it, and finally give this princess the real power she deserves: DOUBLE SUN POWER!!!! 🤯
What do you think about this pheno? Do you think it will be that “strange” one? I love those stretching colas! 🤩
Day 70: Watering with 8L of tap water.
Day 72: Feed @ 1ml/L, 6L of tap water in total. It’s very strange I’m using full strenght nutes with Dr. Grinspoon. I’m still alternating one watering with nutes and one without. Leaves are ok and pointing up to the sky, tips are perfect and colors too, so she should be just very hungry. This week I switched Biomassa with Florastimo. Florastimo increases the synthesis of natural hormones of plants, the metabolism and assimilation of nutrients, the production of essential oils and resins, and maximizes the production of flowers and fruits.
Day 75: Watering with 8L of tap water. Runoff PPM is 700.

Likes
2
Share

@Miketama
Follow
Grow Diary Introduction
This diary was created with the idea of recycling as much as possible and utilizing every single watt of power to its absolute maximum potential. Honestly, you could call this run a survival experiment.
Right after harvesting my last grow, I reused the old soil and salvaged the previous Biotabs, which were still fairly intact (you can see photos of this in the germination week). These recycled tabs will be the backbone of the feeding schedule for this run. To reduce the bacterial load, I watered the soil with a water and turmeric mixture—though this probably knocked back the beneficial microbial life in the soil as well. For containers, I’m using some balcony pots with built-in saucers that I found out on the street and repurposed. I started the seeds in 0.25L of fresh substrate mixed with a little bit of mycorrhiza.
Initially, the plan was to plant one NL and one AB per pot, but one AB failed to germinate, so I left one NL to grow by itself in one of the pots. Each pot has two recycled tabs, and so far, they’ve only been fed a couple of times with Orgatrex at 2ml/L.
They germinated on April 1st and spent their first 45 days indoors. The first week was a real bottleneck for them, as they were placed inside a tent that was in late flowering, meaning the climate was totally wrong for seedlings. For the remaining 4 weeks, they shared the tent and kept the plants of the new indoor cycle company, staying in there for as long as space would allow. Afterward, I moved them to the veranda windowsill. They are currently kept inside, pushed up a bit tight against the window glass, which keeps them safely away from bad weather and pests.Currently, the plants are only getting about 5 to 6 hours of direct sunlight per day. Because of this, the buds aren't particularly dense, with the exception of the top colas on the Northern Lights. I'll probably dry and smoke those main apicals, as they turned out surprisingly nice and dense visually, especially considering the rough conditions they went through.
The Afghan Bullet (AB), on the other hand, developed much smaller buds, but they are more balanced and greater in number. I'll be throwing the smaller NL buds in with these, making it absolutely perfect material for some top-tier bubble hash. As the master Frenchy Cannoli used to teach, overly dense buds aren't actually the best for washing bubble hash; this looser structure is exactly what you want for a great extraction.

Likes
37
Share


@William137
Follow
Pleased with the progress! Had a few leaves curling up but seems to have been sorted with and extra fan and lifting the lights slightly. The pots seem very heavy and mosit so im not sure if im overwatering them
Likes
34
Share


@ClubRiot
Follow
BCN Power Plant
Week 14
11L Pot
LED: SP250 (245W) for Flow. Stage
Canna COCO
Mineral Nutrients:
👇
Sensi Cal-Mag Xtra: 1 ml/L
Power House Part A: 1.5 ml/L
Calcium Plus Part B: 1.5 ml/L
Stimulus: 1.5 ml/L
Bud Explosion: 1.5 ml/L

Likes
1
Share


@Olduffybastard88
Follow
You can see the girls on week 4 right at the end of video aprry didn't get much time with plants this week will update more in the coming days
Ones in tent are day 5 flower the larger ones outside tent are week4 the smaller ones sitting at window are going into week 3 and need some nuits to kick start them
Likes
15
Share


@SmokingDwarf420
Follow
14/08/2023
Nothing special to mention at the beginning of this week, except my new heat/humidity detector, which is actually an old device I found. I came across it because my little one doesn't seem very reliable anymore(As you can see on a picture it say 69% while the other big one say 45%). Still no nutriments, just water with pH-. And I think I won't make any more changes until the final weeks, when I'll probably trim a maximum of leaves.
17/08/2023
I redid the LST for number 3, without knowing what I was doing, and I'm not sure if I did it right, but I'm pretty happy with the result. The canopy of #3 looks really good, even though the overall canopy is quite uneven. However, doing the LST on all 4 plants intimidated me way too much.
So I changed the position of each plant so that they wouldn't encroach too much on each other; I only have a space of 60cmx60cm.

Likes
3
Share


@autogrowmadness
Follow
Started the flush process today , flushing for the next 2 weeks everytime she dries up.