


Likes
Comments
Share


@SubliminalSociety
Follow
went for a short trip and when I came back, I found my plant eaten by a nasty snail. R.I.P.
I'll leave her standing but it's an auto so I'm not expecting much

Likes
49
Share


@Roberts
Follow
The Mandarin Squeeze sisters are growing great. Loads of frost on the Cola sites. They are looking super healthy and promising at this point. I am a little heavy on nitrogen if Anything was to be changed. She is bulking and probably has a good smell going. I have a cold and can't smell right now. Nothing much to report. 🤞🏻she bulks good. Thank you Terpyz Mutant Genetics, and Spider Farmer. 🤜🏻🤛🏻🌱❄️🌱
Thank you grow diaries community for the 👇likes👇, follows, comments, and subscriptions on my YouTube channel👇.
Thank you Happy Growing 🌱🌱🌱
https://youtube.com/channel/UCAhN7yRzWLpcaRHhMIQ7X4g

Likes
38
Share


@DomanAtrik
Follow
I keep finding these little green caterpillars eating leaves 😑 Thankfully I also keep finding praying mantis. I really hope the Sensibloom with PH perfect fixes my soils high PH of 7.2.


Likes
170
Share


@Master_weeda
Follow
Bonjour à tous les padawans et maîtres jedis jour84 arrosage avec 25 centilitres d'eau ph6.3
Jour87 arrosage avec 30 centilitres d'eau ph6.3
Jour88 pratique de la techniques du tronc fendu (videos explicatives) et arrosage avec 20 centilitres d'eau ph6.3
COMMENT FENDRE LES TIGES DE VOTRE PLANT DE CANNABIS
Pour fendre les tiges de votre plant de cannabis, il vous faudra :
Une lame propre et aiguisée (une lame de cutter fonctionne bien)
Un mètre ruban
Une ficelle ou un adhésif pour marquer les coupures que vous ferez le long de la tige
Un crayon, une baguette ou une brochette pour séparer la tige une fois fendue
1. Tout d'abord, commencez par mesurer la partie de la tige que vous allez fendre. Il faut faire une incision d'environ 10–20 cm juste sous la branche la plus basse de votre plant. Utilisez un ruban adhésif ou de la ficelle pour marquer le début et la fin de l'incision.
2. Ensuite, prenez votre lame et faites une incision en travers de la tige, en commençant par le haut. Attention à faire une coupe propre, jusqu'au centre de la tige.
3. Utilisez votre lame pour tailler en descendant vers le bas, jusqu'à la marque inférieure de la mesure que vous avez prise auparavant. Essayez de tailler aussi droit que possible. Une fois que vous avez atteint votre marque du bas, laissez la lame au centre de la tige, puis utilisez un crayon/baguette/brochette pour ouvrir la partie coupée, puis sortez votre lame.
QUEL EST LE MEILLEUR MOMENT POUR FENDRE LES TIGES ?
Il existe de nombreuses théories sur le meilleur moment pour passer votre tige au couteau, mais la plupart des cultivateurs suggèrent de le faire à la dernière semaine de floraison. Même si certains cultivateurs recommandent de le faire dans les 3 derniers jours avant la récolte, nous recommandons de le faire un peu plus tôt (7–10 jours avant la récolte).
QUELS SONT LES RISQUES À FENDRE LES TIGES ?
Fendre les tiges est une technique à stress élevé très agressive que nous ne recommandons qu'aux cultivateurs expérimentés. Nous ne recommandons également pas de fendre les tiges sur les variétés à autofloraison, car cela peut être bien trop intense pour elles.
FENDRE LES TIGES, ÇA MARCHE VRAIMENT ?
Il existe un solide ensemble de cultivateurs expérimentés qui déclarent que le fait de fendre les tiges peut produire de bons résultats. Malheureusement, peu de données qualitatives le prouvent. Cependant, il semble que la fente des tiges soit originaire des Pays-Bas, où elle est pratiquée par des cultivateurs néerlandais experts depuis les années 1970.

Likes
1
Share

@Mo_Powers
Follow
The cold days are behind us and summer is just around the corner. It’s only a small step so far, but with the warming sun, it’s set to take off in the coming weeks.

Likes
14
Share


@Korinthius
Follow
Okay, so interesting week all around for both myself and this plant.
First off, apologies for the limited pics this week. A lot of time was spent on another plant, but going forward, you should see an improvement.
Second off, more apologies. This time, for the time-lapse video. It appears a bit jumpy during the first period as I was getting it properly configured, before bumping it out of position. I also realized I could zoom in with it.
Now, on to Pink Lemonade.
Its been an interesting start with this lass. Possibly I moved her over a hair early to her final home, or I somehow caused her some stress, but the week started off slow. But that all changed as the week went on, and she quickly produced her 2nd, and now 3rd nodes.
From what I have seen, this plant, at least thus far, seems to stress easily, but once she comes back, she comes back with a vengeance.
For those wondering what my intents with this young lady are, I plan to top her at least once, possibly twice, but no more than that. This grow is more about quality than quantity, and even though I should not lose quality by having more, I am also attempted to have this completed by a specific date. I would like to be harvesting this young one for beginning of sept. As per the seed company, she has a flower time of 8 - 8.5 weeks. Pretty tight time frame. We will find out how accurate it is. Pretty much 2 months exactly. That leaves me approximately 10 - 11 weeks to work with the plant, but as I have never grown this strain, I may move her to the bloom tent sooner. Also dependent on how fast she grows upwards as well.
Until next week, keep on growing.

Likes
8
Share


@Exr_300
Follow
Marshydro grow light ts1000 Moved them inside to finish bugs are a pain lol out doors in doors they seem happier
Likes
8
Share

@Mo_Powers
Follow
it has now clearly gone into flowering. really nice pistols and if it continues like this, it will become really thick buds. it has got a few yellow leaves but that's not bad.
Likes
4
Share


@Ourweedfarmuk1
Follow
Hi guys it’s been 2 weeks since the last update. She has been growing at a nice steady pace. Not too much lateral growth but she is getting wider.
Have used a few garden stakes for lst & have been leaf tucking and defoliating selectively.
She is also in pre flower low lights already at 24/0 and have been giving a P/K spike in her nutrition to initiate flower. She is responding well to the feeds.
No topping so she will be growing in all her glory how she is meant to grow.
She’s stout and bushy and hasn’t given me any problems at all.
Leaves are a nice rich green so she is all good no deficiency that I’ve noticed.
What a strain! This was the first Autoflower I ever grew some years back so this is sentimental to me.
I’ll be back next week now that we are off to the races.
Thanks to fastbuds for the genetics.
Won’t let you guys down
Let’s grow!!!!


Likes
60
Share


@julian100614
Follow
La pequeña gorila sigue fabricando pistilos y sus tricomas siguen transparentes, con lo cual la dejaremos alguna semanas mas para ir viendo el proceso.
Los cogollos están realmente prensados y tiene un fuerte olor a cítricos 🔥 muy muy pegajosos
Con ganas de terminar esta maravilla para poder fumarla 👌

Likes
3
Share


@Xabii
Follow
Considering to chop in the next couple days just to end this, nothing happens, plant is sick and all, worst grow I had... so far.
Values are average of the day.
DATE - EC(us/cm)
20250521 1967
20250522 1903
20250523 1895
20250524 1961
20250525 2012
20250526 2047
20250527 2077
DATE - PH
20250521 5.92
20250522 6.03
20250523 6.01
20250524 6.00
20250525 6.01
20250526 6.01
20250527 6.01
DATE - ORP (mV)
20250521 232
20250522 231
20250523 228
20250524 209
20250525 193
20250526 179
20250527 167
DATE - °C - RH% (Tent Temp/RH)
20250521 25.4 47
20250522 25.5 42
20250523 24.3 38
20250524 24.8 46
20250525 24.7 53
20250526 25.0 49
20250527 25.0 49
DATE - °C (Reservoir)
20250521 21.1
20250522 20.9
20250523 19.7
20250524 20.5
20250525 21.1
20250526 21.1
20250527 21.0
DATE - CF
20250521 19.67
20250522 19.03
20250523 18.95
20250524 19.61
20250525 20.12
20250526 20.47
20250527 20.77

Likes
35
Share


@hannabis420
Follow
Alot of trial and error on this gal and shes fast to spring back, resilient to a lot-- hot res temps, training, etc. beautiful plant and genetics!
Likes
9
Share


@Ryno1990
Follow
The strain came out amazing very purple an very dense didn't have a very strong smell but deff a nice one got 3 ounces after all said an done

Likes
19
Share


@Joeycrack9
Follow
Lemon Mandarin (topped)
Papaya Sherbet
Gorilla Melon
Lemonpaya
Orange Sherbet
Likes
39
Share


@J_diaz420
Follow
Muy ansioso con este proyecto, mi primer cultivo s.o.g gracias a royalqueenseeds.
48 hrs en papel húmedo dentro de un pote hermético y luego 24 hrs en sustrato a luz apagada antes de comenzar con el fotoperiodo de vegetación.
El sustrato es lightmix y solo añadi micorrizas granulares .
Veremos como resulta este proyecto 💪✌️🍀


Likes
278
Share


@Metatronix
Follow
A big hello to all the cannabis growing gardeners...and all the other visitors that came across my grow journal.
I apologise for the late updates, what you see on the photograph is what i found growing after my 5 day Christmas absence. i actually took the photographs on the day of my 41 birthday.
During this time the four plants drank a lot of water that nobody was refilling, normally it was ok, this time though when i came beck the ph was at 5.6 after i replenished the missing water it jumpted to only 5.8.
It happened first time to me so i thought "give it a couple of days girls will drink and the replenished fresh water with PH of 7.4 will up my reservoir", Unfortunately it was a bad choice, plants started to drink less and less every passing day, so at this week end started adding PH+ (first time since a long time, my PH+ bottle was bought in 2015 ;)
During the week only added PH+ and PK 13-14.
----------------------------------------------------------------------------------
The SE 7000 is hanged at 28 cm. over the canopy and runs at 550W.
This whole grow's main sponsor is Spider Farmer. You can easily obtain all the great grow equipment we use at: spider-farmer.com
A big thank you to Jessie and the whole Spider Farmer crew for supporting me with the newest technological advancements in horticulture. Thanks to them what i do here is possible.
Thank you SeedsMafia for giving me the opportunity to try out your stock.
seedsmafia.com/en/feminized-cannabis-seeds/moby-dick-feminized.html
Plagron did send us their Contest package for the Power Buds competition .
Thank you for your visit, please leave a like and hope to see you beck here in about a week.

Likes
6
Share

@HeinziGrow
Follow
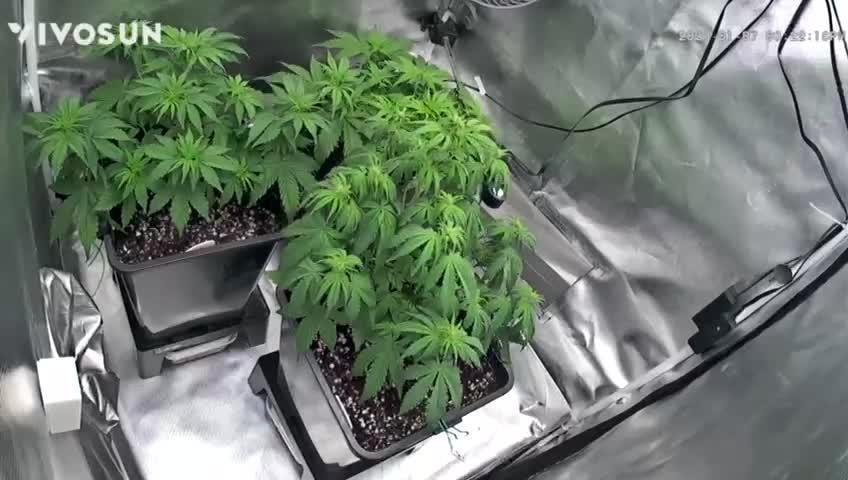
Guten Morgen liebe Freunden, es beginnt Woche 7. Was soll ich sagen, ich habe Pflanze Nummer 1 vernichtet weil sie sich leider nicht erholt hatte nach der überwässerung. Den anderen beiden Pflanzen geht es sehr gut, die 2 strains sind sehr verschieden, Pflanze 3 fängt jetzt erst das blühen an. Ich gebe ca alles 3-4 Tage 2-3 l wasser pro Topf mit einem EC Wert von ca 1,7-1,8. Ich halte euch wie immer auf dem laufenden. Sören Sonntag freunde und bis bald

Likes
23
Share


@SonomaSungrown
Follow
• French Macaron got planted into her 30 gallon fabric pot packed with HEAVILY-AMENDED Roots 707 soil.
– No more BS soil for me. Back to the good stuff!
• Took clones of the Chem Brûlée and Pineapple Meatball to determine sex
•Those girls are extremely root bound at this point... but don't want to accidentally transplant a male into the BIG pots since I am on a plant count restriction (6 mature plants in California)
Here's my Super Soil Recipe:
Sonoma Sungrown
2021 Photoperiod Soil Recipe
Makes ~8 cubic feet of Supersoil (enough for 3x30 gallon smart pots)
7 cubic feet Roots 707 Potting Soil
.5 cubic foot worm castings
1.25 lbs. bone meal
1.25 lbs. fish bone meal
2.5 lbs. high phosphorus bat guano
2.5 lbs. blood meal
1.5 cups oyster shell
1.5 cups kelp meal
1.5 cups alfalfa meal
1/3 cup Epsom salts
1/2 cup agricultural lime
1 cup Azomite
1 tbsp granular humic acid
1 tbsp mycorrhizae (mykos)

