


Likes
Comments
Share

@Chubbs
Follow
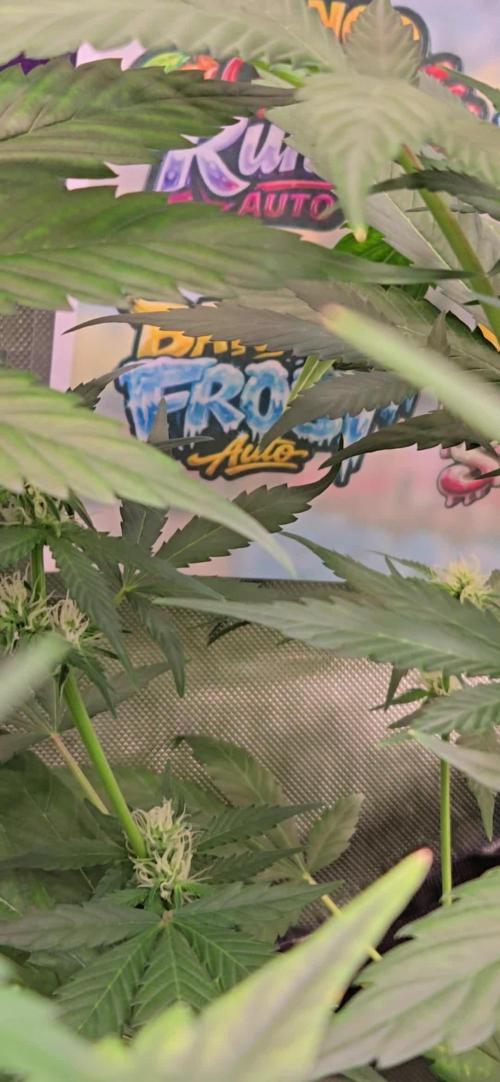
What up Fam, I apologize for the late update. Been away for 2 weeks from the ladies and my son who was watching them did amazing, as I came back to an absolute forest. The plants almost tipped in size which is crazy the growth they had while I was gone. I started adding bloom nutes and did a defoliation and lollipop this week. I'd normally start my training around week 3 but over all they're happy and healthy as can be. Let's Go Happy Growing.


Likes
7
Share


@Hightable420
Follow
One more week till chop. Huge dense nugs with high resin levels and LOUD terps.
Likes
2
Share

@Organic_G
Follow
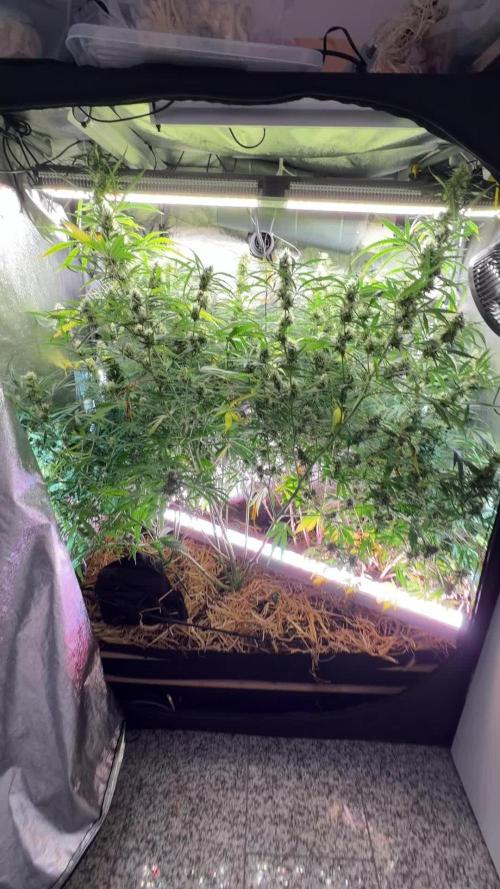
Langsam wirds was
Die kleineren performen zwar nicht so optimal dafür die zwei großen um so besser
Terps sind bei einer Top, bei einer eher Garlic, nicht so mein Fall
Likes
12
Share


@NuclearPyro
Follow
Struggling with RH, tent is too crowded bc I have lots of negative pressure, tent is bowing in hard. The best I can get down to is 50%RH, however I have tons of circulation. Look at video. I put a dehumidifier in the lung room. Rh drops if I open window, but its raining. Too wet outside rn. It went from blizzard (dry) to rain for 7 days now, maybe thats why Im struggling. Need circulation in lung room too. Vents open, still struggle, tent door open, im fine. And I use blackout curtains so no light penetrates the room. It maintain complete darkness 24/7. Plants sleep when i sleep, so never worried about it. My house was built in 1952 post WWll, so no insulation, just straight brick and a solid slab. That means it will hold moisture. Lung room at 35% RH. Rearranged set up. Trichomes...... 70% clear, 20-25%% cloudy, 5% amber


Likes
27
Share


@RDWCGrowing
Follow
4/1/2023
Week 7- Day 1 of Veg (Day 59 overall)
Water Change Day!!!
Water was really low it was just above the hump in the Res cutting it close to not having enough water in the system to keep it going. They drank a lot making it close going the full 14 days. I am still going with the previous grows and adding 36 Gallons but even looking at the root I think the SILICA is working and the roots are further along at this point than in previous grows. This next two weeks will watch how much they drink and how low my Res starts getting, and will make a decision on changing the water weekly from here on out or still keep on the plan of every other week until Week 4 of Flower.
Added 36 Gallons
Mammoth SILICA= .5Mil/Gal = 18Mil
CALMAG= .5Mil/Gal = 18Mil
Root Drip= 1Mil/Gal = 36Mil
FloraMicro = 5.4Mil/Gal = 194Mil
FloraGrow = 4.2Mil/Gal = 151Mil
FloraBloom = 4.6Mil/Gal = 166Mil
ORCA = .5Mil/Gal =18Mil
PPM= 536
PH=5.84
PPFD=500
Tent Temp= 76.5
Water Temp= 71.4
Humidity= 58%
4/2/2023
Week 7- Day 2 of Veg (Day 60 overall)
Not much today, PH was at 5.81, I brought that back up to 5.90. I took care of some badly needed defoliation in each of the back sides .. I was able to see some really good clone material to use on the lower backside of each of the plants. I will be taking two clones from each to breed over the next few weeks depending on when I am going to flip them.
4/3/2023
Week 7- Day 3 of Veg (Day 61 overall)
A little FIMing, A little Topping, and a Little bit of defoliation.
Might have to take my clones during the week this week, I am trying to wait until Saturday to hit week 8 but again they are getting all over the place and I need to trim some of the sides and lower areas.
4/4/2023
Week 7- Day 4 of Veg (Day 62 overall)
I decided to take my clones and clean up the lower half of the plants. I took 2 clones from each plant to go into the cloning machine.
4/5/2023
Week 7- Day 5 of Veg (Day 63 overall)
Water Temp is sitting at 73. Right in my ideal range for my setup.
Ideal range 70-74
My Temp Tent is my ideal zone75.6
Ideal for this grow 70-78
The lights are still waiting the switch to flower to get maxed out...
The Humidity is coming in right at 60% I love it..
I took so much off yesterday I figure it was a good day to let them rest.
4/6/2023
Week 7- Day 6 of Veg (Day 64 overall)
I needed to Defoliate some and I topped a little. The plants might force me to flip them soon. Next Wed is the 10 week mark half way through the 20 weeks. The net is Bingo... Which means that If/when the plants hit the net I will have to flip them. The Net is set to the max height that I can let them get based on the Breeders Stretch report 75%.
4/7/2023
Week 7- Day 7 of Veg (Day 65 overall)
#3 is 22 inches Tall, #2 is 19 Inches Tall.
Net is set at 24 inches. Net is also set as my Bingo point, if they hit the net then I have to flip no matter what to account for the Breeders recommended 75% Stretch allowance. I think I am going to have to flip right at the 10 week mark of the Competition which is Wed 12 Apr.
I topped a little, I de-foliated a lot to start getting it ready for the anticipated Flip.

Likes
29
Share


@olli0420
Follow
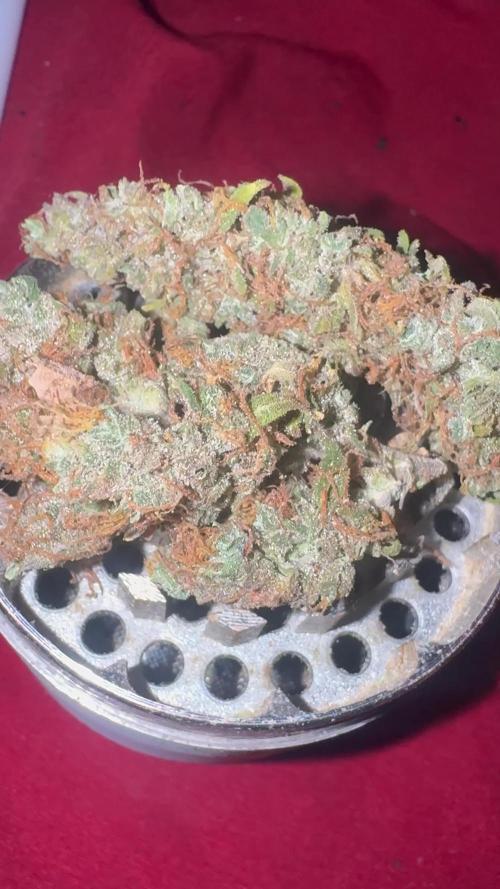
this week is going really good! I am flushing right now with just plain water. I was supposed to harvest but I decided to give it another watering since the ppm values were the maximum recommended for harvest and I want as less fertilizer in my buds as possible😁 next time I'll water I'll give them 4/5 liters per plant and when the soil is kinda moist and about to dry I will give them 24 hrs of darkness to increase resin and then FINALLY chop everything off!
I'm really excited to try them! they smell really amazing.




Likes
2
Share


@High_Grade_Dadli
Follow
Smooth sailing so far....8 bud site so far...might do some defoliation nxt weeks...let's see
Likes
54
Share


@rhodes68
Follow
1/29 Week 5
Nothing but the kind of problems I asked for, some white tips that mean an increase of runoff is needed.
Half expected to see this as I have been varying the amount as a learning experiment. Will up to 20% for a few days
In addition will be reducing nuets slightly keeping cal-mag as is until reason to change presents itself.
Will be kind of boring the next couple of weeks at least till they get into the big tent.
1/30 Aeryn now at 15 inches
Runoff at 40% and nuets reduced to lower pot EC
Ive tossed out my old bottle of Cal-Mag I think its turned on me as these white tips did not appear until it was folded into the feed.
Just no way this dose of nuets is causing the tips to show burning.
2/1 Major defoliation last night at lights out.
Removed perhaps 25-40% or leaf mass on all plants to allow them to stay in the tent another two weeks.
It was time to learn the process anyway, took a compromise path to doing it, some recommended taking more some less, hey sounded good to me.
Plants doing very well after defoliation except for those aggravating white tips, going to be reducing Cal-Mag again to 1ml/gal and keep CT at 5ml/gal taking C-M to zero based on what I see.
2/2 Dropped Cal-Mag from feed, want to see if that has anything to do with those white tips.
Runoff is at 40-50% ppm out under 900 so dam if I know. Will continue to defoliate as we go when something pokes its head where it does not belong.
Otherwise they are beautiful, good job so far Fast Buds. 👍
2/3 man they recover fast, removed a few fan leaves that poked their heads where they shouldnt.
Add Si to feed tomorrow for stem strength
Not comfortable leaving these in veg for two more weeks, just asking for problems. So...
Plan for flowering:
Flipping this weekend so new week will still be veg.
Removing one plant from the Moya tent to the Flowering tent to relieve space pressure as both tents will be set to 12/12 and just flower them all.
Should have space in Moya to cover the few days they are in there with just three plants, have a bout 18" of light hang to work with.
Thinking of moving Aeryn as she is largest and most likely to cause issues.
Just not sure what the stretch is going to be 😳
2/4
The white tips were absolutely caused by the Cal-Mag, considering the doses and PPM that is puzzling to say the least.
Adding Si for a few feeds to get em ready for flowering as I have no idea how these are going to grow so heading off some potentials.
Plants hit 20" over night still flipping in a few days

Likes
4
Share

@SamDo
Follow
🇺🇸 Grow Journal – Week 13
Week thirteen.
The plant seems in good shape overall, even though it’s starting to show some light discoloration on a few leaves.
I don’t really know what’s causing it.
Maybe it’s because the plant is growing and needs more nutrients now.
Or maybe there’s some kind of nutrient blockage starting to appear.
The substrate has been running for thirteen weeks, so it could be getting a bit loaded.
I’m thinking a flush might help — just to give the root system a reset before moving forward.
This week I also worked on defoliation and topping.
We’re now at sixteen apexes, and I think that’s enough.
It’s probably the last topping, because if I wait much longer, the plant is going to get too big and it’ll be harder to manage once she stretches.
Aside from that, everything looks fine.
However, I did notice a big drop in pH in the reservoir, which is strange.
I added Athena Balance, just like always, but the pH keeps going down.
I don’t really understand why it’s dropping so much.
Other than that, everything’s okay — nothing special to report.
The plant looks stable, and we’re getting close to the flowering stage.

Processing
Likes
8
Share


@Joni2017
Follow
Hello everybody 👋🏻 today full moon 🌕. I put the seed in a tupper on top of the router where it gives a good temperature😊. I will put the led at half power (400W) during vegetation and at full power (800W) in flowering
Royal Dwarf
This variety, which removes the genetics of the first autoflowering plants, is reaffirmed in the sector as a plant of the most interesting.
Dwarft genetics comes from the crossing of 2 very specific indications that transmit its main characteristics. RQS crossed a Dwarft with a feminized Skunk to obtain the Royal Dwarft. Finally, he crossed the result with his autoflowering predecessor to stabilize this characteristic.
With a maximum height of around 50 cm, and a little branched structure, it becomes a compact and vigorous plant, perfect to cultivate in small spaces, discreetly.
With a maximum production of 40g per plant, and notorious for being the most productive genetics of Royal Queen Seeds, it will be a variety of the pleasure of the most impatient growers, being able to achieve an interesting harvest volume without having to wait for a whole harvest cycle .
We are talking about a marijuana genetics with a sweet but aromatic taste, and really strong in intensity. The taste picks up the bottom of the Dwarft part, but with the nuances of the Skunk marijuana variety.
As for the effect, we will obtain the mental clarity and the socializing effect of the Skunk with a pleasant physical effect coming from the indica part. Of moderate power, it seems a boil recommended for day to day.
THC: 13%
CBD: Low
Yield Indoor : 150 - 200 gr/m2
Yield Outdoor: 30 - 80 gr/plant
Height Indoor: 40 - 70 cm
Height Outdoor: 50 - 90 cm
Flowering time: 6 - 7 weeks
Harvest Month: 8-9 weeks after sprouting
Genetic Background: Skunk x Ruderalis
Type: Sativa 60% Indica 10% Ruderalis 30%
Effect: A motivating and inspiring feeling
Flavor: Citrus, Sweet
Climate: Cold
Bio Tabs
Now fertilizing your plants will be much easier; we only have to add the Bio Tabs and the other components that are included directly in the pot when we plant, and the rest of the crop will only add water to our pots.
In the middle of the crop you have to apply an irrigation with Orgratrex and Bactrex to reinforce the biological activity and that's it. We will have plants as always, the most productive and tasty, totally organic and without having to worry about excess nutrients or fertilize them.
Dosage and how to use the Starter Pack of Bio Tabs step by step:
Fill our pots to about 3/4 and add 3g of Mycotrex for each pot, no matter the size. More or less are 3 tablespoons of coffee rasas.
Then we add another 25g of Startrex (which comes to be 2 tablespoons) every 5L of soil, so if we have 10L of pot then 50g and so progressively.
We stir well to mix with our substrate and just fill the pot of earth.
Then we make the hole to transplant our plant to the final pot, and in that hole you have to throw another 2g of MycoTrex into the hole itself and we can now transplant our plants.
Then we have to add your Bio Tabs tablets, every 5L of earth a tablet on the substrate, if we have 10L then two tablets ... You have to bury them closer to the edge of the pot than in the center. They are buried about 5 cm deep in the substrate and we will have our plants fertilized for weeks.
We make a mixture with the last component that remains when we plant, Bactrex. Add 1g to a liter of water and give the first watering with that mixture.
From now on, you only have to water with water until the 5th week.
At the 5th week, we will have to contribute a new help to our plants, we will add 20ml of Orgatrex and 1g of Bactrex in 500ml of water and stir well. Water only with that half a liter a plant and only once.
Add water until the end of the crop, that's that easy.😋👏🏻👏🏻
Biobizz light mix
With Light Mix of BioBizz we will be 100% sure of having bought one of the best lands available for your seeds. Saving on the ground is one of the worst mistakes we can make, since we are starting a job that the final result is to seek the highest quality and production. To think that is where the plant will have to live all its days of life so it will have to be of the best possible quality.
With Light Mix you will have an excellent substrate, as each land has a different formula and composition, we will find out who will best resist this substrate, according to the climatic conditions where we are going to plant. It is characterized by its high proportion of water / oxygen retention, this soil pulls more towards water retention so it will be perfect for all those who live in warmer areas avoiding having to water the pots so often, it retains a lot of humidity. We will have to be careful with the first days of our plants so as not to soil the land too much, otherwise the roots will not shoot as they should and you could even drown your plants, this advice is worth all the autoflowering genetics that are more sensitive to root problems and excess irrigation.
This sack of earth comes very light of nutrients, so this substrate should provide practically nutrients in all phases of the crop from the second week.
Composition:
Peat moss
Perlite
Ec: 1.2
Ph: 6.2

Likes
14
Share


@Wenz004
Follow
Next grow week done
Nothern light topped...started to grow better after one week of my absence and pure stress for the plant...nutrients data above are only for this plant
Northern light untopped which gets only aptus nutrients (data see last week) shows impressive grow...develops monster leaves which is a bit problematic...lower part does not have enough light...however I decided not to influence this plant much...only done some light lst
Likes
30
Share


@Canadian
Follow
Day 70 the plants are getting ready full of trichomes probably it will require two more weeks for the Amber star to showing up and I'm trying to cut them down at 20 or 30% amber trichome

Likes
23
Share


@RadDad
Follow
Week 3 and we exit the seedling stage. Blueberry is doing very well in her new 5 gal home.
A Lesson I learned earlier this season is to really watch your watering if you have a small plant in a large pot. I found the best way to avoid over watering is to just water around the plant rather than trying to wet the whole soil. At this point shes not very thirsty so still only getting 500ml/24. Ooooohhh I also have a DS/EC meter coming tomorrow so next weeks update will have a few more deets.
I thought Blu looked a little lonely in her giant pot so I gave her little a friend. Since we're kicking off the veg period this week it's time to switch to Grow Girls Grow by Dutch Science Nutrients. Not starting any training yet since my plan is main-line this one and I need like 8 nodes to start that process. Still lots of growing to do before she gets topped.
I've been doing some reading and I've grown concerned about the strength of the grow light in my tent. My last grow resulted in a pretty trash harvest. My current lights is just a cheap no name from Amazon my new light from Mars Hydro, should be here sometime this weekend then we can take things to the next level.
Until next week
Be rad to each other.

Likes
300
Share


@Ju_Bps
Follow
Hello growmies 👩🌾👨🌾🌲🌲,
👋 Girls looking good, Buds keep coming along and start to bump 😋😋 ❄️❄️
The #1 is more and more purple 💜
💪 Did a big defoliation ✂️✂️
💧 Give water each 2/3 day
2 l Water + Bloom + Green Sensation + Sugar Royal (3.5 + 1 + 1 ml/l)
PH @6
💡Mars Hydro - FC 3000
50% 26 cm
Mars Hydro Fan kit
Setting 9
Have a good week and see you next week 👋
Thanks community for follow, likes, comments, always a pleasure 👩🌾👨🌾❤️🌲
Mars Hydro - Smart FC3000 300W Samsung LM301B LED Grow Light💡💡
https://www.mars-hydro.com/fc-3000-samsung-lm301b-led-grow-light
Mars Hydro - 6 Inch Inline Fan And Carbon Filter Combo With Thermostat Controller 💨💨
https://www.mars-hydro.com/6-inch-inline-duct-fan-and-carbon-filter-combo-with-thermostat-controller
Fast Buds - Tropicana Cookies FF🌲🌲
https://2fast4buds.com/us/seeds/tropicana-cookies-fast-flowering
Likes
Comments
Share


@Organic473
Follow
First week looks good for all the girls hopefully...This week has been a rain out as the last of the rainy season comes to an end full moon on 15th December 2024 rains as usual.

Likes
Comments
Share

@DerTim
Follow
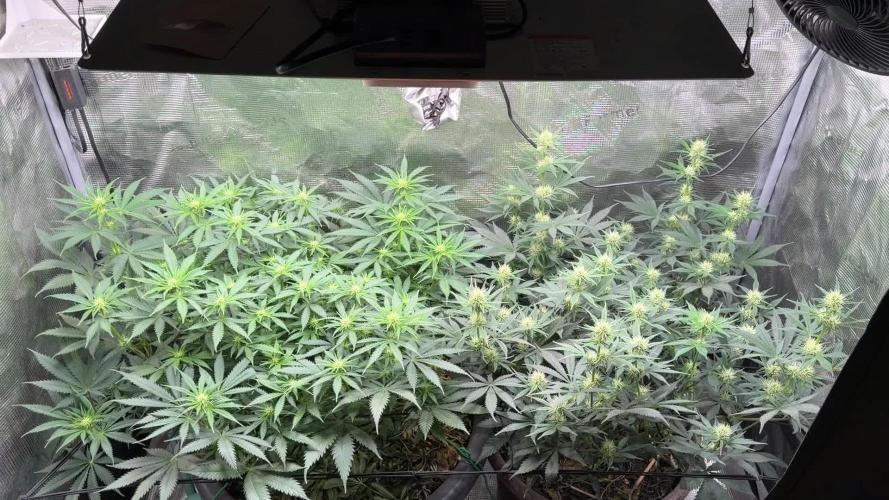
Willkommen im wöchentlichen Update von unseren beiden Indoor Schönheiten. Wie ihr sehen könnt, geht es beiden hervorragend. Viel mehr gibt es dem Ganzen nicht hinzuzufügen. Euch viel Erfolg bei eurem Projekten und bis nächste Woche.