Likes
Comments
Share
Amazing smell for this early on. Impressed with the difficult to grow blueberry lobster
Likes
101
Share
@TOTEM
Follow
Almost done here! What a journey. I’m gonna flush her tonight, even if the soil is still wet. I’m sorry I don’t have one extra week (2 weeks with Overdrive would be better), but the buds are big and fat now. Definitely time for a big flush. You can see trichomes maturation on the two videos I uploaded.
Likes
155
Share
@deFharo
Follow
Bienvenidos cultivadores de marihuana clandestinos y también a los que tienen la fortuna de no serlo!🖐️👨‍🌾👍 Este es un diario donde semanalmente explico algunas de mis técnicas de cultivo y preparados orgánicos, los cuales llevo experimentando dos años en cultivos de marihuana interior. • Hay dos componentes absolutamente necesarios para cualquier cultivo y de los que no se puede prescindir: La luz y el agua... hoy toca hablar de agua, homenajear al agua que la montaña y el cielo me regalan para mis plantas de marihuana!! 💧💧💧 Tengo que decir, que hasta el momento, nunca he usado agua con cloro en mis cultivos, mi interés por el agua pura de manantial ya venía de antes, pues yo mismo la consumo habitualmente, el cloro es añadido al agua corriente para hacerla potable y acabar con posibles bacterias o patógenos, pero no distingue entre buenos y malos. Siempre he creído que el consumo de agua pura, ayuda a mantener la micro biota de nuestro sistema digestivo, os podría hablar de las ventajas palpables, pero voy a obviar comentarios escatológicos. En el caso de mi modo de cultivo, donde baso toda mi técnica en el mantenimiento e inoculación masiva de Microorganismos de Montaña (MM) en el sustrato, el uso de agua pura sin cloro es obligado. El 03 de julio de 2020, publiqué lo siguiente: GROWING TIP: Agua!! Mineralizada, viva y estructurada. La importancia de la calidad del agua para el cultivo es vital para mi, he recorrido los manantiales, ríos y arroyos de mi zona con el medidor de EC y el de PH para conocer las aguas que me rodean, recojo siempre que hay oportunidad agua de lluvia de la terraza de un vecino, nunca me falta agua pura, desecho regar con agua del grifo. Para mi, y actualmente, la mejor mezcla de agua que puedo ofrecer a mis plantas es agua de lluvia 75% con otra de un manantial de montaña de agua alcalina (Carbonato cálcico PH: 9.2) y muy mineralizada (EC: 0.85), esta agua yo mismo la consumo regularmente, consigo una mezcla de agua pura con un EC alrededor de 0.19, me garantizo así el aporte de calcio y otros minerales. En épocas donde no llueve uso agua pura de manantiales y arroyos con EC de 0.3. Estas aguas las filtro y almaceno a obscuras en mi casa, la cuestión es que el agua parada pierde oxígeno y también desordena su estructura molecular haciéndola caótica. Para poder recuperar esta estructura y oxigenación, el agua debe estar en movimiento como en la naturaleza, yo me ayudo de un agitador magnético para volver a tener agua viva, el agitador crea un vórtice implosivo que en 10 minutos pone las cosas en su sitio y carga de oxígeno nuestra agua, una vez hecho este proceso voy añadiendo los nutrientes uno a uno y sigo agitando hasta el final. El agua tratada con esta técnica, mejora la asimilación de nutrientes porque favorece el intercambio catiónico e inunda de oxígeno nuestro sustrato y raíces, también con esta técnica se pueden bajar las concentraciones normales de EC en un 30% y conseguir los mismos resultados, prueba y verás!! ------ Hoy tengo algunos comentarios nuevos sobre los diferentes tipos de agua que uso y usé. - Agua de río: Comencé recogiendo agua de los dos ríos caudalosos que cruzan mi pueblo, buena agua, no hay industrias en su cauce, pero sin embargo las aguas fecales de los pueblos acaban en él. Por lo que, ante la duda, deseche el uso de este tipo de agua. - Agua de lluvia: Como comenté antes, recogía agua de lluvia desde el desagüe de la terraza de un vecino (PH: 7, EC: 0.07), mucho trabajo, exposición vecinal y explicaciones surrealistas a los transeúntes que me preguntaban, como decir que recogía el agua para mi perro que no podía tomar agua con minerales por tener tendencia a la formación de piedras en la vejiga, en otras ocasiones, respondía con entusiasmo que era la mejor agua para cocinar alubias!! 🤷‍♂️😎 Definitivamente dejé de recoger agua de lluvia de ese lugar, pues el agua que explico a continuación ya viene con los niveles de EC que yo busco... - Agua de montaña: Manantial permanente a 700m de altitud, el PH varía según la época del año, cuando en otoño, invierno y primavera hay más lluvia, el PH está en 7, y el EC en 0.25, en verano el PH sube a 8 y el EC a 0,5, esto es debido a que la carga de minerales es mayor cuando no hay lluvias. Según la geología de la zona, rocas cálcicas, arcillas y basalto principalmente, este agua mineral contiene suficiente mineral (Ca, Mg, Si, Al, Fe, K...) para no tener necesidad de usar aditivos como CalMag. Esta, es el agua que más uso para riegos. - Agua de manantial alcalino: Casi a nivel del mar, muy mineralizada, con menos variación de PH y EC en épocas de lluvia: PH entre 8 y 9.2, EC entre 0.5 y 0.9. Esta agua la uso de varias maneras: a) Es el agua que yo bebo. b) El café y la comida la hago con esta agua. c) Por su nivel de alcalinidad la uso para los diferentes fermentados anaeróbicos, compensa la extrema acidez de estos preparados y aporta minerales ya solubilizados. d) Este invierno la he usado para riegos mezclada con agua de des-humificador al 50%, obteniendo agua con un EC de 0,25. e) Las raras ocasiones en que riego sólo con agua, uso ésta si el cultivo va bien, y si necesitara hacer un lavado de sustrato por sobre fertilización, uso el agua de des humificador: PH: 7, EC: 0.09, que al no contener minerales el poder de disolución es mayor. - Agua de des humificador: Este invierno debido a las bajas temperaturas, alta humedad relativa y aparición de oídio, me vi obligado a tener funcionando permanentemente un des humificador, y para hacer de la necesidad virtud, he estado recogiendo esta agua exenta de minerales, mezclándola al 50% con las aguas del manantial alcalino, de esta manera me he he ahorrado algunos viajes al manantial de montaña. Recientemente medí el consumo de este aparato, y casi me caigo de espaldas al comprobar un consumo de 140w, lo he tenido encendido más de 3 meses las 24h del día y en ocasiones he tenido funcionando dos des humificadores! y yo, engañosamente, pensé que no consumían más de 50w... bueno, después del disgusto de saber el despilfarro de vatios, yo, que me he esforzado mucho en los últimos cultivos, acarreando macetas del interior al exterior, por consumir el mínimo de luz eléctrica y que me ha supuesto obtener unas cosechas medio bajas para lo que estaba costumbrado, ahora, en mis nuevos 4 cultivos la luz no va a ser el obstáculo, ya que ahora los des humificadores están guardados, y voy a alumbrar estas plantas con todo lo que me quepa en la carpa, la media de vatios por planta de mi última temporada de cultivos fue de 40w/planta, esta temporada voy a llegar a los 100w por planta... más luz es igual a más masa floral!!🌲🌲🌲🌲 - Agua de mar (for nerds): Yo no me he atrevido a usarla para riegos, pero con el agua de mar preparo Ormus casero con agua del mar Cantábrico, donde separo el sodio y hago precipitar los minerales: Publicado el 10 de julio de 2020 a) Fuente principalmente de Magnesio, Azufre y calcio para todo el cultivo. El Ormus contiene de un 30 al 60% de magnesio. Yo lo uso sistemáticamente en todos mis riegos, las dosis van desde el 1% al 2%. b) Contiene más de 70 minerales, la mayoría en modo monoatómico que mejora el intercambio catiónico y la asimilación de nutrientes. c) Al ser un producto alcalino se puede usar para subir el PH del riego cuando se necesite. Aumenta muy poco la carga de EC. d) Forma parte de mis componentes en la solución acuosa que preparo para germinación y establecimiento de semillas. e) Almacenado a obscuras el producto no tiene caducidad conocida. • Agua de coco (for nerds). Producto natural rico en azúcares, vitaminas, proteínas y aminoácidos, enzimas citocininas (División celular, crecimiento), ácido giberélico (Estimulación de raíces) y minerales (Ca, Fe, P, Mg). - Los momentos clave de más demanda de enzimas citocininas comienzan en la mitad de la primera etapa de germinación y establecimiento de la plántula, y al comienzo de la etapa de floración/reproducción. En la última etapa de los cultivos es innecesaria. - Los momentos clave del ácido Giberélico comienzan también en la primera mitad de la primera etapa de cultivo y las últimas semanas de crecimiento vegetativo, después de estas etapas la necesidad del ácido decae hasta hacerlo innecesario en las últimas semanas del cultivo. - Yo uso el agua de coco, alternándola con otros nutrientes, sólo en las primeras etapas de la planta y hasta la preflora. - Las dosis dependen de la carga de EC que se prefiera. Como mínimo aconsejo una carga en disolución de EC de 0,4 o PPM 200. - El agua de coco natural se debe guardar en el refrigerador, como máximo 4 días, pues fermenta con mucha facilidad. y esto es todo por hoy... tengo sed! 😁 Hasta la próxima semana... SALUDOS CULTIVADORES!!🖐️👨‍🌾💧💦🌞💡 =================================
Likes
6
Share
@Saltoa
Follow
Do you care about the flowers blooming.Do you have an intense smell in your nose
Likes
6
Share
TUESDAY 7/16: I graduated two of my hybrids to 3 gallon pots and moved them outdoors today. Both were Candy Cane x Amnesia Autos that had been in solo cups. They were both extremely well rooted and should do just fine. I watered them in with spring water and a little extra bokashi, dolomite, and azomite and wished them well. I hope to graduate a couple of the Candy Cane x C4's tomorrow or the next day, but it will be another week before the other CC x C4, the Candy Cane x Early Miss, and the Candy Cane (S1) are ready. Neither Candy Cane x White Widow seedling made it...😥 WEDNESDAY: I transplanted another Candy Cane x Amnesia and a Candy Cane x C4(purple pheno) into 3 gallon pots today. I watered them in with Azomite, Dolomite, Biochar, Kelp Me Kelp You and sprayed them with Boom Boom Juice a few times early in the morning. By noon, they were standing at attention and growing a millimeter a minute. They are loving the sunshine.😎 Tomorrow, I'll transplant another Candy Cane x C4 and another Candy Cane x Amnesia. The Candy Cane x Early Miss is a misshapen miniature mongrel, but I'm hoping she snaps out of her funk and gets busy growing soon. The Candy Cane(S1), and the last two Candy Cane x C4's are tiny little runts..I'm hoping the Boom Boom Juice I misted them with all morning will kick them into gear....🙏 I was really hoping to have at least one Candy Cane x White Widow in the grow too, so I went ahead and floated another bean last night..it had sunk by this morning. Fingers crossed... THURSDAY: I transplanted another Candy Cane x C4 and another Candy Cane x Amnesia into 3 gallon pots today. Out of Bio Tabs, so mixed up some of my recharged soil with a little extra coco coir, perlite, bokashi, biochar, and a handful of compost, along with some Osmocote Plus, then watered them in with azomite, dolomite and Kelp Me Kelp You. The day of sunshine did seem to kick the Candy Cane x Early Miss into gear, but I didn't really see much growth on the other CC x C4 or the Candy Cane (S1)..what did grow is really twisted up like the Early Miss hybrid..I'm thinking that I must've used too much Mycotrex and/or Great White on the new seedlings. They have all been rooted like crazy, but several had weird-looking, slow-starting, twisted foliage.😕 So the current line-up of hybrids in this diary consists of: 4 * Candy Cane x Amnesia Auto (planted) 2 * Candy Cane x C4 (planted) 1 * Candy Cane x Early Miss (not yet planted) 1 * Candy Cane x Amnesia Auto (not yet planted) 1 * Candy Cane (S1) (not yet planted) FRIDAY: Inspected for pests and repositioned them a few inches over so that they get another half hour of sunlight per day. I sprayed the area with Ortho again and bought a little air bubbler to aerate water for compost tea. SATURDAY: They've all put on a couple of inches since Thursday. I mixed up a fairly weak batch of Big Bloom and Grow Big plus some Kelp Me Kelp You and douched them with about a half-gallon right as the sun was coming up. I also prepared a foliar feed using Big Bloom and Kelp Me Kelp You and sprayed them well as the sun came up, and again after it was going down. I also started aerating 4 gallons of water today...will add the compost tea tomorrow morning and let it cook for 24 hours. The Candy Cane x Early MIss is a few days away from being planted and moving outdoors, and one of the remaining Candy Cane x C4's is a few days behind her. The other Candy Cane x C4 and the Candy Cane (S1) probably won't make it, but that's fine..I had really only planned to grow 5 hybrids plus a photo and a Zkittlez auto. Also, the Candy Cane x White Widow bean may yet come up. SUNDAY: I foliar fed them and sprinkled a little more Silicium Flash on top of the soil of all my plants and also mixed about 4 grams of Bactrex into a jug with 3/4 gallon of bottled water and douched them with about 2 pints each. That should really get the beneficial bacteria and fungus kicked into overdrive. I started brewing a 4 gallon batch of compost tea today. Since I don't have any Orgatrex, I am using a little Big Bloom, Kelp Me Kelp You, and Grow Big in the tea in addition to the PK Compost Booster tea from Bio Tabs. I'll add Mycotrex to it about 2 hours before it finishes and thoroughly dowse them all tomorrow morning. MONDAY: I fed the outdoor ones each about a liter of compost tea and foliar fed them a couple times as the sun came up, and gave each of the remaining seedlings in the cabinet about 2 shot glasses full each and foliar fed them as well. It looks like I've finally got a Candy Cane x White Widow Auto seed to sprout...fingers crossed that she takes off normally. If she does fully emerge, she's already waaaay behind the rest...🙏 Late last night one of my cats ate half of one of the biggest leaves on my Early Miss hybrid, but she's okay..actually starting to grow. I may actually plant her outdoors tomorrow.👍 It's been a decent week for them...tomorrow begins a new week.
Likes
22
Share
Start March 16 🇱🇺🌱🤩 day 48 Grow method 12/12 from seed Sea of green At the moment everything is more than good, my ladies are enjoying their healthy i see a beautiful green and trichome formation everywhere and a beautyfull smell is coming up also ... in 7 days there will be another schwazzing for my ladys and from then on .. let it go Short info about my Humidity: as you can see my humidity sensor from my CT grow system that I have is around 80% RH, but that is not right, my humidity  is around 49-52% my sensor gets 24 hours  fully blown by my humidifier  onto the sensor no matter where I hang it because my ventilation is all around and is blown from top to bottom and a box fan lets everything circulate through the growroom so my old hygrometer is hanging in there againe and everything is fine.. Amnesia by & for @superstrains_official Runtz by & for @zamnesiaxseeds Sour Diesel by & for @inseedious.nl Cobalt Haze by @sensiseeds02   & Arjans Strawberry Haze by @greenhouseseedco   for @amsterdamseedcenter Under @marshydro_ebay Nutes by @hypronl_official Soil: Atami light mix & 5mm broken puffed clay & 16mm puffed clay on the bottem of my 5.5L. pots Temp: 25,62 °C temp outside 15°C Lights: 12/12 Humidity: 49-52% Vpd/KPa: 1.3 -1.4 Ph : 5.90 Tds/ec 1.5 Water: 0.8L. p.plant  23°C CO²: No Mercy Tabs Nutes by Hy-Pro Fertilizers HyPro : Spraymix 0ml by 1L. HyPro : Terra vegi & bloom 2.2ml by 1L. HyPro : Rootstimulator 5ml by 1L. HyPro : Generator 0.16ml by 1L. HyPro : Epic Bloom 00ml by 1L. HyPro : Cal-Mag   0.2ml by 1L. Light distance: =55 cm dimmer on 75% = 970umol/m² +-10 Gear all controlled by @ctgrow_control_systems 1x MarsHydro TSW3000 1x MarsHydro TSL 2000 Air Van: 800m³ Prima Klima on 30% Filter: Prima Klima 660m³ for seed& veg stage & 660m3 CanLite for bloom stage 3 l water cooling airco Diamant... 3.3l humidifier 1.8l dehumidifier
Likes
7
Share
Buenos dias a todos. Es la primera vez que cultivo, en este caso es una Sour Compassion CBD. Esta planta fue un esqueje que me regaló un amigo. Cuando me lo dio estaba espigado en un vaso de plástico con 1 mes de vida. La pase a una maceta "Mad Rocket" de 16L. La hice vegetar 2 meses y luego la pase a florar el 8 de Marzo. Tuvo 111 días de vida y 71 días de floración. Con respecto a la fertilización que aparece, hace referencia a toda la vida de la planta. Saludos cannabicos
Likes
13
Share
@Kirsten
Follow
The plant is coming along nicely, building the flowers. Here's what I did this week. 21.7.25: I watered with 2ltrs of dechlorinated water PH'd to 6.1, containing the following nutrients; 💜 1/2 TSP Mega Crop Part A PH: 6.1 PPM: 767 24.7.25: I watered with 3ltrs of dechlorinated water PH'd to 5.9 with; 💜 1 TSP Cal-Mag 💜 1 TSP Mega Crop Part A PH: 5.9 PPM: 1360 31.7.25: I watered with 2ltrs of dechlorinated water PH'd to 6.6, containing the following nutrients; 💜 1 TSP Sea K PH: 6.6 PPM: 509 + I watered with 2ltrs of dechlorinated water PH'd to 6.2 with; 💜 2ml Trace PH: 6.2 PPM: 368 Thank you for checking in this week and hanging out in the comments 😁💚✌️🌱🙌
Likes
6
Share
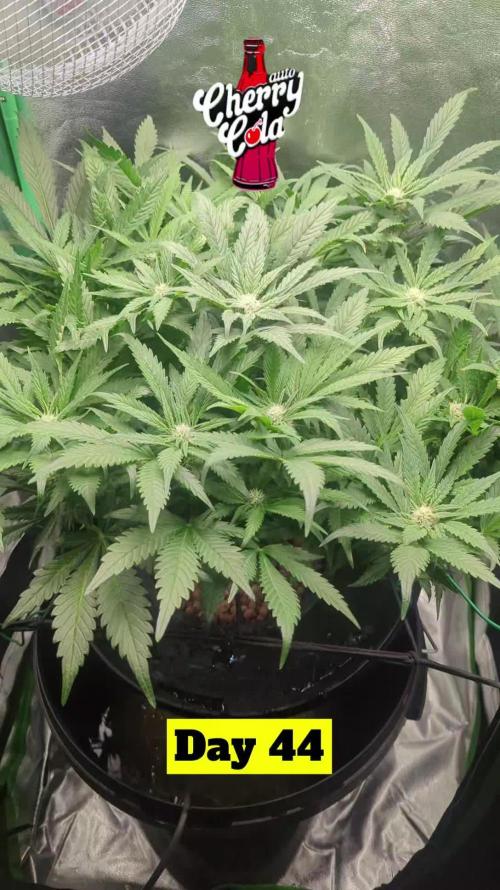
More Big changes this week! The flowers seem to be growing and getting bigger every day - I anxiously look in my tent each morning to see the new developments and there seems to be new changes each time - very cool to smoke a bowl in the morning and go check your garden! I was able to get some pretty cool photos with my macro lens - I found the ONLY flower site and first signs of red colors on one of the lower flowers of Cherry Gorilla #3 - I was able to get some pretty sweet pics of that. If you have a smart phone or tablet, definitely check out some of the macro shots and pinch/zoom in! I did add a fan on the bottom blowing underneath the canopy, in efforts of opening up the stomata of the ladies. We are finally having our first relatively hot week up here and it has absolutely tested my environment management skills - AC, Dehumidifier, Fans, Window open and close - this silly temp VPD and humidity control dance all day will not be too much longer, very much looking forward to the lower temperatures of the fall and winter months! When opening up the tent - you are blasted with a unfamiliar smell that can be explained as a sweet dank. I have touched some of the lower buds on each of the plants and WOW! - They are SWEET and Cherry flavor like crazy - The GMO is just as I expected - Garlic Gas Sweetness when touching her leaves - You are left with a very sticky goo on your finger that absolutely smells of its particular strain. Again - I could not be happier with the garden, and especially this being my first grow ever. Looking forward to more changes and absolutely some input from the Grow Diaries Community!
Likes
19
Share
@HeavyHead
Follow
Some old autos I’ve been working on crossing for awhile. Making the switch back to coco so just doing a small LST test run and a cheap drip emitter system. Did the old paper towel method in a Tupperware container placed onto a heating pad with 100% sprouted. Started on a very diluted feed. Letting them get anchored and will switch to bottom feeding for my first few feeds to get the roots chasing the moisture to build a solid root system early, then back to the top drip system. Going to be playing with some of my leftover nutes so won’t be following any set charts. 1.5ml micro,grow,bloom and a drop of cal mag
Likes
14
Share
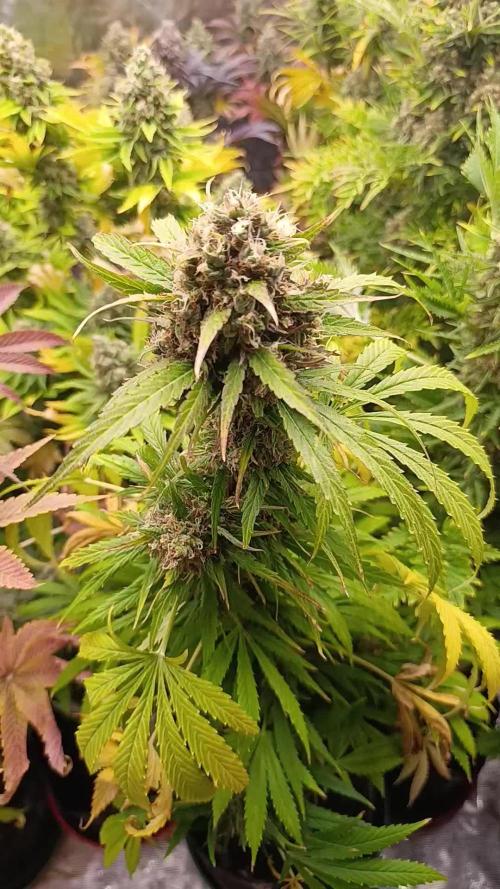
The smoke is beautiful! and that is without cure. Flavours of fuel and citrus coming through, hopefully they come out after cure. Buds are solid but not that dense. But trichome covered buds to the point that it was very difficult to trim for more than 5 minutes without cleaning off my scissors. Recommend growing 4 or more of these to get a good amount on hand. very little popcorn buds. will update with weights and smoke after drying and short cure. She was a pleasure to grow! likes the calmag. so frosty and greasy! When it has been a day with high temperatures don't be afraid to feed twice! While packing on the weight she can be very thirsty. If fed well she will reward you with frosty hard nugs! Give this strain a try!
Likes
22
Share
@Weedbadk
Follow
Día 1 y todas germinaron súper rápido 3 días Día 5 desde puesta en sustrato Ya todas están arriba Estoy solo pulverizando el sustrato Temperatura 23c humedad 75%
Likes
Comments
Share
March 24 - 30 Pretty mellow week with final prep for leaving them unattended for 5 days. Drizzela is showing signs of a lime green discoloration in a small area to keep an eye on. Blumat is steady and dialed in. The plan will be to water over the Blumat system with recharge mixed in which will prolong calling for water from the reservoir.
Likes
29
Share
Ya visteis , cultivo fácil, de principio a fin, pocos errores una pérdida tan solo de 4 ejemplares y por dejadez. Pero enserio si todo se hace correctamente vais a flipar lo rápido que van y después lo buenas que están. Humedad en el secado por debajo de 45% y temperatura media de 23 grados. Hasta aquí es todo fumetillas, que paséis un final de año de lujo entre buenos humos.
Likes
7
Share
@Wiffz_CBD
Follow
A real fun grow. Loving the purple color. She weighed in around 8oz with the stems attached she smells real fruity. Had a bit of leaf burn in early flower because the cored came out ever so slightly of the controller. My fault. I noticed ZERO gnats or pest.
Likes
55
Share
2nd net is up. Early bud formations are promising. holding up to the extremes pretty well, some leaves taking minor damage, but overall, she is holding up, gave her 1 night at 50F see how she would react, stressful. Not advised as it messes with her metabolism, but I want to see if it triggers any anthocyanin response. Love to see her purp up but no signs yet. Remember, For every molecule of glucose produced during photosynthesis, a plant needs to split six molecules of water. This process provides the hydrogen needed for synthesizing glucose and other organic compounds, while oxygen is released as a byproduct. Homework. If Rubisco activity is impaired and it cannot properly function or regenerate its substrate, the plant's leaves are likely to turn a pale green or lime green, a condition known as chlorosis. Essentially, Rubisco activity is highly regulated and susceptible to various environmental and metabolic factors that can cause it to become inhibited, leading to an apparent failure in RuBP regeneration due to a lack of consumption. Rubisco regeneration is intrinsically linked to nitrogen supply because Rubisco is a major sink for nitrogen in plants, typically accounting for 15% to over 25% of total leaf nitrogen. The regeneration phase itself consumes nitrogen through the synthesis of the Rubisco enzyme and associated proteins (like Rubisco activase), and overall nitrogen status heavily influences the efficiency of RuBP regeneration. RuBisCO is a very large enzyme that constitutes a significant proportion (up to 50%) of leaf soluble protein and requires large investments in nitrogen. Insufficient nitrogen supply limits the plant's ability to produce adequate amounts of RuBisCO, thereby limiting the overall capacity for photosynthesis and carbon fixation. Maintaining the optimal, slightly alkaline pH is crucial for the proper function and regeneration of Rubisco. Deviations in either direction (too high or too low) disrupt the enzyme's structure, activation state, and interaction with its substrates, leading to decreased activity and impaired RuBP regeneration. (Lime/yellowing) Structural Component: Nitrogen is an essential building block for all proteins, and the sheer abundance of the Rubisco protein makes it the single largest storage of nitrogen in the leaf. Synthesis and Activity: Adequate nitrogen supply is crucial for the synthesis and maintenance of sufficient Rubisco enzyme and Rubisco activase (Rca), the regulatory protein responsible for maintaining Rubisco's active state. Nitrogen deficiency leads to a decrease in the content and activity of both Rubisco and Rca, which in turn limits the maximum carboxylation rate, Vmax, and the rate of RuBP regeneration Jmax, thus reducing overall photosynthetic capacity. Nitrogen Storage and Remobilization: Rubisco can act as a temporary nitrogen storage protein, which is degraded to remobilize nitrogen to other growing parts of the plant, especially under conditions of nitrogen deficiency or senescence. Nitrogen Use Efficiency (NUE): The allocation of nitrogen to Rubisco is a key determinant of a plant's photosynthetic nitrogen use efficiency (PNUE). In high-nitrogen conditions, plants may accumulate a surplus of Rubisco, which may not be fully activated, leading to a lower PNUE. Optimizing the amount and activity of Rubisco relative to nitrogen availability is a target for improving crop NUE. Photorespiration and Nitrogen Metabolism: Nitrogen metabolism is also linked to the photorespiration pathway (which competes with carboxylation at the Rubisco active site), particularly in the reassimilation of ammonia released during the process. To increase RuBisCO regeneration, which refers to the process of forming the CO2 acceptor molecule Ribulose-1,5-bisphosphate (RuBP) during photosynthesis, the primary methods involve optimizing the levels and activity of Rubisco activase (Rca) and enhancing the performance of other Calvin-Benson-Bassham (CBB) cycle enzymes. Biochemical and Environmental Approaches: Optimize Rubisco Activase (Rca) activity: Rca is a crucial chaperone protein that removes inhibitory sugar phosphates, such as CA1P (2-carboxy-D-arabinitol 1-phosphate), from the Rubisco active site, thus maintaining its catalytic competence. •Ensure optimal light conditions: Rca is light-activated via the chloroplast's redox status. Adequate light intensity ensures Rca can effectively maintain Rubisco in its active, carbamylated state. •Maintain optimal temperature: Rca is highly temperature-sensitive and can become unstable at moderately high temperatures (e.g., above 35°C/95F° in many C3 plants), which decreases its ability to activate Rubisco. Maintaining temperatures within the optimal range for a specific plant species is important. •Optimize Mg2+ concentration: Mg2+ is a key cofactor for both Rubisco carbamylation and Rca activity. In the light, Mg2+ concentration in the chloroplast stroma increases, promoting activation. •Manage ATP/ADP ratio: Rca activity depends on ATP hydrolysis and is inhibited by ADP. Conditions that maintain a high ATP/ADP ratio in the chloroplast stroma favor Rca activity. Enhance Calvin-Benson-Bassham (CBB) cycle enzyme activity: The overall rate of RuBP regeneration can be limited by other enzymes in the cycle. •Increase SBPase activity: Sedoheptulose-1,7-bisphosphatase (SBPase) is a key regulatory enzyme in the regeneration pathway, and increasing its activity can enhance RuBP regeneration and overall photosynthesis. •Optimize other enzymes: Overexpression of other CBB cycle enzymes such as fructose-1,6-bisphosphate aldolase (FBA) and triose phosphate isomerase (TPI) can also help to balance the metabolic flux and improve RuBP regeneration capacity. Magnesium ions, Mg2+, are specifically required for Rubisco activation because the cation plays a critical structural and chemical role in forming the active site: A specific lysine residue in the active site must be carbamylated by a CO2 molecule to activate the enzyme. The resulting negatively charged carbamyl group then facilitates the binding of the positively charged Mg2+ion. While other divalent metal ions like Mn2+ can bind to Rubisco, they alter the enzyme's substrate specificity and lead to dramatically lower activity or a higher rate of the non-productive oxygenation reaction compared to Mg2+, making them biologically unfavorable in the context of efficient carbon fixation. The concentration of Mg2+ in the chloroplast stroma naturally increases in the light due to ion potential balancing during ATP synthesis, providing a physiological mechanism to ensure the enzyme is activated when photosynthesis is possible. At the center of the porphyrin ring, nestled within its nitrogen atoms, is a Magnesium ion (Mg2+). This magnesium ion is crucial for the function of chlorophyll, and without it, the pigment cannot effectively capture and transfer light energy. Mg acts as a cofactor: Mg2+ binds to Rubisco after an activator CO2 molecule, forming a catalytically competent complex (Enzyme-CO2-Mg2+). High light + CO2) increases demand: Under high light (60 DLI is a very high intensity, potentially saturating) and high CO2, the plant's capacity for photosynthesis is high, and thus the demand for activated Rubisco and the necessary Mg2+ cofactor increases. Mg deficiency becomes limiting: If Mg2+ is deficient under these conditions, the higher levels of Rubisco and Rubisco activase produced cannot be fully activated, leading to lower photosynthetic rates and potential photo-oxidative damage. Optimal range: Studies show that adequate Mg2+ application can enhance Rubisco activation and stabilize net photosynthetic rates under stress conditions, but the required concentration is specific to the experimental setup. Monitoring is key: The most effective approach in a controlled environment is to monitor the plant's physiological responses e.g., leaf Mg2+ concentration, photosynthetic rate, Rubisco activation state, and adjust the nutrient solution/fertilizer to maintain adequate levels, rather than supplementing a fixed "extra" amount. In practice, this means ensuring that Mg2+ is not a limiting factor in the plant's standard nutrient solution when pushing the limits with high light and CO2. Applying Mg2+ through foliar spray is beneficial to Rubisco regeneration, particularly in alleviating the negative effects of magnesium (Mg) deficiency and high-temperature stress (HTS). While Mg can be leached from soil, within the plant it is considered a mobile nutrient, particularly in the phloem. Foliar-applied Mg is quickly absorbed by the leaves and can be translocate to other plant parts, including new growth and sink organs. Foliar application of: NATURES VERY OWN MgSO4 @ 15.0g L-1 in a spray bottle. For those high-intensity workouts when 1 meal a day is just not enough! Foliar sprays are often recommended as a rapid rescue measure for existing deficiencies or as a supplement during critical growth stages, when demand for Mg is high. Application in the early morning or late evening can improve absorption and prevent leaf burn. The plant was getting a little limey yellow in the centre. Shortly thereafter, she was back in business, green mostly regenerated. The starting point [of creativity] is curiosity: pondering why the default exists in the first place. We’re driven to question defaults when we experience vuja de, the opposite of déjà vu. Déjà vu occurs when we encounter something new, but it feels as if we’ve seen it before. Vuja de is the reverse—we face something familiar, but we see it with a fresh perspective that enables us to gain new insights into old problems. Confidence is evidence... nothing more. You are confident because you have driven 10,000 times, you are confident because you have spoken 10,000 times. People think confidence is a feeling, but it's not. If you want more confidence, then you need to create evidence, take more shots, collect more data, build more experiences, take more risks; fail, confidence doesn't come first; it is the reward you get for doing the work. no one else wants to do.
Likes
9
Share
The purple punch is doing very well with her companion banana purple punch sisters! She already even has a wonderful smell. I'm very excited for her to get a little lst later in the week. Just trying to be patient I wanna do lst but I feel it's even still a little early. I have been tucking leaves but I may defoliate a small amount here soon when I perform LST. Check back next week to see just how fast she grows & remember its 4:20 somewhere!!!!!!!!!!
Likes
6
Share
She is fattening up real nice. I made the mistake of not adding a filter and omg this girl smells loud asf. Skunky with a hint of sweet really cannot wait to harvest her. We are almost at that point. She get her last feed this week and then it’s off to flush. 4gs of full tilt per gallon at an ph of 6.0 to finish her off. Thank you all for watching you all are the real mvps thanks you.
Likes
17
Share
the seedlings germinated on September 22 in the biobizz light mix soil after 13 days I administered 1ml / lt. advanced nutrients ph perfect grow 1ml / lt. ph perfect micro 1ml / lt. 2ml / lt. b-52 2ml / lt voodoo juice after 4 days I repeated the fertilization with 1.4ml / lt of the main nutrients and 2ml / lt of b-52 after a few days I noticed some burnt tip signs of overfertilization so from day 12 I started giving demineralized water until the outflow for 3-4 times until a few days ago that I noticed a yellowing of the upper part and spots that look like calcium or potassium deficiency I was also wondering if I can do without the cal-mag since the ph perfect micro contains a lot of calcium. tomorrow I give the third dose of nutrients hoping they will recover since nothing has changed with the first two fertilizations Days 39 they do not seem mileage even after a week of fertilization even if at very low dosages the next time I increase the nutrients and let's see what happens Days 41 it looks like it's going well they still look nutrient deficient the next time we increase the dosage.