


Likes
Comments
Share

@SkunkyDog420
Follow
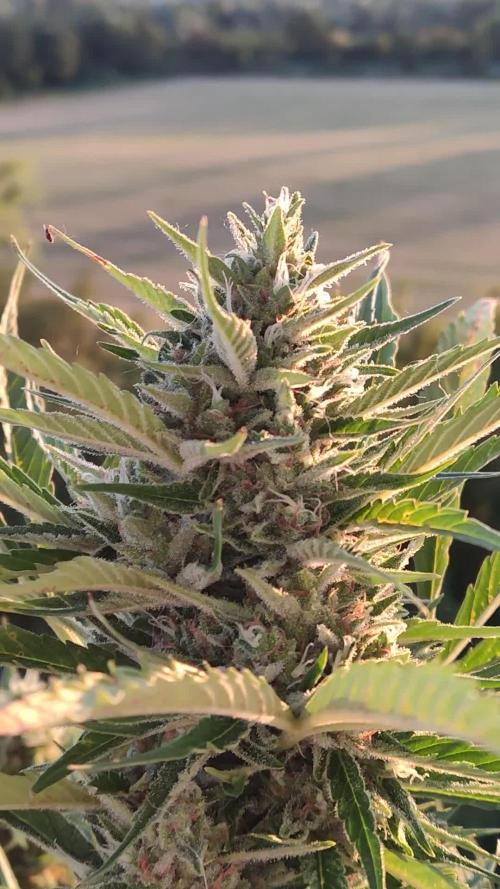
Hallo zusammen 🤙.
Sie wächst sehr schön und macht keine Umstände.

Likes
60
Share

@Hologram
Follow
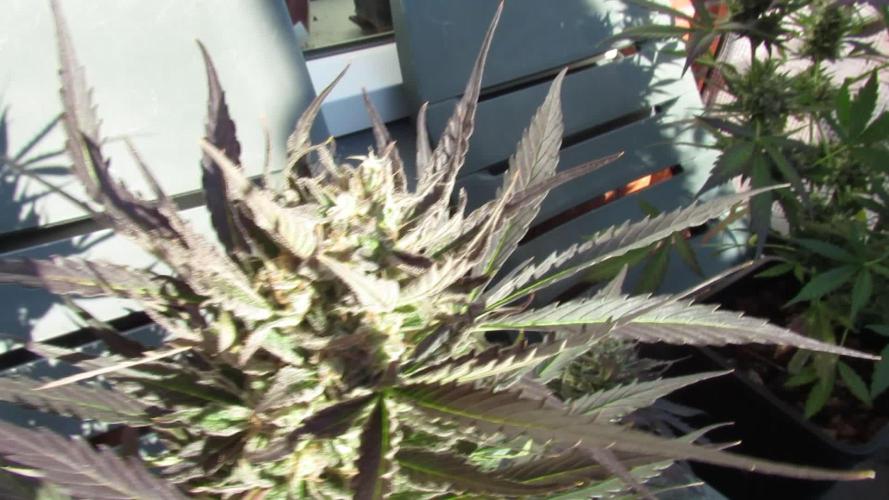
BEELZEBUB is ready 2b harvested!
Next update is gonna be a harvest. after drying a bit so i can make a 'smokereport' (i use vaporizer) at the same time
The R is now back in the months (septembeR) so its gonna b RRRainy and cold..
luckily the sun is still shining now and then (yeah) ..butshe has 2b harvested soon, the weather is not getting any better..
can see that on her leafs.. beautiful puprle and autumn colours..
Her buds are very solid and demonic, i can even smell some brimstone LOL (nah just my imagination going wild i guess
😸
Happy growing4all✊
***KISS! growingtechnique: Keep It Simple, Stupid!✊

Likes
6
Share


@Scottydarkmoonbuds
Follow
Love these two strains. This is my first outdoor grow with fast buds. They both smell great. I need to get some Dr Zymes soon to help with little pests other than that it's been smooth growing

Likes
3
Share


@Giuliojuana
Follow
Sembra andare tutto bene però consigliatemi come migliorare il coltivo

Likes
9
Share


@phatty_mcnasty
Follow
Lot's more growth! It appears the stretch has mostly stopped. I put my zkittles on a platform to get it more in line with the canopy. The green crack/alaskan diesel really stretched. I have been pruning dying leaves and removed all of the LST. Letting the plants do their thing now that height has been controlled. It's looking like the zkittles will be my first strain available for harvest. Got my humidity down to around 40% after it drys out from watering. Still have a fan blowing air into the tent, and have been rotating the plants too for more even light/ to limit the risk of bud rot. Probably too many plants in my small space. Also noticed the light has always been at 24/0 as I never switched the timer on. Oh well!


Likes
22
Share


@RDWCGrowing
Follow
1/11/2024 Vegetation Week 1 Day 1- I have a root almost in the water.. Yay!! Top feeding is almost done. she is looking a little sad as I work the transition Top feeding but once the roots are fully in the water she will start to take off. Ensured my PPFD is set between 250-300 it is set to: 258
1/12/2024 Vegetation Week 1 Day 2- I have a root in the water.... NO TOP FEED TODAY SIR!!! now that a root is touching the water and she looks stable, I am not going to topfeed, I will see how she looks tomorrow and as long as everything looks good I am going to go ahead and do a change and week 1 fill on Nutes.. I know it is a couple of days in but the same Nutes go through Week 2 and get changed at Week 3 So I should be good to go.. I will just ensure I fill to root touching the water when I change tomorrow.
1/13/2024 Vegetation Week 1 Day 3- Water Change Day!!
I added 36 Gallons of Water to the system:
Silica= .5mil/gal= 18mil
CalMag= .75mil/gal = 27mil
FloraMicro=3.0mil/gal = 108mil
FloraGro=2.0mil/gal = 72mil
FloraBloom= 2.0mil/gal = 72mil
PH DOWN= 30mil
Very important thing with this system is to now wait the 24 hours for the system to adjust.. Do not make any further adjustments to your PH up or Down for 24 hours to allow time for the system to balance.
1/14/2024 Vegetation Week 1 Day 4- Today I just adjusted the PH to ensure that it was right at 6.0
1/15/2024 Vegetation Week 1 Day 5- Today I Cleaned up the lower damaged leaves from the transition from top feeding to roots in the water. She looks good today.
1/16/2024 Vegetation Week 1 Day 6- Today I just took a picture of the beautiful lady for Log. Other than that just normal day to day operations, check the pH, check the Humidifiers and fill as necessary, check level of water in the Res. Everything looks great. onto Tomorrow!!
1/17/2024 Vegetation Week 1 Day 7- Today I filled the humidifers, checked the PH and just let her grow.. Grow baby Grow.....

Likes
2
Share

@ao_grows1978
Follow
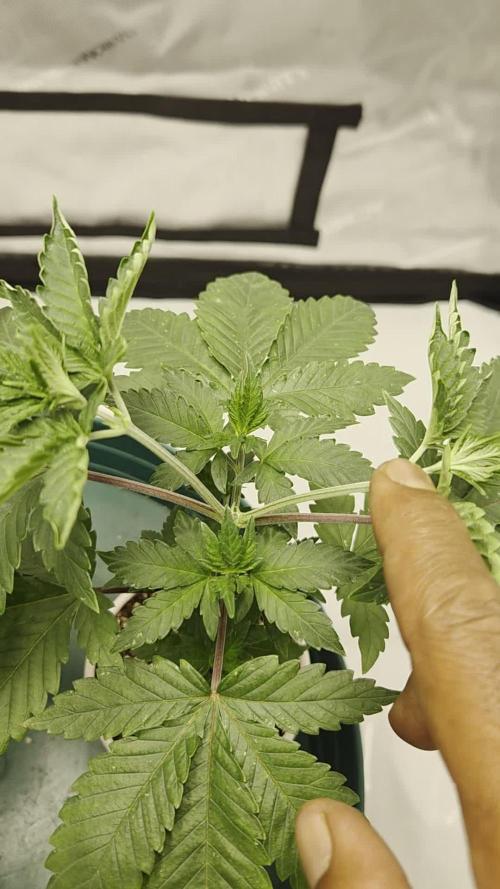
Week 5 of vegging has come to an end. The girls are drinking daily and the new tops are developing nicely. I've been stressing the tops a bit, bending them down to let light hit the next set of nodes. The light is now at 24" and at 60 %. I'll be adjusting the intensity and height to keep dli relative. I've also been gradually decreasing light time over the course of 6 days and are currently at 14 hours. The next week will be transition to flower, giving me approximately 9 weeks to finish. Stay tuned.

Likes
24
Share


@Mrs_Larimar
Follow
2023-09-08
First of ll, thank you team @Kannabia, especially to Zoraida.
he hnded me the Freebees at the Spannabis this Year, after i showed him my previos Kannabia
Grow.
He said, "Oh as you liked our Strain " La Blanca" you will love the Super OG Kush"
he was right, i was fascinated from beginning how vigour and well structred those OG Kush were growing
and when Buds appeard i was totally overwhlmed.
so for me the Perfect Strain.
👉easy to grow
👉super structure
👉great ratio from Buds to Leaves
👉wonderful packed Colas
👉crusted with Trichomes
👉for me absolutely recommendable Strain👉👉https://www.kannabia.com/en/feminized-cannabis-seeds/super-og-kush


Likes
10
Share


@NirvanaGrower
Follow
last week of nutrients. Jamaican Dream and Three Blue Kings will be ready for harvest in 10 days.
Video of Trichomes:
1) G.C.
2) J.D.
3) T.B.K.
4) A.S.D.


Processing
Likes
36
Share


@Ganjagrandaddy
Follow
Day 40 from seed ( 3 in flower).
To sat they had a slow start these BlackBerry are surging ahead now. Only # 2 seems to be smaller now. The pale # 3 is still gaining size with no signs of stopping at all, she has a lot of sites around her that need a pin down now they are long enough to reach pot edge.
Likes
14
Share


@Lol_You_Looked
Follow
It's the 4th week! Stilling doing the mainlining, for some reason I found myself training the branches to form a bull horn shape, maybe I'll mount it on the wall after this first grow, lmao.
I added more CalMag this week, as now I'm thinking the rust/brown spots and tips are from a Calcium deficiency since I am using distilled water. Time to watch these leaves, and if it continues to rust it might be the VPD.
Nov 28th - pH 6.0, PPM 860, 1.7 EC, Temp 70f, Humidity 50%
Nov 29th - pH 6.3 -> 5.8, PPM 860, 1.7 EC, Temp 80f, Humidity 55%
Nov 30th - pH 5.8, PPM 860, 1.7 EC, Temp 80f, Humidity 60%
Dec 1st - pH 5.9, PPM 860, 1.7 EC, Temp 80f, Humidity 70%
Dec 2nd - pH 5.5 -> 5.9, PPM 840, 1.7 EC, Temp 80f, Humidity 60%
Dec 3rd - pH 5.9, PPM 810, 1.6 EC, Temp 80f, Humidity 70%
Dec 4th - pH 5.7, PPM 790, 1.6 EC, Temp 80f, Humidity 70%

Likes
35
Share


@Master_weeda
Follow
Bonjour à tous les padawans et les maîtres jedis
Pour cette semaine je prévoit de pratiquer comme technique spéciale le LST et juste un arrosage.
Pour cela comme à mon habitude j'attend le cinquième noeud ou que je juge la plante robuste.
Je profite que cette semaine qui va être relativement calme pour faire un LST appliqué et vous faire un rappel de ce qui est pour moi la meilleure technique pour arroser une autofloraison et la façon dont je pratique le LST.
En suivant ces quelques simples conseils vous obtiendrez un résultat optimal tout au long de votre culture :
Le cannabis est une plante qui n’aime pas recevoir un léger arrosage en continu. Il est impératif de l’arroser en grosse quantité, puis d’attendre que la terre soit bien sèche avant d’arroser à nouveau!
Pour calculer la quantité d’eau nécessaire à chaque plante, suivez cette règle :
Le volume d’eau à donner lors de chaque arrosage doit représenter au moins environ un quart du volume du pot !!
Exemples :
pour un pot d’1L, donnez 0,25L d’eau à chaque arrosage pour un pot de 4L, donnez 1L d’eau à chaque arrosage pour un pot de 12L, donnez 3L d’eau à chaque arrosage pour un pot de 30L, donnez 7,5L d’eau à chaque arrosage !etc…
Pour donner un tel volume d’eau, il est souvent nécessaire d’arroser en deux (voir trois) fois, lentement et uniformément sur toute la surface. Disposez de bonnes coupelles sous les pots, celles ci se rempliront d’eau qui remontera dans le pot par capillarité en moins d’une journée. Il est également très important d’utiliser un bon terreau de qualité, avec une bonne capacité de rétention d’eau mais qui assure également un bon drainage (celui ci doit contenir de la perlite, et/ou de la coco, etc..)
Il vous faut alors maintenant attendre quelques jours en sous-pesant régulièrement les pot avec vos bras. Quand ils seront redevenus très légers, vous pourrez arroser à nouveau !!
En effet, comme l’eau pèse beaucoup plus lourd que la terre, un pot gorgé d’eau pèse plusieurs fois le poids d’un pot d’une plante prête à être arrosée. Avec un peu d’entraînement, vous apprendrez donc très rapidement à sous-peser vos pots pour savoir quand une plante a soif.
C’est une technique à la fois très facile et très efficace, et qui peut être appliquée à toutes les plantes en pots !
En arrosant de cette façon, en général vous devrez arroser vos plantes tous les 3 à 6 jours.
Pour cette semaine 3 au jour 17 ma plante fais 12 centimètres et son cinquième noeud apparaît je décide donc de pratiquer un LST sur ma plante.
Pour ce j'utilise du fil de fer galvanisé que je plante directement dans le substrat en faisant attention de ne pas endommagé les racines car n'oublions pas que ce qui pousse dessus pousse aussi dessous.
Jour 17 je pulvérise du une solution composé d'une cuillère à café de savon noir mou dilué dans un litre d'eau en prévention d'éventuels nuisibles.
Je corrige mon LST suivant la pousse de ma plante ...
Pour ma par c'est la manière dont je procède. Comme promis petit rapel de:
Quand commencer à appliquer la technique LST
De nombreux cultivateurs commencent la manipulation dés que les plantes possèdent entre 3 et 6 nœuds ou une paire de feuilles. Durant cette première étape de la croissance, le tronc encore flexible est pliable sans risque qu’il ne se casse, même si au fur et à mesure du développement de la plante il sera de plus en plus difficile de le plier. Nous pouvons continuer à guider la croissance des branches durant toute la culture, même durant la floraison, ce qui pour cette étape représente un grand avantage face à la taille, qui n’est pas du tout recommandé une fois que la formation des têtes commence, cela stressera en effet la plante, ce qui aura pour effet de retarder la récolte.
Comment appliquer la technique de guidage LST
Si nous sommes prudents, la flexibilité naturelle des fibres du cannabis permet de plier leur tronc et branches avec une relative facilitée, même durant la floraison des plantes.
En utilisant une corde fine, nous pouvons accrocher la pointe de la plante à la base du pot par exemple ou à un tuteur que nous aurons planté dans le substrat. Nous plierons le tronc avec précaution et nous le fixerons avec la corde, à partir de là, nous pouvons augmenter progressivement la tension de la corde, chaque jour un peu plus, jusqu’à obtenir la position souhaitée. Soyez attentif à la réaction de la plante, essayez de ne pas appliquer trop de pression sur la corde et rappelez-vous que la flexibilité des branches peut varier d’une plante à l’autre.
Pour obtenir de meilleurs résultats, il suffit de suivre quelques règles simples. Pour commencer, nous devons choisir une corde fine mais pas trop pour ne pas blesser les troncs au fur et à mesure qu’ils grandissent et qu’ils deviennent plus gros.
Nous pouvons utiliser des crochets en plastique souple ou de n’importe quelle autre matière flexible pour éviter d’endommager les plantes. Spécialement en intérieur, utiliser des cordons en plastique de couleur (voir les diaries de @Silky) est très pratique pour voir facilement les accroches et faciliter le travail au milieu du réseau formés par les cordes, les tuteurs, les mailles ou les supports que nous aurons dans la culture. Bien entendu, en culture extérieure et surtout en guerilla nous ferons juste le contraire et nous utiliserons des matériaux de couleur qui n’attirent pas l’attention pour que notre jardin reste discret.
Pour stresser les plantes au minimum, la mieux est de réaliser ces manipulations le soir ou juste après que les lampes en intérieur s’éteignent, ce qui leur permettra de se remettre durant la nuit. Normalement, le jour suivant nous pourrons observer comme les pointes des branches que nous avons pliées se dressent de nouveau vers le haut à la recherche d’une source de lumière.
Que la force soit avec vous
Processing
Likes
14
Share


@Gugne
Follow
Both of them sexed already, the little one yesterday and the big one today that's why i'm there with new photos before usual, lol. The new branches looks well.
And have a bonus, pics of my last harvest as a click bait lol.

Likes
26
Share


@Melloganja
Follow
It was a perfect 11-week cycle, everything went very well, I really liked the result using the new Lec lighting system, my first cultivation in coconut, it was difficult to adapt with the watering at first, but I soon adapted. I really liked the result so far of 3 plants harvested, total of 1055kg wet, I still lack two plants to harvest. Post results later.

Likes
125
Share


@LegacyMarketFarm
Follow
MAY 28TH 2024 - AMENDED with a TOP DRESS between EACH ROW of plant's using GAIA GREEN GYPSUM & GAIA GREEN MINERALIZED PHOSPHATE.
The plant's will be getting another top dress THIS SUNDAY as their LIGHT CYCLE changes to 14/10. We will be TOP DRESSING with GAIA GREEN POWER BLOOM & GAIA GREEN GLACIAL ROCK DUST.
They where given their first FLOWER MICROBE tea 55 gallons split between all of the beds. Not even in flower yet and their consumption is pretty encouraging signs.
MAKE SURE to subscribe to our YOUTUBE for this next FULL LENGTH episode coming up after THIS SUNDAY !!
MOST IMPORTANT OF ALL, SUPPORT OUR SPONSORS !
PROMO CODE GREEN PLANET : LEGACY
PROMO CODE MARS HYDRO : LEGACY
PROMO CODE SEEDSMAN : LEGACY10
MAKE SURE TO FOLLOW OUR SOCIALS & JOIN OUR GREAT COMMUNITIES !
TWITTER : https://x.com/LegacyMrketFarm
YOUTUBE : www.youtube.com/channel/UCR89iF2Iqy3zlHZhFfU2MMg
YOUTUBE GAMING : www.youtube.com/channel/UCw8-qCFg-PUf00waTO5JOGw


Likes
12
Share

@Northern_Ent
Follow
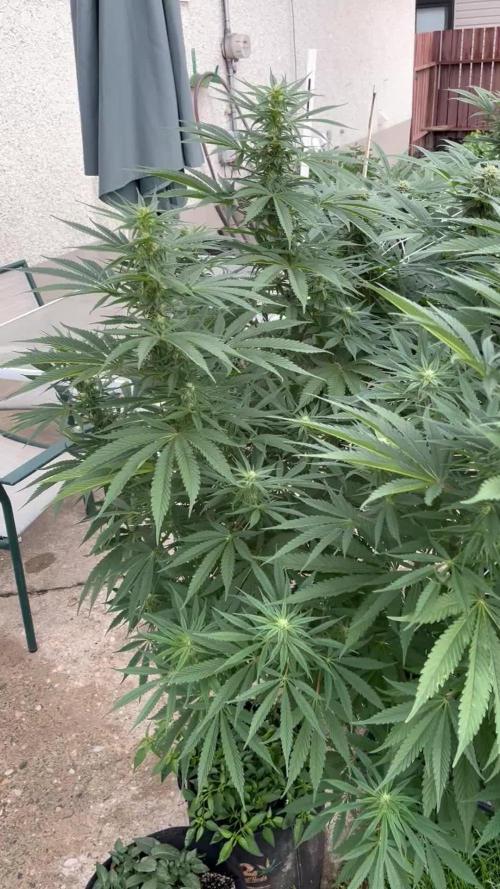
Aug 9: Mimosa Shot is doing fine. She was slower starting than her wagon partner Sunday Punch EV, but she is liking the warmer weather.
Got UV led lights from AC Infinity going today. These are designed for indoor so I can only put them out on nice weather days. Did this last year and seems to work. The UV lights make Edmonton in the fall feel more like California in the summer, or at least that’s the idea. UV is critical for trichome production so it’s a good way to boost THC percentage.
Aug 14: rainy the last few days.
Mimosa Shot likes to be a bit warmer. It was slower getting going in the spring, and now it seems to be suffering from a P deficiency. Reddish petioles, and a blueish tint to the leaves. She has received Power Bloom and barley just like the other plants, but still seemed to be lacking something. Ed Rosenthal’s Grower’s Handbook says P deficiency can be due to cold weather. Decided to try and dissolve 0.5 tsp of Power Bloom in 1 L of warm water to use as a high P foliar spray. As always, used a bit of Dr. Bronner’s Peppermint Soap as a surfactant, and apple cider vinegar to adjust pH. Power Bloom mostly dissolved but with some undissolved. Unfortunately I don’t have a working TDS or EC meter. Not sure how strong it was so just sprayed a bit on the fan leaves.

Likes
4
Share

@Growstopher
Follow
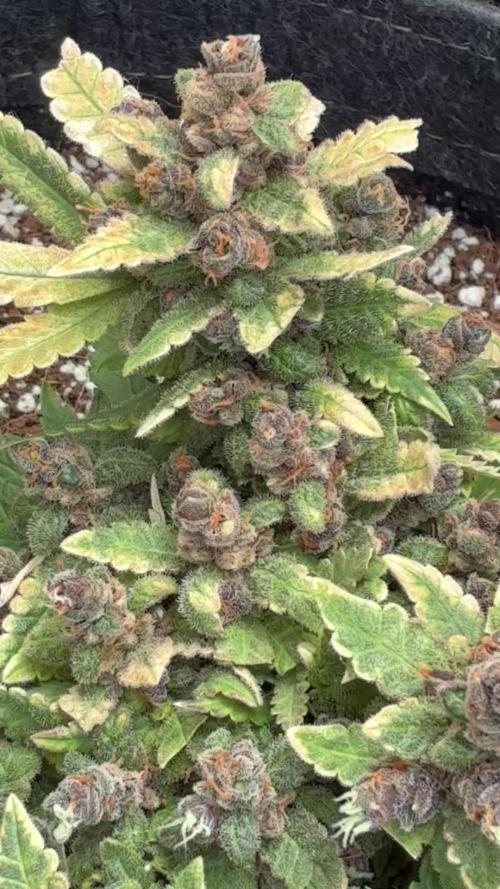
7.14.25. Harvest was 7.13. Glad this grow is over time to finish up!
Wet bud was 22.5 grams Bud looks decent sticky and smells pungent! Will starting next grow in month or 2!
Thanks for checking out grow!