


Likes
Comments
Share


Likes
40
Share


@Mr_und_Ms_Lue_Roots
Follow
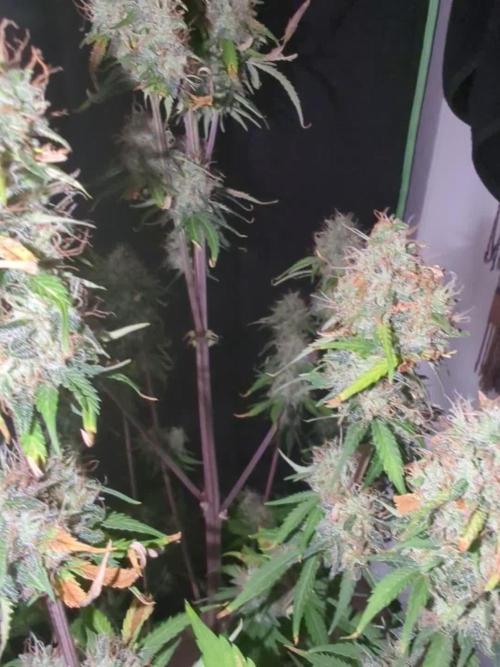
Bisher können wir sagen, dass Sie sich wirklich gut macht.
Trotz den strapatzen und dennoch so viel Liebe, macht es den anschein, als würde die Pflanze wieder ihren normalen Lebensweg aufnehmen und auch ihr Lebensziel verfolgen.
Die Blütenvorbereitung ist voll im gange, lilafarbende Stämme wie jetzt auch aktuell an den Blattstielen sind augenscheinlich Sichtbar.
Dennoch ist es ziemlich kühl geworden. Was für unsere Pflanze natürlich nicht schlecht ist, da wir sie auch so, hoffentlich eher zum Purpeln bewegen können.
Das Giesverhalten hat sich halbiert sprich wir Gießen im moment alle 2 Tage ca. 4 Liter und ohne die vorherigen Zusätze von Juice, Co2, Acti- Vera, Heaven.
Weitere Beobachtung dazu, läuft trotzdem.
Wer bis hierher gelesen hat darf sich jetzt schon anfangen auf die nächste Woche zu freuen 😋
Denn unser neues Equipment ist solangsam eingetroffen.
Das heißt: Das 80er Indoor Zelt wird durch ein 1,5x 1,5x 2 m ersetzt.
Die 600 W. Keramiklampe die in dem kleinen Zelt nur auf erster Stufe (ca. 480 W.. lief, wegen wärmentwicklung) wird durch eine neue Lazerlite LED 720 Watt ersetzt.
Ein großer Aktiv- Kohlefilter wie auch der große Abluftventilator, stehen schon in den Startlöchern 😎
Somit wird die Lady ab ca. Mitte bis Ende dieser Woche, einen mega schönen und warmen Platz im innenbereich bekommen.
Allen growern eine bezaubernde Woche gewünscht! 😉

Likes
28
Share


@cheetah844
Follow
Growing pretty well so far. I'm excited for this to be a good daytime strain to keep me motivated, in a good mood and hopefully not anxious. She'll be going outside so I'm strengthening her stem so she'll be able to handle outdoor stresses.

Processing
Likes
17
Share


@Majormolasses
Follow
Decided to turn on my bloom lights on my Optic 2 Gen 3 LED which incrediblely increased the temp so lucky 🍀 I have a carbon filter from ac infinity “4 and a inline fan from Vivosun which really work great to suck the stagnant hot air out of my 32”x32”x72” tent. Other then that have been feeding these girl Urb& liquid seaweed and they seem to be loving it. Would love to make a compost tea soon.

Likes
1
Share

@Canine
Follow
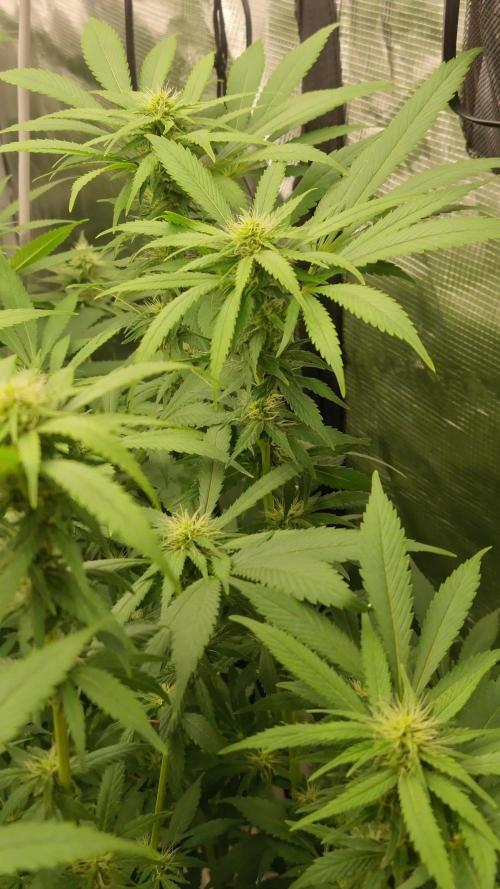
Top left: Northern lights 10 of 10 seedkeepers
Top right: grandmommy purple herbies
Bottem left: blue sunset sherbet Barney's farm
Bottem right: glookies Barney's farm


Likes
34
Share


@SWGuerrilla
Follow
Another strong week. Away for a few days and he heat was back upto 28-30 so was a bit concerned but they came through fine with a heavy dowsing. Still stretching and lots of preflowers. Very happy that my first grow is still going and this decent!

Likes
167
Share

@Schnabeldino
Follow
📅 Week 11 | 🗓️ Day 71–77 — 3rd week of flowering
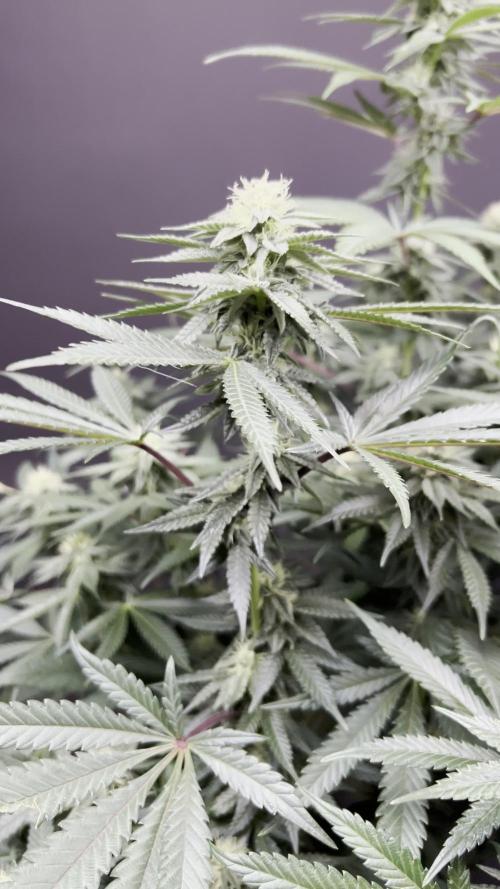
Biscotti Gelato 🍪🍨 – elegant, fragrant, stacking and frosting up beautifully
🔸 The stretch has clearly settled — she’s holding a sturdy, balanced canopy with strong verticals and consistent cola height. Buds are now clearly formed clusters, each topped with thick tufts of bright white pistils. Calyxes are beginning to swell and stack neatly, and there’s a noticeable layer of early trichome sparkle spreading over the sugar leaves.
🔸 The foliage remains deep, lush green, with broad, slightly glossy leaves showing no signs of stress. The overall posture is confident and vigorous — she’s thriving in her rhythm. Those slightly purple petioles add a nice touch of personality under the lights.
🔸 Watering & care: Keeping the same steady routine — moist but not soaked, around 30% soil moisture before watering. Airflow through the canopy looks solid, and humidity is still in a safe zone for mid-flower. I'm still at half the amount specified for fertilizer.
📈 Current Conditions
🌡️ Day: 27 °C
🌡️ Night: 18 °C
💨 Humidity: 59 %
🔦 PPFD: 800–900 µmol (12/12 light cycle)
🛠️ Setup
💡 Cosmos 200 W
⛺ Tent: 120 × 120 × 180 cm
🍯 Pots: 18 L plastic pots
🌱 Medium: Bio-Bizz Light Mix
💊 Nutrients: Advanced Nutrients ≈ ½ of the schedule)
💧 Water: Tap water (0.5 EC)

Likes
20
Share


@Hanfstadt_Hamburg
Follow
Day 32: It's the 5th week already! The soil plant is starting to flower as well. The roots of the hydro plant are healthy again, although the plant is of course still very small.
I removed a few leaves that overshadowed some of the lower flowers/nodes.
Day 34: The results of the LST really start to show. A number of flowers begin to grow. The plant takes more and more horizontal space. I redid the LST today to move the buds even further away from each other
Day 37: A lot of growth / stretching went on this week. For the soil plant I redid the LST again today, and the whole pot is almost covered when it was only half of it a couple of days ago. The hydro plant has quite a bushy top now.
Likes
5
Share


@Ninjabuds
Follow
Hey there it’s been really cold lately it’s been hard to keep the humidity and temps at a decent range. A lot of the plants are showing stress from the environment.
The pound cake auto is doing pretty well it has gotten a lot larger. This morning I finally saw some small pre flower hairs coming from the main stem. Also the stems in the plant seem to be starting to stench. So 90% sure buy the end of the week the plant will really be showing signs of flowering. Well just saying it’s flowing now. From what I see online this strain takes along time to switch to flower compared to lots of auto flower strains. This would be a perfect strain if you wanted to main line
Likes
34
Share


@Southwest_budders21
Follow
Day 49 Flip day! Just flipped them to 12/12 took loads of leaves off. Let's see if I've guessed the sex right then 😏 I think I've got 3 fems but people still tell me I want know until I've flipped 🤷♂️🏼
Update: Day 50 and day 1 of flower looking very happy will give a nice feed when soil dries out. Lights are now maxed out and on Day 51, day 2 of flower I'm sure all 3 are definitely fems will keep eye on them next few days 👀
Update again: Day 53, Day 4 of flower and they looking beautiful 😍
Likes
88
Share


@Wastent91
Follow
Bene bene scusate il ritardo 😌 di un giorno come nell' altro diario.. purtroppo ho problemi in famiglia con mia nonna che nn sta molto bene e non ci sto molto con la testa e nn riesco a stare dietro come meriterebbero l attenzione massima tutti i progetti. Anche nelle descrizioni , considerazioni, opinioni , mi piacerebbe avere più tempo x farlo x descrivere davvero bene come le ragazze stanno esplodendo di vita ! Apparte questo velocemnte posso dire che la ragazza che sta crescendo con un soil dinamico sinergico creato con micorizia e funghi benefici, melassa e comunque tutto completamento organico, della linea di Bio Tabs , sta crescendo davvero bene , un verde intenso sintomo di prosperità, ho solo aggiunto 3 ml di pk bio , ma 😅 potevo anche evitarlo dato che stava già benone!! E si vede nelle foto non c'è nulla che posso dire di negativo su di lei per ora !
Mentre la secondo ragazza , io nn avendo mai usato il nutrimento della linea RQS, probabilmente sono stato un po' leggero con i nutrienti e si vede che è andata in carenza di calcio e magnesio
. Ora ho provveduto ad aggiungere al nutrimento solito che gli do, quindi vediamo come va!! 🙏 Ringrazio come al solito la luce fantastica che fa prosperare le mie piante come fosse un ☀️ in miniatura!!! Mars hydro la migliore luce che posso consigliare a tutti se avete un grow box piccolo come il mio o cmq anche più grande da un metro x metro e altro 180 cm o 200 cm sarebbe l ideale.. ma 😄 purtroppo ora nn posso permetermela quindi va bene così ! Ringrazio RQS dei semi spettacolari che consiglio a tutti! Buon 420 a tutti! 🐱😽💪👊🧙♂️🌱🌿🌲💨
Likes
2
Share


@AestheticGenetix
Follow
7/8/25 Starting to look very very nice. Some nice purple flakes on the edges of the sugar leaves with bright hairy orange pistils on nice bulbous shaped buds
Likes
69
Share


@DeepWaterGrower
Follow
[DAY 43] - 13/07/2022
- Temp. 29° / RH: 50/60%;
- EC 1.3; PH 6.3 - In the next few days:
a) I will gradually raise the EC up to 1.5, first with a large addition of CaMg+ (up to 3/4 ml/L), then moving on to the full pre-flowering feed;
b) I try to keep PH at 6.0 to improve the absorption of cal-mag;
- Lamp: 80% (120 watt) - 50 cm away from the center of the net - 18/6 cycle;
- Many leaves seems to be too green, almost dark green, we'll see next days how plant grows and fix if needed;
- I widened the canopy a bit outwards through the scrog net, I hope it will help the light penetrate better in the center;
- I also removed a single leaf that was very large and which from day one was blocking all the light in the center of the net. I was certainly wrong not to remove it before, which is a lesson to me for the next runs.
[DAY 44] - 14/07/2022
no update, just uploaded pics
[DAY 45] - 15/07/2022
- 28°/29° C - 45%/50% RH (dry day);
- PH 6.0/6.2 - EC 1.5 (1.1 preflower blend and 0.4 only CALMAG due demineralized water);
- Lamp: 80% (120 watt) - 40 cm away from the highest point of the plant - 18/6 cycle;
- A bit leaf tucking today - This weekend I'll remove the ties;
- Center of the net is slowly filling up, new small branches are popping up and I hope they can fill that central hole.
[DAY 46] - 16/07/2022
- 29° C - 65% RH (wet day);
- PH 6.2 - EC 1.5 ;
- Since yesterday almost all the new leaves are growing showing signs of some problem (look pictures). Some deficiency? Excess of nutrients? Other? I ask with a growquestion and hope to understand more about it. Fingers crossed 😐
- Thanks to the advice of @Chow_13 and @SwissKush I realized that the leaves were signaling me to start flowering nutrition right away, the plant is starting to require more P and K.
I just replaced the solution in the DWC with 8 liters of bloom nutrient. In the evening I upload some pics to show how plant reacts.
[DAY 47] - 17/07/2022
- 29° C - 65% RH (wet day);
- PH 6.2 - EC 1.6;
- I just regenerated the CO2 tanks and I decided to put them outside the box because they are too bulky (the tube through which the CO2 passes is inside the grow box).
[DAY 48] - 18/07/2022
- 29° C - 65% RH (wet day);
- PH 6.1 - EC 1.7;
- TS1000 40 cm away - 80% (120 watt);
- New leaves are growing well.
- Removed the branch tie;
- Found an ant on the log, but how the hell did you get in?
[DAY 49] - 19/07/2022
- 29° C - 60% RH ;
- PH 6.0 - EC 1.74;
- TS1000 40 cm away - 80% (120 watt);
- Plant is drinking about 1.5 liters of solution per day. I'm trying to keep the PH below 6.1, at the moment it is 6 and tomorrow I try to lower it to 5.9 / 5.8; I highlight how the solution inserted on 16/07/2022 had EC 1.6 and today the EC is 1.74, it has slowly risen over the last few days. For the moment nothing alarming, I see how it proceeds and if so I intervene;
- Removed the 2-3 liters still in the DWC and inserted 8 liters of new solution: EC 1.37 - PH 5.9. The plant was not drinking well, the EC was continuing to rise and tomorrow I start the new week, so I anticipated the replacement of the solution.
EC 1.6 was too much? Or the plant was not yet ready for a full flower blend? I don't know, let's see how it goes with the new solution.
Likes
200
Share


@Ferenc
Follow
Day 86, 5th of December 2020:
Craziest group I have ever had...
Honestly I just want to see the end. I will be away for 2 weeks almost.
Original Sensible Seeds ladies are dope.
Gelato is very nice proper shape one of my favourite she is just nice and not problematic.... :)
Runtz Gum is amazing nice big buds are on the way really nice! The same no problem with her at all!!!!
Do-Si-Dos OG is just crazy.... She is not an easy lady... problematic... never met a plant like this one. ...
Too much strech and now I need to tie and stand her up somehow i broke one branch.... I put a tape arounf so hopefully saves that bud tho....🤣
Her flowers kill her lol
Black Ghost OG is sweet and good girl she is the easiest player from them she is good for begginners similar to Wedding Gelato even is shape haha....
Wedding Gelato from RQS is just perfect no problem with her at all... good for begginners as well... :)
So This is how it is 5th week has started I just wanna get it done really long journey :)
The lamp is now on 11 hours and off 13 hours. Every week 15 minutes was taken off and after 4 weeks here we go. Strated 12/12 and now 13/11 wanted try to imitate the nature as the light days are getting shorter.
Fertilization has changed no more epsom salt from this week and I will stop giving nitrogen as well from next week.

Likes
18
Share


@BudsBros
Follow
Amazing it happened again. I'm not the god of growers but some autoflowers come out like one. This is incredible, I think it's my best result, truly exceptional.
This Bubble Gum is wonderful, and it is made in Romania by the guys from Seeds Mafia with a truly wonderful cannabis know-how.
It's giant, full of resin, full of swollen flowers, branches that look like arms, I had to use a bottle to compare the lighters were funny. Super perfume, I pulled it off with a lot of white because there was also a lot of yellow and I didn't want to risk the problems at the end. The maturation is there, the scent is all, the resin as well, the quantity is monstrous for me, for an autoflowering in general, even grown on the ground without particular miracles, it is super.
Sincere congratulations to the guys of Seeds Mafia seeing is believing!
Mamma mia planting, my best ever. Get the seeds!
https://seedsmafia.com/en/autoflowering-cannabis-seeds/auto-bubble-gum-feminized.html
Our light is super lovely wide and supplied by Viparspectra
https://www.viparspectra.com/

Likes
2
Share


@Growfather1
Follow
Hello everyone!
Here is the latest update on the Amnesia Haze Part 2 diary, which follows two plants as they move right along.
Recent Actions & Status
* Major Maintenance: About 12 hours ago, the plants received a thorough defoliation, a neem oil spray treatment, and a good flush. They are currently recovering well from all that stress.
* Lighting: The Spider Farmer light is currently running on a 24/0 schedule (24 hours a day, 7 days a week).
* Future Plans: I am planning on transplanting them next week into a bigger pot to give the roots more room to explode.
Environment Metrics
| Current Stage | Week 3 (Vegetation) |
| Humidity | Stable and in check at 65% |
| Temperature | Swinging between 21°C and 26°C at peak moments |
We thank you for stopping by and have a nice day.
Best regards,
Growfather

Likes
5
Share


@ChiloteAnonimo
Follow
Día 01 de su octava semana de flora.
Pandemia kush y la Trimosa x mimosa sin apical se van a cortar a mediados de esta semana.
El resto por cuestión de tiempo voy a apurarlas cortandolas en 10 días más.

Likes
9
Share


@GrowInBavaria
Follow
12.03.2024 – Ein Desaster mit Hoffnung
Wo fange ich an, wo höre ich auf…? In diesem Zeitraum bin ich umgezogen und musste mir überlegen, wie ich das Ganze manage, damit die Ernte am Ende optimal wird – was sie leider nicht wurde.😅
Die Pflanze war genau in der Zeit fertig, als ich mit meinem Umzug beschäftigt war und in den Urlaub geflogen bin. Also entschied ich mich dazu, sie vor meiner Abreise zu köpfen und aufzuhängen. Eigentlich wollte ich die gesamte Ernte wieder in DryFerms trocknen lassen, doch da ich mein Zeitmanagement dieses Mal überhaupt nicht im Griff hatte, wurde alles ziemlich kurzfristig. Die Buds mussten ja auch vorher noch getrimmt werden. Also ließ ich das bleiben und hängte sie einfach auf.
In meiner neuen Wohnung stellte ich schon mal ein Hygrometer auf, um die relative Luftfeuchtigkeit zu checken – 42 %. Schon ziemlich trocken, aber ich dachte mir nichts weiter dabei. Wird schon irgendwie klappen...
Dann flog ich in den Urlaub. Fünf Tage später war ich zurück. Die Ernte hing bereits einen Tag vor meiner Abreise. Als ich mein Zelt öffnete, sah ich das Desaster kommen: Das Hygrometer zeigte eine RLF von nur 32 % an. Die Buds waren staubtrocken. Die ganze Arbeit – für nichts. Besonders ärgerlich, denn von allen drei Pflanzen war diese die vielversprechendste, sowohl was die Terpene als auch den Ertrag betrifft.
Ich war kurz davor, alles wegzuschmeißen, weil ich mir das Elend nicht mehr anschauen konnte. Schlussendlich entschied ich mich aber doch dazu, die Ernte so gut es ging zu trimmen. Ein Desaster, das kann ich euch sagen! Die Hälfte aller Buds löste sich in Staub auf – kaum setzte ich die Schere an, zerfielen sie.
Am Ende blieben mir doch noch 32 g, allerdings extrem empfindlich. Curing? Keine Chance. Trotzdem wollte ich das Beste herausholen. Also packte ich die Ernte mit zwei Bovedas für sechs Tage in ein Glas – und siehe da: Die Buds nahmen die Feuchtigkeit auf, die sie brauchten! Am Ende hatte ich zumindest halbwegs vernünftiges Material.
Jetzt lagert alles in Grove Bags mit einem Boveda und wird genau beobachtet. Ich hoffe, dass daraus noch gutes, rauchbares Material wird!
Eins ist sicher: Die Dosidos Auto wird auf jeden Fall noch mal gegrowt – und dann richtig ✊!

Likes
9
Share


@StoneyMelony
Follow
Gorilla Glue #4 auto is a big plant,She has a lot of side stalks and is a bit bushy. She has even as well as uneven internodes. All filled in very nice and a was suprised how big of buds there where forming near the end. A little bit of LST did help to get the cannopy more even. EC levels never raised EC 1.4 and i had never a problem with feeding her. She matured very fast and i was amazed by her speed. I harvest this plant at day 73. This plant had a wonderfull smell of pine with lime and huge cola, buds are a bit hazy covered with some nice crystals.
Overview of my grow:
Tent: Secret Jardin DS120 4 x 4 (120 cm by 120 cm)
Lights: 2 x 120 Watt CTlite c4 clusterled
Climat: Trotec Dehumidifyer 240 watt- 10L/24h
Filter: Prima Klima carbon filter PK2600
fan: 2 x Secret Jardin 20watt osc. fan
Pots: Gronest 4 x 11 liter airpots
Water : automated water system
PH: bluelab
Nutrients: Plagron cocos A/B
Plagron PK 13/14
ATA cal/mag
Epsom salt
no rights to music in the videos


Likes
44
Share


@Chedderbob112
Follow
Well tge skittles popped first waiting on the kings kush tae pop tge revegged triple g is budding at the moment av tied her down stay tuned this should be a good run monster cropping and revegging here we Fukin go who else is dain this or is it just me surely not comments welcome and there mite be a secret diary so stay tuned @chedderbob112 @s2340420long pockets

