


Likes
Comments
Share

@DogDoctorOfficial
Follow
💙 Project Blue Tent – Week 4
Blue Waffle F1 – Pheno B (Folder 13B)
Hello everyone, and welcome back to another update from Project Blue Tent!
For anyone joining us for the first time, this project follows four individual Blue Waffle F1 plants from Zamnesia, each documented in its own diary from seed to harvest. Although they all live inside the exact same environment, receive the same nutrition, grow under the same lights and experience the same conditions every single day, every plant is allowed to tell her own story.
That's one of the things I love most about growing from seed.
We're not simply growing four plants.
We're discovering four different personalities.
Everything inside this tent is built around the Zamnesia ecosystem, while the ladies are growing in Plagron Premium Coco Growbags and being fed exclusively with the Plagron Hydro nutrient line.
Today it's time to spend some quality time with Blue Waffle F1 – Plant B.
⸻
🌱 Week Four – Small Plant, Big Potential
This week felt like another important milestone for Plant B.
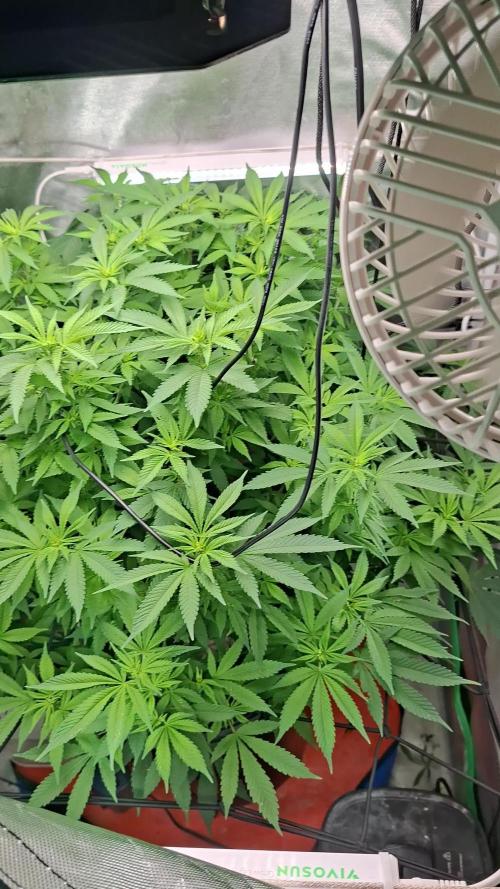
While she remains slightly more compact than her sister, she's developing exactly the way I hoped she would. Her internodal spacing stays beautifully tight, the side branches continue to stack evenly around the main stem, and the overall structure is incredibly symmetrical.
Rather than stretching upwards, she's investing her energy into building a strong foundation first.
Personally, I love seeing this type of growth.
Plants like these often become a dream to train later on because they're naturally dense, balanced and eager to fill every available space once they're encouraged to branch out.
The stem continues to thicken nicely, while subtle purple pigmentation is becoming more noticeable on the petioles and main branches, adding another little touch of personality to this phenotype.
⸻
🌡️ The Blue Tent Environment
One of the biggest goals with Project Blue Tent is maintaining consistency.
By keeping every environmental factor as stable as possible, the differences we observe come primarily from the plants themselves rather than changing conditions.
This week's average environmental conditions were:
• 🌡️ Day Temperature: 27°C
• 🌙 Night Temperature: 25°C
• 💧 Relative Humidity: 67%
• ⚗️ pH: 5.8
• ⚡ EC: 1.88 mS/cm
• 💨 CO₂: approximately 450 ppm
• 💡 Light Schedule: 18/6
• ☀️ PPFD: approximately 350
The Zamnesia Phytonaut LED continues providing a beautiful, even light distribution across the entire canopy while the Grow Environment Controller keeps everything running smoothly throughout the day.
Stable conditions allow the plants to focus on one thing...
Growing.
⸻
🥥 Feeding Update – Learning Coco One Week at a Time
One thing that really caught my attention this week was the overall leaf colour.
Just like her sister, Plant B remains incredibly healthy, but she's showing a lighter shade of green than I personally like to see.
Fortunately, plants are excellent communicators.
Before deficiencies become serious, they often give subtle hints that they're ready for a little more nutrition, and I believe that's exactly what these ladies were telling me.
Rather than waiting for problems to develop, I decided to make a gradual adjustment.
The feeding schedule is now:
• Plagron Hydro A — 1.8 ml/L
• Plagron Hydro B — 1.8 ml/L
• Plagron Hydro Roots — 1 ml/L
I also introduced a small amount of Plagron pH Min to help keep the reservoir perfectly stable over longer periods.
One thing that has genuinely impressed me throughout this grow is just how stable the Plagron Hydro line has been.
Once the reservoir is mixed and dialled in, the pH barely moves throughout the entire week. Occasionally it may require the smallest correction, but compared to what I expected when starting coco, the stability has honestly been outstanding.
Coming from years of growing in living soil, I'm really enjoying learning how responsive and predictable coco can be when small adjustments are made instead of large corrections.
Growing really is one continuous learning experience.
⸻
✂️ Topping Day – Building Tomorrow's Canopy
This week also marked Plant B's first High Stress Training session.
She received her very first topping.
Unlike Low Stress Training, where branches are gently bent into position, topping intentionally removes the plant's main growing tip to interrupt apical dominance.
By doing this, the plant redirects energy into the side branches instead of focusing almost exclusively on one central leader.
Many growers choose to top much earlier, sometimes above the second or third node.
Personally, I prefer allowing the plant to develop a little longer before making that first cut.
Waiting gives me a stronger stem, additional secondary branches and, most importantly, many more growing tips to work with later.
My goal isn't simply to create two tops.
My goal is to build the framework that will eventually fill an entire SCROG net.
Everything we're doing today is preparing these plants for the weeks ahead.
Because topping is considered High Stress Training, timing is important.
I only perform it on vigorous, actively growing plants that are showing strong health.
Although the foliage is still a lighter green than I'd ideally like, Plant B's posture, growth rate and overall vigour clearly showed she was more than ready for the procedure.
The cut itself was made using my Zamnesia Pruning Scissors, giving a clean, precise cut with minimal tissue damage.
Sometimes the smallest tools make the biggest difference.
⸻
🌿 Blue Waffle F1 – Plant B
The more time I spend watching this phenotype, the more I appreciate her personality.
She's compact.
She's balanced.
She's methodical.
Rather than racing upwards, she seems determined to build a solid foundation first.
Every branch appears evenly spaced, the stem continues gaining strength, and even after topping she looks completely unfazed.
It's always fascinating how two sister plants can respond so similarly while still expressing their own unique character.
Plant B feels like the quiet achiever.
She's simply getting on with the job.
⸻
👀 Looking Ahead
Next week should be a very exciting one.
With the feeding now increased and the topping behind her, I'll be watching closely to see how quickly the two new leaders begin taking over.
I'm expecting the canopy to start opening naturally as the side branches accelerate and the overall structure becomes wider.
Over the coming weeks we'll continue shaping these ladies, preparing them for the SCROG while allowing each phenotype to reveal more of its own personality.
The adventure is only just beginning.
⸻
💙 Thank You
A huge thank you goes to Zamnesia for making Project Blue Tent possible, from these fantastic Blue Waffle F1 genetics to the complete ecosystem surrounding this grow.
A heartfelt thank you as well to Plagron for providing the Premium Coco Growbags together with the Hydro nutrient line that continues teaching me something new every single week.
Thank you to GrowDiaries for giving growers from around the world a place to document their journeys, learn from one another and build such an incredible community.
And finally...
Thank you to every single person following along.
Whether you've been here since day one, recently discovered these diaries, leave comments every week, quietly observe from the background or simply enjoy watching these plants develop, your support truly means a lot.
I hope you're all having an amazing week, and I can't wait to show you how these beautiful ladies continue evolving in the next update.
Until then...
Growers Love, happy growing, and I'll see you all next week. 🌱💙
P.S. One thing I love about documenting every single step is that these diaries become more than simple grow logs. Hopefully someone who has never topped a plant before can look at this week's photos, understand the process, see exactly where the cut was made, and feel a little more confident when the time comes to do it themselves. If these updates help even one grower become more confident with their own garden, then they've already achieved something special. 💙🌱


Likes
168
Share


@Still_Smoq
Follow
📆 Week 8, 24-30 June 2024
24 June - Defoliated
25-30 June - Observed and let the plant grow.
📑 Defoliated Pablo. Well, she successfully smothered out the main apex and topped herself. I gave it the final pinch to complete the process. Pablo is one of most densely packed plants I’ve grown. She is beautiful and lush, but she requires a little more attention than most.
🍶 24, 27 June nutrient solution changed
🍽️ 24, 27 June feeding schedule updated
💧 Using reverse osmosis water with EC/TDS at 0
🐉 Nutrient solution EC 2.8 at 74 degrees F
🔆 Light power at 80%, DLI 40 canopy coverage at 12hrs
😤 Using PYPABL, Air Pump, 400GPH
That is it for this week. Thanks for the look, read and stopping by.

Likes
2
Share


@valiotoro
Follow
Hello everyone 😎
Week 8 of flower for the KK auto from Dutch Passion ❤️🔥
Spider Farmer SE-7000 100%
Now only plain water💧
Weight is coming 😎
I will harvest in 2-3 times first the top buds

Likes
10
Share

@KurtThePlantGuru
Follow
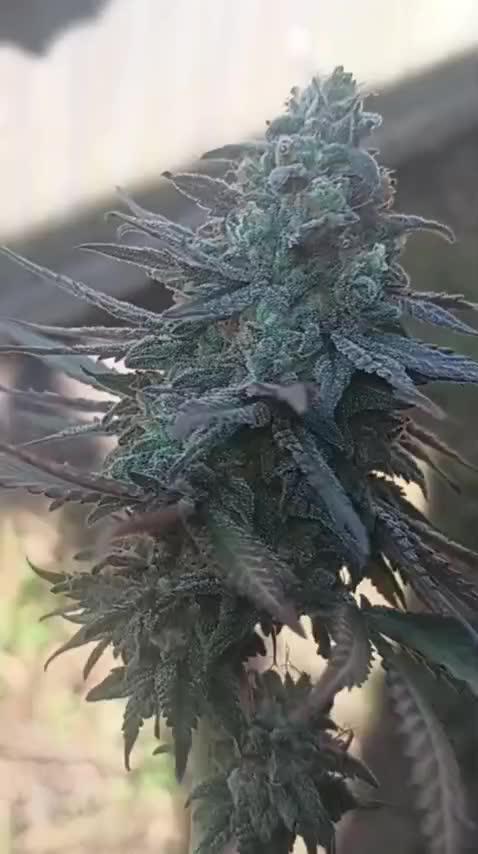
Finally chopped down and harvested. My best plant yet and that was all thanks to homegrown genetics for these killer genetics. If you haven't tried this guy yet, I absolutely beg you to. You will not be disappointed
The Terps are straight Dank Ripe Black Cherry, that Superboof orange rind/hashy funkiness, and sum really nice earthy hash notes from the Pure Michigan. All comes together and almost reminds me of a really deep earthy cherry pie with a very slight Superboof orange influence. Very black cherry/Cherry Candy heavy. But not traditional "candy" you see now days.
All around 10/10, I will be running Apple Junky and Garlic Applez next!

Likes
58
Share

@Qutro
Follow
What a crazy week, growmies.
It’s amazing to see how fast the early flower phase kicked in right after the first pistils showed up.
The girls were obviously more than ready after a 10-week veg, but honestly I can only speak in superlatives about them.
The stretch is absolutely insane(15cm this week), and it really takes all our skills to keep the canopy even especially since we’re running two different strains in the tent.
We’ve been doing aggressive bend-overs / tie-downs every other day just to keep the canopy under control.
To keep up with their appetite, bumped the watering up to 4 liters and they happily took it both times. Will stick with a simple routine: one plain watering, one feeding.
We’re already seeing some frost coming in, which is great this early in flower. 😄❄️🌱
Light intensity:85% on 40cm.
Vpd: 1,1-1,35kpa

Likes
44
Share


@RakonGrow
Follow
Note :
+ jegliches Zubehör wird in der GermniationsWoche aufgelistet . Zeitraffer Videos folgen immer nachträglich.
+ videos werden so geschnitten das nur ein geschlossenes Zelt erscheint , ergo Fehlen paar reale Minuten (ca 1 Std) .
Day 57:
+ 2.0 Liter Flaschenwasser
+ + Dünger für Blühte
+ + + Canna Terrar Flores (Achtung wirkt wie PH-)
+ + + Canna Boost
+ + + Cannazym
+ + + Canna PH+
+ + PH 5.91
Da es heute heiss ist , wird wie Gestern laufen . Bis 19:00 Uhr wird das Licht reduziert und dann DLI nachgeholt.
Day 58:
Da es immer noch heiss ist , wird wie Gestern laufen . Bis 19:00 Uhr wird das Licht reduziert und dann DLI nachgeholt.
Day 59:
+ 2.0 Liter Flaschenwasser
+ + Dünger für Blühte
+ + + Canna Terrar Flores (Achtung wirkt wie PH-)
+ + + Canna Boost
+ + + Cannazym
+ + + Canna Rhizotonic
+ + + Canna PH+
+ + PH 5.91
16h jetzt mit 1000 PPFD und jeweils 1 Stunde Sonnenaufgang und Sonnenuntergang.
Day 60:
Mal ein bissel Größenvergleiche gemacht .Das Clipper Feuerzeug ist 7.5 cm hoch .
Day 61:
+ 1.75 Liter Flaschenwasser
+ + Dünger für Blühte
+ + + Canna Terrar Flores (Achtung wirkt wie PH-)
+ + + Canna Boost
+ + + Cannazym
+ + + Canna Rhizotonic
+ + + Canna PH+
+ + PH 6.01
Day 62:
Das Wetter bleibt stabil, damit bleiben die Growwerte auch stabil. Bisher Läuft das 1000 PPFD Spitze und 750 PPFD Sekundätriebe ganz gut . Ihre Freundin die leider ein Wasserschaden erlitten hat (tja da war wohl irgendwas im Wasser was ein Regenbogenfilm erzeugt hat , im schlimmsten Fall Waschmittel) nimmt der einen Seite zwar licht, aber geht halt nicht anderes bei nur einer Lichtquelle . Ich fahr halt gleich ein doppel Experiement mit dem Licht. Bisher aber holt sie ganz gut nach mit 900-1000 PPFD auf die ziemlich gleich hohe Krone .
Day 63:
+ 1.75 Liter Flaschenwasser
+ + Dünger für Blühte
+ + + Canna Terrar Flores (Achtung wirkt wie PH-)
+ + + Canna Boost
+ + + Cannazym
+ + + Canna Rhizotonic
+ + + Greenhouse Feeding BioEnhancer
+ + + Canna PH+
+ + PH 6.01

Processing
Likes
10
Share


@BodyByVio
Follow
This week I Supercrop all the plants and spred them out over both lights. One more week of Veg and they are ready to explode
Check me out on Instagram @growmorestressless

Likes
28
Share


@Ferinky
Follow
En esta actualización se incluyen 2 semanas ya que por trabajo me fue imposible añadir la semana anterior.
El día 15 de Agosto recibió la segunda pulverización de Bacillus Thuringiensis para prevenir el ataque de las orugas.
Sigo alternando riego de agua un día con riego de Ascophillum Nodosum al día siguiente. He dejado de regar con Cannazym.

Likes
Comments
Share


@Organic473
Follow
Another first timer strain and luckily this one has passed the germination week from white label seeds...it was a sunny week which propelled the enhanced growth...looking forward to crossing her with some Skunk #1 pollen.
OG SKUNK Loading.

Likes
14
Share


@eldruida_lamota
Follow
Que pasa familia, vamos con la segunda semana de crecimiento de estas Gorilla Zkittlez Auto de FastBuds.
Tiene muy buenas reseñas y pues me animé a colocar 5 plantas.
La tierra que utilizamos que está en la publicación anterior es top crop all mix, aparte alimentamos nuestras plantas con Agrobeta.
Por supuesto el ph se mide en cada riego y se mantiene en 6.2, regando cada 72 horas e intentando mantener la humedad un poco alta al principio.
Las próximas semanas vamos viendo cómo avanzan.
Mars hydro:
Code discount: EL420
https://www.mars-hydro.com/
Agrobeta:
https://www.agrobeta.com/agrobetatiendaonline/36-abonos-canamo
Hasta aquí todo, Buenos humos 💨💨💨

Likes
4
Share


@Phatlad187
Follow
Week 5 from seeds and they are grow fast and started to LST, looking good and health growing perfect under 24 of light set at 400watts
@growerchoice ..
@shogun
All shogun feed to be used
@ShogunA&B coco
@Shogun calmag
@Shogun active boost
@Shogun zamzym


Likes
5
Share

@PapaTerps
Follow
AlienZ Automatic - Greenhouse Seed Co.
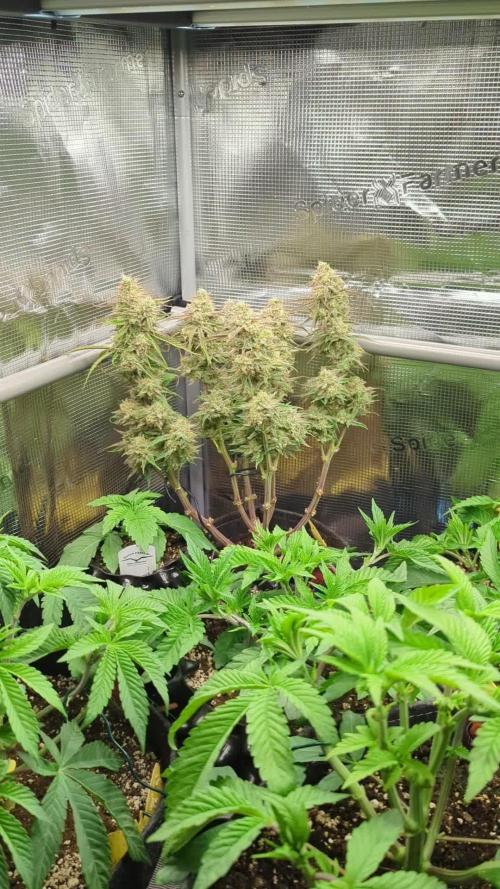
Day 89 - watered with 3L of RO tap water, mixed with the defined nutrients in order and then pH'd to 6.3.🚿 She's in week 8 of flower now and I think this will be her last diary entry before harvest! I gave her a good defoliation today to remove most of her remaining fan/larger leaves as she doesn't need them anymore, I've also completely removed all nutrients from her feed, anything defined is from her very last feed - she is now just on plain RO water 👍🏻 she will be watered maybe twice more this week, before I leave her to completely dry back, at which point she will be harvested🌸✂️. She was really enjoyable to grow and smells lovely and floral, with hints of candy and earth, lots of vibrant colours too!



Likes
18
Share


@BudMunchies
Follow
10/22: wow… what a mess. I should have defoliated last week. They were incredibly overgrown and now i had to stress the hell out of them to get the tent cleared up for light.
Hopefully the stress does not cause any issues.
As if the defoliation was bot enough stress on them, my light height has reached its top, and PL1 had two colas starting that were already pressed into the light. And so i removed their tops a node or two down. Im sure this was as good as hitting the plant in the face with a brick. Hope she recovers!
If youve been following along, you know i planted these with hopes for the extremely purple pheno. And i believe that if i had it, she would have started showing her colors by now.
Looking forward to seeing what these turn into and if they make it without any issues after i kicked them around a bit.
Likes
6
Share

@Ninjabuds
Follow
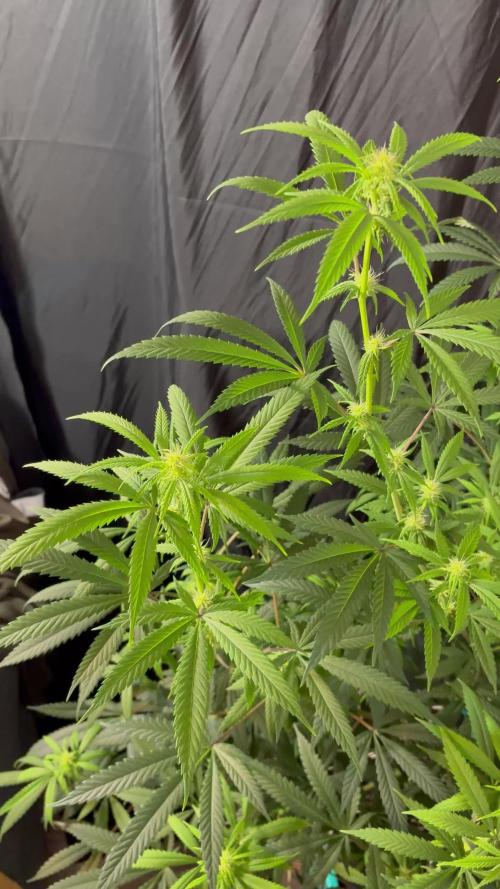
The plants are looking really healthy. I’m still getting used to my new lights. I think I didn’t push enough light in week 2 of flower I’m ramping up the light intensity now. I had to whip out my par meter I was keeping the light to far off the plants. This light has to be closer to the plants than my mini sun. I’m lurking this light a lot I just need to get used to it
Likes
167
Share


@DeepWaterGrower
Follow
⭐ TrolMaster tracking ⭐
I started to track my crop during week 15, when I got the Tent-X TCS-1 by TrolMaster. First impression was: this is too professional for me, I can't handle setting it up and using it well. Then I started reading some posts on Instagram, I visited their site and in 5 minutes my cultivation experience took a huge step forward with disarming simplicity, I couldn't believe it.
I have uploaded tracking videos from the TrolMaster app for each week from the 15th to the 19th, as well as the two weeks of drying stage.
⭐ Controller Chronicles ⭐
Day after day I appreciated the clarity and precision for data, access to all settings and instant readings by connecting a WIFI router to the controller's LAN port. I loved the possibility to dim my lamps remotely, or even automatically based on the temperature in the box!
🌱 GERMINATION (2 days)
Seeds in a glass of EC 0.4 tap water for 10 hours, then in root riots and under the lamp. They sprouted after 48 hours from dry seed.
🌿 GROWING STAGE (10 weeks and half)
I decided to give these plants a long vegetative growth and this allowed me to do a lot of training on both.
Starting from the 4th veg week I started with defoliation sessions every two weeks, for a total of four during the entire vegetative phase. The last defoliation was done a couple of days before the switch, in order to allow the lower parts of the plant to get as much light as possible.
Furthermore I did Topping on week 6, cutting the apical branch, then on week 8 I did Topping again on several sites, as well as SuperCropping on the highest branches to make the canopy uniform.
The light cycle I used is 18/6 and the last two veg weeks I lowered the light hours to 16/8 first and 14/10 then.
During the veg stage I made 4 DWC change, PH was always between 5.5 and 6, about EC I started with 0.6 and was 1.4 on the last veg week.
🌸 FLOWERING STAGE (9 weeks)
I started this phase after 36 hours of darkness, I then changed the DWCs solution (adding a flowering stimulator).
Then I mounted the ScrOG-net about 50 cm from the base of the plants and I wove the phenotype #1 through the net occupying at least 60% of the available space; the phenotype #2 stretched shortly after the switch and I used the net only to widen the central branches.
They showed the pre-flowers two weeks after the switch, then I made two defoliations on week 3 and 5 flo.
During the last four weeks of flowering (weeks 6-9) I simply paid attention to the PH-EC levels to provide the roots with optimal conditions. I then kept the TEMP-RH-VPD-PPFD values under control and this also thanks to the Tent-X controller by TrolMaster which allows me to provide optimal conditions also above.
I chopped them when trichomes were about 85% milky and 15% amber.
During the flowering stage PH was always between 5.8 and 6.2, about EC I started with 2 and was 2.3 on the last week before flush.
✅ HARVEST
- From dry seed to harvest: 140 days (2 days germination + 75 days veg + 63 days flo).
- Chopped after 4 days flush and 48 hours in dark;
- Wet trim, removed fan leaves.
✅ DRYING STAGE
- Time: 14 days;
- Average: 20° C - 50% RH.
- After that I made a dry trim, removed branches and sugar leaves.
⚖️ DRY WEIGHT
- Phenotype #1: 230 gr buds + 25 gr larf;
- Phenotype #2: 105 gr buds + 50 gr larf.
So, the overall dry weight is: 335 gr buds + 75 gr larf.
✅ CURING STAGE
- Curing is done after 30 days with Boveda 62%.


