


Likes
Comments
Share

@3rnest
Follow
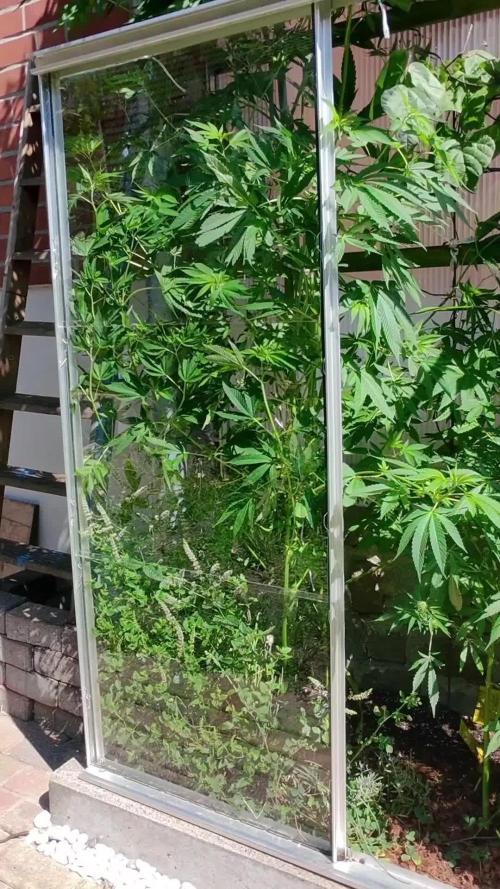
Nun wurden die 3 Meter erreicht.
Zum Glück hat die Pflanze nach oben genug Platz und kann sich gut entfalten.


Likes
12
Share


@Kayanesta
Follow
Smells amazing, buds are greesy to the touch…serious genetics from fast buds!

Likes
8
Share


@Papastroumf
Follow
Day 51 : Watered with 2.5L each lady. I added as always 1 co2 tab per 4.5L . Also i added nutrients. The next one will be pure water. Her burns stopped and doesn't continue to burn new leaves. She lost a lot of power because of lack of energy. She is trying to produce some stuff , i am curious to see how this fight will proceed.
Edit (Day 56) : Watered 1.5L pure tap water of 7.5ph and 360ppm. No co2 today. Just pure water with 0.5/L Cal-Mag. Buds are fattening nothing else.
Likes
17
Share


@ButterfliesLittleFarm
Follow
Hello Diary.
The first week of flowering is over, the plants have branched out nicely, the Purple Punch has grown more than 60cm and has now become crowded on the Farm.
Specifically, Purple Punch # 1 grew 66 cm, Purple Punch # 2, which sprouted a few days later, grew 54 cm, which surpassed roommate Watermelon, who keeps them company on the Farm.
Along with the height, there are a lot of leaves throughout the plant, but this time I'm not sure if I would do defoliation.
The plants normally look healthy and satisfied, they did not reflect as much as on Watermelon, that they were harmed by too many nutrients. They’re obviously a little more resistant to that. Except for the yellowish tips of the leaves, which I believe is genetics, everything else seems fine.
The flowers started to form, so I have new motives to photograph. At the beginning of the week, I also changed the light regime to 20 hours of the day and 4 hours of the night.
I water every two to three days, when each plant gets about 2 liters of water. I add food at about every other watering. Sometimes biobizz and sometimes I put Easy Grow or Easy Bloom tablet, depending on the stage the plant is in.
p.H. I always adjust the water value to a value between 6.2 and 6.5.
Conditions on the Farm are more or less satisfactory, the temperature is about 25 degrees while the humidity is slightly lower than satisfactory, varying between 40% and 50%.
Here’s a brief overview of the past week.
18/02/2021 - Day 23.
Watering. I adjusted the water to 6.3 p.H with Plagron’s Lemon Kick and added 1.5 mL / lit CalMg preventively.
Temp / Humidity on the farm - 25 degrees and 41% humidity.
20/02/2021 - Day 25.
Watering. I regulated the water to 6.4 p.H, I added 1ml / lit CalMg and BioBizz as scheduled for the first week of flowering.
Temp / Humidity on the farm - 24.4 degrees and 43% humidity.
22/02/2021 - Day 27.
Watering. This time I watered only with water which I regulated p.H at 6.3.
Temp / Humidity on the farm - 24.6 degrees and 40% humidity.
23/02/2021 - Day 28.
Photography and height measurement.
Temp / Humidity on the farm - 25 degrees and 42% humidity.
That’s it for this week, a big hello and thank you to everyone who follows the diary and thanks for the comments. See you soon.
Likes
58
Share


@Mosquito_Haarlem
Follow
Het is zover, ze is aan haar eind gekomen.
Na een moeilijke start heeft ze zich ontpopt tot een prachtige dame met mooie kleurrijke toppen als resultaat.
Ik hoop dat ze smaakt zoals ze ruikt want ze ruikt heerlijk zoet bloemachtig.
Bedankt Weedseedsexpress voor de mogelijkheid deze strain te kweken en de trotse eerste te zijn op Growdiaries.👌🏽
Ik heb de toppen opgehangen in de tent en wanneer ze droog zijn zal ik de overige resultaten hier rapporteren.
Denk dat het ongeveer anderhalf a 2 weken zal duren.
Tot dan ✌️🏽
Rook rapport: vandaag 23 april , 5 dagen na het oogsten, zijn de toppen zo goed als droog.
De toppen zijn niet echt compact maar luchtig. Ze heeft het ook zwaar gehad met veel temperatuurverschillen.
Ze heeft mooie paarse suikerblaadjes.
De smaak is lekker licht, tropisch aardeachtig en het effect is een couchlock. Stoned als een moederneuker.
Dit was mijn eerste wintergrow en heb er veel van geleerd.
Ik weet nu hoe ik het in de volgende winter beter kan aanpakken.
Bedankt voor het volgen en tot de volgende kweek👍🏼
De volgende grow wordt de ....Girl scout cookies autoflower van Weedseedsexpress

Likes
50
Share


@Igrowneil
Follow
Hey growers
Day 35
This run is sponsored by VIPRASPECTRA LEDS
XS4000 480W AND P2000 X2 400W
TOTAL POWER RUNNING 880WATTS
Hey guys and girls this week hasn't been the best I overwatered , underwatered and then underwatered again , shit these girls express some amount of water , I literally flooded there plants to get a somewhat of a recovery response which isn't going the quickest either , some roots where exposed ( small amount ) wow they look healty white and fuzzy looking with plenty of hairs which indicates the bio roots worked extremely well even the terra aquatica TRI PART as this is synthetic it has charge ions the plant will uptake (N) continuously if overdone I've held back on as I don't want to damage the root zone with a build up of salts as we will ruin any microbial life with salts locking out important nutrients uptake also
Noticed the fade on some bottom leaves losing colour but I've been holding bk on (N) as some looked dark !! What to do next I'll take step by step and observe the situation for a while before acting to fast
.seedbanks involved ZAMNESIA, E.T.S , RQS
ZAMNESIA
GORILLA GLUE AUTO
This girl is growing pretty well with a good vigour even through this.bad week , staying pretty compact with an abundance of pistle formation indicates this is going to be decent size dense nugs and hopfully keep good airflow around these girls . The outsider gorilla glue over with the newer plants is hitting a good rebound, nothing special but not a total waste anyways which shows strong resistance overall which is a good incentive when picking which genicitis you would run in smaller space this is definitely the square ⬛ 10liter S.O.G / ScrOG method with these plants being smaller and Bushier
GIRLS SCOUT COOKIE'S AUTO
Growing the most compact with very big pistle formation 🙌
explosive pistle formation , I think using buddy from early flower in lower dosage has increase the amount of flower sites with abundance of pistles as this is starting to happen on all plants growing but these girls are taken that to the extreme and would also suit the 10liter square pot method
RUNTZ AUTO
girls are growing big and formation of lots of tops and lateral branching is great 👍 pistle formation isn't as quick bhy these girls didn't flip as quickly to flower , they did take the underwatering pretty bad plus some leaves being remove cause some more shock , lol its been a shit week but nothing we won't be able to fix over the next few days I need to start getting watering correct
ROYAL QUEEN SEEDS
DO SI DO AUTO .
the girls aren't doing to bad and looking better after being dryer than normal when I underwatered them , needless to say there coming bk to life and branching out continues to go on forming lots of viable tops and plenty of flower sites , might be a slow starter but never let that full you
EMERALD TRIANGLE SEEDS
BLUEBERRY AUTO
yes this girl is doing well , the other sister looks like a basil plant and nothing much will come of her . I can't wait to try this girl out and most of the seeds I had 4 blueberry I only got one viable seed , disappointed but the one that's growing is doing well so the taste is what will sway my decision
HEADLIGHT KUSH AUTO
doing well and getting to a good size and keeping on par with the ZAMNESIA seeds this is a good strain
LEMON HAZE AUTO
hopfully I'll contain any stretching untill the girls reach SCROG height
So hopfully the girls will do better from today and I can update with these girls praying 🙏 again , going to set DLI to 45 , temps to 23oC and water upto 0.33 liter a day this week day 36 onwards


Likes
Comments
Share

@AestheticGenetix
Follow
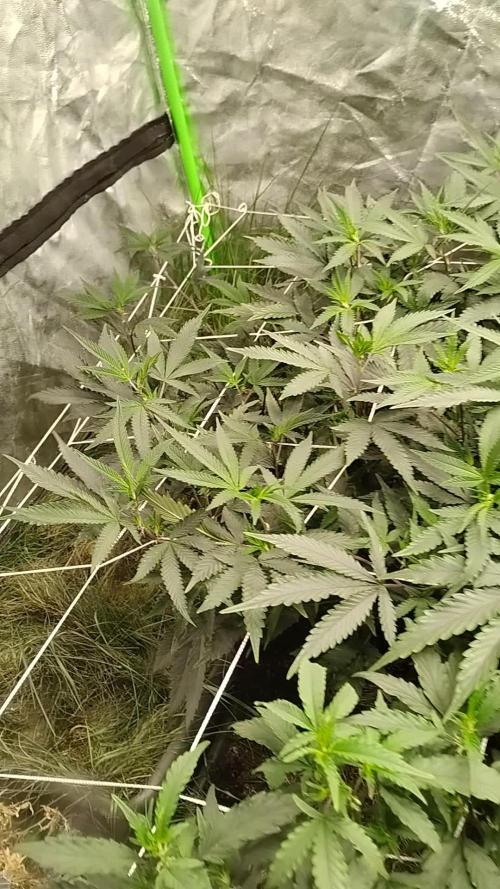
Plant is a beast
Shout out to Thydemise from Thydankgenetics
Likes
34
Share

@Atomik_water
Follow
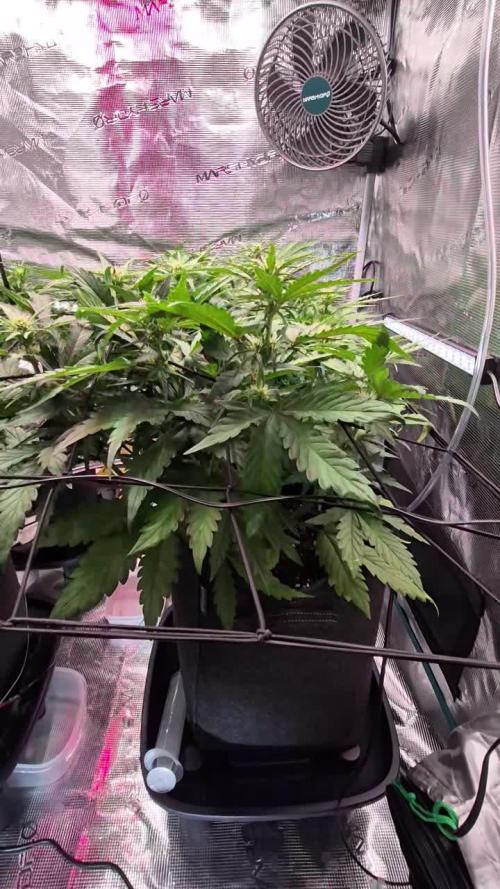
Successful transition into the flowering stage. Switched off the Mars Hydro Adlite Blue bars and fully engaged the Adlite Deep Red bars alongside the main fixture (85%) and low-level side lighting to trigger the stretch phase. Canopy was trained under the trellis net using LST, resulting in 6–8 uniform shoots per plant rising vertically.
Increased irrigation volume to 1.2 L per pot to secure a steady 10–20% runoff, successfully preventing salt accumulation. Stepped up feed concentration to EC 2.1 and pH 6.0, supplemented with ATOMIK Amino for stress relief and mineral chelation. The root zone is thriving with runoff measuring at pH 5.6–5.8 and EC 1.7. Environment dialed in at 28.5 °C, 61% RH, VPD ~1.48 kPa, and CO₂ at ~1100 ppm. All tops are praying with dense pistil development.
Day 31 Rising EC to 2.3 ph 6.2.
1.5 liter every morning in 11l pots. Coco perlit 70:30
Day 31 (Flower Day 4): Lowering PPFD to 630 (45dli)µmol/m²/s worked wonders, with leaves now actively praying and bud sites stacking rapidly. Fed 7L (EC 2.4, pH 6.3) with ~15% runoff testing at EC 2.0–2.3 and pH 5.5–5.9, confirming perfect uptake and zero salt buildup. Dialed the microclimate by routing the text{CO}_2 tube directly under the canopy with a PC fan for laminar lift, and set the S16 under-canopy bars to level 5.
Processing
Likes
2
Share


Likes
8
Share

@D4D3DHOMMIES
Follow
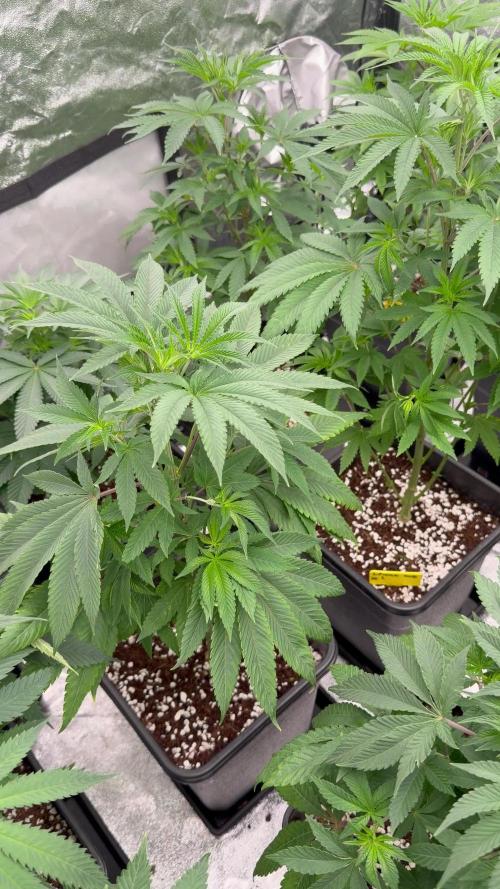
Entering week 7, preparing the plants for flowering. Some will probably need a little more time, so I might give them a bit more than a week of vegetative growth. And I'm also making my first clones! With great results!

Likes
7
Share


@COLORBLIND_CANNABIS
Follow
I THINK THEY ARE DONE STRETCHING. GDP 1 IS 27.5 INCHES TALL. THATS BEEN HER HEIGHT FOR AT LEAST TWO DAYS NOW. GDP 2 IS 18.5 INCHESS TALL. #2 IS IN A 3 GALLON POT, I THINK THATS WHY SHE IS SO MUCH SMALLER. COULD ALSO JUST BE GENETICS. DAY 43.
DAY 44: EACH PLANT HAS STRETCHED ANOTHER INCH. GDP 1 IS 28.5 AND GDP 2 IS JUST UNDER 20 INCHES TALL. NOT TOO BAD. LETS SEE IF THEY STRETCH ANYMORE. ITS SLOWED OVER THE PAST COUPLE DAYS FOR SURE.
DAY 45: ADDED ENHANCEMENT PUCKS FOR FLOWER. 1 PHOTO RED FLOWER BOOSTER. 1 UVA TRICHOME BOOSTER.
DAY 48: GDP 1 IS 30IN TALL TODAY. GDP 2 IS 20.5 INCHES TALL. BOTH PLANTS APPEAR HAPPY AND HEALTHY. LEAVING THE UVA TRICH BOOSTER LIGHT ON FOR THREE HOURS AT A TIME.
DAY 49: GDP 1 STILL 30IN TALL. GDP 2 CLOSER TO 21 INCHES BUT NOT QUITE THERE.

Likes
4
Share

@Bncgrower
Follow
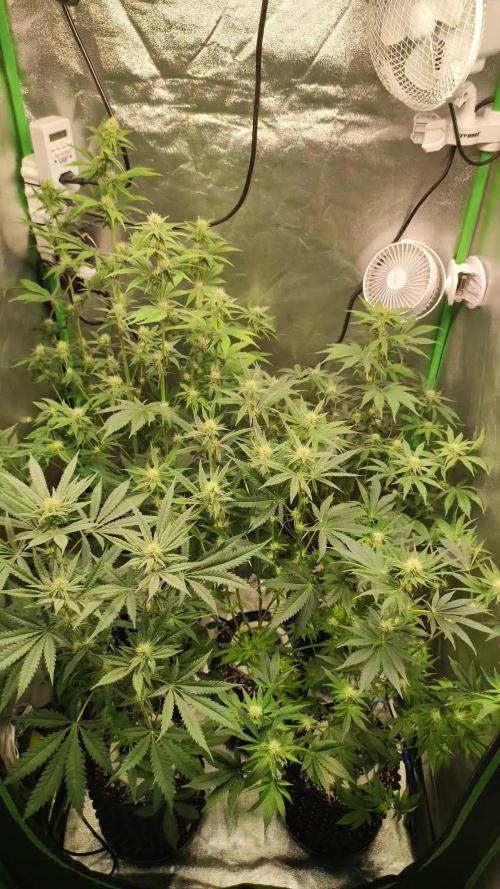
Defoliation done on the last day of the week, everything's fine so far. The flowers have already started to give off a wonderful scent, everything is going as expected. Looking forward to the next few weeks... ✌️
Likes
17
Share


@JonnyKush
Follow
hey guys sorry for the absence but in this period I have had a lot to do with my work and I have not been able to bring a good detailed diary, but finally now the holidays will start and I will be able to dedicate myself 110% to a new crop and new ones diaries. having said that, I think I will leave him a week at the most and finally reap the benefits 💚🌳💚🌳maybe my fault the RQS slow release nutrients did not perform as much as the ADVs in my tent, you can see it from the video of 27/07/22 where you can see that 2 out of 6 plants are visually leaner and less compact to the touch , I wanted to try on the same varieties in order to have feedback. I think it could also be caused by the crowding of the tent but with the ADV I have not encountered any problems. I will definitely try them again, giving them much more attention.
Likes
2
Share


@nenenedudu
Follow
lowered the ionbeam lights and adjusted all lighting to get even 20k lux everywhere.
Likes
23
Share

@ohcibi
Follow
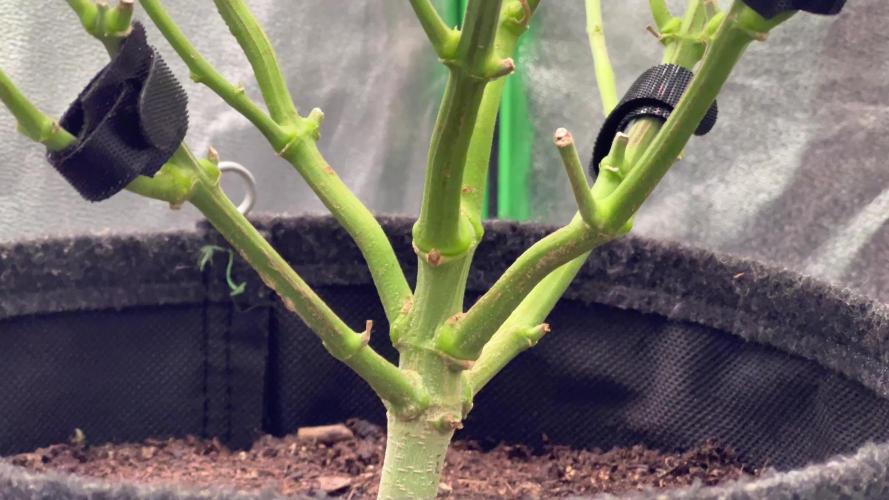
Final week now. I watered with clear water today and it’ll be the last time. Harvest will be on the weekend probably.
Was a nice ride with some hurdles but it should turn out alright. Excited for the next grow already. Will most probably be Dynamite Diesel. Stay tuned for more.
Update:
All the branches are hanging at half past eight, as we say in German. None of them can hold its weight properly anymore. Only one or two days left. I’m excited to see the roots. The ones in my first grow have been kinda crippled for various reasons mostly my fault. But this time the roots at day 12 when I repotted already looked stronger and even almost bigger than those of my first grow after the harvest. So I’m expecting the entire pots to be filled with strong roots justifying this so far magnificent result.
Likes
35
Share


@eldruida_lamota
Follow
Bueno familia ya finalizamos, estas red hot cookies son una cepa bestial.
La verdad que el secado muy bien 7 días en Malla y a los botes, 45% humedad y 23 grados es la temperatura ambiental que han tenido en el secado.
4 plantas que se cultivaron en un armario de 1.20 pero estos ejemplares solo ocuparon 80x80.
Así que ya está cultivada esta gran variedad que es novedad este 2020, americana de la familia Cookies, la Tropicanna Cookies (Girl Scout Cookies x Tangie) con un porcentaje de thc entre los 17/25%, una bomba.
Que decir de Agrobeta, lo peta 💪 en cuanto a nutrientes. Un saludo y buenos humos.

Likes
16
Share


@Andres
Follow
she is a sweet seed mix auto ... just germinate and we will see.in the course of the weeks if I can know the type of seed
Likes
2
Share


@ProlificGrowth410
Follow
Not getting enough light coverage due to the light the tent came with and the inline fan not doin anything at all honestly but still doin pretty good so far hopefully I don't get bud rot before I can make it to my first harvest... I know it would be way better with a Grow Abby soil edition 😜