


Likes
Comments
Share

@bkickstand
Follow
Grow Diaries: Week 22 Journal Entry – The Durban Poison Quartet
* Date: August 14, 2026
* Location: Eastern High Plains, CO
* Stage: Photoperiod Vegetative / Early Transition
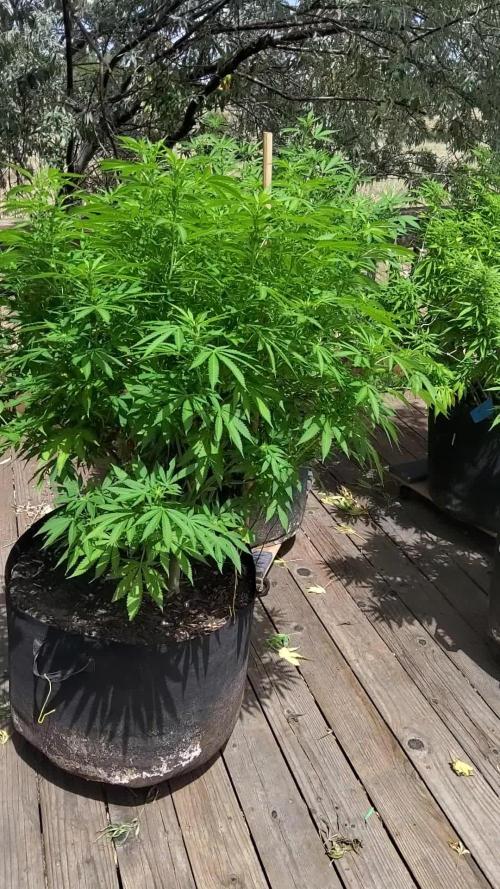
We are officially hitting week 22 with the Durban Poison quartet sitting in their 25-gallon bags on furniture dollies out on the deck. The growth and vigor across all four plants continue to impress, filling out their canopy space with deep green, healthy foliage.
Sunlight Optimization & Layout Adjustments
With the sun tracking differently as we push deeper into August, maximizing every hour of direct light is critical. Today, the entire quartet was carefully rearranged on the deck. Shifting the positions of the 25-gallon containers ensures that the peripheral branches and lower growth get their fair share of unfiltered exposure, keeping the canopy uniform and preventing any shaded bottlenecks.
Feeding & Nutrition: Sea Kelp Tonic
Today marks an important milestone in the weekly feeding schedule: it is sea kelp tonic day. Applying this organic tonic provides a rich array of natural micronutrients, trace minerals, and beneficial growth hormones to support root vigor, enhance stress resistance, and fuel sustained vegetative health as the plants continue their upward push.
Phenotype Notes & Observations
* DP4 Progression: A special callout for DP4 this week—she is really starting to step up her game, showing fantastic structure and officially beginning to build out her colas. The low-stress training (LST) and welded stakes are doing their job, opening up the inner sites to catch maximum light.
* The Quartet: DP1, DP5, and DP6 are keeping pace right alongside her, showing dense foliage and strong branching throughout the 25-gallon setups.
Update 8.15.26
Durban Poison Update: Transition to Flower!
The Durban Poison crew is officially making the shift! After a solid vegetative phase since sprouting back in mid-March, the girls are starting to show their first exciting signs of flower.
* Early Pistils & Cluster Development: Tight cluster formations and fresh white pistils are popping up at the top sites, confirming that the photoperiod crew is transitioning right on schedule.
* Nutrition & Care: Following recent top dressings like the seabird guano applied earlier in August, the plants are looking robust, healthy, and ready to pack on weight as bloom sets in.
* Training & Setup: Sitting comfortably in their 25-gallon bags on furniture dollies, all four plants have responded exceptionally well to low-stress training (LST).
Things are really starting to ramp up for the outdoor setup. Stay tuned for more updates as these flowers start stacking!

Likes
3
Share


@High_Grade_Dadli
Follow
Ending up trans set 1 got a lil more space in GH...topped up the other also did some defoliation(everything) and LST HST( set 1&2)


Likes
5
Share

@GERGrowDesigns
Follow
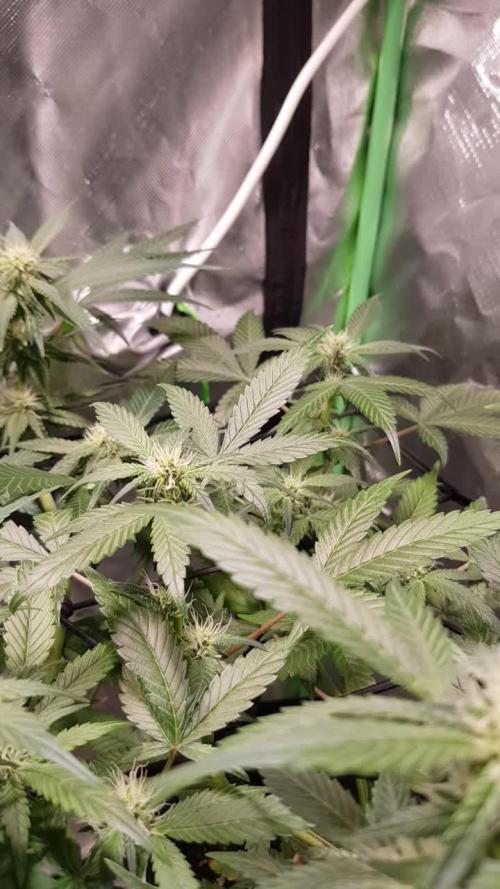
Welcome to Flower Week 2 of Fast Buds Lemon Cherry Cookies Auto
I'm excited to share my grow journey with you from my
FastBuds Project . It's going to be an incredible ride, full of learning, growing, and connecting with fellow growers from all around the world!
For this Project , I’ve chosen the Feminized Auto strain Lemon Cherry Cookies :
Here’s what I’m working with:
• 🌱 Tent: 120x60x80
• 🧑🌾 Breeder Company: Fast buds
• 💧 Humidity Range: 60
• ⏳ Flowering Time: 8 Weeks
• Strain Info: 28,5%THC
• 🌡️ Temperature: 26
• 🍵 Pot Size: 12
• Nutrient Brand: Hy-Pro
• ⚡ Lights : 600W x 2
A huge thank you to Fast Buds for allowing me to try my Best with this amazing collection from Automatic and Photo Strains they managed to Sponsore . Big thanks for supporting the grower community worldwide! Your genetics and passion speak for themselves!
I would truly appreciate every bit of feedback, help, questions, or discussions – and of course, your likes and interactions mean the world to me as I try to stand out in this exciting competition!
Let’s grow together – and don’t forget to stop by again to see the latest updates!
Happy growing!
Stay lifted and stay curious!
Peace & Buds!


Likes
34
Share


@BOMbolenath
Follow
The plant is developing well despite the high temperature.
During the week the weather got better, the plant is growing well.

Likes
21
Share


@Staffedition
Follow
Привет друзья. Моей растихе сегодня 28 дней.
Начал применять LST технику на 19 дне и продалжаю применять её через день, а 18 августа добавил ДЕФОЛИЗАЦИЮ
С 20.08 ДЕФОЛИЗАЦИЮ делаю каждые 3,4 дня
С 20.08 применяю технику LST каждые 3,4 дня
На сегодняшний день влажность 63%
Растение растёт хорошо. генетика радует.
Всем мира и добра!
#Smail_Seeds

Likes
10
Share


@GreenTHC
Follow
Day 62, harvest day. I will update after the drying and curing process. Wish I could've let them go a little longer but had to harvest slightly early. For my first attempt I'm happy with how the ladies turned out! Nice gassy smell, big sticky dense buds, great colours and 81g altogether wet trimmed. Lost one due to growers error but I've learnt a lot for next run. I will be growing one Auto Chem OG along side one Auto NL x BB from Oasis Genetics. Have a great day and happy toking! 🍃💨

Likes
3
Share

@ThreeLittleHerbs
Follow
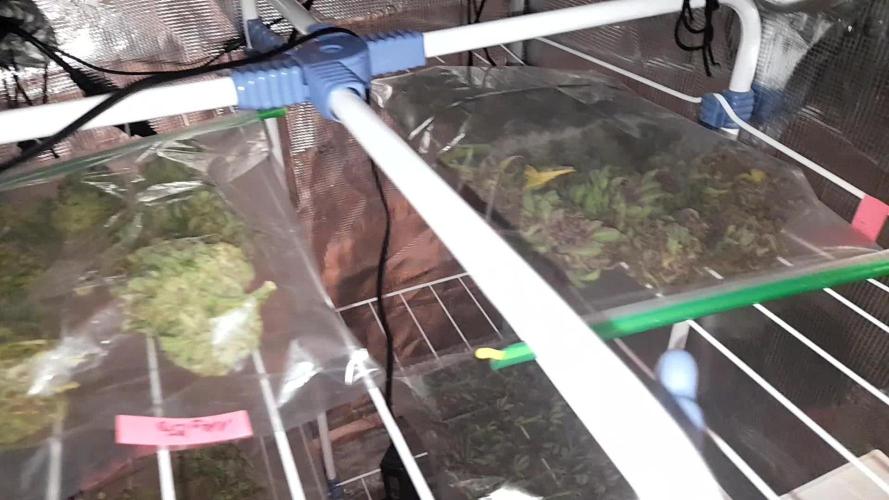
Took a photo of an example budsize :-D The papaya structure is like bud only - i like it!
After 2 days of drying in my tent on 21 degrees/55-6o% humidity i put the buds/branches into dry ferm bags and dry them down in my tent aswell.
I am proud of what the papaya became even with the snapped branches at the beginning-
Likes
11
Share

@GreenHobbit
Follow
Woche 8 – Tag 52 | Start in die heiße Phase
Die Mädels sind jetzt voll in der Blüte angekommen und der Stretch ist durch. Die Struktur steht, jetzt geht’s nur noch um Budentwicklung und Gewicht. Besonders die Blueberry zeigt wieder, warum sie als Heavy Feeder gilt – hoher Wasserverbrauch und ordentlich Wachstum.
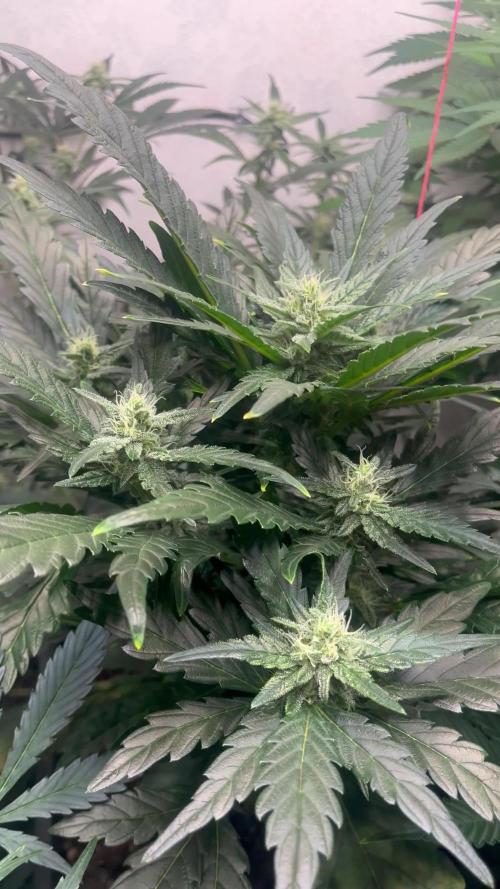
Die Budsites entwickeln sich gleichmäßig über das ganze Canopy und die ersten Ansätze werden sichtbar dichter. Insgesamt ein sehr gesunder Eindruck, sattes Grün und stabile Triebe.
Ich habe das Gießverhalten leicht angepasst, um mehr Trockenphasen reinzubringen und die Wurzeln stärker arbeiten zu lassen. Gedüngt wird nicht mehr nach – die vorhandene Versorgung reicht vollkommen aus bis zum Ende.
Klima bleibt stabil, Umluft wird jetzt nochmal wichtiger, da das Blätterdach deutlich dichter wird.
Ab jetzt liegt der Fokus klar auf:
* kompakte Buds
* saubere Klima- und Gießführung
* kein unnötiger Stress
Bin gespannt, wie sie in den nächsten 2 Wochen eskalieren 😏🔥
Zum Ende der laufenden Woche nochmal ein paar Bilder. Die buds schwellen langsam richtig an und die harzbildung ist jetzt in voller Fahrt.


Likes
65
Share


@Visions
Follow
10/21/19 - I believe this week will be the final week of nutrients then straight to a one day terpinator/molasses feed, then molasses, and then straight oh water until harvest. Her buds even on the 1 gal are looking nice and frosty. This strain definitely looks like she could yield more if she was mainlined.. if the end product ends up being worth the grow I seriously might do it.
10/22/19 - Hairs are almost 50% dark and trichomes are almost all cloudy. Very few clear left with a slight amber amount. Next feed with be the start if the flush.
10/23/19 - 3 gal is almost ripe enough. Going to flush until harvest for her. 1 gal isnt as fat but slightly frostier. Going to give her another boost then flush as well. Feeding should be tomorrow. Should have both phantoms harvested by next week.
10/24/19 - Give or take the 2 phantom OG's are 8 weeks old today or 56 days into flowering. They have less than 2 weeks to go IF that. Flushing from here on out while they finish fattening and ripening. She smells like sour diesel, spice, and berry. Very strong terp profile and fluffy looking flowers. If I decide to grow again I'll definitely use hid grow lights in flowering and hst them. Will yield so much more due to my slip ups of being high lol.... I've already noticed the difference on how HST affects here. It affects her significantly in a good way. For instance I slightly broke a main stem near the main stalk. Left it to heal and in flowering the buds and growth are obviously much bigger than the one stem that wasnt affected. I will also make sure her vegetative state is in perfect sync before I flower here. I sort of rushed this grow to get some bud in my stash. 1st growers eagerness gets the best so that hurt my yields when I could have just went to HST from the start. Live and learn 👌 UPDATE* She was flushed with molasses and 1 tsp of terpinator. Next feed will be bush doctor and ph water and maybe molasses again or the chop. 👍
10/25/19- we are past the 8 week marker. By next Thursday I believe I will chop them. If not next weekend. Will dry some in the tent. Slow dry to preserve terps. Will do a regular 7 day dry in a closed cardboard box with ventilation as well. Hoping for 2 oz from these 2 phantoms 👌
10/26/19 - Girls a losing color in their fans. SO CLOSE to harvest. Uploaded the last video before harvest enjoy 👽
10/27/19 - No updates today! Girls are ripening up.
Processing
Likes
19
Share


@CannabisAprendiz
Follow
Esta es una genética de un olor muy fuerte y pesado se siente intenso desde la vegetación , es una variedad muy resinosa con unos colores morados hermosos , probando las flores cuando terminó el secado y ahora curando las flores se siente un sabor terroso , al principio no me gusto ya que nunca había probado este , pero después al seguir fumando se siente un sabor final muy agradable.
Esta genética se conservará para futuros cruces y experimentar algo nuevo.
muy conforme con la producción de cada clon

Likes
Comments
Share


Likes
18
Share


@ButterfliesLittleFarm
Follow
Hello Diary.
I am very happy that we are starting again. I’m going back to Automatics again. Many thanks to Royal Queen Seeds for sending me two of their new strains, Green Gelato Automatic and HulkBerry Automatic. So this is the first of two new diaries.
WHY GREEN GELATO AUTOMATIC?
Green Gelato Automatic is the autoflowering version of a legendary cannabis variety. The original strain is the lovechild of Thin Mint Cookies and Sunset Sherbet. It's one of the most aromatic strains available and produces monstrous levels of THC. Green Gelato Automatic contains both sativa and indica genetics. Her effects can be felt in the body and mind simultaneously. In fact, with a THC content of 24%, she's one of the most potent autoflowering strains you can find. She sends the mind into overdrive and makes a perfect smoke when writing, painting, or doing anything creative. The strain also boasts medicinal properties, taking the edge off pain, elevating mood, and raising appetite.
LET'S START FIRST WITH THE FARM SET-UP:
Box - Secret Jardin DS120W 120x60x178
Lights - MIGRO 200+
Ventilation - Blauberg Turbo - E 100
Fan - Oscillating Koala Fan
Humidifier - Beurer LB 45
Soil - BIOBIZZ Light - Mix
Pot - 11L Fabric Pot from RQS
Seed - Royal Queen Seed
Nutrition - BioBizz and RQS Organic nutrition
I apologize in advance for the detailed documentation, or the large number of photos, but I enjoy it, and I think it will help others around tracking their plants.
LET THE DIARY START OFFICIALLY:
10/06/2020. planting.
I have prepared everything I need for planting. The 11lit fabric pot I got from RQS, also Organic Boost Nutrition and Mycorrhizza from RQS, Soil is Light-Mix from BioBizz and of course the seed of the new strain Green Gelato Automatic. After adding 50g of pellets from Organic Nutrition and 5g of Mycorrhizze, I mixed everything well in the pot. After that I watered well and soaked the soil, I dug a hole with a wooden stick about 2-3 cm, I first put 1g of mycorrhize and then put the seeds inside. I lightly covered the hole with earth and put the pot in his new home. The temperature was about 25 degrees and the humidity about 65%.
14/06/2020. She sprouted.
After 4 days, Green Gelato came out. In the meantime, I sprayed the surface of the earth a little twice. The temperature is still around 26 degrees, thanks to the summer and the high temperature that enters the apartment anyway. I regulate the humidity with a humidifier, I maintain it around 60% -65%.
15/06/2020.
Her first photo shoot, I also watered her with about 2 liters of water, which I only regulated p.H. at 6.3 with Plagron, Lemon Kick.
19/06/2020. Day 1.
Green Gelato is officially one day old. On that occasion I took another photo shoot to celebrate this big day :).
24/06/2020. First Feeding
First feeding. She got a whole meal from BioBizz, Root-Juice, Bio-Heaven and Acti-Vera, p.H of water I regulated with Lemon Kick from Plagron.
25/06/2020. Day 7.
End of the first week. For now, everything is great. It is developing nicely, its conditions are almost perfect. Green Gelato will also have two roommates in the box, HulkBerry Automatic.
Green Gelato - Day 7. - 10 cm
I think that’s all for this week, I’m happy that it’s starting all over again, following its development and looking forward to what’s to come. See you next week.
Likes
6
Share


@wheedtobeus420
Follow
Day 33 she’s beautiful and flowering and wonderful. I’m really excited for how she’s turning out. I used recycled dirt for the first time ever because they were my last cycle for summer break. But she’s impressing me like always none the less. can’t not wait for her!

Likes
30
Share


@SAC87
Follow
Hi Growers.
Day 21 Flower
So this week I decided to defoliate as they are super leafy. I took that pile from each plant. I also took off any branches that I thought would be under the trellis. It’s being pushed up so it’s hard to tell. They are pretty happy regardless. The leaves I left are already quite big after 3 days.
I did 2 hydrogen peroxide flushes around the defoliation to combat any possible pests and nutes weren’t gonna help in a slightly stressed state and they won’t hate some extra oxygen to the roots. I let them dry for 3 days and fed today.
The Vipar Spectra XS2000 is growing these plants nicely, heating the tent a prefect amount. It’s so powerful in my 2x4, I’d love to see it in a 3x3. They’re happy with it up at 22-24” until I know they’ve stopped stretching.
Pretty easy week. Just trying to keep them happy and growing big.
Happy Growing 🌱


Likes
45
Share


@MadeInGermany
Follow
Info:
Unfortunately, I had to find out that my account is used for fake pages in social media.
I am only active here on growdiaries.
I am not on facebook instagram twitter etc All accounts except this one are fake.
Have fun with the update.
Hi everyone :-) .
This week she has continued to develop very well.
She reacts very well to the training :-).
It was poured twice with 1.2 liters each this week.
Everything was cleaned and refilled.
Stay healthy 🙏🏻
You can buy this Strain and Nutrients at :
https://greenhouseseeds.nl/
☝️🏼☝️🏼☝️🏼☝️🏼☝️🏼☝️🏼☝️🏼☝️🏼☝️🏼☝️🏼☝️🏼☝️🏼
Green House Seeds Company Cup Clone 🏆
Type:
Wonder Pie
☝️🏼
Genetics:
Wedding Cake x OG Kush
👍😍
Vega lamp: 2 x Todogrow Led
Quantum Board 100 W
💡
Flower Lamp : 2 x Todogrow Led
Cxb 3590 COB 3500 K 205 W
💡💡☝️🏼
Earth: Canna Coco
☝️🏼
Fertilizer: Bio Grow Feeding ( GHSC ) , Enhancer ( GHSC ) , Bio Bloom ( GHSC)
☝️🏼🌱
Water: Osmosis water mixed with normal water (24 hours stale that the chlorine evaporates) to 0.2 EC. Add Cal / Mag to 0.4 Ec Ph with Organic Ph - to 5.8
Likes
8
Share


@2x2UkGrow420
Follow
Also a fastbuds purple lemonade in a 11 litre pot (30grams)a a original cheese in a 2 litre pot(experimenting)which is not ready yet. Strawberry pie.....wow so impressed with the yield but also the looks are amazing and smells like strawberries... who’d of thought it lol. Recommend to everybody will defo grow again. Fastbuds are killing the auto game!👊🏻
Likes
117
Share


@PEAKYPLANTERS
Follow
WELL WELL WELL BROTHERS OF THE WEED!
MY FIRST EXPERIENCE WITH THIS SEED HOUSE WAS SENSATIONAL !!!! AS WAS MY FIRST EXPERIENCE OF GROWING MY PLANT IN PHOTOPERIOD FOR THE FIRST TIME IN MY LIFE ...... THE RESULT ???? FANTASTIC QUALITY GEMS THAT SPILL WITH GLUE.
MY SUPER CHALLENGE WAS MAKING THEM GROW OUTDOOR FOR THE WHOLE VEGETATION, THEN PUSH THEM TO FLOWER IN THE TENT! IT WAS NOT SIMPLE ....
AT THE BEGINNING I HAD TO FACE MANY PARASITES .... BUT AFTER VARIOUS PRECAUTIONS WE WERE ABLE TO GO THE RIGHT TOWARD ME AND MY BELOVED CHILDREN .... I CUT THE BUDS FROM THE TOP TO THE BOTTOM, that is, I REDUCED THE CANOPY BY CUTTING FIRST THE TOP AND AFTER A FEW DAYS, THE UNDERLYING PART.
THEIR RESISTANCE WAS REALLY NOTABLE FOR THE LITTLE SPACE AVAILABLE IN THE TENT AND SINCERE I BELIEVE THAT I COULD NOT ASK MORE FROM SANTA CLAUS THAT A LARGE HARVEST IS EXCELLENT QUALITY FOR THE CHRISTMAS HOLIDAYS (IF THIS WE COULD HOLIDAYS)
AFTER AN EXPERIENCE SO CLEARLY POSITIVE .... I CANNOT TRY THEM ALL ... YOU CONTINUE TO FOLLOW ME AND SUPPORT ME AS ALWAYS
BEST REGARDS
PEAKYPLANTERS