


Likes
Comments
Share


@DogDoctorOfficial
Follow
💙 Project Blue Tent – Week 7
Blue Waffle F1 – Pheno A (Folder 13A)
Welcome back everyone to another week inside Project Blue Tent! 💙🌱
If you're new here, welcome aboard.
This project is all about exploring the incredible Blue Waffle F1 genetics from Zamnesia while putting the complete growing ecosystem through its paces.
Rather than documenting four plants as a single diary, each phenotype receives its own individual journey from seed to harvest. They share the same tent, the same environment, the same nutrition, the same irrigation and the same lighting.
And yet...
They still manage to tell four completely different stories.
As I always like to say:
We're not just growing plants.
We're getting to know them.
────────────────────────
🌿 Week Seven – The Final Cleanup
This week feels like a milestone.
The SCROG has done its job.
The canopy is full.
The plants have established their structure.
And now it's time to prepare everything for the next chapter...
Flowering. 🌸
Plant A is looking absolutely beautiful at the moment.
Her foliage has developed into the rich, healthy green I've been hoping to see, and the overall structure is remarkably balanced. After several weeks of gently guiding branches underneath the SCROG, we've managed to create a canopy that is surprisingly even from one side of the tent to the other.
At approximately 60 cm, she's sitting comfortably within the space we've created for her.
And although she could certainly continue growing vegetatively, I don't want to simply keep filling the tent with more and more foliage.
At some point, you have to stop building the canopy...
...and start preparing it for what comes next.
That's exactly where we are now.
────────────────────────
🕸️ From SCROG to Flower
Over the last couple of weeks, the SCROG has completely changed the way these plants occupy the tent.
Instead of allowing individual branches to dominate vertically, we've been gently guiding them horizontally beneath the screen.
The result is exactly what we were looking for:
A broad, relatively even canopy with many developing tops sharing the available light.
SCROG isn't about forcing a plant into submission.
It's about working with its natural growth and redistributing that growth across the available space.
And looking at the tent now...
I'd say the mission has been accomplished.
The screen is filled.
The plants have claimed their territory.
Now we need to create the best possible starting point for flowering.
Which brings us to this week's main job.
────────────────────────
✂️ Defoliation – Cleaning Today for a Better Tomorrow
This week we're performing a deep, purposeful defoliation across the canopy.
For anyone unfamiliar with the technique, defoliation simply means selectively removing leaves from the plant.
But it's important to understand what defoliation isn't.
It isn't stripping a plant bare.
It isn't removing leaves just because they're in the way.
And it isn't something that should automatically be performed every week.
The purpose is to improve the structure we've already created.
After several weeks of SCROG training, there is now a tremendous amount of foliage packed into a relatively small space. While those leaves are essential during vegetative growth, too much overlapping foliage can eventually create unnecessary congestion inside the canopy.
So we're removing selected leaves that are:
• Blocking developing growth
• Creating unnecessary overlap
• Restricting airflow through the interior
• Shading lower areas that we've decided to retain
• Or simply no longer contributing enough to justify occupying that space
The goal isn't to make the plant look empty.
The goal is to make the plant efficient.
────────────────────────
🌬️ Why Defoliate Before Flower?
Timing is everything.
We're doing this now because the plants are still in vegetative growth and have time to recover before we ask them to transition into flowering.
Defoliation is a form of stress.
Even when performed carefully, removing a significant amount of foliage temporarily changes the plant's balance between its leaves, roots and growing points.
That's why I don't want to perform a major cleanup deep into flowering unless there's a very good reason.
Right now, the plants can take that short period of recovery while they're still operating under an 18/6 light schedule and actively producing new vegetative growth.
After the cleanup, we'll give them time to recover, settle and rebuild their foliage before flipping the lights.
The idea is simple:
Stress now.
Recover now.
Flower later.
Rather than asking the plant to simultaneously deal with a major transition into flowering and a significant amount of pruning, we're separating those events.
One step at a time.
That's especially important in a project like this, where I'm trying to observe the plants rather than simply push them as hard as possible.
────────────────────────
🌿 Plant A – Looking Better Than Ever
Plant A continues to impress me.
The first thing that stands out this week is the colour.
That slightly lighter appearance we saw earlier in the grow has completely disappeared. The foliage is now displaying that rich, healthy green that tells me the current nutritional strategy is working extremely well.
She's vigorous without looking excessive.
Healthy without showing signs of nutritional stress.
And most importantly...
She's balanced.
Her branches have responded beautifully to the SCROG, and the canopy has developed into a very usable structure for flowering.
This is one of those moments where you can look at the plant and realize that the weeks of small adjustments have finally come together.
The topping.
The recovery.
The daily SCROG work.
The irrigation.
The feeding.
The environmental stability.
None of those things created this canopy by themselves.
They're all pieces of the same puzzle.
────────────────────────
💧 The Drip Irrigation System
One of the things I have become particularly impressed with during this project is the automatic drip irrigation system.
It's working beautifully.
With the plants now drinking more consistently and the canopy becoming increasingly demanding, having a reliable irrigation system makes maintaining uniformity across the tent considerably easier.
Each plant is currently receiving approximately 1.2 L per 24 hours, delivered through the drip system.
And the plants are clearly enjoying the consistency.
One of the advantages of automated irrigation isn't simply saving time.
It's repeatability.
Instead of relying on every watering being manually performed at exactly the same interval and volume, the system provides a much more consistent routine for the plants.
That consistency becomes increasingly valuable as the root systems develop and the plants transition toward flowering.
So far...
The system is doing exactly what I wanted it to do.
And honestly, watching four plants respond so uniformly to the same irrigation strategy has been one of the most satisfying parts of this project.
────────────────────────
🥥 Feeding Program
The feeding recipe remains unchanged this week.
And for now, I don't see a reason to interfere with something that is clearly working.
Current nutrition:
• Plagron Hydro A — 1.9 ml/L
• Plagron Hydro B — 1.9 ml/L
• Plagron Hydro Roots — 1 ml/L
Current EC remains approximately:
1.92 mS/cm
with the solution maintained around 18°C and pH at 5.8.
The plants are showing excellent colour, strong growth and healthy leaf development, so I'm perfectly comfortable maintaining the current recipe for now.
We may increase the nutritional strength next week depending on how the plants respond after defoliation and as flowering approaches.
But that's exactly why I don't like changing several variables at once.
First, we observe.
Then we adjust.
The plants will tell us what they need.
────────────────────────
🌡️ Environmental Conditions
The Blue Tent continues to remain remarkably stable.
This week's average conditions were:
• 🌡️ Day Temperature: 28°C
• 🌙 Night Temperature: 27°C
• 💧 Relative Humidity: 65%
• 🥥 Substrate Temperature: 24°C
• 💦 Nutrient Solution: 18°C
• ⚗️ pH: 5.8
• ⚡ EC: 1.92 mS/cm
• 💨 CO₂: approximately 450 ppm
• 💡 Light Schedule: 18/6
• 💧 Irrigation: approximately 1.2 L/plant/24h
• ? Pot Size: 8 L
• 📏 Plant Height: approximately 60 cm
The plants are continuing to respond beautifully to these conditions.
The root-zone temperature remains particularly stable, irrigation is consistent, and the canopy has enough air movement to support vigorous transpiration.
As we move toward flowering, environmental management will become even more important.
The room we've created now needs to support not only vegetative growth...
...but the much denser flowering structure that is coming next.
────────────────────────
🌬️ Why the Cleanup Matters
One of my main objectives with this defoliation isn't simply aesthetics.
It's airflow.
When four vigorous plants completely fill a 100 × 100 × 200 cm tent, the amount of foliage inside that space becomes considerable.
From above, everything can look absolutely perfect.
But underneath that beautiful canopy is another story.
Leaves overlap.
Branches cross.
Interior spaces become crowded.
Air needs to move through all of that.
By selectively removing excess foliage now, we're opening those internal spaces before flowering begins.
That gives us a cleaner structure going forward and makes it much easier to inspect the plants, maintain airflow and monitor the developing flowers.
This is also one reason I'm much happier doing the major cleanup before the flip rather than waiting until the plants are deep into flowering.
Once flowering begins, the priorities change.
I want the plant concentrating its energy on developing flowers rather than repeatedly recovering from major structural work.
So we're preparing the room now.
Clean canopy.
Good airflow.
Healthy structure.
Then...
Flower.
────────────────────────
🧠 Defoliation Isn't About Removing Leaves
One of the biggest misconceptions surrounding defoliation is that more leaves automatically means a worse plant.
That's not true.
Leaves are incredibly important.
They're the plant's solar panels.
They capture light and help drive photosynthesis.
So the objective should never be:
"How many leaves can I remove?"
The better question is:
"Which leaves are no longer contributing enough to justify occupying this space?"
That's the philosophy I'm following here.
We're not trying to weaken the plant.
We're trying to improve the relationship between:
Light → canopy → airflow → growing sites.
And because we've already spent weeks creating the structure with SCROG, this cleanup is simply the final refinement of that work.
────────────────────────
🌱 Plant A's Personality
Every phenotype continues to develop its own personality, even when all four plants are living under almost identical conditions.
Plant A has consistently been one of the more balanced girls in the tent.
She doesn't appear interested in becoming the biggest plant in the room.
Instead, she seems much more interested in becoming an efficient one.
Her growth is structured.
Her canopy is balanced.
Her foliage is beautiful.
And after weeks of training, she has settled into the SCROG extremely well.
Now, after today's cleanup, she looks almost like a different plant.
Less crowded.
More open.
More organized.
And ready for the next chapter.
That's the part of growing I really enjoy.
You spend weeks slowly building something...
Then one day you step back and suddenly realize:
It all came together.
────────────────────────
👀 Looking Ahead
The next few days will be about one thing:
Recovery.
No unnecessary training.
No chasing perfection.
No constantly changing the environment.
Just observation.
The plants have been through topping.
They've been trained beneath the SCROG.
They've filled the canopy.
And now they've received their final major vegetative cleanup.
So we're going to let them breathe.
Let them recover.
Let them continue growing.
And then, assuming everything continues to look as good as it does today...
we flip the Blue Tent into flower. 🌸
This is the point where all those weeks of preparation finally start paying off.
The screen is full.
The structure is ready.
The plants are healthy.
Now we just need to let them do what plants do best.
Grow.
────────────────────────
💙 Thank You
A huge thank you to Zamnesia for making Project Blue Tent possible, from these fantastic Blue Waffle F1 genetics to the complete ecosystem surrounding this grow.
A massive thank you to Plagron for providing the Premium Growbags together with the Hydro nutrient line, which continues delivering excellent results and beautifully healthy growth.
A special thank you to Mars Hydro for the drip irrigation and automatic drainage system. After watching these plants respond to the consistency of automated irrigation week after week, I'm genuinely impressed with how well the system is performing.
Thank you as well to GrowDiaries, for giving growers around the world a place to document their journeys, exchange knowledge and learn from one another.
And finally...
Thank you to everyone following Project Blue Tent.
Every comment, every question, every bit of feedback and every person simply stopping by to see how these four phenotypes are developing means more than you probably realize.
We've spent weeks building this canopy together.
Now the really exciting part is about to begin.
The plants are cleaned.
The SCROG has been filled.
The room is ready.
Flower is next. 🌸💙
Until next week...
Growers Love, happy growing, and take care everyone! 🌱💙
Likes
5
Share


@Dgessy
Follow
Tout se passe bien pour elle, aucune carence en vue, peut-être un petit excès d'azote. Le stretch semble terminé, il ne reste plus qu'à la laissé gonfler 💪 Prochain arrosage à l'eau clair ph ajusté.



Likes
2
Share


@ao_grows1978
Follow
The Afghani x Mac1 auto from DNA recovered well from the training and is in full bloom. Bud sites are looking great. Had an issue with humidity this week and the leaves started looking rough. She got a dose of Recharge this week and drinks about 8-12oz of water throughout each day. All in all she's trucking right along. Very happy with how smooth this solo cup grow is going.


Likes
9
Share


@BrigadeDesTerps
Follow
Topping effectué pour arriver à 16 colas
Palissage des tiges secondaire aux noeuds du bas afin de commencer à les former pour dans la tente de 90x60 pour qu’il puisse s’épanouir et ainsi pendre tous l’espace
On va le garder au maximum à la hauteur qu’il est actuellement et essayer de faire en sorte que les tiges occupe entre 80x50 à 85x55 d’espace dans la box
Pour ensuite les laisser monter 10/15cm en hauteur et lancer la floraison
À la 3ème photo j’ai fait un dessin pain de la futur mise en formation
En rouge ça sera les middle bud qui occuperont l’espace centrale
Vert foncée ça sera les bud qui occuperont les espaces gauche /droite du centre de la longueur de la grande box
Pour l’autre vert ça sera le comblement de la largeur
Le dessin n’est pas la finalité du projet c’est juste la suite d’actuellement
On avisera au moment venu du bouquet fin
Pour la floraison il y aura la mise en place d’un 2ème panneaux SANlight dans la grande boxe afin de croiser les spectre et donner une meilleur pénétration lumineuse pour la floraison, j’espère atteindre un beau rendement au cm2

Likes
11
Share


Likes
26
Share


@GERGrowDesigns
Follow
Dear Growers ,
Welcome to Veg Week 3 Day 19-28 of Sweet Seeds Permanent Jealousy Auto.
Whether you're a beginner or an expert, you are warmly invited to join, ask questions, and share your own experiences along the way!
Project Setup & Conditions:
• Brand/Manufacturer: Sweet Seeds
• Tent: 222cmx150cmx150cm
• Light: 2x 720 Watt Full Spectrum
• Humidity: 50%
• Soil: Narcos Organix Mix
• Nutrients: Narcos Products
• pH Value: 6
Big Love to Sweet Seeds for theyre Outstanding Strains and Genetics .
If you want Germinitation results like mine , check out Kannabia Seeds with my link [https://www.kannabia.com/de?ref=61966] and grab the germination device or theyre amazing strains . Trust me – it’s worth it for sure ! Code GGD at Checkout for another 20% Discount
Stay curious and keep up Growing —we look forward to welcoming you back for the next chapter soon!

Likes
19
Share


@Sato_Growing
Follow
Week 5 has home and some of my plants are flowering already. With the lst i made a lot of good branches, i had some snaps but nothing that i need to worry about cauuse i fix it with electrical tape.
I added GuanoGalong Dry powder 1.10.1. and GuanoGalong Palm tree ash 1.30. I mixed those 2 powders and feed my plants with top dressing 100 g per plant
I Will lst my plants a little bit more and then i will add the sgroc net to help my plants later on .. :) <3
See you next week :3


Likes
12
Share

@TrickzGrowz
Follow
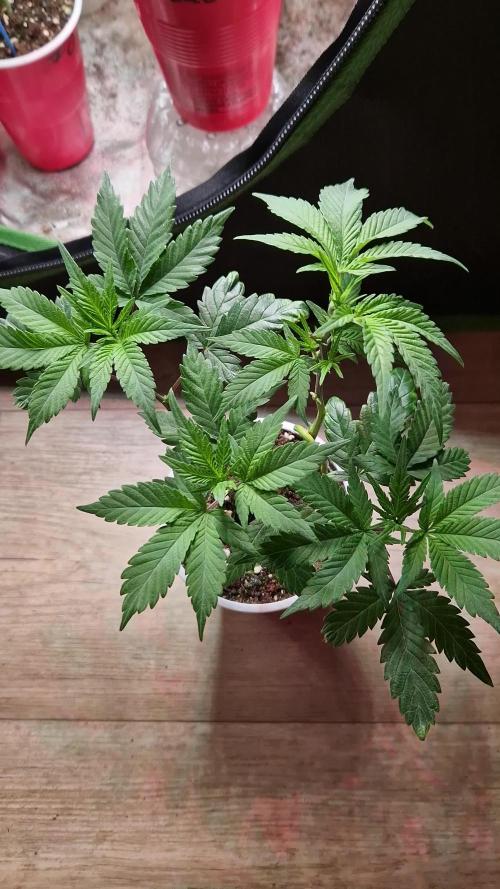
Servus Moin!
Die Permanent Melons sieht super aus! Der untere Trieb holt schon komplett auf und muss nur noch dicker werden.
Likes
8
Share


@peterfly98
Follow
Day 21: the next watering will be with the full fert cycle starting week 4. Plants are bouncing back from lst.
Day 23: leaf tucking, defoliation and more lst.
Day 25: Very hot week, hitting 29°C but the plants are still growing fine
Likes
54
Share


@Roberts
Follow
Gorilla Cookies has been growing great lately under the Spider Farmer G3000 light. I just changed the light to a 12/12 schedule. So tomorrow will be her first day of flowering light times. I like to wash in some fresh dynomyco when I grow in coco so I added that to the nutrition mix, but only 1 time. I will start increasing light strength as she starts to stretch over next 3 weeks. Everything is looking good at the moment. Thank you Spider Farmer, and Pure Instinto Seeds. 🤜🏻🤛🏻🌱🌱🌱
Thank you grow diaries community for the 👇likes👇, follows, comments, and subscriptions on my YouTube channel👇. ❄️🌱🍻
Happy Growing 🌱🌱🌱
https://youtube.com/channel/UCAhN7yRzWLpcaRHhMIQ7X4g
Spider Farmer G300w: https://amzn.to/3S2zvsd
Spider Farmer 10X20 Heat Mat Kit - https://amz.fun/lsa0J
Spider Farmer Amazon Store: https://www.amazon.com/spiderfarmer
Spider Farmer Official Site: https://spider-farmer.com
Discount code: saveurcash (stackable)

Likes
43
Share


@Jack_Greenstalk
Follow
Now that V started, both ladies have began flush. Nemo actually started early last week since (20 ml heavy 16 finish and 1 gallon of RO watrr per feed). Nemo on left, a little less directly under the light is more developed, both bud structurely and trichome color (clear transitioning to cloudy or milky trichs more each day). V on the right side is much less finished, being a more haze influenced pheno. it seem lankier and slower to finish, however severe light stress from being grown up to close to light has bleached maybe 6-10 tops of the 15 tops on v. nemo will be done sometime later this week or early next week. Going to harvest the tops entire plant on nemo, then rewaeave V back thru the scrog to allow greater distance to light and better airflow for it to fill in a little more and finish up over next 2 weeks or so. will be closely monitoring bud sites in top colas to harvest when trichomes are almost fully milky white, just before amber.

Processing
Likes
62
Share


@DudeGrowsWeed
Follow
Happy New Year!!!
Over the past week I did some HST bending on my photos and cut down 2 of the 3 Blackberry’s. The branches are starting to recover and straighten out after the HST now. I still have some issues with pale leaves and a few spots here and there. I’m going to try adding some Dolomite Lime with the next watering and think that should help with the paleness. I’m also going to up the amount of CalMag and Mammoth P to see if that helps with the spotting. I’m not sure if I should see the spotted leaves recover or if the spots will remain. I suspect the spots will remain on the existing leaves regardless of what I do at this point, but hopefully no new spotting will develop.
The lights went off before I was done taking pics, so some pics will look a little different. The pics with the lights on I had to color correct, they still look a little more on the yellow side than in reality, but much closer to reality than the pre-color corrected versions. Once the lights went off I turned the flash on for my camera, those pics did not need any color correction. You can see the differences in the pics of all plants, the first 2 are color corrected with the lights on, the last 2 are taken with a flash and no color correction. Also all close up pics of the Critical+ are with the lights off and flash on.
I read several books on cannabis over the past few days, some good, some not so much. One that I liked was “Marijuana Cultivation Reconsidered: The Science and Techniques For Huge Indoor Yields” by Read Spear. This book is available on Amzon’s Kindle Unlimited service, which costs $9.99/month, but they offer a free 30 day trial (which is what I’m using at the moment). Reed’s book is broken down into 3 sections, the first and third go fairly deep into the science behind growing, he does a pretty good job at breaking it down in easy to understand terms, but I had to read several sections 2 or 3 times to really get it (or just move on with as much understanding as I could digest). The second section is the nuts and bolts of growing. Most was a review but there were several topics he touched on I hadn’t thought of in a while. And again its well written. He also offers the section only in a separate book called “Small Spaces, Big Yields”. If you are not interested in going deeper into the science behind growing, “Small Spaces, Big Yields” is what I would recommend (if interested in reading books on cannabis).
I took some notes while reading and I’m going to add some of these notes in my dairy updates over the next few weeks. This week I’m going to include a note on electrical, this should be a fairly basic concept, but it is super important IMO…
“Electrical Items In a sealed grow room or in a tent, you will have water pooling on the floor from time to time. There is no avoiding this. Mop it up when you see it, and never put your electrical gear directly on the floor. Never. Not even for a moment. In fact, let me stress this point in bold capital letters. ALL ELECTRICAL GEAR MUST BE MOUNTED SECURELY ON A WALL OR TENT POLE.”
-Read Spear
I’ll add more did bits like this in my diaries over the upcoming weeks.
If anyone has any good book recommendations please let me know in the comments. I’m looking for books that might not be as popular as the ones by Jorge Cervantes or Ed Rosenthal (I’ve read those). I did just order “True Living Organics” by The Rev which I’m looking forward to reading. But I’m looking for more. I really want to step it up and learn as much as possible. Your comments, feedback and recommendations are very much appreciated!
Until next time, Happy Growing! Stay Positive! And have an amazing 2019!!!


Likes
37
Share


@LaGrassaFarm
Follow
Una planta que sin realizarle podas, ramifica muy bien, estructura típica de Índica, desde sus inicios en floración, genera mucha resina.

Likes
28
Share


Likes
27
Share


@DeepRootsGrowTrees
Follow
Gelato-K By Kannabia Seeds
Week #19 March 15th-22nd
Week #8 of Flower
About 4 weeks left. She continues to stack and swell her buds are cover in trichomes.

Likes
6
Share

@PapaTerps
Follow
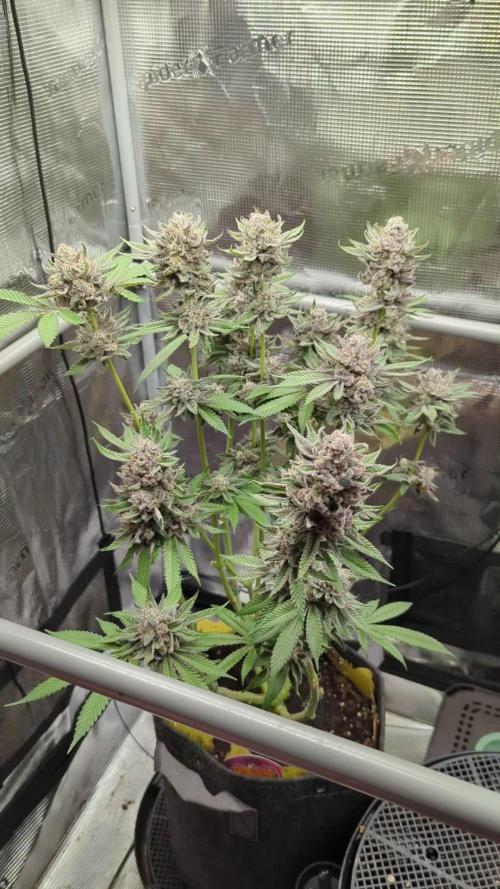
Gary Patron - Nine Weeks Harvest
Day 125
🚿 No watering for this week, she was left to dry back in preparation for harvest.
✂️ I removed some of her fan and larger sugar leaves, I then chopped her at the base and hung her to dry in a dark cool environment with temperatures between 19-21 degrees Celsius and relative humidity set at 58-61% 👌🏻
🌸 Start of week 10 bloom, and her trichomes have started to turn amber and all her pistils have dried and browned. She has been thoroughly flushed, so today is harvest days 🎉

Likes
39
Share


@Hazecat_420
Follow
Se regó foliarmente con Big One para estimular la floración. Y se comenzó con Voodo Juice para estimular raíces además de Top Bloom para ya comenzar de lleno con la floración. Seguimos ...

Likes
7
Share

@Pheno_Minds
Follow
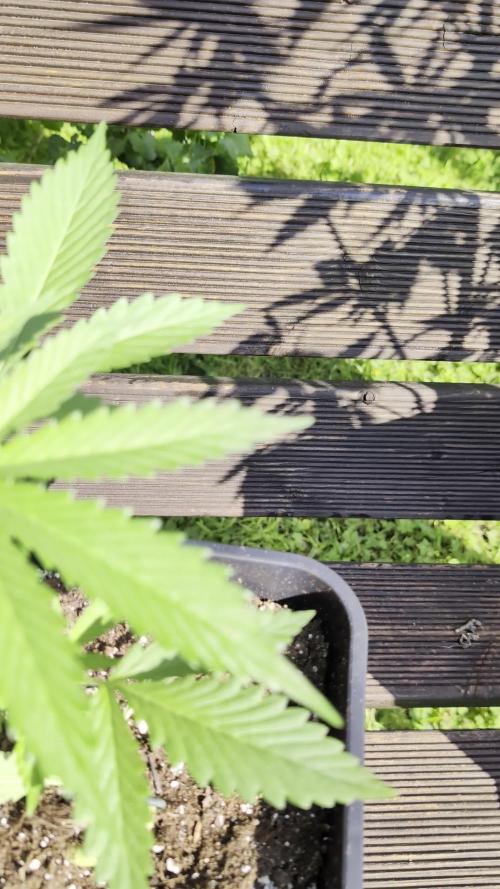
📋 Die Strawberry Banana von Fastbuds befindet sich jetzt in der dritten Woche der Vegetation, insgesamt stecken wir in der vierten Woche seit dem Keimen. Die Pflanze hat die anfängliche Startphase hinter sich gelassen und bildet jetzt ein stabiles Wurzelwerk aus. Das Blattwerk sieht gesund aus, die internodalen Abstände sind kurz und gedrungen, was auf ein gutes Lichtmanagement hindeutet.
📏 Die aktuelle Höhe liegt bei 12 cm. Die Umgebungswerte haben sich bei einer Durchschnittstemperatur von 27 Grad und einer Luftfeuchtigkeit von 58 Prozent eingependelt. Das ist ein solider Korridor für dieses Stadium, in dem die Pflanze ihre Stoffwechselprozesse langsam hochfährt.
💧 Die Wassertemperatur lag im Schnitt bei 21 Grad, was ideal ist, um den Wurzeln keinen Kälteschock zu verpassen und die Sauerstoffaufnahme im Substrat zu begünstigen. Die Pflanze zeigt sich durstig, aber nicht übermäßig, was zeigt, dass der aktuelle Gießrhythmus gut auf das Substrat und das Wurzelvolumen abgestimmt ist.
📸 Beobachtung für die kommende Zeit: Die Strawberry Banana beginnt jetzt zusehends mit der Seitentriebbildung. Wenn das Wachstum in diesem Tempo weitergeht, werde ich in der nächsten Woche über erstes sanftes Training nachdenken, um das Licht besser in die unteren Bereiche zu leiten. Die Vitalität ist absolut in Ordnung, keine Anzeichen von Mängeln oder Stress. Läuft nach Plan.