Likes
Comments
Share
@Sir_Yes
Follow
━━━━━━━━━━━━━━━━━━━━━━━━━━━━━ 🌾 FLOWER — Day 28 🌾 ━━━━━━━━━━━━━━━━━━━━━━━━━━━━━ Feeding🍬 Bud Candy added with the water & Green house flowering ━━━━━━━━━━━━━━━━━━━━━━━━━━━━━ STRAIN LINEUP ━━━━━━━━━━━━━━━━━━━━━━━━━━━━━ buds are developing, leafs getting frostier Row 1 — 5280s 🌿 Notes: good progress so far Row 2 — Blue Soap Drip ? Notes: good progress so far Row 3 — Vanilla Velvet 🍩 Notes: good progress so far ━━━━━━━━━━━━━━━━━━━━━━━━━━━━━ ✂ CLONE UPDATE ✂ ━━━━━━━━━━━━━━━━━━━━━━━━━━━━━ Round 3 ✅—recloned 5/5 of them. Getting trained in cloning and truth, some government rules. Round 2 ✅—potted 5/7 of them. (killed on 9.9.26) (Round 1 đŸŒ±â€”killed)
Likes
20
Share
Que pasa familia, Ășltima semana de floraciĂłn de esta farm cheese de genofarm, y que decir, es increĂ­ble vaya aroma y vaya flores repletas de tricomas. Lleva su limpieza de raĂ­ces ,despuĂ©s se controlĂł ph temperatura y humedad todo el cultivo, de principio a fin. Variedad de 10 para trabajar en indoor, ideal para SOG .
Likes
4
Share
@GeminiCQC
Follow
Hbss is 27in tall ABxRKO is 38.5in tall I'm starting to run out of height because of the ABxRKO as it finally flowers. Still slight nute issues with the HBSS, but nothing too tough to handle for now. The smells the HBSS give off are absolutely crazy. Just letting them grow, and watering every day seems to work. Will upgrade to earth boxes for this tent since a little autonomy is nice
Likes
6
Share
@Mr_Prawn
Follow
Algunas plantas empiezan a tener hojas amrillas, son 3-4, son siempre las de la derecha de la pareja easy2grow, aplico cannaflush 4ml/L 10 litros en depĂłsito, lo beben en 2 dias. El dia 16 cambio el tanque a soluciĂłn nutritiva.
Likes
6
Share
@NootkaOG
Follow
*VEG UPDATES ARE BEHIND ON THIS GROW. PLEASE GO AHEAD TO WEEK 1 FLOWER FOR BEST CONTENT.* I started this diary back in October but have not done any updating to it until today (February 15,2021). There will be pics for all veg weeks as well but I have not kept very good track with my pics of each strain until I flipped them to flower. From here on out I will feature all of my future grows weekly from seed to harvest. Please follow along.
Likes
9
Share
@Joliet
Follow
This week I just LST and Defoliation again. They so pretty ! And One of them is flowering. I think she must be stressed when changing the pots.
Likes
56
Share
Bonjour Ă  tous les padawans et les maĂźtres jedis Pour cette semaine 3 au jour 19 ma plante fais 21 centimĂštres et son septiĂšme noeud apparaĂźt je dĂ©cide donc de pratiquer un LST sur ma plante. Pour ce j'utilise du fil de fer galvanisĂ© que je plante directement dans le substrat en faisant attention de ne pas endommagĂ© les racines car n'oublions pas que ce qui pousse dessus pousse aussi dessous. Jour 17 je pulvĂ©rise du une solution composĂ© d'une cuillĂšre Ă  cafĂ© de savon noir mou (marque briochin) diluĂ© dans un demi litre d'eau en prĂ©vention d'Ă©ventuels nuisibles. Pourquoi le savon noir mou ? Savon noir : quelle utilisation pour le jardin ? Le savon noir est un produit naturel dont les propriĂ©tĂ©s nettoyantes sont connues depuis l'AntiquitĂ©. UtilisĂ© pour l'entretien de la maison et pour les soins corporels, ses vertus antibactĂ©riennes et insecticides en font un alliĂ© prĂ©cieux pour le jardinier bio. Le savon noir est fabriquĂ© Ă  partir de potasse et d'un corps gras de type huils vĂ©gĂ©tale comme l'huile d'olive, de lin ou de maĂŻs. Produit naturel et biodĂ©gradable (s'il ne contient pas d'additifs, comme cela peut-ĂȘtre parfois le cas), c'est un trĂšs bon produit nettoyant, pour les sols, la cuisine, la vaisselle, le linge, etc... TrĂšs polyvalent, il est Ă©galement Ă©conomique, comparĂ© aux multiples dĂ©tergents classiques du commerce. Le savon noir se trouve sous forme de pĂąte molle et brune ou sous forme liquide, diluĂ© avec de l'eau. C'est du savon noir liquide dont on se sert gĂ©nĂ©ralement au jardin, car son utilisation est plus simple. Il s'achĂšte dans les magasins bio ainsi qu'en grandes surfaces ou jardineries. Attention : la recette du savon noir de mĂ©nage et celle du savon noir utilisĂ© en cosmĂ©tique ne sont pas forcĂ©ment les mĂȘmes ; les savons noir de mĂ©nage (multi-usages) peuvent contenir davantage de potasse afin d'amĂ©liorer le pouvoir dĂ©graissant (irritant ou dessĂ©chant pour la peau), voire mĂȘme certains additifs chimiques. Au jardin, ce sont en prioritĂ© les propriĂ©tĂ©s antiseptiques et insecticides du savon noir qui sont utilisĂ©es. Le savon noir liquide est utilisĂ© pour lutter contre les pucerons, les cochenilles, les araignĂ©es rouges, les aleurodes, les psylles et autres thrips. C'est un insecticide de contact ; il tue les larves et nettoie le miellat qui englue les feuilles. La recette de l'insecticide Ă  base de savon noir (mou pour ma par marque briochin) est simple Ă  rĂ©aliser : une ou deux cuillĂšres Ă  cafĂ© de savon noir mou (briochin) diluĂ©es dans 1 demi litre d'eau tiĂšde (dilution Ă  5 %) ; une fois la prĂ©paration refroidie, pulvĂ©risez-la sur les plantes atteintes, en prenant soin de ne pas oublier l'envers des feuilles. À renouveler 1 Ă  2 fois si nĂ©cessaire, pour ĂȘtre totalement dĂ©barrassĂ© des indĂ©sirables. Comme il est de mise pour la plupart des traitements, ne pulvĂ©risez pas la solution Ă  base de savon noir en pleine journĂ©e, sous le soleil (ni sous la pluie !) ; procĂ©dez le matin de bonne heure ou patientez jusqu'Ă  la fin de journĂ©e, lorsque les tempĂ©ratures sont en dessous de 20°C. Jour 18 Je corrige mon LST suivant la pousse de ma plante ... Pour ma par c'est la maniĂšre dont je procĂšde mais petit rappel de la technique du LST Quand commencer Ă  appliquer la technique LST ? De nombreux cultivateurs commencent la manipulation dĂ©s que les plantes possĂšdent entre 3 et 6 nƓuds ou une paire de feuilles. Durant cette premiĂšre Ă©tape de la croissance, le tronc encore flexible est pliable sans risque qu’il ne se casse, mĂȘme si au fur et Ă  mesure du dĂ©veloppement de la plante il sera de plus en plus difficile de le plier. Nous pouvons continuer Ă  guider la croissance des branches durant toute la culture, mĂȘme durant la floraison, ce qui pour cette Ă©tape reprĂ©sente un grand avantage face Ă  la taille, qui n’est pas du tout recommandĂ© une fois que la formation des tĂȘtes commence, cela stressera en effet la plante, ce qui aura pour effet de retarder la rĂ©colte. Comment appliquer la technique de guidage LST Si nous sommes prudents, la flexibilitĂ© naturelle des fibres du cannabis permet de plier leur tronc et branches avec une relative facilitĂ©e, mĂȘme durant la floraison des plantes. En utilisant une corde fine, nous pouvons accrocher la pointe de la plante Ă  la base du pot par exemple ou Ă  un tuteur que nous aurons plantĂ© dans le substrat. Nous plierons le tronc avec prĂ©caution et nous le fixerons avec la corde, Ă  partir de lĂ , nous pouvons augmenter progressivement la tension de la corde, chaque jour un peu plus, jusqu’à obtenir la position souhaitĂ©e. Soyez attentif Ă  la rĂ©action de la plante, essayez de ne pas appliquer trop de pression sur la corde et rappelez-vous que la flexibilitĂ© des branches peut varier d’une plante Ă  l’autre. Pour obtenir de meilleurs rĂ©sultats, il suffit de suivre quelques rĂšgles simples. Pour commencer, nous devons choisir une corde fine mais pas trop pour ne pas blesser les troncs au fur et Ă  mesure qu’ils grandissent et qu’ils deviennent plus gros. Nous pouvons utiliser des crochets en plastique souple ou de n’importe quelle autre matiĂšre flexible pour Ă©viter d’endommager les plantes. SpĂ©cialement en intĂ©rieur, utiliser des cordons en plastique de couleur (voir les diaries de @Silky) est trĂšs pratique pour voir facilement les accroches et faciliter le travail au milieu du rĂ©seau formĂ©s par les cordes, les tuteurs, les mailles ou les supports que nous aurons dans la culture. Bien entendu, en culture extĂ©rieure et surtout en guerilla nous ferons juste le contraire et nous utiliserons des matĂ©riaux de couleur qui n’attirent pas l’attention pour que notre jardin reste discret. Pour stresser les plantes au minimum, la mieux est de rĂ©aliser ces manipulations le soir ou juste aprĂšs que les lampes en intĂ©rieur s’éteignent, ce qui leur permettra de se remettre durant la nuit. Normalement, le jour suivant nous pourrons observer comme les pointes des branches que nous avons pliĂ©es se dressent de nouveau vers le haut Ă  la recherche d’une source de lumiĂšre. Que la force soit avec vousđŸ’Ș
Likes
Comments
Share
Likes
7
Share
@Miketama
Follow
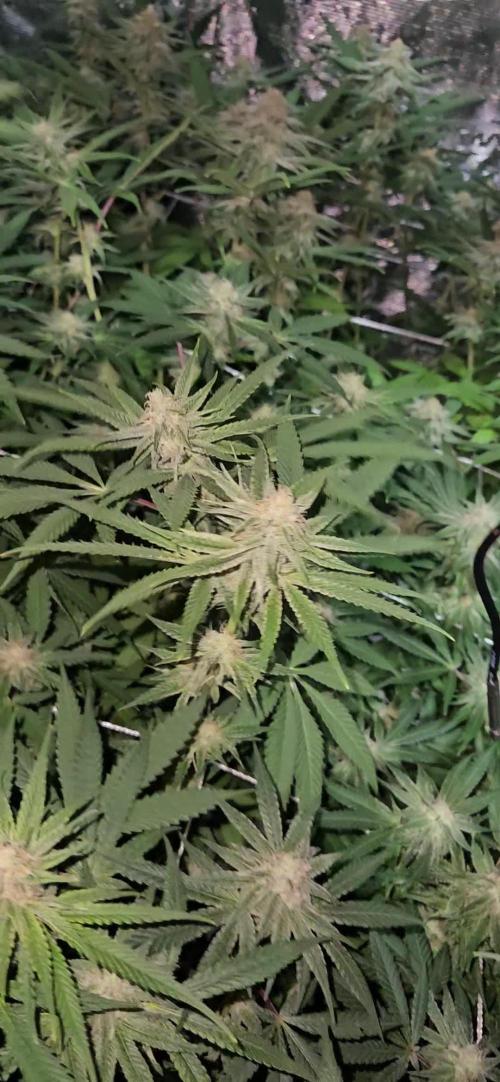
Quick update on Black Opium #2! This week: ‱ Still in stretching/flower production phase ‱ Fed with Thicker & Bigger Flowers at 1/3 dose ‱ Continuing steady development
Likes
41
Share
This week the weather is better. The buds are getting fat and it is developing well. Smells like baked sweet.
Likes
4
Share
@Chucky324
Follow
Hello. This is the end of week 8 and the beginning of week 9 of veg. Well... I got this one repotted and got it out to the greenhouse. It's looking happy. It's got it's leaves turned towards to the sun now. Doing OK. It was 31*c in here yesterday... but it's cloudy today. OK. Be Great. Chuck.
Likes
36
Share
@m0use
Follow
The time is finally here to post the harvest. I waited till it was all done and dry before updating the dairy so will add in the dry weights next on the 2nd half of the harvest entry. Had some ups and downs with this plant. mainly the extreme yellowing that was happening. I should have treated this faster with a flush but was super reluctant and I feel this has suffered in the end. The top best looking buds could have been larger and the lower ones could have been thicker. There is some smells with this plant but they are not pronounced. Just smells like mild basic weed, this would be one reason not to grow it, however, the crystals on this plant have been the most I've ever grown before. When trimming them every time the scissors snipped or the brush stroked I saw some falling down onto the tray. This plant would be great for making hash. had a good little ball of finger hash at the end of it and will be giving that to my friends to smoke or make a strong edible with. I don't plan on growing this strain out again, the lack of smells and the fact I'm only trying to grow cbd dominate plants is the main reason. If my friends really like this I have some clones so can always give them some. Speaking of clones they are doing well outside, greened up a lot and showing signs of revegging. Took some photos of the weed hang drying on day 1 in the tent and a week later to show how much they shrink. most of the lower growth is quite larfy but will make good edibles or hash, that will be a fun project to do and may include that in my projects diary. That's about all I can think of if you have any questions just ask. m0use Disclaimers: 1. I have divided the total watts of light in half, 300w(150w) for this diary. It will accurately reflect the g/w ratio as the two plants growing in this tent are listed in two separate diaries. 2. I include any shake/trim in my gross totals as I use them to make edibles. 3. I did not follow any proper ways of listing my nutrients. Some are ml/l of total solution watered, others ml/l of total medium and some are just the total amounts I added, not as a ratio. If you have any questions let me know! +++++++++++++++++++++++++++++++++++++++++++++++++++++++++++++ Cost + Time Analysis Of Growing Cannabis. m0use’s Breakdown +++++++++++++++++++++++++++++++++++++++++++++++++++++++++++++ Light Schedule === Veg [Dec 18th 2021 - Mar 11th 2022] 18h on 6h off - 6am-12pm Flower [Mar 12th 2022 - May 10th 2022] 12h on 12h off - 9am-9pm This is extra tricky this harvest as I went through 2 different hydro rates in three different periods, plus a veg and bloom switch between them. Mon-Fri are TOU rates, all weekends are off-peak pricing all day. Off Peak = 7pm-7am + all weekend Mid peak = 11am-5pm On peak = 7am-11am + 5pm-7pm TOU rates: Dec 18th 2021-Jan 17th 2022 Cost of kwh with on-peak "17.0c", mid-peak "11.3c" and off-peak "8.2c". Jan 18th 2022 - Feb 7th 2022 Cost of kwh with on-peak "8.2c", mid-peak "8.2c" and off-peak "8.2c". Feb 8th 2022 - Current Cost of kwh with on-peak "17.0c", mid-peak "11.3c" and off-peak "8.2c". — Dec 18th 2021-Jan 17th 2022 Weekdays “21 days” 6am - 7am -- 1hr @8.2c/kwh off-peak 7am - 11am -- 4hr @17.0c/kwh on-peak 11am - 5pm --6hr @11.3c/kwh mid-peak 5pm - 7pm -- 2hr @17.0c/kwh on-peak 7pm - 12am -- 5hr @8.2c/Kwh off-peak Weekends “10 days” 6am - 12am – 18hr @8.2c/kwh off-peak 6h @17.0c/kwh 6h @11.3c/kwh 6h @8.2c/kwh + [email protected]/kwh weekdays/weekends — Jan 18th 2022 - Feb 7th 2022 Weekdays “15 days” 6am - 7am -- 1hr @8.2c/kwh off-peak 7am - 11am -- 4hr @8.2c/kwh on-peak 11am - 5pm --6hr @8.2c/kwh mid-peak 5pm - 7pm -- 2hr @8.2c/kwh on-peak 7pm - 12am -- 5hr @8.2c/Kwh off-peak Weekends “6 days” 6am - 12am – 18hr @8.2c/kwh off-peak 18h @8.2c/kwh + [email protected]/kwh weekdays/weekends — Feb 8th 2022 - Harvest Veg Feb 8th - March 11th 2022 weekdays “24 days” 6am - 7am -- 1hr @8.2c/kwh off-peak 7am - 11am -- 4hr @17.0c/kwh on-peak 11am - 5pm --6hr @11.3c/kwh mid-peak 5pm - 7pm -- 2hr @17.0c/kwh on-peak 7pm - 12am -- 5hr @8.2c/Kwh off-peak weekends “8 days” 6am - 12am – 18hr @8.2c/kwh off-peak 6h @17.0c/kwh 6h @11.3c/kwh 6h @8.2c/kwh + [email protected]/kwh weekdays/weekends — Flower March 12 - May 10th 2022 weekdays “42 days” 9am - 11am -- 2hr @17.0c/kwh on-peak 11am - 5pm --6hr @11.3c/kwh mid-peak 5pm - 7pm -- 2hr @17.0c/kwh on-peak 7pm - 9am -- 2hr @8.2c/Kwh off-peak weekends “18 days” 9am - 9pm – 18hr @8.2c/kwh off-peak 4h @17.0c/kwh 6h @811.3c/kwh 2h @8.2c/kwh + [email protected]/kwh weekdays/weekends — Total hours in each peak period 126+144+168 = 438h @17.0c/kwh 126+144+252 = 522h @11.3c/kwh 306+378+288+300 = 1,272h @8.2c/kwh Lights === LED’s I use are 48w and 18w, per stick, they are arranged on an array totaling 300w. 6400k 18w*6 = 108w + 3000k 48w*4 = 192 108w+192w=300w | 300w/1000 = 0.3Kw * note I am using 150w as stated in my disclaimers to account for the missing plant in a separate diary.* Using the previous c/kwh numbers above I can find out the total cost of the lamps in the 3 peak periods. I converted the cents into dollar amounts beforehand to avoid dividing by 100. 8.2c/h = 0.082$/h 438h * 0.17c/kwh = $74.46kw * 0.15kw = $11.17 on peak 522h * 0.113c/kwh = $58.99kw *0.15kw = $8.85 mid peak 1,272h * 0.082c/kwh = $104.30kw *0.15kw = $15.65 off peak The "h" hours and "kw" kilowatts cancel out and we are left with a value of $ dollars per peak period, add all the peak periods up and you get your total cost of running the lights in dollars. $11.17 + $8.85 + $15.65 = $35.67 for the grow light only. My light grew for 20 weeks and 4 days, or 144 days. almost 21 weeks total. $35.67 / 144d = 0.2477$/d average of about 25c a day in electricity 337.2kw for the entire grow. Using the regular calculation of grams harvested divided by watts used is not accurate to me, it does not account for all the time the lamps are on, the length of grow to the over all cost. The calculation that makes sense to me is this, harvested dry weight of usable cannabis buds/trim/keif/whatever in grams divided by total kw used. Could also combine it with grams per total single use costs “anything you used only for this grow and wont reuse in the next, or fractions of multi use items like fertilizers if they œ full” and see how much you’re investing per gram. "kw" Ă· "g" = kw/g "$" Ă· "g" = $/g I have harvested 5.34oz or 151.6g on 337.2kw. 337.2kw Ă·151.6g = 2.22 kw/g of usable cannabis. This is not an ideal ratio for me and looks like a lot of energy waste happened from the extended veg period. $35.67 Ă· 151.6g = 0.24c/g It cost 24c/g when comparing total electricity cost to gross yield, almost identical to the comparison of total electrical cost to the number of days in the grow 25c/day. Neat! legend, kwh = kilowatt per hour kw = kilowatt w = watt h = hour c = cents $ = dollars d = day LED= Light Emitting Diode
Likes
9
Share
Update last week of Goofiez 2 the harvest is coming!!!
Likes
4
Share
First day of week numero 5..... I have no words, we are almost in the middle and buds are huge👍 Ec value 1,8.... everything is going well so farđŸïžđŸïž
Likes
9
Share
@Rizik86
Follow
Day 10 - 2 inches tall seedling. 3rd set of leaves. 4th set emerging from center. PPM 268 2 mL CalMag 4 mL Micro Grow Bloom B52 Voodoo Tarantula Piranha Rhino Skin Sensizym and Bud Candy. Day 12 - Checked PPM 255. First visible roots sticking out from netpot. Plant is green and happy. Added 2 mL CalMag PPM 300. Day 14 - Checked PPM 268. Raised bucket and plant. Light is 26 inches from top of plant. Adjusted light duration to 20 hours on and 4 hours off. Half a dozen roots sticking out from bottom of netpot. 3rd set of leaves have 5 fingers. I believe this means its no longer a seedling. Now entering VEG.
Likes
4
Share
Had alot of fun with these realized my dumbass could only use my plant for two plants but everything is a learning process i really wanna lrean how to get fat ass nuggs any help is welcome
Likes
4
Share
Que hay familia, vamos con la tercera semana de floraciĂłn de estas Runtz de Zamnesia y empezamos con riegos intercalados cada 48 horas controlando siempre el Ph, que ahora mismo lo dejamos en 6.5 Temperatura y humedad dentro de los parĂĄmetros correctos. SeleccionĂ© de las 5 plantas, 3 , que creo que son los mejores ejemplares que por el momento estĂĄn creciendo bien y tener tienen un buen color, se ven bien sanas, todo normal hasta ahora, ya empezaron a formarse las flores, estĂĄn increĂ­bles. Vamos viendo cĂłmo progresan. Hasta aquĂ­ todo, buenos humos 💹💹💹.
Likes
9
Share
Some of the buds/ leafs were starting to turn brown. It seems like it was a bit past it's prime, I harvested on day 60 of flower. The strain was 56-63 days Jack Herer by pHenos Nursery. The trichoms looked ready, I did have some issues that I've noted in previous weeks but it smells amazing and I can't wait for it to finish drying and curing!