


Likes
Comments
Share


@JinksyGrows
Follow
Hello, hello! Hope you're all doing well. Welcome to Week 7, Veg w/ Space Cookies. The Deets:
The Good:
-Space Cookies is moving well. I was able to make her quite a bit bigger by training her out this week. She took the space well and is filling up the new open space quickly.
-Full transplant and first transition's feeding went very well and she took every drop. No burns, no dipping out, no attitude.
-Strong like Bull. Every week she gets thicker and thicker. During transplant I buried a small portion of her stem to shore her up and it has proven to work very well. Smallest plant but has the thickest laterals and main. I really like this little one and I feel she has been the easiest to work with so far. Haven't faced as many issues with her as I have with the others (so far). Hope she keeps it up👌.
-Pistil party! It's a girl! Yay!! So there's pistils. Not heavily pronounced yet, but clear as day. Will add in a picture tomorrow, but a little to shaky to take a proper photo, at the moment. Soon👍
-pH and PPM's are in check. Not too concerned about my ppm reads, as the new soil is warping these run-off numbers, but I'm very pleased to see her Run-off come back at a solid 6.2pH. A long road from the 5.3 I was battling for 1.5-2 weeks.
The Bad:
-Get atta here with that 'bad' nonsense. She's doing good😊
The 'Meh':
-Got her to be a bigger bubble, but she lost some more height. Propped her up on the same ceramic pot that Do-Si-Dos was last grow. Almost a perfect height making an even canopy.
-Really bushy. I open her up and it seems she's filled the empty space within 24 hours. Going to do a quick bottom to top defo and prune before moving her to flower. Still trying to learn what to take in Veg that will end up being nothing but LARF in Bloom. I feel I did a little better this time... but I'm positive there will be a lot to take in the early weeks of flower, during the stretch.
-Before the transplant, I was running 24/7 extraction due to a weather change in my area. In her shorter 3 gallon pot, she picked up a bit of wind burn on the low end fans. I knew it was being pretty battered around, but I didn't really have a choice. I really needed that air exchange. These fans will be removed in near future if/when she needs/wants to cannibalize them.
Notes of the Week:
-All transplants were done with a 15mL/Gallon soil of Gaia Green 2-16-0 Bone Meal for slow release P/Cal throughout Bloom. Added bonus of keeping pH in check (somewhat like a dolomite lime). "Stim Root #1" for softwood applications has been used sparingly as well. Allows for zero delay when transplanting. Roots tap into new soil immediately. No stunting, no lost time.
-A water feed was given to each girl in the past two days as I am back to my feed-feed-water schedule (and working well). I did include a small dose of GP3 Bloom, Humic acids, molasses and potassium silicate to keep her moving until the next feed (Bloom and Humic halved). Cut the Cal/Mag and pulling my Mag from the Bloom's 1.5%.
-Training is pretty much over. PSK has a little work to do, but this week all the training ties will slowly be released and replaced with bracing cables. 5-6, 2 foot sticks of bamboo and 1, 3 foot main bamboo line have been inserted and will be used to pull laterals back inwards, give them strength, and help them carry their flowering weight. All bamboo sticks (except for the 3 foot main) were inserted into the new transplant soil where there would be no roots and no root interference. To reduce root interference on the 3 foot main, I sharpen to a point in order to push roots aside, not bluntly destroying them.
-The flip is on the calendar. PSK is even in good shape now. It's time. Either Sunday, May 31st or June 1st these girls will be put into 12/12. I'm really looking forward to this, but as per the usual, I'm a little nervous. It's been a battle with them so far and I'm really, REALLY hoping Bloom goes a tad better then early Veg did.
-Oddly enough, these plants are larger in size then grow #2, at the same period of time (49 days). Attributing earlier training and the SF for these changes. Keeping the girls shorter and using more LST has pushed them to move a bit faster. Noted.
-Hygrowzyme and King Kola will be introduced into the new Bloom schedule in the coming week (s). I did not use the PK booster as early as recommended last grow and looking to see what changes I will see with proper applications, throughout flower. Hygrozyme will only be used for the first few weeks of Bloom. If anything feels amiss or my gut tells me somethings off, I'll stop it's use and just use what I know.
Thank you for stopping by all ya'll. Been a pleasure to share this week and I look forward to sharing Bloom with you. I kept this one pretty short....Yay me! hahaha😅. Cheers everyone. Take care of you and yours, happy trails with the girls and see you on the other side. Peace!😃

Likes
7
Share


@trelopoulos
Follow
They grow vigorous and strong.. need to do a good training to manage growspace.. huge leaves!


Likes
8
Share


@Darkside419
Follow
First time growing indoors so this trellis net or scrog thing really isn’t for me any suggestions? Do I put up second net?

Likes
7
Share

@georgesa
Follow
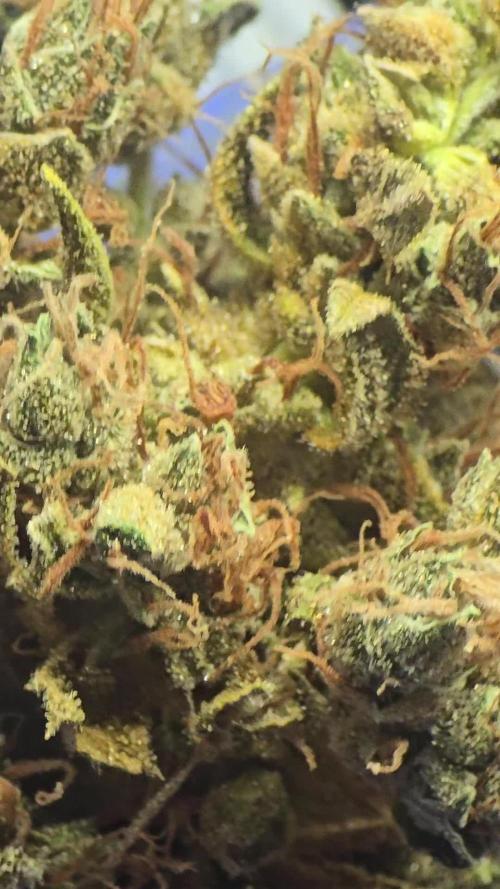
Super hazy goodness!!
Like growing nevils haze, but with the Yields and shorter flower time of Casey Jones!
Would recommend this, or any of the other Haze x CJ crosses to scratch that old school amsterdam itch!

Likes
41
Share


@Santica_Garden
Follow
Just another update for the Alien OG by The Cali Connection , I have uploaded a video for you guys which gives you guys a better look and how I'm progressing and how I'm training the ladies.
Any questions guys just ask.
Happy Growing 👍🏾🌱💚😎

Likes
10
Share


@MadeInGermany
Follow
Flowering day 19
since the time
change to 12/12.
Hey all together 😀.
This week she has developed beautifully ☺️.
I poured it 3 times with 1.2 l this week.
Tomorrow I will add the 2 g GHSC Powder Feeding Bio Bloom because the first blossoms are coming :-).
I checked all the leaves thoroughly for pests or diseases and everything is fine ☺️.
Next week I'll look at your roots as soon as the coconut is completely rooted.
As every week, the tent was cleaned and the entire technology checked.
The humidifier was also refilled every day 👍.
In the next few days I will remove the bottom shoots so that the energy doesn't end up being wasted in the small popcorn buds.
I wish you a lot of fun with the update.
Stay healthy 🙏🏻 and let it grow 🍀
You can buy this Strain at :
https://www.zamnesia.com/de/5165-zamnesia-seeds-kalini-asia-feminisiert.html
Type:
Kalini Asia
☝️🏼
Genetics:
Black Domina x Purple Kush
👍
Vega lamp:
2 x Todogrow Led
Quantum Board 100 W
💡
Bloom Lamp :
2 x Todogrow Led
Cxb 3590 COB 3500 K 205W
💡💡☝️🏼
Soil :
Canna Coco Professional +
☝️🏼
Fertilizer:
Green House Powder Feeding
☝️🏼🌱
Water:
Osmosis water mixed with normal water (24 hours stale that the chlorine evaporates) to 0.2 EC. Add Cal / Mag to 0.4 Ec Ph with Organic Ph - to 5.5 - 5.8 .


Processing
Likes
12
Share


@Tazard
Follow
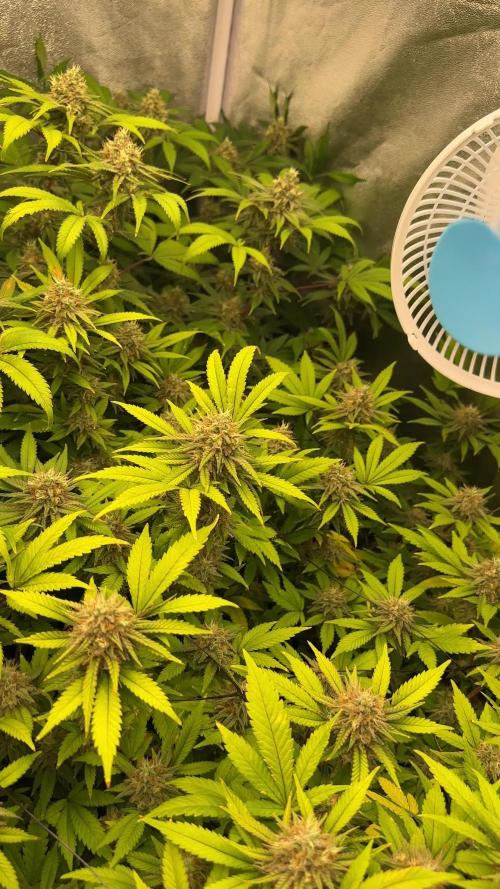
Wow what a week. We are at 48” as of day 20 on the Enemy of The State plants (both are the same height now). The two White Criticals were 36 and 38 inches from the top of the tanks and the taller tops on Purple Purple are about 34”. Wedding cake is about 30” now. All my plants seem to love the 5.2 pH. Enemy of the state are on a lighter feed of about 950ppm and wedding cake is still eating from a vegetive reservoir at 1125ppm. Thanks for looking!



Likes
37
Share


@The_Projexx
Follow
We did really well this round with this strain even though she grew very different from what Im used too. We ended up with a half pound of some excellent smelling and tasting cannabis!


Likes
11
Share


@Badassxwar
Follow
One plant had a big stretch late this week. But I believe it was due to me placing the middle plant in the back right because my middle light is an older model without bloom switch. And I wanted the nicer plant under the red leds, but over night that next night, it grew like 4 inches above my canopy :/ but i think I'm going to tie the 2 middle stretchers on her to the middle opposing stalks. I started the besties because the buds are formed nicely on top so now I want to start giving some size focused mid bloom nutrients. Going by the schedual so far for flower on my nutrient chart. Oh and when I started using the bud candy I noticed some AMAZING smells that I've never smelt on a strain before. The new tricomes smell like a cotton candy/gummyworm, and the water leaves when cut off smelt like straight gas/diesel. But the 2 smells are not present together. Its weird. Forgot cal mag this week



Likes
38
Share


@Cariboo_OG
Follow
Utopia Haze is a rare heavily sativa dominant hybrid (90% sativa/10% indica) strain created through back crossing Brazilian Sativa strains. This tasty little bud took home 1st Place for Best Sativa in the 2008 High Times’ Cannabis Cup and for good reason – with its potent 18-22% average THC level and long lasting cerebral effects, Utopia Haze is one powerhouse smoke. The Utopia Haze high comes on soon after you finish your first toke, hitting you with a strong cerebral lift that infuses you with a sense of hazy relaxation.
Type: Feminised/Photoperiod
Cultivation: Indoor/Outdoor
Flowering Time (days): 70-75
Indoor Yield (g): Up to 650
Feminised Outdoor Harvest Month: October
Feminised Outdoor Harvest Month Week: 3rd-4th week
Aroma: Citrus, Woody, Pungent, Mint
Effect: Cerebral Lift, Hazy Relaxation, Sleepy
Welcome Everyone to the Final Entry of my Utopia Haze Grow !
There is so much to discuss ! I have been extremely busy as of late trying to get this Harvest together, but i am happy to have it here for you now !
I Seriously under estimated the amount of time, help from others, and my own necessary skills to pull this off.. and i still kind of screwed it up lol !
But its worth noting i have never actually done this before and trying to document it during....was extremely hard.
It is next to impossible to work an iPhone with rubber gloves on !
First I want to discuss everything step by step so before you jump straight into the comments on how the end product is so small in "quantity"
Rest assured i am happy with its"quality"...and thats all that matters to me because Life is a journey not a destination! and i have learned so much from this grow that I couldn't be any happy even if i messed some things up :)
But at the very least I hope you read through this entry in its entirety with an open mind and focus more on the process, rather than just the outcome!
I ran out of Ice & i was only able to wash three times..(normally I've heard you should go sometimes 5-6 washes)
Preparation is Key & things will be much better next round :)
Photos 1-22
These are pretty self explanatory but for those of you just tuning in now.. this is what happens to a very happy plant when you don't have the necessary tools to monitor key components of growing cannabis.. Ph, as well as EC levels play a very key role in the outcome of your grow lol that being said I was just able to save this plant by purchasing both tools but that doesn't mean the plant didn't suffer because of the prior events.. This was a Huge reason behind me choosing to turn this harvest into what i would consider
"Solventless Hash Rosin" from "Ice water extracted Bubble hash".
Pictures 23
The idea here is the process of using "fresh Frozen Cannabis" this has been discussed many a time online on such sites as instagram and here on grow diaries as well.. I personally have Never tried the process so i decided to try it out and make a judgement for myself..
Video 24
The Cannabis has now been in the freezer for 72 hours making it very well frozen.. as you can tell i struggled getting it all into the 25u Screen Wash Bag. One thing of note i would do differently is i will de-stem my next batch as i also believe this played a part in the amount of plant matter that escaped through the sieves.
Photo/Video's 25-28
The idea here is "ice water Seiving" & especially with the bags that I am using here that are only have screen material on the bottom portion of the bag it is very important to have spaces in-between the screens to allow the water to pass directly through the screens into the bottom bucket with the least amount of resistance.. because the hash is so extremely temperature dependant if it gets warm on the side of the bag.. it will stick there and not make it to the bottom to become use able product..
29
You do not need to use as much Ice as i used here lol... the idea is to keep everything very cold..i certainly achieved that but at the sacrifice of using so much that i ended up grinding product and producing "contaminants" but in the end they are just plant matter that i would be smoking when i rolled up my joint either way so.. I'm not super disappointed..
But it should be noted that what you want to achieve here is a Layering effect where you have the wash bag between two small layers of ice while the "water current" washes the Trichomes away allowing them to be separated by the screens setup below :)
Before Starting the machine you should allow some time (i.e.;10-12minutes pre soak to allow the product to become saturated) before the first cycle.
By video 32 I have just ran out of ice lol..
Video 33-34
Here I have a tip for you.. to separate the screens that you sieve through.. cut 5 gallon buckets to stretch them across nice and tight.. it'll make scooping your Bubble that much easier ! i learned this from the many "Frenchy" videos I have watched :)
Picture 35
Here in lays the problem for most people.. drying your hash without loosing vast amounts of "Terpenes" whilst also stay ever vigilant against mold !
Thanks to all those videos I've watched on youtube.. id like to think this was one of my most successful parts of this process..
Things to Note; Terpenes start to seriously evaporate at temperatures 68F or 20C
you need to stay as cold as possible whilst bringing the Relative Humidity in the space down into the 40-30% to stay away from that nasty mold !
I used my cold storage room in the basement.. with a dehumidifier running to keep the space at 45% RH & staying at a constant 15c.
All while spreading the hash as thin as possible across parchment paper, on top of the white screens with a fan moving air across both sides of the paper.
Pictures 36-38
These are some macros i took in the middle of my drying session I fell in love with the colour.
Yes i know the black spots are plant material but they will get caught when i bag the hash & squish the oil out.
Thing to Note; at this stage it is important to ensure you 'micro plane" the hash down as fine as you can whilst staying weary of the temperature... any "chunks" will hold pockets of moisture.. that lead to potential problems..ie; mold ...
Picture/Video 39-41
Successfully planed bubble hash ready to be bagged and Squished !
Picture 42
Ive decided to follow Pedro.. from Pedros Grow Room and double bag to be on the safe side so i don't have any blow outs.
So thats One 25u bag inside one 160u bag ! :)
Pictures 43
This is almost 3 grams of the bubble hash from above, already melting in the bag.. this is where i ran into trouble again lol things started getting to warm in the house and i was only able to get one of the three squish's i did on video :( things started getting sticky.
Picture 44
This is basically just a photo of the equipment I'm using; 3x5 LowTemp Cage in the frame I built myself, with a 20Ton bottle jack.
Something to note here is this is an older Lowtemp model with only a single heating zone which is which i have it closed here heating Both sides of the press :)
As well as the importance of having adequate pressure on your plates.. my rig is very overkill for the size of hash bags..lol
Video 45
Here is the lovely press video.. its didn't quite work the way i wanted either lol my directional folding wasn't quite tight enough for a big "drip" :)
&the Press was set to 65°c
Photo's 46-50 are pretty self explanatory :) I had a blow out.. but still managed to pull an 80% return from the hash once squished...& yes it tasted amazing :)
Was it worth it in the end... that could be debated.. for some..i understand..its not your thing, but for those of us that are interested in making our own concentrates.. free from Solvents...
I wouldn't make it any other way :)
If even ONE of you reading this diary finds it helpful to reference for ANYTHING.....even if its "what not to do" ill consider it a success !
Thanks again for tagging along on this garden adventure.. its been one heck of a journey !
Much Love from B.C. Canada,
Until Next time,
Cariboo

Likes
22
Share


@Chucky324
Follow
Hello. This is the end of week 1 and the beginning of week 2 of flowering.
Left these girls alone this week. Just watered once. They need food tonight. These plants are on the night shift.
I didn't do a diary on my main grow room so I posted a video of it last. My 7 best clones.
This week I'll be hauling leaves for mulch for under my bushes and trees in my yard. People rack the leaves out to the street for the vacuum truck to take.
I go with my 45 gallon tub on a dolly, and my pitch fork and scoop shovel and gather leaves. The dolly makes it easy to dump them around the yard.
I've planted a lot of nectar giving plants and bushes for the humming birds and bumble bees and honey bees that bloom at different times of the year.
Right now in Nov. I have 4 Winter Flowering Mahonia Bushes and about 6 humming birds chasing each other around. The bees come out when the temp get over 10* c
In Jan. I have a winter flowering honeysuckle that blooms and smells heavenly, that the humming birds also like.
Ok If you can be great, at least be good.
Chuck.



Likes
6
Share

@GoodTimesOrganics
Follow
Hi liebe Community and Welcome Back! 🌿💚
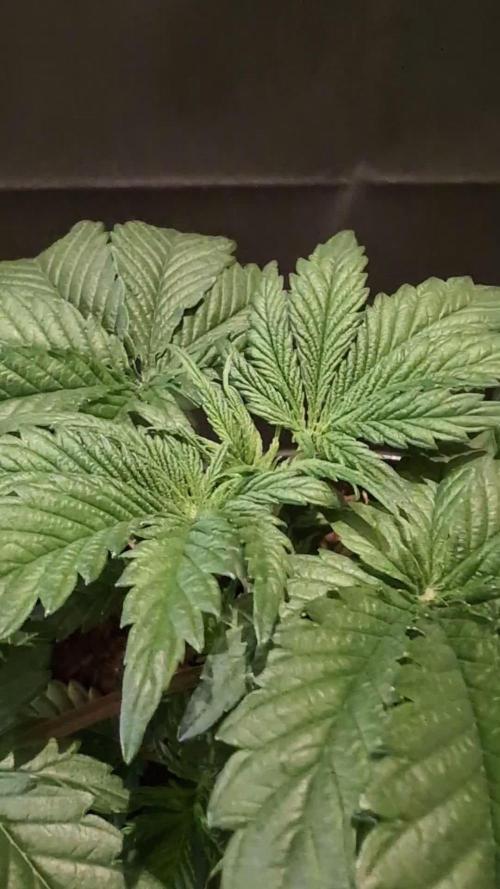
Die kleinen Äffchen wachsen prächtig! 🌄🐒
Die Jungpflanzen machen sich sehr gut und es ist zu beobachten, dass nun dass Wachstum richtig startet.
Die Seitentriebe bilden sich immer weiter aus. Die Blattform ist schön Breit und Buschig.
Die Umgebungsgegebenheiten sind aktuell gut:
—————
🌞 Temp: 24
🌚 Temp: 18°C bis 19°C
💨 RH: 58%
VPD: 0,91 kPa
💡ppfd: 330 mpm
—————
Viele Grüße 👋
Likes
11
Share


@Meisterwulle
Follow
Hi zusammen,
Habe die Woche mal eine große Entlaubungsaktion (hoffentlich die letzte) gestartet.
Die Pflanzen sehen soweit gesund aus, #2 hängt allerdings von der Höhe etwas hinterher… seis drum - es haben sich sehr viele Blütenstände entwickelt und bin insgesamt mit der Anzahl schon sehr zufrieden, das Zelt lässt sich gut füllen. Hab j4f ein paar Stecklinge geschnitten von jeder Pflanze - weiß noch nicht, was ich genau damit mache, Aber dachte zum wegwerfen sind sie zu schade :)
Da #1 im Gegensatz zu den anderen höher gewachsen ist, hielt ich einen scrog für eine gute Idee.
Wünsche euch noch eine schöne Woche und grüße
Wulle

Likes
55
Share


@Max1973
Follow
Day 93 - Fattened up good, getting really heavy....posted pic of test bud.... vid of the led uv globe i got on ebay...
works awesome.... highly recommend...... 😎
maybe 1 more week.... they smell delicious, not very strong smell....
just normal water in bottom drip tray, dutch master one gold ....next week, flush em and next sunday pull em..... idk....
Day 95 - had a good look at both girls and worked out a harvest plan...... i've started flushing/watering on the smaller one,
and sunday (day 100) will be her last. i'll leave the larger one (she's still quiet white) for another week and re evaluate her fate next week.
Day 97 - 4 vids .... looks good 😎
getting a 1600x Camera Endoscope USB Digital Microscope from ebay, see if it will help with harvest........ 😎
Likes
27
Share


@Mookzer
Follow
Bonjour je reviens avec des photo est des avis sur ma purple quenn auto mis en terre le 16 août 2021 elle mais extrêmement de temp à fleurir et semble avoir des difficultés à finir sa floraison elle est dans un pot en tissu de 14 cm de haut maos très large avec 30 grm d engrais à diffusion lente de royal quenn seed avis photo svp !