


Likes
Comments
Share

@eldruida_lamota
Follow
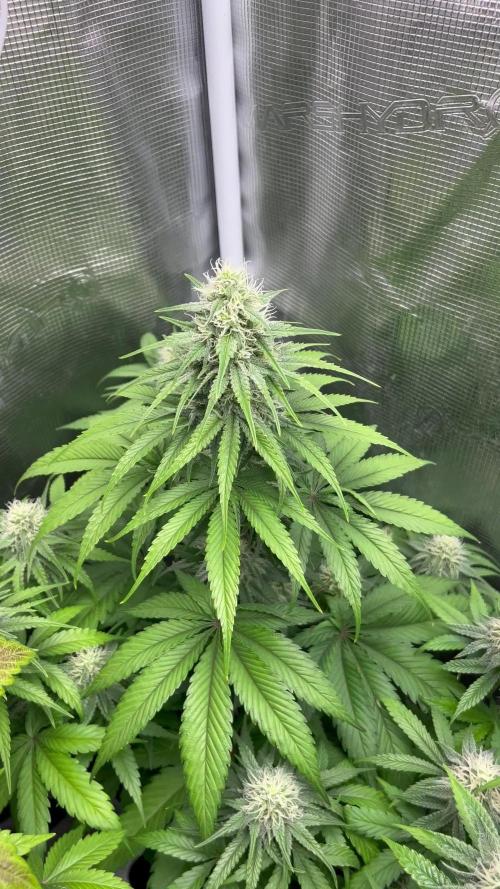
Actualizamos familia, con la quinta semana de floración de esta Toad Venum de growerschoice.
Tienen un color bien verde sin carencias por el momento y se ve que están sanas, la flor ya empezó a tricomar y a formarse, las plantas están en macetas de 7 Litros definitivamente, con tierra top crop, con una altura similar a 50 cms.
Añadí también tiras de color azul / amarillo para prevenir y controlar mejor el tema plagas.
El riego que aplicamos son 800ml de agua cada 48 horas y el ph se controla en 6.5, la temperatura la tenemos entre 22/25 grados y la humedad ronda el 55% gracias al humidificador.
El ciclo lo cambiamos a 12h de luz/ 12h de oscuridad, el mismo día que escribo esto el foco está al 100% de potencia. Me gusta subirlo muy progresivamente.
- os dejo por aquí un CÓDIGO: Eldruida
Descuento para la tienda de MARS HYDRO.
https://www.mars-hydro.com
- los nutrientes directamente desde https://agrobeta.com/agrobetatiendaonline/36-abonos-canamo
• Estoy muy agradecido por el aprecio y la acogida a todos los que me seguís, tanto a seguidores como a marcas que apoyan todos estos proyectos, aquí seguiremos cultivando y aportando nuestro pequeño grano de arena a este gran sector.
Hasta aquí todo, Buenos humos 💨💨💨

Likes
17
Share


@Paflucy
Follow
Heeloo everybody :)
After huge problems on veg, finally we start blooming :) First day after older ladies break into flowering. Right now they are on 12/12 lighting cycle and they just get the final boost of nitrogen.
When the girls were at 10 level I cut them down into 5, 4 and 3 level or 4 and 3 level. I had also erased all the bottom levels. After removing top level I waited 3 days and removed the lower one. The stem had maybe 3 cm but I decided to try and make a clone off it, just as an experiment. I was super suprised when I saw some roots after only 10 days :)
Grow Medium - Biobizz light mix + with acid humus + dolomite + perlit + Great White Shark ( when transplanting)
On the bottom and top Plagron Coco 60 - Peebles 40
Check the lamp, it's something really innovation in my opinion.
https://bilberry.pl/en/home-page/


Likes
6
Share


@KingCatfish
Follow
Two autos are wierd ( small, over watered) plan on doing something to them but the rest is growing at good rates. Finishing up the flowering on a couple trees

Likes
28
Share


@MrGrowthSpurt
Follow
What's up Growmies🤟🏽 Week #7 of flowering is officially in the books. This is my last and final week of this run even though based on the Trichromes I think another week maybe 2 would be way better. However I have a new bigger tent and equipment and I'm excited to grow some strains from generous breeders.
Hello week #8🙌🏾🙌🏾
Each of the strains I'm growing say 8 week flowering time with 2 saying 8 to 10 weeks. Right now Id say they have an 80 to 20 trichrome ratio with the 80 being cloudy and 20 being amber, but not on all of them. Some are mostly cloudy with a few clear trichromes.
I am feeding them plain water ph'd to 6.6 I haven't given her nutes the last 2 weeks just about, just plain water. This may be partially to blame as to why the fan leaves shriveled up so badly, coupled with missing their watering by 2 days twice on consecutive weeks🤦♂️🏽. It's a wonder these ladies are still kicking.
All in all it has been a great experience with these plants. Stay tuned for the chop💪🏾. Until then my friends, Happy growing and may the grow goddesses bless you all with a bountiful harvest!!

Likes
15
Share


@OrganikTek
Follow
Weather Continuos Cool And Wet
Beautiful Bubs Forming In Black Cream
Wedding Cake Gone Full Bloom. Discoverd Source Of The Yellowing.... Red Led From My esp32....
BomBerry Shes a Later Late VegBoom Late Full Bloom If Shes Continuos To Grow I Dont Have More Space For Her
Couskush She Isnt So Big as The Other. The Other Are More Evolued I Think. Shes Now Starting To Go Full On Bloom.
Chears BrotherHood


Likes
86
Share


@DogDoctorOfficial
Follow
Apolo F1 Mission Diary - Week 1: The Verdant Odyssey Begins
Greetings, fellow cultivators and horticultural aficionados! Our Apolo F1 has successfully sprouted its green wings and embarked on the adventurous journey of vegetative growth. Strap in for a thrilling week 1 report that's as lush and comprehensive as the foliage we're nurturing.
This week, our verdant hero underwent a transplant into a tiny pot filled with a soil and Aptus Holland Mycor Mix. Now, let's delve into the magical world of Mycor Mix. Picture this mix as the Avengers of the soil, with various species of endomycorrhizae joining forces. They're fixed on a vegetal carrier, not unlike a botanical superhero's ride, feeding and protecting these fungi, ensuring they're ready to go to work for our Apolo F1.
Now, let's talk watering – a crucial aspect of our plant's well-being. Here, I turn to my trusty sponsors, Aptus Holland, for their nutrient line. The star of the show this week is Regulator, a concoction containing Mono-silicic acid (Si), Boron (B), and Molybdenum (Mo). Si acts as a nutrient transporter, while B enhances calcium uptake and fiber production. Meanwhile, Mo plays the role of a botanical Uber, moving nitrogen from lower to upper leaves with finesse.
But that's not all – our plant's diet includes CaMg-Boost, a luxurious 0.5ml/l concoction. This organo-mineral plant booster is the VIP treatment for preventing calcium and magnesium deficiencies, ensuring our Apolo F1 develops powerful fruit set and reaches the pinnacle of quality.
The nutrient symphony continues with All-in-One Liquid, a 100% mineral-based fertilizer that's the maestro of all mediums and systems. Its unique manufacturing process renders it pH-variation insensitive, a testament to its resilience in a wide pH-range throughout the vegetative phase to flowering/maturation.
And let's not forget the organic touch with Startbooster at 0.25ml/l – the secret sauce for stimulating root system development and vegetative growth. It's like giving our Apolo F1 a botanical energy drink, ensuring it's in top form for the journey ahead.
Our green prodigy is currently basking under the protective dome, a symbol of pride in this early stage of growth. It's like watching a seedling transform into a robust plant, and I couldn't be prouder.
Before we wrap up this week's report, I must extend a heartfelt shoutout to @James and Royal Queen Seeds for blessing me with the Apolo F1, to Aptus Holland for being the guardians of my plant's nutrition, and to Grow Diaries for providing the digital amphitheater where our horticultural exploits can unfold.
Stay tuned for more chapters in our Apolo F1 Mission Diary – where we'll witness the magic of botanical alchemy and the evolution of our green companion. Happy growing, fellow cultivators!
As always thank you all for stopping by and for supporting me on this journey, i am super passion about growing and fell blessed to have you all with me on this new journey <3 <3 <3
Genetics - RQS APOLLO F1
Ligth - LUMATEK ZEUS 465 COMPACT PRO
Food - APTUS HOLLAND
All info and full product details can be find in can find @
https://www.royalqueenseeds.com
https://aptus-holland.com/
https://autopot.co.uk/
https://lumatek-lighting.com/
With true love comes happiness <3<3<3 Always believe in your self and always do things expecting nothing and with an open heart , be a giver and the universe will give back to you in ways you could not even imagine so <3<3<3
<3 <3 <3 Growers love to you all <3 <3 <3

Likes
12
Share


@PedroAndHisPlants
Follow
Hey everyone!
Welcome to our second grow journal! We're growing the same strains as in the first journal, but this time, we plan to only top the plants. They're in 18-liter pots, and you'll be able to follow their progress here as well.
These plants are 20 days younger than the ones in the first grow, so it'll be interesting to compare their development. Stay tuned for updates!
Likes
1
Share

@psychonaut420
Follow
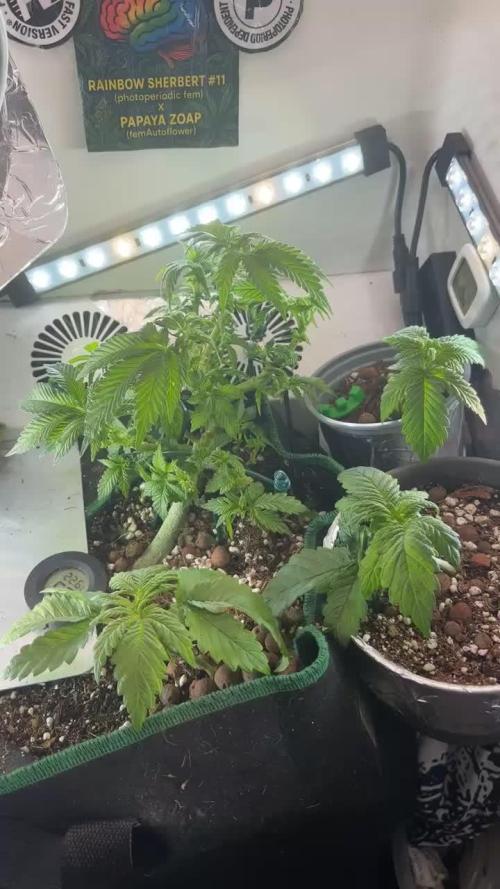
The first 2 one companion planting a f1photoperiod(documented on another diary) and in a 2L pot are both lemon cherry cookies auto and the last one in a 1L pot is frozen face auto there are 2 sets of 2 side branches streaching on each autoflowers and handeling first set of defoliation and LST extremely well hopefully should see signs of more streaching as coming up to pre flower due to autos genetic makeup

Likes
6
Share

@Wilstang
Follow
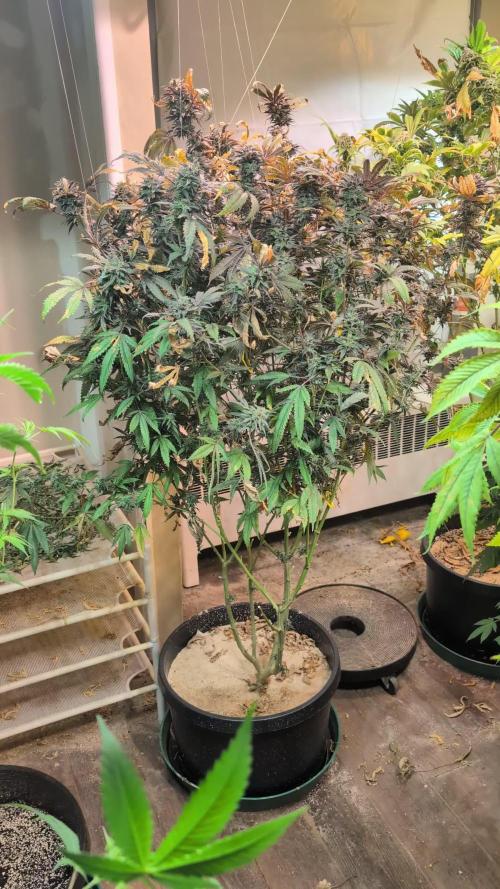
IPM
https://www.arbico-organics.com/product/mite-predator-phytoseiulus-persimilis-plus-sachets/mite-predators
https://www.arbico-organics.com/product/spidermite-destroyer-stethorus-punctillum-adults-larvae/pest-solver-guide-mites

Likes
38
Share


@Cariboo_OG
Follow
Utopia Haze is a rare heavily sativa dominant hybrid (90% sativa/10% indica) strain created through back crossing Brazilian Sativa strains. This tasty little bud took home 1st Place for Best Sativa in the 2008 High Times’ Cannabis Cup and for good reason – with its potent 18-22% average THC level and long lasting cerebral effects, Utopia Haze is one powerhouse smoke. The Utopia Haze high comes on soon after you finish your first toke, hitting you with a strong cerebral lift that infuses you with a sense of hazy relaxation.
Type: Feminised/Photoperiod
Cultivation: Indoor/Outdoor
Flowering Time (days): 70-75
Indoor Yield (g): Up to 650
Feminised Outdoor Harvest Month: October
Feminised Outdoor Harvest Month Week: 3rd-4th week
Aroma: Citrus, Woody, Pungent, Mint
Effect: Cerebral Lift, Hazy Relaxation, Sleepy
Welcome Everyone to the Final Entry of my Utopia Haze Grow !
There is so much to discuss ! I have been extremely busy as of late trying to get this Harvest together, but i am happy to have it here for you now !
I Seriously under estimated the amount of time, help from others, and my own necessary skills to pull this off.. and i still kind of screwed it up lol !
But its worth noting i have never actually done this before and trying to document it during....was extremely hard.
It is next to impossible to work an iPhone with rubber gloves on !
First I want to discuss everything step by step so before you jump straight into the comments on how the end product is so small in "quantity"
Rest assured i am happy with its"quality"...and thats all that matters to me because Life is a journey not a destination! and i have learned so much from this grow that I couldn't be any happy even if i messed some things up :)
But at the very least I hope you read through this entry in its entirety with an open mind and focus more on the process, rather than just the outcome!
I ran out of Ice & i was only able to wash three times..(normally I've heard you should go sometimes 5-6 washes)
Preparation is Key & things will be much better next round :)
Photos 1-22
These are pretty self explanatory but for those of you just tuning in now.. this is what happens to a very happy plant when you don't have the necessary tools to monitor key components of growing cannabis.. Ph, as well as EC levels play a very key role in the outcome of your grow lol that being said I was just able to save this plant by purchasing both tools but that doesn't mean the plant didn't suffer because of the prior events.. This was a Huge reason behind me choosing to turn this harvest into what i would consider
"Solventless Hash Rosin" from "Ice water extracted Bubble hash".
Pictures 23
The idea here is the process of using "fresh Frozen Cannabis" this has been discussed many a time online on such sites as instagram and here on grow diaries as well.. I personally have Never tried the process so i decided to try it out and make a judgement for myself..
Video 24
The Cannabis has now been in the freezer for 72 hours making it very well frozen.. as you can tell i struggled getting it all into the 25u Screen Wash Bag. One thing of note i would do differently is i will de-stem my next batch as i also believe this played a part in the amount of plant matter that escaped through the sieves.
Photo/Video's 25-28
The idea here is "ice water Seiving" & especially with the bags that I am using here that are only have screen material on the bottom portion of the bag it is very important to have spaces in-between the screens to allow the water to pass directly through the screens into the bottom bucket with the least amount of resistance.. because the hash is so extremely temperature dependant if it gets warm on the side of the bag.. it will stick there and not make it to the bottom to become use able product..
29
You do not need to use as much Ice as i used here lol... the idea is to keep everything very cold..i certainly achieved that but at the sacrifice of using so much that i ended up grinding product and producing "contaminants" but in the end they are just plant matter that i would be smoking when i rolled up my joint either way so.. I'm not super disappointed..
But it should be noted that what you want to achieve here is a Layering effect where you have the wash bag between two small layers of ice while the "water current" washes the Trichomes away allowing them to be separated by the screens setup below :)
Before Starting the machine you should allow some time (i.e.;10-12minutes pre soak to allow the product to become saturated) before the first cycle.
By video 32 I have just ran out of ice lol..
Video 33-34
Here I have a tip for you.. to separate the screens that you sieve through.. cut 5 gallon buckets to stretch them across nice and tight.. it'll make scooping your Bubble that much easier ! i learned this from the many "Frenchy" videos I have watched :)
Picture 35
Here in lays the problem for most people.. drying your hash without loosing vast amounts of "Terpenes" whilst also stay ever vigilant against mold !
Thanks to all those videos I've watched on youtube.. id like to think this was one of my most successful parts of this process..
Things to Note; Terpenes start to seriously evaporate at temperatures 68F or 20C
you need to stay as cold as possible whilst bringing the Relative Humidity in the space down into the 40-30% to stay away from that nasty mold !
I used my cold storage room in the basement.. with a dehumidifier running to keep the space at 45% RH & staying at a constant 15c.
All while spreading the hash as thin as possible across parchment paper, on top of the white screens with a fan moving air across both sides of the paper.
Pictures 36-38
These are some macros i took in the middle of my drying session I fell in love with the colour.
Yes i know the black spots are plant material but they will get caught when i bag the hash & squish the oil out.
Thing to Note; at this stage it is important to ensure you 'micro plane" the hash down as fine as you can whilst staying weary of the temperature... any "chunks" will hold pockets of moisture.. that lead to potential problems..ie; mold ...
Picture/Video 39-41
Successfully planed bubble hash ready to be bagged and Squished !
Picture 42
Ive decided to follow Pedro.. from Pedros Grow Room and double bag to be on the safe side so i don't have any blow outs.
So thats One 25u bag inside one 160u bag ! :)
Pictures 43
This is almost 3 grams of the bubble hash from above, already melting in the bag.. this is where i ran into trouble again lol things started getting to warm in the house and i was only able to get one of the three squish's i did on video :( things started getting sticky.
Picture 44
This is basically just a photo of the equipment I'm using; 3x5 LowTemp Cage in the frame I built myself, with a 20Ton bottle jack.
Something to note here is this is an older Lowtemp model with only a single heating zone which is which i have it closed here heating Both sides of the press :)
As well as the importance of having adequate pressure on your plates.. my rig is very overkill for the size of hash bags..lol
Video 45
Here is the lovely press video.. its didn't quite work the way i wanted either lol my directional folding wasn't quite tight enough for a big "drip" :)
&the Press was set to 65°c
Photo's 46-50 are pretty self explanatory :) I had a blow out.. but still managed to pull an 80% return from the hash once squished...& yes it tasted amazing :)
Was it worth it in the end... that could be debated.. for some..i understand..its not your thing, but for those of us that are interested in making our own concentrates.. free from Solvents...
I wouldn't make it any other way :)
If even ONE of you reading this diary finds it helpful to reference for ANYTHING.....even if its "what not to do" ill consider it a success !
Thanks again for tagging along on this garden adventure.. its been one heck of a journey !
Much Love from B.C. Canada,
Until Next time,
Cariboo

Likes
17
Share


@Todzilla
Follow
Outdoor coco 15g pots
Progress:
Lava cake is about week 6.5. Starting to ripen and get heavy. Buds are getting fat. Strong sweet cookie/ ice cream smell. Buds are getting more frosty. Buds are getting so heavy I installed a net on 3 of 4 and doing #4 soon. On my most mature plant - About 25-30% of pistils have turned color. Some trichomes are milky, none amber. Looks like plants are a few days apart.
Marathon OG week 5 1/2. Still stacking and getting fat. Smells dank. Trichomes are showing up. The 20 gallon OG is growing into a monster. I’m still waiting for the heavy bud stacks….
Nutes:
Bumping up ppm, the dry koolbloom and molasses, stopping regular koolbloom and grow. Looking to starting flushing the lava cake in a week or so. Feeding 2x a day; 3x on hot days.
Weather:
Had a good week of cooler temps until yesterday, when it was 97. Looking at hugs in the 80s this week, perfect.
Pests:
The moths and caterpillars are in full swing so I’m applying BT every morning. I’m working hard to reduce caterpillar 🐛 losses. We lost all of the top colas on a plant in another location 💔 . I’m only losing one bud at a time and not the entire colas so far.
Wishing fat buds and monster harvests to all.
Likes
25
Share


@PrairieFrostGrow
Follow
*****Week 15 growth – March 13 to 19, 2021 – Week 6 flower ******
Feeding has ended this week and we are in flush mode now. The girls have just started to slow down their drinking and pistols are changing colour, buds are swelling, they are getting ready to finish. Added the UV and IR light bars in this week. Started the week with just one bar and then both in place by end of week. Each bar has 10 x 730nm, 10 x 395nm, 6 x 660nm pulling 30 watts each. Trichome enhancers!!
Working with the new light this run I have certainly pushed them with more light intensity than they should have received, broke 1100 PAR for a bit. This has also started to cause some foxtails to begin rather than staying compact and swelling the buds. Know for next time……always changes to make 😊
Little more detail…..
Mar 13/21, Day 36
- Feed day with full line of Innovating Plant Products but at ¾ strength.
- Keeping up the feeding but thinking about nitrogen levels and working on reducing.
- feeding with grow – 0.5, micro – 1.5, bloom – 2.5, ult B – 0.5, carbs – 0.75, B Storm – 2, S Storm – 3, Terp – 3, Jet Fuel – 1.5, Rezin 1
- 1300ppm and 6.2pH
- 4L
- Added in the first UV bar today
Mar 14/21, Day 37
- Seeing lots of swelling these days from the girls.
- Microbe feeding today…….possibly last round of microbes.
- Plain tap water with Recharge @ ½ tsp/gal and Natures Candy @ 1.5ml
- 400ppm and 6.1pH
- 3L all around today…..very little run off.
Mar 15/21, Day 38
- Another feed day today. Last week of feed so pushing them a little more. No Grow added! Last couple of feeds with CalMag as well, seeing some magnesium issues so giving last dose.
- feeding with micro – 1.5, bloom – 2.5, ult B – 0.5, carbs – 1, B Storm – 2.5, S Storm – 3, Terp – 3, Jet Fuel – 1.5, MagNifiCal – 1.5ml
- 1175ppm and 6.0pH
- 4L
-
Mar 16/21, Day 39
- Just giving the basic building blocks at this stage. Most of the supplements not added this feeding.
- feeding with Grow – 0.5, micro – 1.5, bloom – 2, carbs – 1, Rezin – 1.5ml, MagNifiCal – 0.5ml
- 875ppm and 6.0pH
- 4L
Mar 17/21, Day 40
- Last Feed Day……calling it at day 40 this run!!!!!
- 4L of feed water left from yesterday so added in 12L of RO water to keep the ppm down.
- Left over plus Rezin @ 2ml, Overdrive @ 2ml (its hard to let go of your routines…I have been using Overdrive for so long……it feels wrong to not be using it this run….snuck in a couple ml😊)
- 485ppm and 6.0pH
- 4L
- Light power pushed back up to 525 watts……..keeping the intensity up to hit the lower bud sites….will see what happens to the uppers.
Mar 18/21, Day 41
- Starting flush but not hitting the pots with 12 gallons of water each type of flush! Will just drop the ppm down to nothing and use RO water……planning on having close to 3 weeks to flush….second guessing that I really have that long though so may actually end up adding a flushing agent to the girls…..decide in the next 4 days so can leave plain water time if I do.
- Watering with Enzymes @ 2ml…….clean up the roots and help them get more of the ppm out of the media.
- 100ppm and 5.9pH……..missed the pH but not adding both up and down, ran with this.
- 4L
- Light power pulled back down 480 watts
Mar 19/21, Day 42
- Dry out day today. Will be letting the pots get dryer now before adding more moisture.
- Leaving them for today though. Give flushing agent in next 2 days if going to.
- Work down the light intensity more in next couple of days as well.
- UV lights going now for 3 hours per day on both fixtures at the middle of the light schedule.

Likes
Comments
Share


Likes
33
Share


@DutchFarmer
Follow
This pheno looks better then the one advertised!
She is not done yet so fingers. crossed she swells up
If you want to support us, take a look at our new diaries and if you like them remember to like, comment and follow us 👍 It will be appreciated! ❤️
Would you like to join our cannabis community?
A chance to win some RQS beans and merch hosted by RQS
💚🍀💚
Please check out my Youtube!

Likes
33
Share


@AshBrand
Follow
6/27/21 - I’m just feeding and letting the plants flower. So far so good! For a first time grow I think I did pretty well but it’s not over yet ;)
6/28/21 - They look great! I bumped up Cha Ching to run until final flush. Hopefully that will help make it a little more frosty. They are sticky to the touch and smell great.
6/29/21 - Some branches fell over from the weight of the bud. I had to tie them up to the light. See the bottom of the plant in the pic above. :)
6/30/21 - Most of the plants keep falling over. I have to tie them up with string to the light. Buds look great!
7/1/21 - More of the plant fell over but I tied everything up so it’ll be supported. I shouldn’t have to tie anymore branches.
7/2/21 - They look good! Lots of buds. More than I initially thought. Oh well, looks good!
7/3/21 - Day 42 of flower. Getting very close to start a flush. I’ll use sledgehammer a couple times then water from there on out. They look on track! I haven’t had any deficiencies or any discoloration. No pests either.

Processing
Likes
23
Share


@GrowGuy97
Follow
Wish the buds would have got a little bigger but feel like that’s particularly my fault for a short Veg but overall I am blow away by the outcome for all the seeds to just be random bag seeds! 2 of the plants are drying now 3rd one will be cut tomorrow & the other 2 got probably 2 more weeks! Will do a taste & smoke report and also give a weight as soon as they dry & cure a little bit but honestly couldn’t be happier with my first grow! Thanks for all the support & help along the way & happy growing friends!🤙🏼✌️🏼🌱
Update on 1st plant - dry weight 42g, still smelled pretty Earthy when I put it in the jar but the smell is definitely coming out now, extremely sticky & frosty buds❄️: 1:🏼🙏🏼
Update - plant 2 Dry weight was 40 grams! Extremely happy with the out come this is honestly some of the best bud I have ever smoked! Amazing to me this came from a random bag seed, it has a very citrusy flavor, smells & smokes amazing! Honestly a 10/10 in my book, wish I could knew what strain this was so I could grow it again!😫❄️✌️🏼🌱
Update - plant 3 Dry weight 34g, smells & look phenomenal, the buds are much smaller & had the smallest yield so far but this is by far the best smelling so far! Will have a smoke update on this one soon, stay tuned friends & happy growing!✌️🏼🌱
Update - plant 5 dry weight was 52g it dried a little faster than plant 4 which I will probably jar tomorrow! Will update again with a smoke report soon, this plant brought my total so far up to 168 off 4 plants👍🏼 Thanks for following friends & happy growing! Also the butter I made from the trim was 🔥🔥
Likes
10
Share


@GracelessGardens
Follow
Still too early in the week to call it fully in bloom yet, little branches really started poking out after I tied down the 2 biggest fan leaves. I have been watering in small amounts but more often, using the soil weight and topsoil to judge.
The smell has started coming in the last 2 days of week 4, skunky right off the bat. Noticed some nice little pistols poking about in bud sites!
Update:D4/wk5
Bud sites are really starting to see expand, trying to keep the big fan leaves out of the way when possible. Going to start adding fox farms big bloom into the watering schedule starting D6/wk5.

Likes
6
Share


@DRO420
Follow
First week of Flower. Girls are starting the final stretch before forming the flowers.


Likes
17
Share


@SmylinPupil
Follow
Well I dummied it down this week, picked off a bunch of leaves and fed them literally, maybe the last dose of ferts(we’ll see).I’ll likely harvest one before the others based off visual appearance and if I can keep it alive long enough. The other three should be good too go in another 3-4 weeks (growing super slow). See you all next week.
Cheers.

Likes
16
Share

@Cooky_420L
Follow
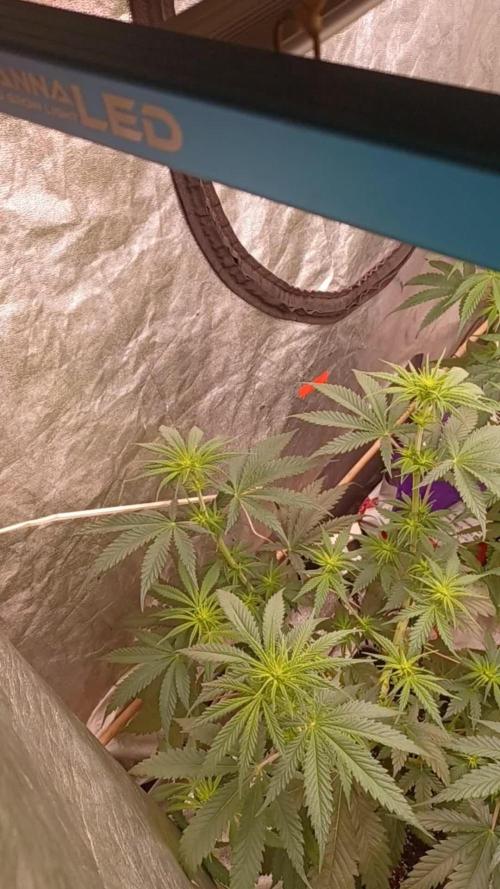
3' semaine de floraison c'est super bien passé, le stretch est fini, pas d hermaphrodite.
Bon Développement général des 2 plantes.
J'ai fait une petite defoliation dans la semaine et augmenté ma lampe et ces réglages resteront jusqu'au rinçage.
Full 75% IR/UV 100%
HR 45/55%
PPFD 781
Bonne semaine à vous les p'tites ✋️ vertes 🌱🌞🌱