
Likes
Comments
Share


@XoticGROW666
Follow
Good bag appeal smell lik sum sour zkittlez with hit of diesel.

Likes
12
Share


@cookingwithninja
Follow
day 49 just pure water phed down.
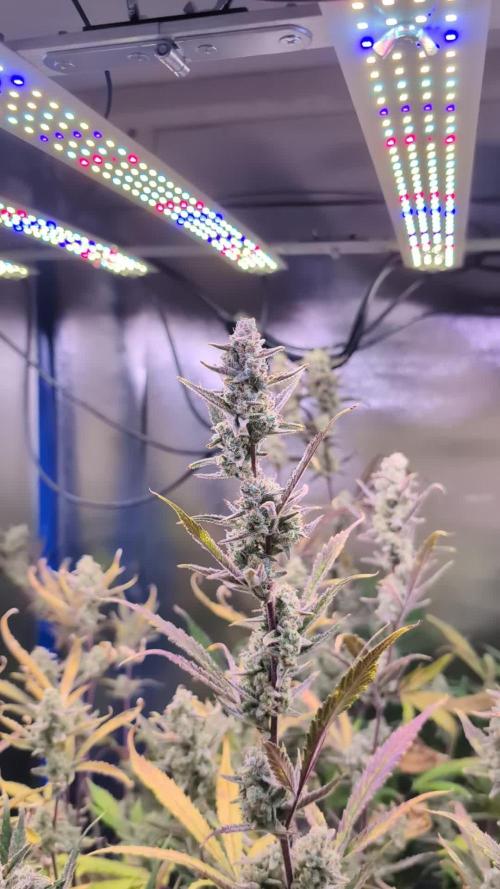
it is day 51, morning before lights on, I might chop today. I use a zero water filter pitcher got off walmart. My humidifier is only a sonic wave. If you use regular tap water it will get gunky in a sonic humidifier. If you have a heat humidifier that boils the water the mist should be clean. These are the 2 types of water humidifiers. Researching best water filters this "zero water" also comes with a free ppm meter! yay! Other water pitcher brands; the water still has ppm. So water misted will still have ppm contamination. You can easily used distilled water only, and reverse osmosis. I just fill a 4gal office water jug with the pitcher and fill my humidifier when needed. I do not use a humidifier in my entire grow up to this point when I chop, I need the perfect rh or this whole effort can fail. growing up to this point only requires 20% effort, chopping now for the 2 weeks dry is this 80% of crucial determination, succeed. A lot of tasks are required today for a clean chop. I feel confident, observed my cross seeds with pink paradise and one with a slightly open caylex looks dark enough for successful germination. I figured 8-16 seeds may be created, 3-4 buds were potentially pollinated. Many growers don't understand when creating genetics with female/female there is a slight chance of herm. You lose 50% of your genetic function. Just water last 2 days, no humic no folvic, 1st time entire grow ha!
There is a lot of cleaning to do, remove the trees, clean the entire tent and environment with bleach water, hacksaw.
I am very proud of my grow. I have sampled 3 of the strains, dr. thunder legit made my lips numb but it could have just been the terps removing my skin cells from the sticky filter, no lie. This is my best grow to date. I did this for you, and to document hype or not under the best conditions I could give my plants, full max potential, although I wish I had more lights, I am not looking for industrial lol, this is how I grow. Learn a lot on youtube and podcasts there is many good content and I may dab into it. You can have a room full of growers and you have 1 seed in your hand, they will all tell you that their way is correct ;) and the best way. Oreo is stinky AF, Bridal is just amazing glad its massive, just not into sativa but the test seemed slight sativa with majority indica, pink untested, dr, thunder just a lip numming plant aha, its very nice, all 4 amazing appeal like advertised, and excited for next run. Either crosses from this or other copycat genetics.
I will give you beautiful glamout shots today, the sizes of the plants, My guesstimate bridal 1lb, thunder 1lb, pink, 0.4lb, bridal 0.5, I am ambitious off 640w lm301h, and 4x 20w blurples daisy chained.
day 51 4 chopped see you in a few weeks :D


Likes
Comments
Share


@Fuzzel
Follow
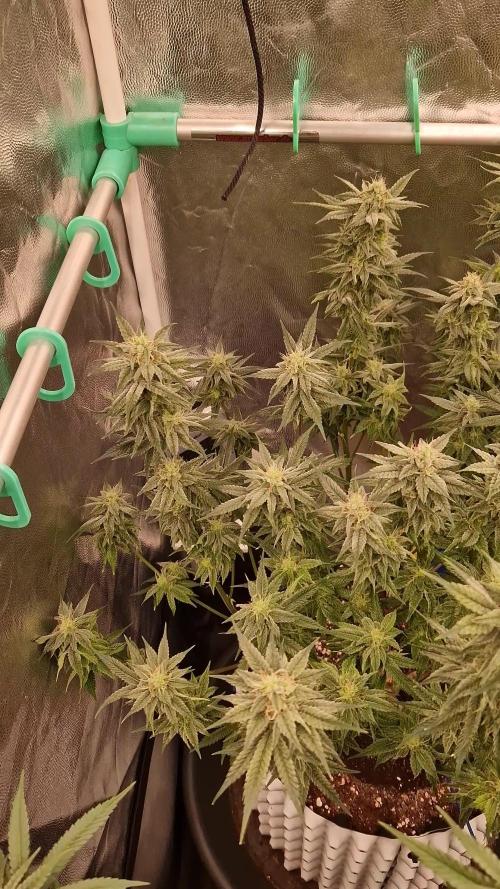
Good bud and visible trichome development.😍
Stretch seems to be slowing down by the end of this week.
Another round of MegaWorm and Guano powder spread on the soil this week.
Temperatures and and watering needs are increasing as the light is set to 100% this week. 160W of LED on about a third of a square meter should push these plants to some nice yields.🙌

Likes
39
Share


@eldruidamx
Follow
Day 57. Watering with clean water.
The light schedule has been changed (12x12). Replaced lamp.
Day 58. Watering with fertilizers.
Day 59. Watering with clean water.
Day 60. Watering with fertilizers.
Day 61. Watering with clean water.
Day 62. Watering with fertilizers.
Day 63. Watering with clean water.

Likes
4
Share


@Rider420
Follow
🌿
Week 17
Blooming proceed very good, flowers are healthy and roots too 👊🏻
Past weeks was really stressful, now it seems back to its original power ⚡️
Size 📐
length 90cm
width 60cm
height 48cm


Likes
65
Share


@Roberts
Follow
Gold Sativa has been growing really fast. I had to take solution out of buckets right before update here. Was causing over watering issues with roots growing so fast. So providing more air space between basket, and solution. Should help her perk up a little more. This is my first run of photoperiods in DWC. I think I got most major issues resolved. She has been trained and now I wait for branches to reach out. I am growing her under a Spider Farmer SE5000,
and in New Level hydro 5 gallon dwc bucket kit. Links below. Thank you Quebec Seeds, New Level hydro, and Spider Farmer. 💪🌱🤜🤛
SE5000
https://amzn.to/3qFpAML
Spider Farmer Official Website Links:
US&Worldwide: https://www.spider-farmer.com
UK: https://spiderfarmer.co.uk
CA: https://spiderfarmer.ca
EU: https://spiderfarmer.eu
AU: https://spiderfarmer.com.au
Coupon Code: saveurcash
Thank you grow diaries community for the 👇likes👇, follows, comments, and subscriptions on my YouTube channel👇. ❄️🌱🍻 Happy Growing 🌱🌱🌱
https://youtube.com/channel/UCAhN7yRzWLpcaRHhMIQ7X4g
www.newlevelhydro.com
www.hygrozyme.com

Likes
6
Share

@Kellergaertner
Follow
The Plant as a hole (without the main stem and roots was 1.4kg. due to German laws I could only keep around 250g of the nicest buds of it. This should end in around 50g of dried flower. The wet flower weight would likely be around 1kg which would have resulted in 200g dry.
For drying i took one nice branch of 42g and hung it on my ESPHome scale. That way I can track the weight loss. After a week at 60% humidity and 11°C (52F) the weight was constant at 10.8g. This is the time I took down all the drying branches, trimmed them and put them to cure (where they now are).
Overall conclusion and learnings of this grow:
- 200W might not be enough
- Growing in DWC without any media (like pebbles, rock wool or so) is absolutely doable
- Compo Expert Hakaphos Red/Green works but you will battle PH drops
- The UVC aquarium cleaner worked great. Never had to use H2O2
- Renewing the water only if really needed works fine for me
- 15L of Water should be the lower limit. The bucket I used was great but maybe a bit small
- Automatic PH dosing (based on ESPHome and Home Assistant) works great
- The cheap Chinese PH/EC probe did not drift much. I only had to recalibrate it once
- It is nice to have the plant elevated for working on it but can get tricky if the stretch is very high like in this case
Overall I'm happy. I did not have any bigger issue with pests or nutrient deficiency.
Likes
19
Share

@TrickzGrowz
Follow
Da die Ladys echt viel Biomasse hatten, hab ich das Netz rausgenommen, um alle Ladys nochmal zu defolieren.
Bei der Pink Poochie kann man wieder Grounded Genetics typische Terps entdecken. Ein sehr süßer Geruch. Die Knospen zeigen auch langsam, das sie dicker werden wollen.
Likes
3
Share


Likes
7
Share


@greensubrange
Follow
Day 39 - 26.06
Set new light, 200watt led
plus new swing fan
Day 44 - 01.07 - Defoliation 50 leafs cut


Likes
4
Share


@420DeepGrow
Follow
📆 Semana 4:
Con el pH del coco terminando de ajustarse y el entorno radicular ya plenamente equilibrado, la planta consolida su floración funcional. El estiramiento se detiene y los puntos florales se compactan en las puntas, con mayor densidad de pistilos y estructura ya fijada.
Los riegos siguen acompasando la demanda sin acumulaciones, manteniendo EC estable y favoreciendo una absorción limpia. La respuesta aérea se mantiene óptima: hojas firmes, color uniforme y una expresión aromática cítrica más intensa y definida.
Semana de afirmación floral y estabilidad radicular tras el ajuste del medio.
Seguimos creciendo fuerte 💪!


Likes
32
Share


@Compassionate_Gardener
Follow
This cycle was all along a great pleasure. The plants developed MUCH BETTER THAN EXPECTED, the result under the Q6W-Gen. 2 LED lamps from SANlight is FANTASTIC. I have NEVER harvested more from plants of the same strain under HPS and the quality of the bud (trichomes, taste aroma) is MUCH BETTER when grown under LED, my decision is definitely made, I will continue to solemnly grow with LED-lights in the future. I harvested 2250 gram of Shiva Skunk and 3009 gram of Serious Kush, that a total amount of 5259 gram. In relation to the 3000 Watts (incl. dimmed part!) power of the LED-lights thats an AMAZING 1,753 gram per Watt.


Likes
5
Share


@420medic
Follow
These 2 girls are simply amazing in there own way... Minus the potassium and phosphorus deficiency they have put did themselves again.. the trichome productions is on point! They are sticky, dense nugs on both plants.. the gorilla punch is a mutant purple pheno.
Likes
40
Share


@Taima
Follow
Mahalo to everyone on growdiaries for following and helping during the grow!!!! I'm going to update in about 3 or 4 days for a dry weight. Also sorry for saying day 72 in the video. Its day 77. Aloha.
Likes
46
Share


@pifflestikkz
Follow
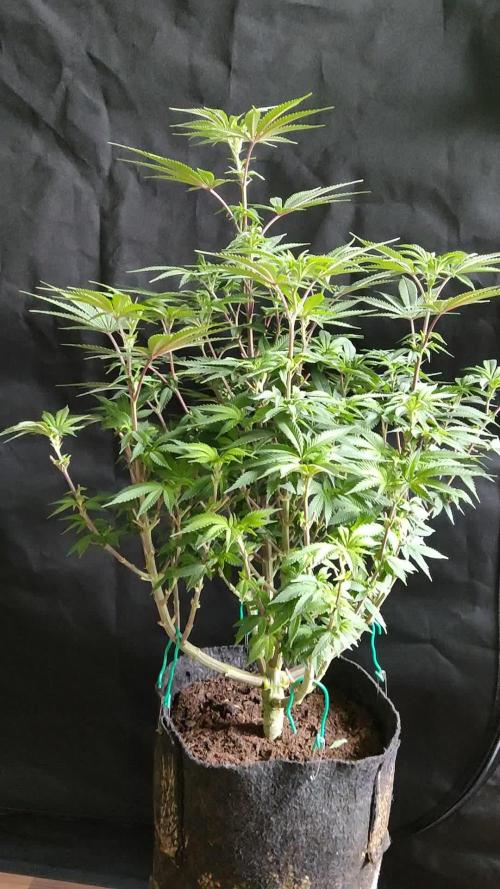
No nutrients will be added till week 2 or possibly 3. Soon as she surpasses her baby leaves I'll start to drip feed 3 times a week.
Under 400w hid omega now.
Likes
7
Share

@Marijuanaut
Follow
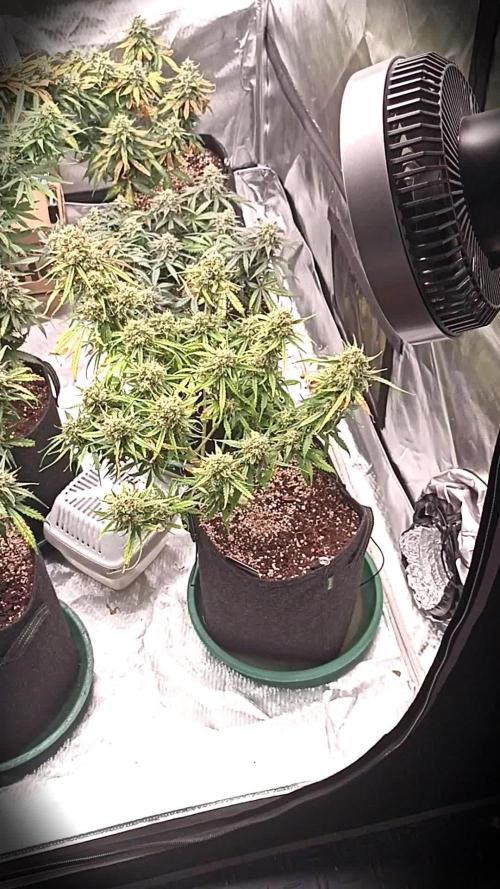
We´re getting there! 😉
Took the week for flushing, net removed for easier handle/access and thricome check.. 😋
I think this one is about ready and we´ll be the first one to go down! 😊
Not the biggets yeld but those buds look mighty fine 😍
Likes
8
Share


@Grow_for_Happiness
Follow
Hot, humid and stormy AF was a good way to describe the past week. Daytime highs were 25-30°C (feeling like 35-40°C) with almost daily thunderstorms in the evenings. Heavy winds, downpours and even a bit of hail to spice up the mix! The girls stood their ground and weathered it all. But then again when you have legs like these two it's hard to get knocked down. Stalk and branches are all thickening up nicely, hoping this means will be able to handle the bud load without netting this year 🤞. Watering every 48 hours and feeding once a week with Reefertilizer Grow. Regular waterings are soaking the pots with a garden hose for a good 3-4 minutes each, and feedings are 12L of nutrient mix on Fridays.
Probably have to do a defoliation this week before these girls push into flower, the insides are getting quite dense.
Happy growing!
