
Likes
Comments
Share


@Albargina
Follow
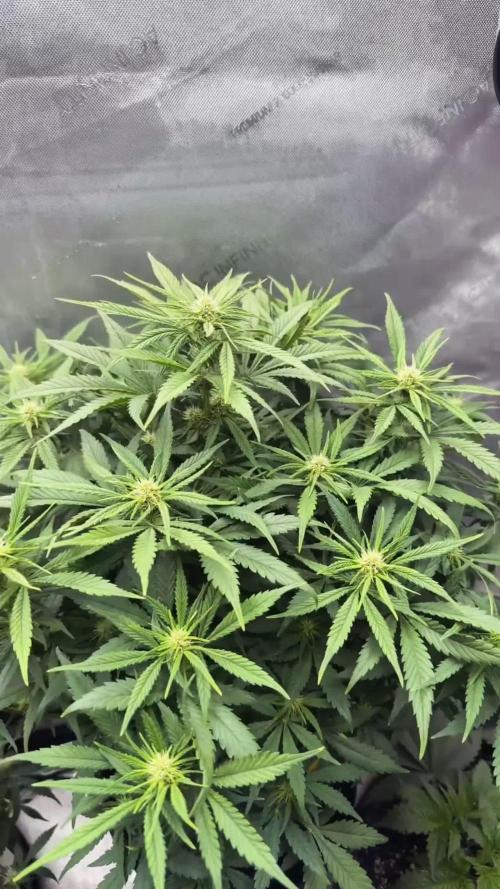
Otra semana mas, y sigo enamorandome cada día, las Blue Elite no paran de sacar resina blanca, y las Rica CBD estan hermosisimas, con grandes y gruesos cogollos, empiezo a notar las macetas de 3L y que la lámpara está ya para el retiro😬, aun así estan saliendo unas piedras con forma de cogollos muy interesantes😂

Likes
6
Share


@artems
Follow
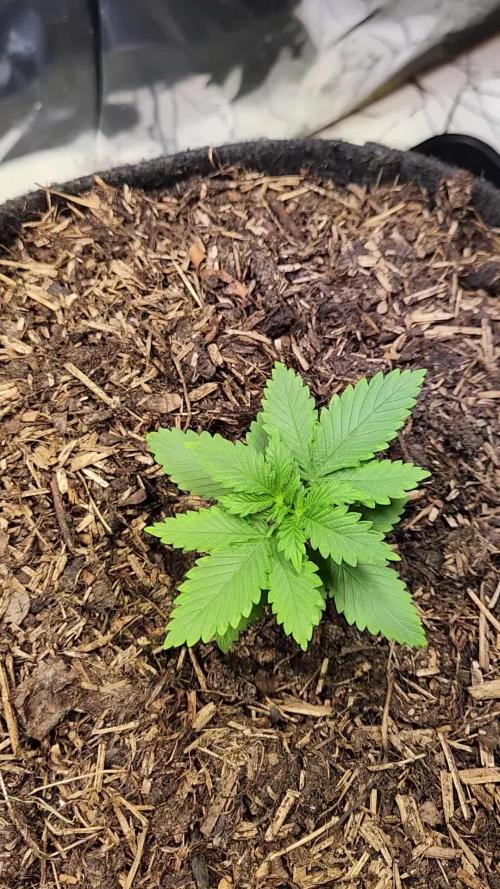
In the first week after transitioning to a 12/12 light cycle, I removed all restraints and supports to observe its growth, comparing it with the Permanent Marker strain. The plant looks vibrant green and has already displayed female signs 🌿. Exciting progress ahead! 😊

Likes
1
Share


Likes
16
Share


@bigbootybotanist
Follow
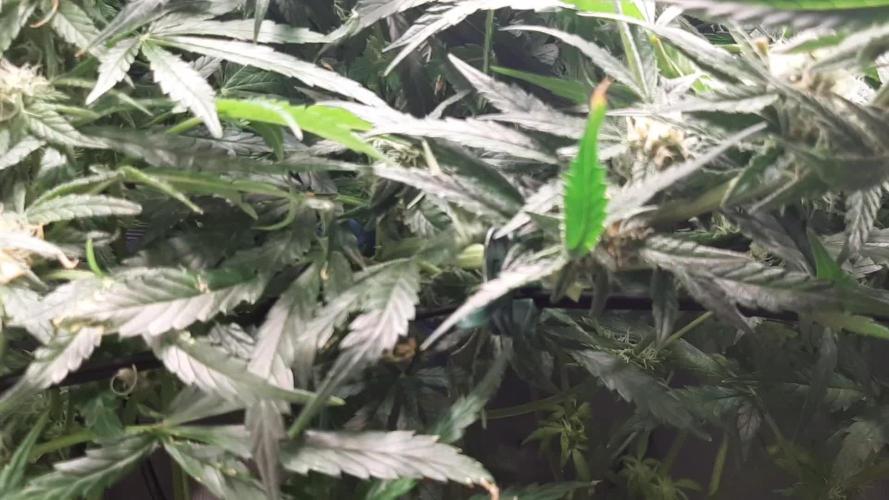
Sheba was starting to accumulate so many trichomes next time i need to make sure the humidity doesn’t fluctuate too much

Processing
Likes
41
Share


@FoxyLoxy
Follow
Ok, as i enter week 4 I'm a little nervous about the growth of these unknown strains. I'm a day away from week 4, one of the plants is very stunted, looks like its having an issue with a nitrogen deficiency? Otherwise I've topped the other two which seem to be doing moderately better, but one of them looks like its about to follow suit of the other plant.
UPDATE; I have replaced the previous pictures posted of the plants with these. As you can tell I have varying deficiency peaking through, especially #2 my wife's plant, if anyone can shed some light, please do so as it is progressing quickly. Right now they're just drinking ph'd water and that is all.

Likes
Comments
Share


@JardineroCannabico
Follow
Se encuentran dos orugas muertas y no se detectan nuevas hojas con mordidas (día 36). Se aplica bacillus thuringiensis por segunda vez, 4ml/L. Se reorganizan las macetas dentro del indoor (día 39).

Likes
22
Share


@takecua
Follow
Por fin llego su día, a sido todo un reto
Ahora estara secando entre unos 7 o 10 días mas o menos
Espero sacar calidad ya comentare .. saludos y mucho verde

Processing
Likes
43
Share


@Jack_Greenstalk
Follow
ladies have started to take off much more this week. I added heavy 16 finish to schedule of nutes. may be adding fire and roots also over next weeks. no huge issues this week, felt pretty dialed in for most part. using grow room glasses ive found i can get decent video of the girls under lights vs having to take them oit find ok lighting and taking a pic.
noticed smell coming off the plants this week, its weak right now, but definitely starting to stink!
going to top at the 3rd node once they reach 8 inches tall. after day 28, I transferred into 3 gallon fabric pots, which will be their final homes til harvest!
(bottom leafs on plant #1 got some spotting, one side was windburn from earlier in grow, the other side I got a few drops of nutrient mixed water on them, and even after wiping away it left spots on leaves, its all good they are going to be removed after topping)

Likes
1
Share


@Pierrougarou21
Follow
Yo Growmies
everything is fine.The enter on the 4 weeks is good.Les sites floraux se développent correctement.
Likes
28
Share


@Ogchemst
Follow
soo... today is flush day.. i uploaded one photo out of 100 of the trichomes because it was hard to find a good spot and take the photo because my hand kept on moving a milimiter to the side and whole focus would be gone.. but there is alot of milky ones starting to appear and i decided im going to go for mostly milky ones as my cookie went for the sativa side and i enjoy head high, she smells sweet like grandmas carmel candies and she smells stroong.. i recommend this strain 100% for fruity sweet smelling bud lovers im sure if i had better light and more experience in growing Autos I would pull alot more weight on that girl and hopefully i will do it next time ! im planning on upgrading soon and growing this strain again because she is just too good thanks for all the support 👊 i will also update on how she tasted and i will update the wet and dry weight when she is ready.😂


Likes
12
Share


@Luke_Lee
Follow
-15.08.2024
The light intensity has been reduced so that the ppfd value is below 1000.
The soil still felt moist, the plants were not watered.
Yellow leaf tips are still there, even turning white.
Continue to observe, do not fertilize and research.
-16.08.2024
Did nothing
-17.08.2024
Visual Control
Soil was dry, Both plants get watered with 500ml water per plant (no nutriens)
-18.08.2024 - 20.08.2024
Did nothing, just Visual Control
-21.08.2024
Soil was dry, Both plants got 1Liter Water per Plant.
(1ml BioGrow, 2ml BioBloom, 2ml TopMax - 1L Water)
Likes
8
Share
@HashishOculus
Follow
Week 11 | Feb 5 - Feb 11 | Flower Days 36-42
Feb 5 - Flower Day 36
00:15 pre-top-off: pH 5.75 / EC 1.852. A touch high, but still controllable. After top-off it settled at pH 5.70 / EC 1.724. She was drinking around 1.5 L/day, and buds were clearly starting to put on real mass. The canopy still carried scars from the earlier incident, but the flowers themselves looked active and healthy.
Feb 6 - Flower Day 37
00:15 pre-top-off EC hit 2.036. That was my cue to stop messing around with dilution. I did a full reservoir change, resetting the system cleanly instead of letting salt concentration creep. The new res went in at pH 5.74 / EC 1.614. She didn’t sulk at all, which was a relief.
Feb 7 - Flower Day 38
Pre-top-off the numbers were calmer: EC ~1.500 / pH 6.18. After topping off with pH-adjusted water and letting it circulate, pH settled at 5.98. She drank less than a liter this day, but given stretch was over and the plant had just had a full res swap, that didn’t automatically worry me. Trichomes were becoming more visible on the sugar leaves - resin building, not just “hair.”
Feb 8 - Flower Day 39
00:15 pre-top-off: pH 5.4 / EC 1.488. pH drifting down was a new pattern compared to earlier in the grow. After top-off it settled at pH 5.72 / EC 1.528. Drinking picked back up. That combination - falling EC with rising uptake - felt like the plant was properly feeding again.
Feb 9 - Flower Day 40
00:10 pre–top-off: EC 1.532 / pH 5.6. After top-off it landed at pH 5.7 / EC 1.488. Stable, predictable behavior. No new spread of damage. Bud sites looked more “structured” now, and the smell was back to pungent and sweet rather than that old hay panic.
Feb 10 - Flower Day 41
00:10 pre-top-off: pH 5.84 / EC 1.566. She drank about 2 liters over the last 24h, which was the clearest sign yet that she was working hard again. After top-off, 15 minutes later, she settled at pH 5.90 / EC 1.518.
Then I did the big job: a major defoliation / cleanup. It was honestly a jungle down there and airflow needed help. I removed nearly all leaves with noticeable discoloration, plus a lot of shaded lower fan leaves that weren’t contributing. I left a few that were only slightly marked so I wouldn’t overstrip her. The difference was immediate: way better airflow, and more tops exposed properly. My fingers were ridiculously sticky afterwards and the smell was loud and pungent - and that was reassuring. Buds were clearly beginning to gain real mass.
Feb 11 - Flower Day 42
00:13 pre-top-off: pH 5.88 / EC 1.608. This was the night I decided to do a tiny, controlled nutrient bump in the top-off water: 1 ml per liter each of Micro, Grow, and Bloom. After circulation it settled at pH 5.88 / EC 1.670 - exactly the outcome I wanted. Slight lift, no spike, no instability.
This week felt like the real transition from recovery into bulk. The canopy still has scars, but the plant is behaving like a producer again - drinking, feeding, and stacking.

Likes
25
Share


@JeyGanesha
Follow
Queste korngarden seeds mi stanno stupendo di giorno in giorno.complimenti..
Cresce a vista d'occhio.ho dovuto pure piegarla in testa sennò troppo alta veniva
Likes
8
Share


@RunWithIt
Follow
Seemingly overnight, the A.K. plant overcame Sour Ripper in growth! Been a fun week as far as the plants go, havent needed to water them at all. Ill take a peak into the tent occasionally, witnessed the growth pick up exponentially this week. I noticed the pots are getting pretty light when i was taking these pictures. Will likely water them tomorrow.
Notes for those interested: My last grow was RUINED from consistently overwatering and NEVER checking pH of feed water. Everything that could have went wrong as a result, did go wrong. Murphy's Law eh? Just trying to see to it that doesnt happen again.
For those interested in the DWC girls, their growth has been nothing less than great 👍. It was less than two weeks ago that i went to the local hydro shop to pick up some hydroguard and damn! Is that shit good or what?! Root rot has been stripped away in almost ALL of my DWC girls, tons of white, happy root growth in their place.
Ive decided that i will flip them all either halfway through this week or monday of next.
Going to mother both A.K. and S.R. 2-3 weeks into flower transition.
Again, great job @RipperSeeds and @Nirvana, really loving this stuff.


Likes
17
Share


@Paflucy
Follow
Yoooo :)
Ladys are doing quite well :) Tons of lovely flavours making my day :)
We can notice slightly deficiencies but "this is the end", so nothing to worry about. They just got the last dose of fertilizers for flowering, now only the final solution -> water -> harvest :) mniam, mniam, mniam, mniam....
Because of the Terpinator they are amazingly oily, I hope there will be no major problems with mold :( like with Glookies...
Older ladys bloom 55 day
Younger ladys bloom 48
Caramelo bloom 43 day
Cheers :)


Likes
28
Share

@wolfvb
Follow
Week 5: babe this cake been baking for 30 days!
Loving this girl so far looking strong and healthy.
Will we have a new star ?

Likes
3
Share

@Oldwied
Follow
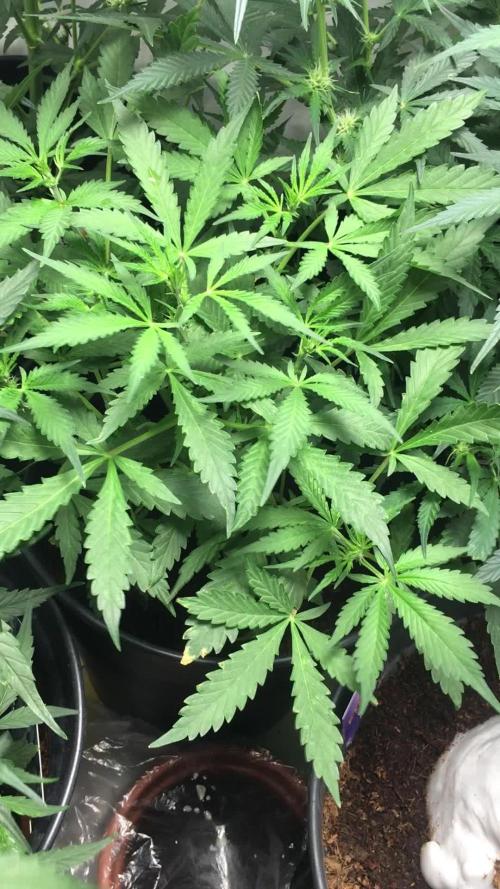
The third week is over the stress of repotting is well absorbed and growth is in full swing.
Light Power: 50%
Day 16
Photoshooting


Likes
4
Share

@Stacy_smokez
Follow
Begging to streaky in flower very bushy plant and the leaves are very close together got to be careful during defoliation letting her stretch to get a better defoliation

