Processing
Likes
Comments
Share
@Lifted
Follow
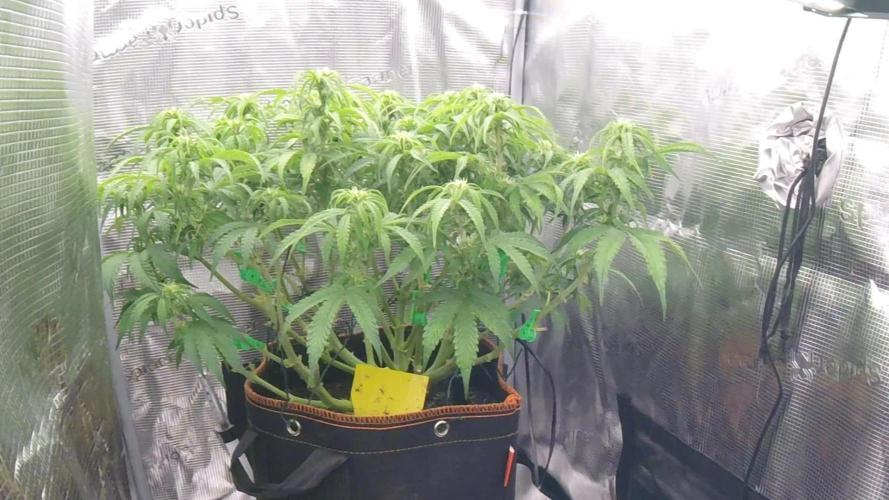
The first picture is from last week and the videos are from today. It's been 56 days in veg so far. I was going to switch to flowering next week but decided to hold off and let it spend more time in recovery. To keep the branches down I used a wire clothes hanger and paper clips.
Likes
1
Share
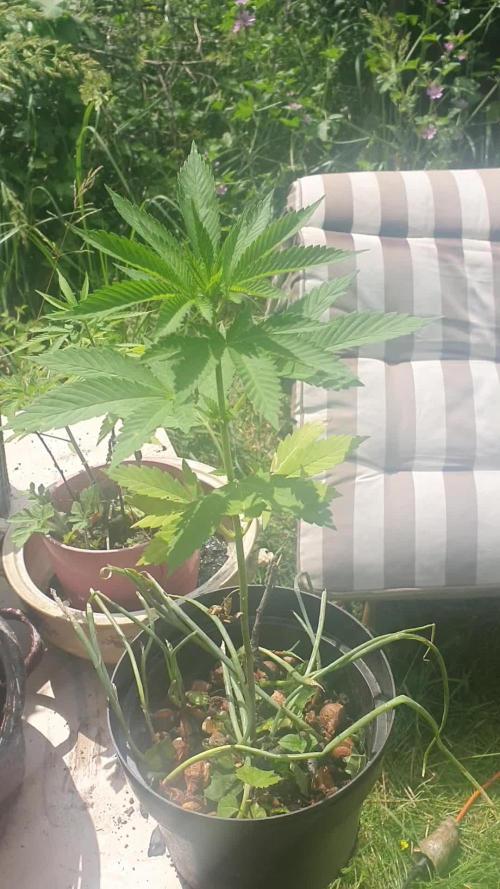
Esta semana hice otro "topping". Ya veo muchas mejoras también gracias al nutri spray y al aumento del pH. Ya estamos empezando a ver algunas mejoras.
Likes
47
Share
@pheverone
Follow
Gave them their 3rd and final heavy defoliation this week. Had lots of useless side branching that will just shadow out the good stuff and cause them to not ripen properly, a lot of this growth was due to the unintended extra 10 days they had in VEG before I noticed the timer wasn't doing what I asked it to do, just one of those things. Always a surprise in the grow room no matter how much you try to prepare and problem solve. I also had an air line manifold blow out this week which was very strange to see. Caught it early so girls didn't go without air for to long and I have 2 air pumps running so 1 going down is only a minor issue but still a great example of the random mishaps that occur when growing. If its one thing that experience has taught me its that less is more when it comes to how many colas you try to fit into a space. Do to many and you'll just end up with a load of mids, battling humidity problems and stress of keeping tons of half ripe colas falling all over onto each other come week 6 or 7. Everything is going great so far, no issues, although I have noticed some of the white hairs on the budlets have slight ginger tops (only a very small few) I have read in the past that this can be a sign of stress and potentially they might flip the hermie but I've done nothing to stress them so I am hoping this is just a abnormality from growing under LED. Boosted the nutrients up to 1000PPM now to let them feed heavy and pump those buds up. Hope you enjoy watching my grow and thank you all for the lovely comments and feedback, it is much appreciated ✌️
Likes
10
Share
Trainwreck is now an established strain in the history of cannabis, now we can see how it turns out on the automatic one from Zamnesia. Remember that we are growing a plant worked with the techniques indicated and another left to grow without pruning to preserve its speed; in the previous/next diary you will find the other plant of the same variety. In this diary we find worked with the Main Lining. Topping at the second internode to create the MainFold, growing shoots worked parallel to the ground for another three internodes and then topped again. We have removed the branches of 1 internode on each side and topped the remaining two branches on each side. Slow down the use of nitrogen during this technique, you may not need everything recommended by the manufacturers. So, if the leaves become too dark or, worse, the tips of the leaves arch downwards and the leaf becomes "crunchy", it is time to lighten or stop the basic fertilizer. She is a bit dark and I slowed down by giving only additives. Comparison is the salt of experience, so the plant in the other diary will be treated very differently, go see it to compare. We started the Plagron fertilization program, we are in 100% organic configuration, the soil is recycled Promix + 1/3 fresh soil + 10% Perlite + RQS Mycorrhizae Mix (4 g in the mix, 1 g under the small fiber pot). We fertilize with: 1 ml/l Power Roots - 1 ml/l Pure Zym - 1 ml/l Sugar Royal - 3 ml/l Alga Grow We sprayed 3 ml/l Vita Race foliar fertilizer once a week. https://plagron.com/it We always have the excellent RQS mycorrhizae flowing in the soil. https://www.zamnesia.io/it/5778-mix-micorrize-easy-roots.html Take a taste of this strain, it's a cross of legendary strains https://www.zamnesia.io/en/11055-zamnesia-seeds-trainwreck-automatic.html Short Description Zamnesia // Trainwreck Automatic is the autoflowering descendant of the popular cannabis strain Trainwreck (a stunning cross of Thai and Mexican landraces). Much loved for its 70% sativa genetics and sativa-like effects, Trainwreck Automatic is as easy to grow as an indica (even in cold climates). This autoflowering strain goes from germination to harvest in 11–12 weeks, meaning you'll be harvesting sativa buds in no time. It prefers warmer climates, but thanks to its short life cycle, it can also be grown in more northern areas (provided it is germinated a few weeks early when growing outdoors) Trainwreck Auto offers delicious lemon and lime flavors that enhance the classic sativa profile of its parents. Furthermore, thanks to the spicy and earthy notes, the overall experience will be even more intense, regardless of whether you smoke or vape it. In terms of its effects, Trainwreck Auto is euphoric, uplifting and energizing. Fueled by a THC content of around 21%, this strain is perfect for socializing and best suited to smokers who prefer to stay active after consuming cannabis, rather than lazing around doing nothing. The whole world of cultivation and much more is from Zamnesia: just take a look at the site and you will find "all the best that nature has to offer" in various shapes and colors. -- // www.zamnesia.com
Likes
61
Share
@Verlido
Follow
Week 18 - Day 1 : Unknown information Week 18 - Day 2 : Unknown information Week 18 - Day 3 : Unknown information Week 18 - Day 4 : Unknown information Week 18 - Day 5 : Unknown information Week 18 - Day 6 : Unknown information Week 18 - Day 7 : Unknown information Week 19 - Day 1 : Unknown information Week 19 - Day 2 : Unknown information Week 19 - Day 3 : Unknown information Week 19 - Day 4 : Unknown information Week 19 - Day 5 : Unknown information Week 19 - Day 6 : Unknown information Week 19 - Day 7 : Unknown information
Likes
55
Share
@Max1973
Follow
Day 37 - Everything looks good.... they are drinking so much.... i built a bit more stable light setup, and i'll need to buy afew more plugs and stuff, to fill it out ...... i organised all the 2700k globes, ready to swap in..... still waiting on the exhaust fan, so i'll keep em in "grow" mode another week or 2 .... i'm vaping a leaf or 2, and drinking "green tea hot chocolates" .... it is so delicious in hot chocolate .... my health has picked up since starting the vape/drinks... the 21 thc/19 cbd is supa healthy ... Day 38 - Getting them ready for Flower, noticed they are lacking in nutrients, so i started em on the heavier dutch master gold flower nutrients. Day 40 - Added some pics. (they look droopy because they in night mode, just turned on lights for pic) - Started them on 12/12 flower, still working on getting all the lights, gear, and globes, for the right spectrum and amount of light.... atm got - 7x 2700k (click) , 2x 6400k (osram), + 60w light panel .... i'll go get some more gear today and hope to expand it to 10x 2700k , 2x 6400k ...... I put the exhaust filter fan on seperate power, so it doesn't go on/off with the timer, but stays on all the time.... it totally fixed up any odour problems, haha ....... Added some different pics for my light spectrum ... etc..... the outside winter temp is now at 40-60oF (5-15oC) so with the 12/12h, the temp inside the tent is dropping to 60-80oF (18-22oC), abit low, but flowering is supposed to be in winter, so idk, see how it goes..... I'm new to growing, so idk how this will work out....... just working it as i go.... i noticed afew spots on a leaf, so i upped the neuts abit more, they are still drinking like fish, huge amounts.... Day 40 late - new vids - Got the extra gear and installed it all... redesigned the initial setup, refined it with proper measurements, had to get my steel rule out, lol....... got the 12 leds in and running, 10x 2700k clicks, and 2x 6400k osrams, with the panel..... it's lookin beautiful and got the exhaust on 24 hrs now, all working perfect with 12/12 timer.... they are forming a few spots on leaves, so hammering the nute water into them now... they are drinkin 1-2 litre of nute water a day each.... (nute water = Dutch mater gold one grow/flower, 800-1000 ppm 6 PH) 😎 Some details about lights.... i did some maths on it, and included some handy pics..... because i'm using cheap leds, i'm keeping the distance at 25cm, they are leds so they won't burn, and it massively increases the lumens/lux/Par, and with my home built light setup, the leds are spread out enough to keep it lower.... worked out good..... something of note is that all the led globes are built/made in china... however different marketing/selling companies from around the world... and the german osrams are 1w leds ... by far the most superior, but anyone can design and send the requirements to china to build em, haha) it's not a contest, we all work together.... haha.... the person with the best led light globes gets my business, because i want the best for my babies.... :) (let me explain- 1w led vs 0.5 w led, the watt of the led projects the light, lumens, LX/PAR etc much further the higher the watt of the led....my 600w panel has 0.5w leds, the philips has 0.75, the osrams have 1w leds..... ) each globe philips (dutch)- 10.5w internal - 14 leds 0.75w 1055 lumens each globe osram (german)- 10.5w internal - 10 leds 1w 1080 lumens each globe click (cheap)- 9w internal - 16 leds 0.56w 800 lumens light panel - 70w - 600w 30 red - 8 red 12 blue - 8 white 7500k 1 ir - 1 uv = 20x blue 6400k - 38x red 2700k internal - 60 double leds - 120x0.5w 6000 lm
Likes
10
Share
I can't believe she is still so happy. She may make it to the finish line. This will be the last week of nutrients. I have no way to flush her so it will be water from here on out.
Likes
12
Share
@ChiTaN
Follow
The girl is huge, the buds are huge and meaty😃The smell is overwhelming, breathtaking :) I can't wait to finish😅
Likes
4
Share
@Andres
Follow
none of this bank has given me an abundant harvest hopefully it can be commemorated with its taste smell and knock out
Likes
9
Share
@Kushizlez
Follow
Slurricane #4 Yield: 34.5g Smell: 8.5/10 - gassy, deep piney, fuel, earthy, Bag appeal: 8.510 - slightly leafy/stemy Crystal coverage: 7.510 - impressed Ash: 6/10 - flaky, mostly white/grey Fire holding: 4/10 - stays lit for 10-30 seconds Smoke: 6/10 - taste is decent High: 6/10 - indica dom Comment: looks amazing, smells amazing, tastes nice, burns like shit. 46.5/70 = 66% 👎🗑️
Likes
60
Share
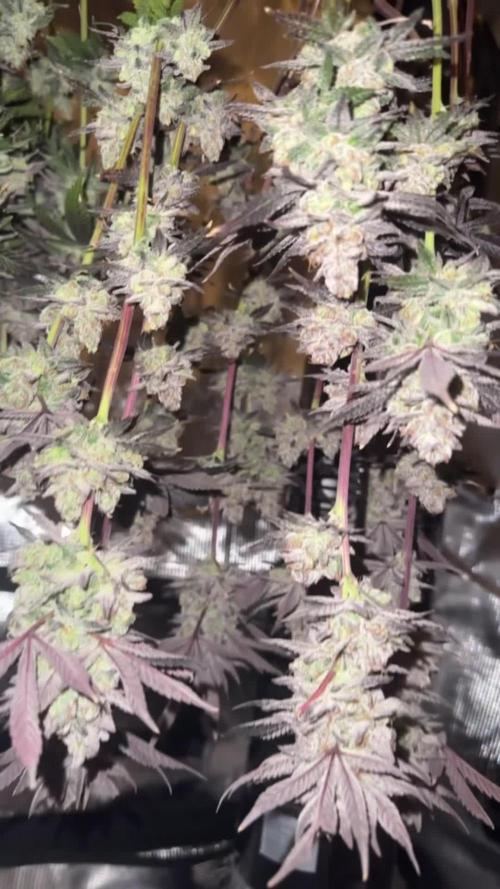
Half way through week 5 and the buds are starting to fatten up, i’m a m so pleased with the length and symmetry of the colas on my plants! feeding nutes every other feeding, don’t want to lock it out on the home stretch!
Likes
66
Share
🍼 Greenhouse BIO Feeding Line which are ORGANIC For LIQUIDS ******GREEN BUZZ LIQUIDS***** also ORGANIC MARSHYDRO ⛺️ has large openings on the sides which is useful for mid section groom room work. 🤩 ☀️ MARSHYDRO FC 3000 LED 300W ☀️Also special thanks to VIPERSPECTRA P2000 (200W) & XS2000(240w) LED growlights
Likes
18
Share
Chemical reactions in which, a single substance splits up into two or more simpler substances are called decomposition reactions. These reactions are carried out by energy, supplied by different sources. The required energy can be supplied by heat (thermolysis), electricity (electrolysis), or light (photolysis). Let’s talk about photolysis reactions (not photosynthesis): Photolysis (also called photodissociation and photodecomposition) is a chemical reaction, in which a chemical (an inorganic or an organic) is broken down by photons and is the interaction of one or more photons with one target molecule. The photolysis reaction is not limited to the effects of visible light, but any photon with sufficient energy (higher than the dissociation energy of the targeted bond) can cause the chemical transformation of the said (inorganic or organic) bond(s) of a chemical. Since the energy of a photon is inversely proportional to the wavelength, electromagnetic waves with the energy of visible light or higher, such as ultraviolet light, X-rays, and γ -rays, can also initiate photolysis reactions. Like all other peroxides, hydrogen peroxide (H2O2) also consists of a relatively weaker O−O bond, which is susceptible to light or heat. The net equation for the reaction is: 2H2O2⟶2H2O+O2 The step-wise reaction mechanism is suggested as follows (Ref.1): H2O2+hν⟶2HO∙ HO∙+H2O2⟶HO−O∙+H2O HO−O∙+H2O2⟶2HO∙+H2O+O2 Using isotope studies it was confirmed that the O2 formed is cleanly derived from H2O2 (Ref.2). Notes: The rate increases rapidly in the presence of catalysts such as MnO2 and KI (Ref.2). The rate of decomposition is slow at room temperature, but it increases with temperature. It is believed to be due to thermal decomposition of H2O2, which seemingly accelerates the photolysis (Ref.3). References: 1.J. P. Hunt, H. Taube, “The Photochemical Decomposition of Hydrogen Peroxide. Quantum Yields, Tracer and Fractionation Effects,” J. Am. Chem. Soc. 1952, 74(23), 5999–6002 (https://doi.org/10.1021/ja01143a052). 2.A. E. Cahill, H. Taube, “The Use of Heavy Oxygen in the Study of Reactions of Hydrogen Peroxide,” J. Am. Chem. Soc. 1952, 74(9), 2312–2318 (https://doi.org/10.1021/ja01129a042). 3.F. O. Rice, M. L. Kilpatrick, “The Photochemical Decomposition of Hydrogen Peroxide Solutions,” J. Phys. Chem. 1927, 31(10), 1507–1510 (https://doi.org/10.1021/j150280a004). Interestingly, as early as 1934 Haber and Weiss (Ref. 1) proposed that HO2∙ is formed in the decomposition of hydrogen peroxide. The subsequent reaction of the transient superoxide radical anion with hydrogen peroxide has been determined to also form the hydroxyl radical (Ref. 2). The higher pH version of the last reaction is, therefore, best represented as: O2∙−+H2O2⟶2HO∙+OH−+O2 And as H++OH−=H2O, the net product formation is not altered. However, alkaline H2O2 is well known to be less stable than acidic hydrogen peroxide (Ref.3) even in absence of light exposure, which accelerates its decomposition (which can involve radical pathways) liberating oxygen! References: 1.Haber Fritz and Weiss Joseph, 1934, The catalytic decomposition of hydrogen peroxide by iron salts. Proc. R. Soc. Lond. A 147: 332–351 http://doi.org/10.1098/rspa.1934.0221 2.TOSHIHIKO OZAWA, AKIRA HANAKI, Reactions of Superoxide with Water and with Hydrogen Peroxide, Chemical and Pharmaceutical Bulletin, 1981, Volume 29, Issue 4, Pages 926-928. https://doi.org/10.1248/cpb.29.926 3.https://www.researchgate.net/figure/Effect-of-pH-on-the-decomposition-of-hydrogen-peroxide-H-2-O-2-0-800-mg-l_fig1_234110563, from Yazıcı, Ersin & Deveci, Haci. (2010). Factors Affecting Decomposition of Hydrogen Peroxide. https://doi.org/10.13140/RG.2.1.1530.0648.
Likes
60
Share
Al no tener humificador se queda un pelín baja la humedad, pero estoy bastante contento con los parámetros. A partir de ahora iré comentando día a día para que podáis hacer un buen seguimiento. Día 8: 🔹Descanso 😴 Día 9: 🔹Trasplante a macetas de 1litro (en los siguientes cultivos pondré directamente en macetas de 1litro). 🔹 Riego con una solución de 2ml/l de acti-vera de Bio Bizz Ec: 600 y pH a 5.9. Siempre en base a un Ec de agua de 400 🔹Abono foliarmente con una solución de acti-vera de Bio Bizz unas 2, 3 veces al día. 🔹 Aplico tierra de Diatomeas sobre el sustrato, media cucharadita de café por cada maceta de 1litro para el control de plagas. Día 10: 🔹Abono foliarmente 2,3 veces al día con acti-vera de Bio Bizz 🔹Bajo la altura del foco a 50 cm de distancia con las plantas. Día 12: 🔹 Aplico foliarmente 1ml/l Acti-vera BioBizz + 0.1ml/l y pH a 6.0 de 2 a 3 veces durante el día. 🔹Remuevo la tierra para por encima con unas pinzas para airear el sustrato. Día 13: 🔹Riego con 0.2ml/l Acti-vera y 0.01 Rootbastic, Ec 1000 y PH 5.9 🔹Pongo unas guías de madera para una mejor estabilidad y desarrollo de la planta. Día 14: 🔹Aplico foliarmente 1ml/l Acti-vera BioBizz + 0.1ml/l y pH a 6.0.
Likes
30
Share
✂️🍯 Tical x Zamnesia — Nectar Drip | Drying & Trimming Report 🍯✂️ And… we are back again 😄 Yes — we are dividing the reports once more. At this point it is probably becoming part of the diary itself, but honestly, there is simply too much happening during these runs to compress everything into one giant update without losing important moments along the way. So thank you for the patience. And welcome back to the next chapter of our Nectar Drip journey: the drying, the trimming, the resin collecting, the temple balls, and the beginning of the cure. 🌱 Quick Recap For anyone arriving only now: This run was grown from seed under 12/12 lighting from the beginning. No long vegetative phase. No giant training sessions. No massive shaping. Just letting the genetics express themselves naturally while observing: - structure, - morphology, - resin production, - flower behavior, - and overall cultivar personality. Last week reflected the harvest itself: - trichome maturity, - fading colors, - hanging branches, - macro photography, - stem structure, - and final harvest observations. One of the smaller plants was frozen immediately after harvest for future washing and extraction work, which we will still cover in a dedicated future update once we complete the washing process properly. But this week? This week belongs to the dry flowers. And honestly… these girls became something beautiful. Drying Process The flowers dried for roughly 10 days under controlled conditions: - approximately 18–20°C - around 60% RH - with the first couple of days closer to 45% RH to help release initial surface moisture safely This part matters far more than many people realize. Drying is not simply: “waiting until the plant becomes dry.” It is controlled moisture migration. The outside of the flower always dries first. The inside stays wetter longer. And the goal is slowing that process down enough for: - chlorophyll breakdown, - smoother smoke, - terpene preservation, - proper moisture redistribution, - and stable curing afterward. Dry too fast? The outside crisps while the inside traps moisture. Dry too slowly? Risk increases: - mold, - anaerobic conditions, - terpene degradation, - unstable cure. These Nectar Drip girls dried beautifully. Dense flowers. Excellent structure. No rushed drying. No hay smell. No collapse. Just slow clean progression. And when the branches finally gave that satisfying “click” instead of bending… we knew it was time 😄 ✂️ Trimming Time So: gloves on, trim bin ready, studio lights running, music playing quietly in the background, Mr. Baggy supervising operations as always 😄 …and branch by branch, the process began. We trimmed entirely by hand using Zamnesia curved-point scissors. And honestly, these scissors became one of our favorite trimming tools. The pointed curved tip allows: - deeper precision, - cleaner access between calyxes, - easier sugar leaf removal, - less accidental flower damage, - and better control overall on dense compact flowers. Especially important on cultivars like this one. Because Nectar Drip became DENSE. Not airy. Not fluffy. Proper compact greasy flowers. The kind that fight back while trimming 😄 Every branch had to be broken down carefully: - separating buds individually, - removing excess leaf material, - preserving flower shape, - protecting trichome coverage, - and trying not to spend half the trimming session glued to the scissors. And yes… the resin production here was honestly ridiculous. 🖤 Resin Everywhere This cultivar is oily. Not just frosty visually. Oily physically. The gloves became coated quickly. The scissors accumulated thick dark resin constantly. The trim bin slowly filled with golden material underneath. And every few minutes we found ourselves scraping resin from: - gloves, - scissors, - fingers, - and tools. That sticky dark material eventually became beautiful little temple balls. And honestly? The way this resin behaved says a lot about the quality of the cultivar. Some resin stays dry and crumbly. This one softened almost instantly with minimal heat. Just body temperature alone was enough to: - soften, - bind, - darken, - and become workable. Extremely greasy resin. Extremely rich trichome expression. The little temple balls became: dark, soft, sticky, shiny, and incredibly aromatic. Beautiful medicine already before even curing properly. 🏆 Final Dry Numbers And now the final flower numbers for the dried plants: 🌱 337.3 grams dry flower Plus: the frozen material resting in the freezer for future washing and extraction work. And honestly? Very happy with these numbers. Especially considering: - the quality, - density, - resin production, - flower structure, - and the overall level of expression these girls delivered. This was not “big yield but average flower.” This was genuinely high-quality medicine. 📦 Storage & Beginning The Cure After trimming: the flowers were placed into glass jars for curing. The temple balls also rest curing slowly inside glass. And now another important phase begins: time. Because curing changes everything. Terpenes settle. Moisture equalizes. Harshness fades. Aromas deepen. Smoke smooths out. The cultivar slowly reveals its final personality. And honestly? This Nectar Drip already smells incredible. Sweet. Creamy. Fruity. Almonds.Dark. Warm. Slightly candy-like. With this deep resinous backend that keeps evolving every day. The room smelled unbelievable during trimming. At some moments it genuinely felt like opening: fruit candy, fuel, cream, and warm resin all at once. Very unique profile. Very memorable. 📸 Documentation & Studio Sessions Of course, we documented almost everything: - trimming time-lapses, - resin collection, - temple ball formation, - close-up flower shots, - drying branches, - sticky gloves, - macro details, - cinematic studio moments, - and behind-the-scenes chaos 😄 Because honestly… these moments matter too. A grow diary becomes more than just showing finished buds after enough weeks. It becomes documentation: - of process, - mistakes, - lessons, - atmosphere, - obsession, - patience, - and passion. And this run definitely carried all of that. ⏳ What Comes Next? Next update will probably become the final chapter: - curing review, - smoke report, - terpene evolution, - effect profile, - overall strain impressions, - and our honest final thoughts about this Tical x Zamnesia collaboration after living with the medicine properly. And honestly… we are extremely excited for that one. Because this cultivar already feels very special. 🙏 Final Thanks And as always… thank you. To Zamnesia. To Tical. To Plagron. To F.O.G. To Lumiflora. To the gear. To the platform. To the supporters. To the silent followers. To the OGs still here since day one. To the curious new visitors. To the people learning quietly in the background. To the skeptics. To the lovers. To the haters too 😄 And to everybody who stopped scrolling long enough to spend even a few moments here with us. That alone deserves gratitude. This collaboration genuinely feels special. And honestly… I still feel like Nectar Drip has one more beautiful chapter left before this journey fully ends. 📡 DELETED @ 1K Please stay tuned.we never quit https://www.youtube.com/@TheDogDoctorOfficial NEW 🙏 Thank you for your patience and continued support. FOR DISCOUNT CODES AND MORE JUST FOLLOW THE LINK https://website.beacons.ai/dogdoctorofficial 📲 Don’t forget to Subscribe and follow me on Instagram and YouTube @DogDoctorOfficial for exclusive content, real-time updates, and behind-the-scenes magic. We’ve got so much more coming, including transplanting and all the amazing techniques that go along with it. You won’t want to miss it. GrowDiaries Journal: https://growdiaries.com/grower/dogdoctorofficial Instagram: https://www.instagram.com/dogdoctorofficial/ YouTube: https://www.youtube.com/@dogdoctorofficial Deleted by Youtube - https://www.youtube.com/@TheDogDoctorOfficial NEW Vimeo : https://vimeo.com/dogdoctorofficial Under construction stay tuned ⸻ Explore the Gear that Powers My Grow If you’re curious about the tech I’m using, check out these links: 🔆 Lighting & Environmental Control • Future of Grow — Advanced LED lighting technology https://www.futureofgrow.com/ DISCOUNT CODE: DOG20 • Lumiflora — Under-canopy LED lighting https://lumiflorade.com/ • TrollMaster — Environmental controllers and automation gear (past collaboration) ⸻ Genetics • Zamnesia Seeds — Genetics used in this project https://www.zamnesia.com/ ⸻ 🌱 Soil, Substrates, Boosters & Root Support • Plagron — Substrates, bio mixes, and supportive products https://plagron.com/en/ ⸻ 🎒 Storage, Curing & Preservation • Grove Bags — Curing and storage solutions https://grovebags.com/ ⸻ 📸 Photography Equipment & Tools (Not sponsors, but part of my creative toolkit) • Sony A6700 • Sony full-frame macro lens + few more • Stacking photography workflow - learning • iPhone (for behind-the-scenes shots) We’ve got much more coming as we move through the grow cycles. Trust me, you won’t want to miss the next steps, let’s push the boundaries of indoor horticulture together! As always, this is shared for educational purposes, aiming to spread understanding and appreciation for this plant. Let’s celebrate it responsibly and continue to learn and grow together. With true love comes happiness. Always believe in yourself, and always do things expecting nothing and with an open heart. Be a giver, and the universe will give back in ways you could never imagine. 💚 Growers love to all 💚 📸 P.S. – The Eye Behind the Lens All photos in this diary (for now — except for the ones showing the camera, which I took with an iPhone) are taken with a Sony A6700 paired with a Sony full-frame macro lens and a few more. Photography is part of the story — it’s how we share the fine textures, the glow, and the quiet details that words can’t always capture. I’ve also started experimenting with photo stacking — a technique where multiple images, each taken at a slightly different focus point, are layered together to create one perfectly sharp image from front to back. It’s not digital enhancement or AI; it’s pure photography — a way to reveal the plant’s beauty in microscopic depth, from trichome to petal. You’ll even see a few shots of "ghost me" capturing the shots — camera, lens, setup — because every grow deserves not just to be cultivated, but documented like art. FOR DISCOUNT CODES AND MORE JUST FOLLOW THE LINK https://website.beacons.ai/dogdoctorofficial NEW DISCORD - Official Server Invite Link : https://discord.gg/ksjAkA5T74
Likes
Comments
Share
@BruWeed
Follow
10/04 - Cumple tres semanas en etapa de crecimiento. Se encuentra perfecta, sus chalas estan impecalbles. Le realice la poda apical y en unos dias voy a realizar LST. Con lo que corte lo clone y lo puse en una maceta pequeña. Voy a dejarla en crecimiento 5 semanas asi se desarrolla bien. En estos dias estare publicando mas imagenes de como viene. 13/04 - Realice LST. Podes seguirme en Instagram @bruweed_arg