
Processing
Likes
Comments
Share


@Ageddd
Follow
Flush week for Ultra Lemon Haze, stinking a little more this week, and eating the stored nutrients.
AH1 is getting weird, loosing colour, i dont know why, im going to increase the nutes a little... Giving Top Bloom (2ml/l) and Big One (0,5 ml/l).
AH2 is branching and branching, and growing a lot. Feeding Top Veg 2ml/l + Green Explosion 0,5 ml/l.


Likes
10
Share


@Oetelando
Follow
After 93 Days the Peanut Butter Breath get Harvested and hang in a Tent with 19 degrees and 60-65% air humidity.
Buds are big as Fuck and have a fruity Smell
last step waiting


Likes
1
Share

@psychonaut420
Follow
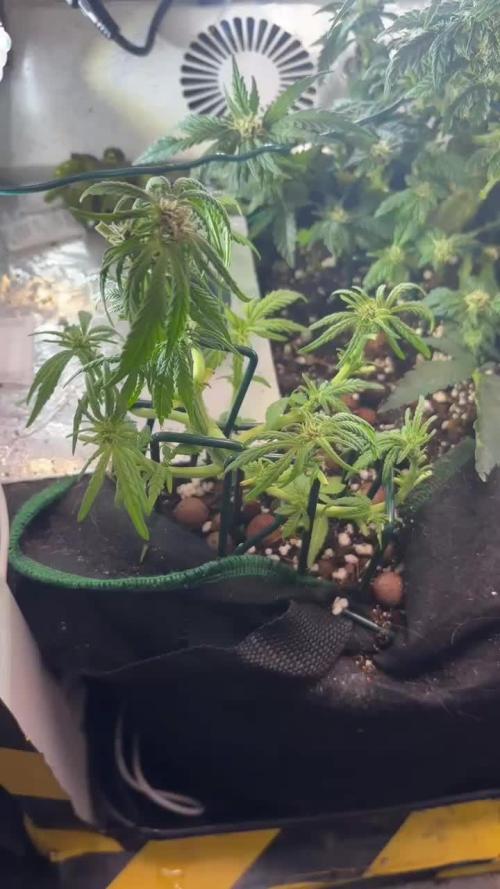
first 2 plants are lemon cherry cookies auto and last one is frozen face auto the white stigmas and streaching side branches are streaching outwards I’ve done more lst and defoleation for light penetration to each bud site


Likes
4
Share


@TheGreenGroomer
Follow
🌱 Week 5, Day 1 – Veg Update 🌱
Hey everyone! We’re officially on Week 5, Day 1 of the veg cycle, and everything is looking fantastic so far! The plants are healthy, vibrant, and showing some solid growth, which has me excited to flip them into flower soon—maybe at the start of Week 6, but I’m taking it day by day.
That said, I have noticed a bit of nutrient burn creeping in, which is a little strange considering the PPMS are sitting at just 450 ppm. The PPFD output is also where it should be, so I’m thinking it could be a minor fluctuation in nutrient uptake or possibly slight environmental factors playing a role.
To be cautious, I’ve dialed back the feeding a bit to see if that helps. I'll give it a couple of days and keep a close eye on them. The goal is to give them a solid week of recovery before we hit the next big step.
Once we hit that one-week mark, it’s time for a deep, heavy lollipop and some defoliation to really clear out the lower growth, ensuring all energy is focused on the top colas. After that, we’ll flip them into flower and get that SCROG net in place. Things are about to get real! Stay tuned for more updates as we get closer to flowering! 🌸
Likes
27
Share


@Northerngrowers
Follow
Primera semana de floración.
Las niñas crecen en condiciones óptimas y recién hecha limpieza de bajos.
Se ve que son muy buenas genéticas ya en la fase vegetativa.

Likes
101
Share


@Ferenc
Follow
Day 58, 11th of November 2020:
I set the lamp 15 minutes shorter to switch off earlier so they receive 11:45 of darkness. I would like to imitate the nature when longer nights come with time till the 4th week (when they will receive 13 hours darkness a day 15 minutes minus 4 times = 1hour) so every week 15 min longer darkness for 4 weeks and then back to 12/12 to have bigger buds from the 4th week....
Wao. Well, all good hopefully they will stop growing soon but the strech is not that much thanks for the trainings such as topping and LST....
Pistils are started appearing so they she the sex I think one more week to go and they will settle down concentrating on bud development.
What to say every 2nd day is fertilization with the mix and ratio above now we are waiting.
Anything else? Well just look atbthe pictures and decide what you think. I am pretty sure they look cool LOL.
This Gleato Zamnesia is very promising I really like the smell already she is nice but all of them I mean I am in love with all so. Kalinia Asia is nice and I am so excited for the Sweed Seeds ones the red girls OMG :)


Likes
3
Share


@Eaegifts
Follow
Day22
Minor lst but that’s about it. She’s doing well and I just chopped her sister today, this girl and a few more left of this cultivar. Thinking we found the keeper already but only the cure will tell for sure.
Likes
14
Share


@Diips
Follow
day 15 - 27/11/2025.
all looking good, healthy foliage all around.
beginning of week 3.
did a early def on the tiniest of them all, due to her leaves shadowing herself. so hopefully it will help her to get more light into the canopy

Likes
10
Share


@coriander
Follow
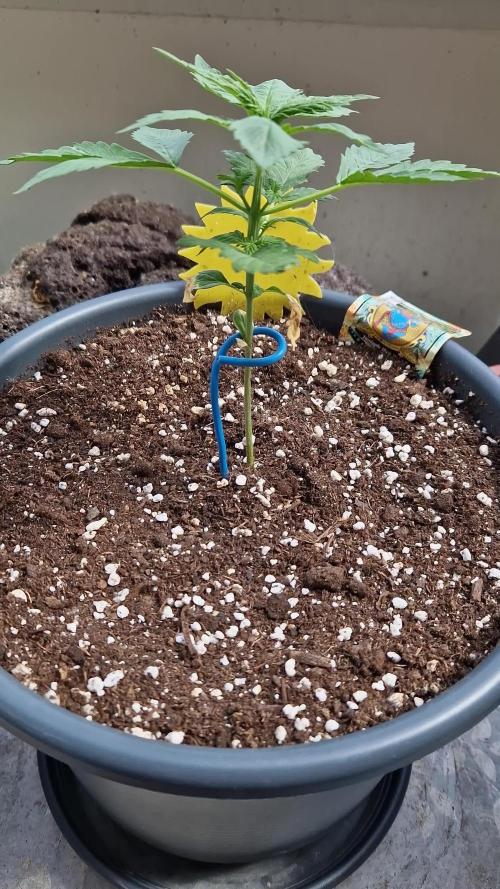
Pretty simple first week! Seed took 3 nights for the taproot to pop and it was planted in its final pot on day 4. On day 6, it finally popped through the soil and on day 7 the little sprout is starting to grow up. There is a small piece of seed casing left attached. Going to leave it for a day or two. If it doesn't fall off, I'll do it myself.
Thanks for stopping by! 🥦

Likes
2
Share


@StonedBay
Follow
Flipped to flower 26/2. have a lot of the lower sites developing nicely. let's hope flowering goes well.

Likes
1
Share


@BruWeed
Follow
Se secaron rápido. Los cocos son pegajosos y tienen aroma muy fuerte.
En humedo me dio 150g en total. Tengo que esperar que se sequen para ya saber el resultado final.

Likes
11
Share

@3rnest
Follow
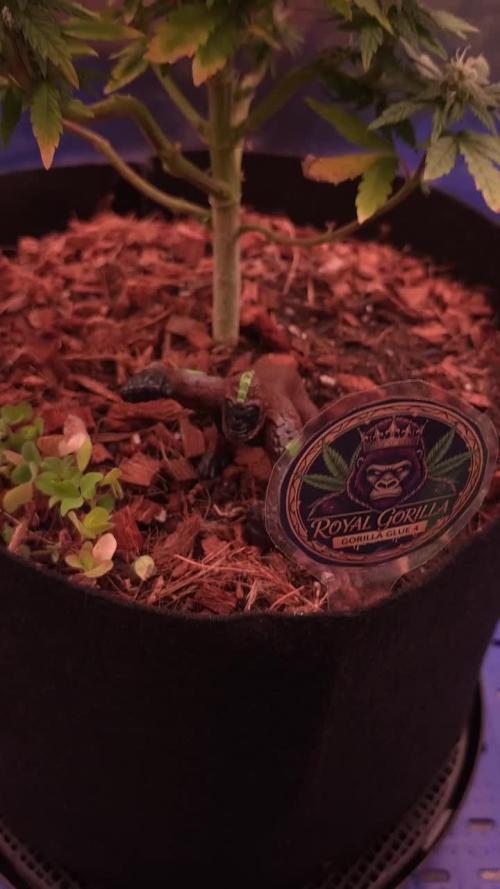
Die Blüten werden jetzt schön harzig und praller, auch der Duft ist kaum noch zu verbergen.
Royal Gorilla ist jetzt schön klebrig und der Haschischgeruch ist deutlich zu riechen. Der Duft hat etwas von Kieferharz und Diesel.

Likes
1
Share

@Manball
Follow
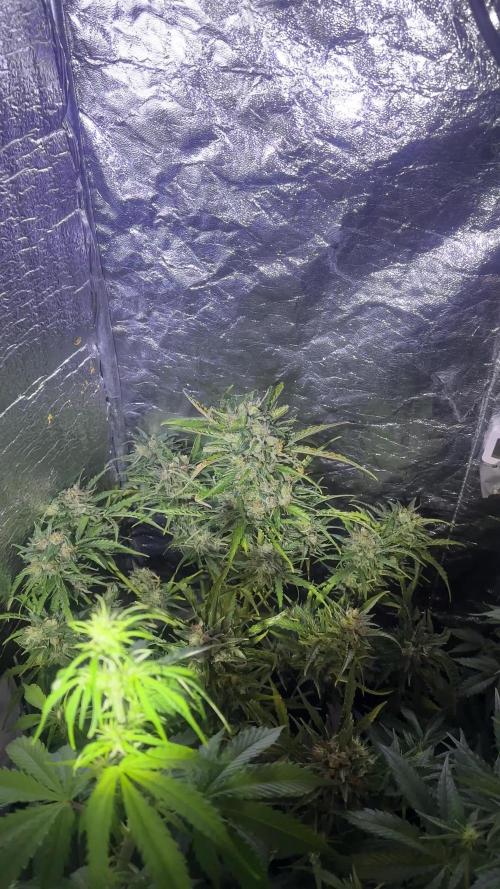
This adoptee has been growing nicely, although she suffered from stress because she wasn’t taken care off very well (she & other had a to find new
Homes).
But after having it for 4 weeks, now entering the 5th week (of flowering, I Guess)
We are getting closer and closer to harvest.
Today’s pictures are from Sunday, we are maturing well :3 there will be only 3 more feeds with nutrients, then flush, an wait for the ideal time to harvest.
Likes
35
Share


@HAN_GROWER17
Follow
Penultima semana de FLoracion, ya comenzaremos con el lavado de raices, se siente bastante el olor que emana de las plantas. Pero este olor es mas a fruta, olores dulces bien marcados, el olor me recuerda mucho al mango
Likes
4
Share


@lotero
Follow
Las amnesia están malitas. Ns exactamente por qué es. El único fallo que creo haber cometido ha sido regar de más, supurando por abajo un par de veces.
He regado cada 4-5 días (muy poco) así q ns si el sustrato está muy compacto y por eso no traga ni como airearlo

Likes
1
Share


@Dailydabs420
Follow
Very happy so far. Been growing nicely. Topped mid week and will be adding in some tie down spots in the coming week for some LST. Daily checks for PH keeping it just about at 5.7 the entire week.

Likes
9
Share

@TrickzGrowz
Follow
Servus Moin!
Die Pinapple Slush XL geht richtig in die Höhe! Die Woche bekommt sie wieder schön Dünger und dann mal sehen wo es hingeht.
Likes
14
Share


@Esoteric_growing
Follow
Swelling up and right on track for a good result, still showing signs I pushed them a little hard with the tip burn but nothing I can do about that now