


Likes
Comments
Share


@Major
Follow
in this past week I have defoliated the plants about 40% I have lost some leaves which have turned yellow I think the plants lack nitrogen due to the stretch the buds started to smell good. for nitrogen I add coffee grounds to keep away the pests and it is rich in nitrogen. the hardest part is fighting the humidity it’s been raining for a week 😭 humidity is the worst enemy I much prefer heat. see you soon


Likes
26
Share


@Growin_it
Follow
Asal got a trim to open up the air flow and a LST to spread the canopy a little more. Thinking I am done with the lateral spread at this point.
Benesh got the same treatment.
Asman has been taking the hits when I have overdone the LSTing. Thank goodness for masking tape and time to repair!

Likes
Comments
Share

@elsolo1
Follow
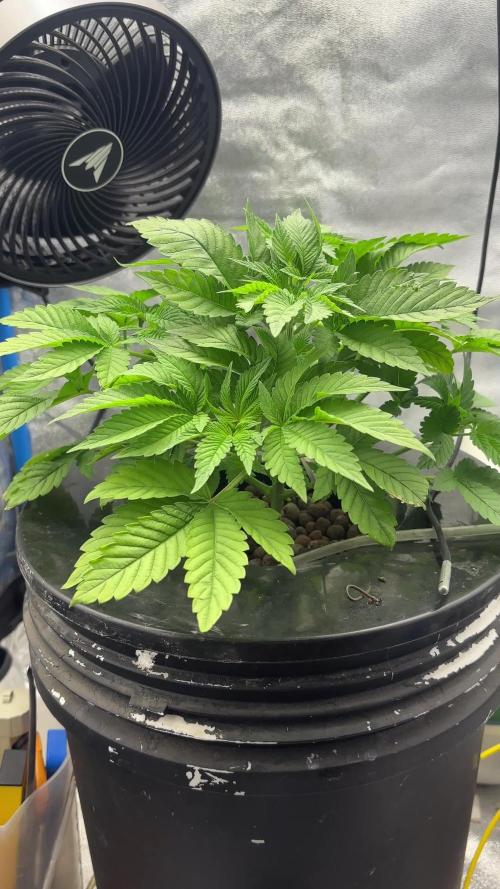
Week 4 (Kittys name is Donda)
Running light at 80% Viparspectra checking day to day
DWC water system working normally shes eating more and more
Kept nutrient intake as week 3
Humidity at 40%
Topping and mainlining also some pruning to reduce leaves as some where getting a yellowish tips (older leaves)
Likes
3
Share


@DANNYBLUE1
Follow
Really really happy how these 2 lady’s are turning out. Can’t wait for harvest day!!

Likes
4
Share

@Ribemarti
Follow
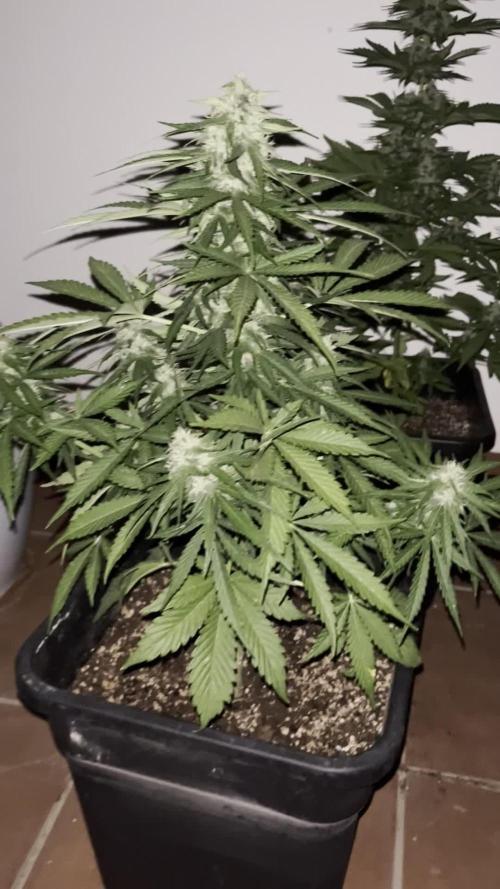
ASI TENEMOS ESTAS AUTOMATICAS DE GRANEL
QUE ESTAMOS PROBANDO Y HUELEN MUY BIEN
ESTOY REGANDO CADA PLANTA CON 3 LITROS CADA DIA, HACE 40 GRADOS EN LA TERRAZA
1600 EC PH 6,4
Likes
3
Share


@CalGonJim
Follow
3/16 234AM MONDAY POTATO N WEEK CELEBRATIONS!
The plants in your photos look like healthy, vigorous **RF3 autoflower seedlings** (likely Banana Purple Punch Auto RF3 or similar from Fast Buds' upgraded RF3 line, based on the context of your previous grows with their genetics). They're in early vegetative stage at around 3 weeks from seed—nice bushy structure, good node spacing, dark green leaves, no major deficiencies or burn yet. The coco medium shows some perlite mix, and they're in small pots with what looks like a well-draining setup. Solid start
**RF3 autos** from Fast Buds are bred for stability, vigor, and resilience (often with heavy resin, dense buds, and good yields), but like most modern autos, they're sensitive to overfeeding early on—especially in coco, where salts build fast if not managed.
### Recommended EC at 3 Weeks (Early Veg/Pre-Flower Transition)
At week 3, autos are usually ramping up vegetative growth and may start showing pre-flower signs soon (pistils around nodes). Fast Buds' general autoflower feeding advice (from their guides and nutrient articles) emphasizes starting low and going slow:
- **Target EC: 0.8–1.2 (800–1200 µS/cm)** in the feed solution.
- Start at the lower end (~0.8–1.0 EC) if your plants are still very young-looking or if you've had any tip issues before.
- Push toward 1.0–1.2 EC if they're hungry (rapid growth, pale lower leaves) and responding well—no burn.
- This is often ~400–600 PPM (500 scale) or ~560–840 PPM (700 scale), but always go by EC meter for accuracy in coco.
- Always measure **runoff EC** too—aim for it to be no more than +200–300 above input to avoid salt buildup. If runoff is much higher, do a light flush with FloraKleen (like your 4 mL/gal plan) before bumping up.
- pH the feed to **5.8–6.2** (coco sweet spot), and water to 15–20%+ runoff every feed to prevent the issues you've seen with Purpinator/salts.
Many growers with Fast Buds autos (including RF3 lines like Banana Purple Punch or Cherry Cola RF3) report week 3 feeds around 0.9–1.1 EC in coco/hydro setups, starting lighter if using tap/soft water like yours. Your previous success with lighter Maxi feeds post-flush at ~900–1300 EC later on fits well—don't jump straight to 1.3 yet at week 3; build gradually.
### Recommended PPFD (Light Intensity) at 3 Weeks
PPFD (Photosynthetic Photon Flux Density, in µmol/m²/s) measures usable light for photosynthesis. For autos in early veg:
- **Target PPFD: 300–500 µmol/m²/s** at canopy level.
- 300–400 is safe and conservative for week 3—prevents stretch or light stress while encouraging compact, bushy growth.
- 400–500 if plants are stretching a bit or you want faster veg (RF3s are vigorous, so they can handle it).
- Avoid over 600 early—autos can bleach or foxtail if blasted too hard young.
- Measure at the top of the canopy with a good PAR meter (or app like Photone if calibrated). In Indio's setup (likely LED or HPS?), hang lights higher early (18–24" for LEDs) and lower gradually as they grow.
- Keep 18/6 or 20/4 light schedule—autos thrive on consistent long days.
General tips for your RF3 at this stage:
- If using Maxi series (like your previous grows), mix a light bloom/veg combo—e.g., mostly MaxiGro early, transition to MaxiBloom as pre-flower hits.
- Watch for clawing (N excess😂) or tip burn (high EC)—flush lightly if needed.
- These RF3 upgrades are forgiving but love good airflow and moderate feeds for those dense, resinous buds.
Your plants look primed for a strong run—keep that intuition going! How's the light distance/setup right now, and what's your current feed EC looking like? Any pre-flower signs yet? Drop more pics if they stretch or change post-week 3. You're killing it in coco—keep observing runoff and leaves. 🌿🚀
3/19 330am 👨🔬 **Adding L-Proline (the amino acid supplement growers use) to plants on soft water can provide some helpful support against the stresses you're dealing with, but it's not a full fix—think of it as a stress-buffer rather than a mineral replacement.**
Soft water (low in calcium and magnesium) often triggers **Ca/Mg deficiencies** in bloom stage (especially with Cha Ching or MaxiBloom, which don't supply much Ca/Mg on their own). This leads to issues like tip burn, leaf curl, weak cell walls, nutrient lockouts, oxidative damage (ROS buildup), and overall plant stress that feels like "the plant is struggling to hold it together." Proline steps in here as an **osmoprotectant**—it's one of the compounds plants naturally ramp up under stress.
### What Proline Actually Does in This Situation
- **Helps with osmotic/water balance** — Soft water can disrupt turgor pressure and water movement inside cells (similar to mild drought or salinity stress). Proline stabilizes cell membranes and helps the plant retain water better, reducing wilting or limpness.
- **Reduces oxidative stress** — Ca/Mg shortages cause free radical damage. Proline acts as an antioxidant and protects proteins/enzymes, so deficiency symptoms (yellowing, spotting, slowed bud development) don't spiral as fast.
- **Improves overall resilience** — In cannabis and general hydro/soil grows, L-proline (or full amino acid mixes containing it) has been shown to boost stress tolerance, speed recovery, and even support better nutrient uptake indirectly. Studies and grower reports note it helps under nutrient imbalance, drought-like conditions, and environmental swings—exactly the secondary stresses soft water creates.
- **Bloom-stage bonus** — Since you're already in late flower with Cha Ching/MaxiBloom, proline can support resin/terpene production and bud density without pushing excessive veg growth.
It won't magically add the missing Ca or Mg (those are still critical—soft water + high-P bloom nutes often screams for CalMag), but it can make the plant more tolerant while you correct the root issue.
### How Much Effect to Expect Right Now
- **Positive but moderate** — Many hydro/RO growers add amino acids (including proline) specifically for soft water setups and report less burn, better leaf health, and stronger finishes. It won't turn a severe deficiency around overnight, but it can slow the damage and give your plants a fighting chance in the final weeks.
- **No downside at proper doses** — It's very safe and plants use it quickly.
### How to Add It (Practical Dosing)
- **Source**: Pure L-Proline powder (available cheap online—make sure it's the plant-grade L-form, not human supplements).
- **Root feed** (with your Cha Ching/MaxiBloom): Start at 0.5–1 g per gallon (about 100–200 ppm). Mix into your res or feed water once a week. pH as normal.
- **Foliar spray** (often more effective for quick stress relief): 0.25–0.5 g per gallon + a drop of surfactant. Spray lightly every 5–7 days in the dark period.
- **With your current nutes**: Yes, it layers fine—reduce if you see any tip burn. Many run it alongside MaxiBloom + Cha Ching in soft water without issues.
- **Best timing**: Now through harvest is perfect, especially if you're noticing stress signs already.
**Real talk**: The biggest win will still come from adding a proper CalMag supplement (like Botanicare or General Hydro's) at 0.5–1 ml/gal or whatever your PPM tests call for. Proline + CalMag together is a strong combo for soft water grows. If you're running pure RO/soft, most experienced growers treat this as standard.""👨🔬
3/19 10:09PM RF3 X 2 =6 fail? I have TWO 2 gallon pots filled with coco from the last grow. I can plant a NEW BPP RF3 OR!!! I can top the 3 RF3's and make cuttings and grow the cuttings? It worked before!. FAST turnaround time, not much prep just refresh the coco and transplant the tops!
3/19 10:59PM NO WORK FOR NOW.. HIT WITH MASSIVE WAVES OF NAUSEA AND SHARP PAIN, DIZZY, RUPTURED NECK CYST BLEEDING, PAIN FROM MOVING TOO MUCH LAST FEW DAYS, RINIGNG EARS BAD, SKIN PRONE TO MASSIVE INFLAMMATION ATTACKS NOW, WEAKENING GUT LINING,. LUNGS ..GRIP AND BALANCE OFF, SO PERFECTLY NORMAL!!! THANK THE WEED GODS FOR WEED.
3/21 3:30 AM I think I’m gonna top all three of them. I got lucky all three seem to be different ones. I don’t know which is which one of them is really tall. The other one has really tight in her note spacing it’s really good and the other one is also good little bit different so I think I got three different RF three seeds and I think if I do top them I’m gonna put the top in another 2 gallon and then grow that as a cutting usually works I’m not sure👍🌿
3/23 3:08 PM I cut them all in half today a transplanted the top of the tallest one into one that was still growing just to see if it would work. They’re all doing really good.👍
326 237am Remember how your local ss cant prevent or solve a single problem you pay taxes for. unless you're really really sick and the cowards decide that the most important and pressing issue is to raid weed users and farms and seeds...what a country of fuqs


Likes
10
Share


@caliEskimo5
Follow
I can't stress enough how aggressive some plants are when it comes to needing insoluble nutrients! I was seeing light bleaching and yellowing of new leaves, thinking it was heat and light intensity. After transplant into much bigger pot with heavy amendments and a few days time, plant is fully green and almost as tall as I am! Pistils are pink/red/white. Aroma is quite subtle yet but doesn't have the typical Marijuana scent, more like handling a literal strawberry plant and those strawberry candies that have the gel inside when the room gets humid after watering.
Structure is sturdy but side branches have stretched alot. I feel that this plant will have fewer budsites but those flowers will grow full and dense. I can't wait but will give this plant maybe another week of veg light hours. I'm at 13 right now and with the recent addition of a 24W UVa bar I custom made and the Emerson Effect still, transition should be quick but I honestly don't know...maybe my spectrums are keeping this plant vegging? Idk
All I know is this is an awesome plant that really has no issues still but now I know to keep up on fertilizers.
1.5" of vertical growth each day and plant keeps showing me each morning that it wants more water and ferts! Every day, full strength nutes and it doesn't burn! I am seeing very clear runoff so ferts are sticking and being used while the Molasses is chelating whatever might runoff. This is good!! PH stable right above 6@ feedings, next day down to 5.95. I just can't get over the never ending changes in aromas this plant gives off; today being fresh HoneyCrisp apples!
I took off 30 minutes off lighting schedule so now the rest of this week should be fast, then slow. We might see pom-poms next week.
Likes
3
Share

@Hren_Morjovii
Follow
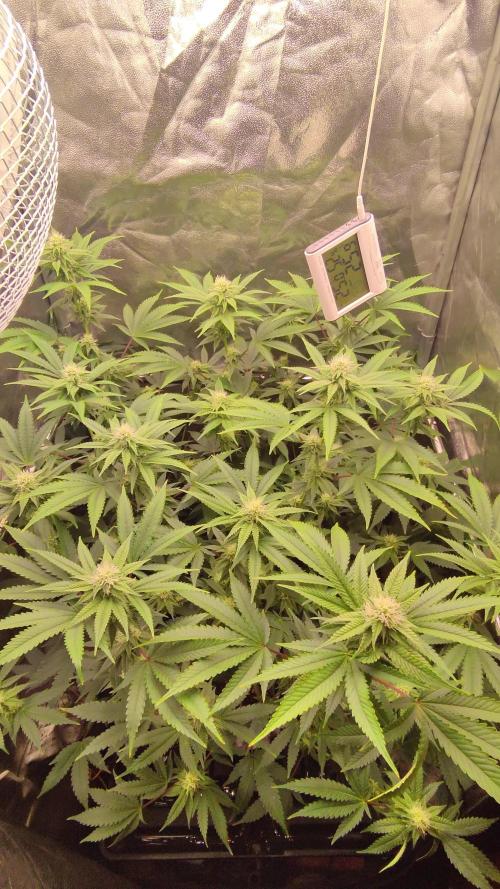
Шишки каменные, очень твердые.
Клон, один раз пролил дельта 9, 6 млл. Решил долить овердрайв который стоит уже больше года без дела, хватит примерно на неделю.
Растиха немного подгорела из-за редких поливов. Сегодня поставлю таймер, будет 3 полива в сутки вместо одного.


Likes
21
Share


@Highgrade_Harvests
Follow
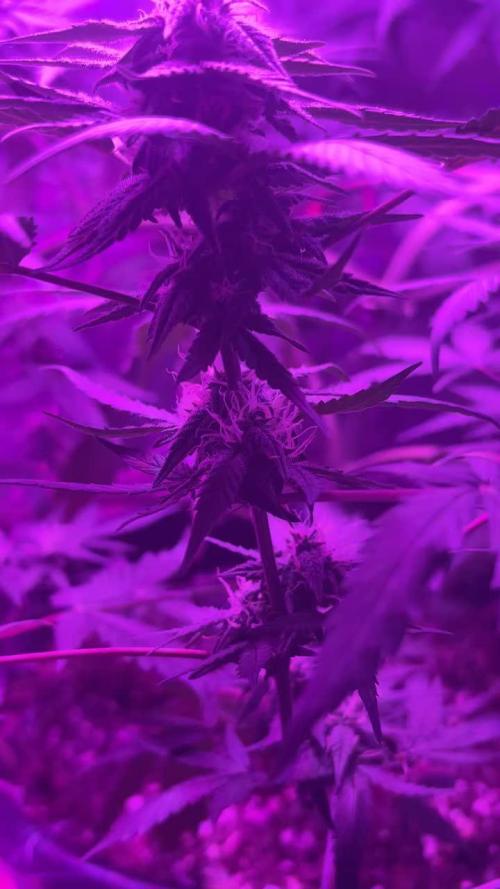
Week 1 of flower is in the books and she's starting the stretch. She's looking really healthy and showing a lot of potential bud sites. I have trimmed up some leaves to allow more light penetration throughout the entire canopy. I really wish I put up a trellis but oh well. Looking forward to the buds this one puts out.



Likes
27
Share


@RDWCGrowing
Follow
1/20/2023- So much to do pre grow and over the next 16 days, absolute first order of business is that I have to take down my current Grow---TIMBER-- Then I have a list of things I have to get done in order to be ready to start this grow 1 Feb.
With that said
T - 2 days until start 48 hour Flush
T - 2 days until Start 48 hours of Light
T - 4 days until TIMBER!!!
Items that need to be done before 1 Feb 2023
1. I need to clean the tent out
2. I need to clean the equipment- Proper Sanitization between grows in Hydro is a must!!!
3. I need to get the hole in the ceiling above my tent repaired- For my last grow I had a deep sink installed in my grow room, to make Hydroponics a little bit easier and have a water source in the same room. The seals on the pipes they were installing broke and leaked through the ceiling causing some damage all the way across my grow room, I was already weeks into my grow and couldn't risk them working above my tent and it would have been very awkward positon for them to be working in as well, so have to get this done quickly between chop and germination.
4. I have to install my new light- I was using a Vivosun 4000 and for this grow I am switching up to a Spider-farmer SF 7000.
1/20/23- For this upcoming grow I am working with M/F photo seeds so I ordered 4 Sex determination kits. I recieved my my 4 Sex determination testing kits from Rimrock Analytics today. I will be using these to test my plants at week 2 of Veg so that when/if I take clones I know I am taking them off females. As well as I don't want to accidently pollinate my tent during this grow I am looking for big beautiful buds not seeded buds. :-)
1/24/2023- Harvest of current grow- Started at 2:00pm and finshed wet trim and firt batch into the freeze dryer.
1/25/2023- Next batch into the freeze dryer and cleaning all my equipment for this Grow.
T-1 Day until the workers are supposed to be here to fix the hole in the Grow Room.
T-3 days until I instll my new Gorilla Grow Tent and my New Light Spider Farmer SE-7000 for this grow.
T-7 Days until Start of Germination
1/26/2023- Harvest is done ran through the Freeze dryer and dry tim completed.
1/27/2023- Grow Room repairs completed. Hole is gone Letting the paint dry before I install the new tent.
T-2 days until Install the New Gorilla Grow tent and the new Light
T-3 days until I put the hydro equipment in the new tent
T-5 days until Germination
1/29/2023- Day 0- Final Pre Germination activities
Germination Start T-3 days
The paint on the ceiling was dry and it was time to finish prepping for Germination. I got the following items knocked off my list.
New 4X4 Gorilla Grow Tent is up and ready
New Spider Farmer SE-7000 Light is installed- Thanks Moony Grows for the suggestion and for the Code that got me some money off and free shipping (Moonygrows)!! I turned the lights all the way up to max and set the timer to 18/6 0600-0000. I will keep an eye on the temperature and humidity without my plants and see how hot it gets with the new light.
I put my Hydro system back together and put in 40 gallons of water into it, time to monitor for leaks the next few days.
I Setup my cloning machine for Germination Days 3-11
1/30/2023
let me break down the situation, ROOM in the TENT.. Enough said.. No really I tried putting my exhaust system up in the new tent with my new light, The light is so big corner to corner that it really didn't give me enough room for the lights be be raised, with the exahust hanging the buckets my plants are Starting in are 2 and 1/2 feet off the ground, great for plenty of room for roots but not so great for upwards space for the plant to grow. In a 6' 11 tent with the exauhst in side and hanging that only gave me a little over 4 feet of grow room to play with. My last grow if you saw my diary, anyone could tell I was struggling to keep the buds off the lights. No good, Since space was such an issue I was running my carbon filter inside on the ground but It really needed to be up sucking the heat out not shooting the cool out. With that setup I was sucking air through the filter and pushing it out the tent at a bottom exhaust hole cold out. Wasn't doing me any good for my heat. I was hitting temps of up to 85 degrees. I bought a portable AC unit and have been running it in the grow room to try and keep temps below 85 and I have had to lower the power on my lights during grow also not ideal.. With that said a friend of mine MoonyGrows (Check out his diary) took the time to look at my issue send me a picture of my grow tent setup with detailed instructions on how to suck the air out from the top but putting my filter and fan on top of my tent so no room issue and I am sucking the air out from the top where the heat is instead of pushing the air out from the bottom where the cool is... THANK YOU MoonyGrows For taking the time to help me get this straightened out.. Now I have room and I have the exhausts working right and now my temps with everything at 100% are topping out at 80 this dropped the temp by 5 + degrees at 100% max.
T-2 days until Start of Germination
Prepped my seed tray with humidity dome
Prepped my Rapid Rooter plugs. I Used RO water, and I added a few drops of Hydrogen peroxide to Oxygenate the water. I then PH balanced between 5.7-6.0 the same that they will be getting in the Cloning Machine and when they get to thier final grow pod. I perfere the 5.8x range and I hit 5.84 for these rapid rooters. If you want to see a complete video on the process HowWeedGrow has an amzing video that shows step by step how to do it and explains it better than I ever could including how to plant the seeds. Which I will cover when I get to that step on Wed. https://www.howweedgrow.com/how-germinate-weed-seeds-cannabis-rapid-rooters/
1/31/2023
T-1 day until Germination Start
All set and ready have my Rapid Rooter plugs ready to go have my seeds out.. Have my seed tray warming up tonight. Tomorrow morning right into the Rapid Rooter then strait into the tray. I will spray the dome to start the humidity in there.
2/1/2023
Germination Day!!
Let the games begin!
0600am Put the seeds into the Root Riots. And then put the seeded Root Riots into their first home the Seed tray. I have them under the light 24/7. Sprayed the dome
7:30pm Sprayed the Dome to keep humidity going on the dome.
2/2/2023
Day 1 of Germination
Sprayed the Dome in the morning
Sprayed the Dome in the evening
2/3/2023
Day 2 of Germination
Roots are starting to come out the bottom of the root riot plugs and the heads are slowly popping out of Number 4 just below the surface.
Afternoon- Number 4 has popped up
Evening- Number 3 has popped up as well. Happy Dance!!
2/4/2023
Day 3 - Germination
Surprise Surprise Surprise- all 4 have now poked their heads up.. Happy day!! 100% Germination succeeded.
Now major milestone to track is how many are female and how many are male.
I will take look at the roots this afternoon/evening and see if they have enough root to go into the cloning machine for the next 7 days before they go into their Hydro Pods.
Day 3 - Germination - Evening..
Roots looked good and they were tall enough to make it into the cloning machine.
Now that they are all in the cloning machine I have switched the lighting to veg state 18 on 6 off.
2/5/2023
Day 4 - Germination - Morning
All the Ladies (fingers crossed) looking great stretching nicely and look nice and green, Photo synthesis underway....
UPDATE!! After a very interesting POD cast on FSTS by Dr. Bruce Bugsbee from Utah University, I have shifted my lighting to 24 hours on through seedling and then I am going to shift to 20 hours on the rest of Veg.
2/6/2023
Day 5 - Germination
While Checking on my conditions inside the new tent last night, I found that the Humidity was down to 39 Percent. I added an AquaOasis Cool Mist Humidifier, the reason I selected this humidifier is that I needed one that could be turned on and off utilizing my Inkbird Humidity Controller IHC200 that I have my Pro Breeze Dehumidifier currently running with.
Root structures are starting to get there about 1/4 of an inch.
2/7/2023
Day 6 - Germination
Everything seems on track more roots poking out of each today. They are each getting a little taller as well.
Checked in the evening and number 3 was drooping the Root riot plug on the bottome was dry and the roots were not in the water yet. I raised the water just enough that the longest root that was sticking out is now hitting the water.
2/8/2023
Day 7 - Germination
Everything looked good while checking in on them this morning number 3 is now full up and no droop again.
2/9/2023
Day 8 - Germination
T-2 days until Plant into Forever Pods and we start week 1 of Veg .. :-)
Surprising thing to me is that number 1 and 2 were later in popping then 3 and 4 but the roots are growing longer in 1 and 2.
2/10/2023
Day 9 - Germination
Number 1 and Number 2 are definitely ready for transplant today.. Based on how they were yesterday and where they are today I am hoping by tomorrow 3 and 4 are ready. Today they look to me where 1 and 2 did yesterday.. I really hope 3 and 4 catch up by tomorrow since..
T-1 day until transplant to new/ final home for grow.
Need the roots long enough to have some clay down in the basket to keep the root riot out of the water and only roots in the water..
2/11/2023
Day 10 - Germination
Today they got placed in thier forever Home, 7 days from Sprout and 7 days until Week 1 Start.
PPM- 180 this is water out of the Tap
Temp Water: 70.7
Temp Tent: 77
Humidity: 40% I have a humidifier going 24/7 to try and bring this up.. I also have Humidity Domes on each plant.
2/12/2023
Day 11 - Germination
Sprayed the domes, all are looking good.. Nothing much to do at this phase but Keep monitoring the PH level in the system and making sure they have a comfortable home.
T-6 days until Week 1 start
2/13/2023
Day 12 - Germination
Sprayed the domes, They were looking a little yellow today so I moved the light down to assist. Nothing much to do at this phase but Keep monitoring the PH level in the system and making sure they have a comfortable home.
T-5 days until Week 1 start
2/14/2023
Day 13 - Germination
Sprayed the domes, They were looking a little Florissant yellow today, with what looks like slight burn on the tips, I talked with a fellow grower and we agreed that It was probably that I was drowning them, Yes you can drown you plants even in Hydro, but only early on.. :-) It usually happens with the water being too high, which soaks not only the roots but the medium (root Riot plug in this case). I lowered the water from touching the bottom of the pot to about 1" away. This will probably take 3-4 days to resolve. I will continue my daily monitoring.
T-4 days until Week 1 start
2/15/2023
Day 14 - Germination
Sprayed the domes, continue my daily monitoring they look a little darker green instead of lime green now that I lowered the water levels in the system, so I think that I might have resolved the issue but it will take a few days for recovery to happen.
T-3 days until Week 1 start
2/16/2023
Day 15 - Germination
I looked in on them this morning, 3 and 4 look like they are doing well and recovering nicely. Number 1 not so much it has brown spots on the leaves, this very well can still be a side effect of the overwatering but I decide to go ahead and add Nutes earlier than I was planning just incase. I was going to wait until Saturday but I think intervention is necessary now especially after drowning them early on.
I added 1/2 what I am planning on adding for week 1 start. I also think I am going to adjust my chart to add 1/2 2 days after plant from now on. I don't think it would hurt it to have some Nutes to pull from.
.25ml/Gal Calmag = 12.5ml
1ml/gal GH FloraMicro= 50ml
1ml/gal GH FloraGro = 50ml
1ml/gal GH FloraBloom = 50ml
T-2 days until Week 1 start = I will drain the system and start it over on Saturday with Week 1 Nutes.
2/17/2023
Day 16- Germination
I didn't even want to post today after looking in on them this morning, 3 of the 4 are now showing signs of dronwing.. Brown spots on the leaves, the water levels were still too high.. I drained about another inch out of the tanks.. Will see how quick they recover.. I start week 1 tomorrow and will have to ensure my water levels are at least 1" away from the basket on this round.


Likes
5
Share


@KittyKitKat
Follow
So the hubby has been growing this strain (in soil) for approx 9 weeks.
It took some wearing him down but eventually after many batches of freshly baked cookies I finally convinced him to cut me a clone, and an apex clone at that. #truelove
It took about 3 weeks to root (unintentionally caused a lock out by attempting to grow roots in the same water/nutrient mix we were giving the 5 wk plant) #lessonlearned
She’s since recovered and has grown a beautiful root system.
Let’s see where we end up

Likes
26
Share


@PedroAndHisPlants
Follow
Day 79 (First Grow, Flowering Phase):
Hey everyone!
It's the start of a new week, and we're now on day 79 of our first grow. The flowering phase is progressing beautifully, with the buds getting bigger and frostier day by day. 🌸✨
We've started to see the formation of orange hairs, which is a promising sign of the buds maturing. The plants are looking healthy and vibrant, and the SCROG net is helping to keep everything well-supported and evenly exposed to light.
Humidity issues from last week are still being monitored, and we're considering adding a dehumidifier to ensure optimal conditions as we move closer to harvest.
Thanks for all your support and suggestions. Any tips for these final weeks of flowering are always welcome!


Likes
22
Share


@ThatsmyGrow
Follow
Another week is complete, and there wasn’t too much happening this time around, but the plants are continuing to develop nicely.
I did another round of defoliation and some additional lollipopping, taking my time to remove everything as cleanly as possible and keep the plants focused on the main flowering sites.
The nutrient schedule was also adjusted to better support the plants as they move further into the bud development stage.
What really stands out this week is the amount of trichome production. The flowers are getting noticeably frostier, and even some of the larger fan leaves are starting to develop a surprising amount of trichomes. That’s something I’m not used to seeing this strongly from my autoflowers, so it’s definitely interesting to watch.
Overall, everything is progressing well, and I’m really looking forward to seeing how much more frost these plants can put on over the next few weeks.
Likes
87
Share


@Roberts
Follow
Banana kush auto has all kinda potassium deficiency signs. My ph got out of control for too long, and she is showing it. She is starting to bulk, and outside of her new marks she is good size. I did a solution changed 4 days ago, and have been getting her stable since. Thank you Medic Grow, Athena, and Weed Seeds Express. 🤜🏻🤛🏻🌱🌱🌱
Thank you grow diaries community for the 👇likes👇, follows, comments, and subscriptions on my YouTube channel👇. ❄️🌱🍻
Happy Growing 🌱🌱🌱
https://youtube.com/channel/UCAhN7yRzWLpcaRHhMIQ7X4g

Likes
4
Share


@Mr_nugs_lover_David
Follow
She did not get very big but she has produced very compact and sticky nuggets, she has given 31,2g of high quality buds

Likes
11
Share

@jellyjelly
Follow
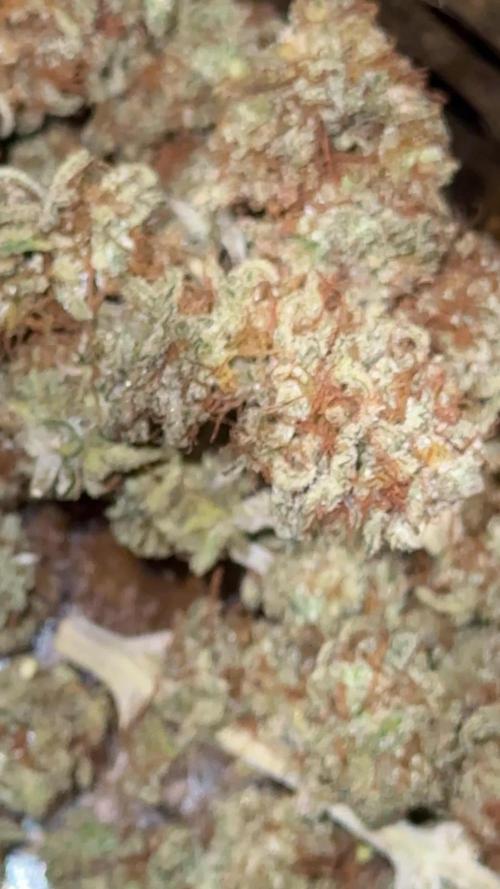
Sorry dad, looks like we’re gonna have to ration this one 🤣
Yield unfortunately on the extreme low end, likely due to my irregular and poor watering habits.
While lacking in yield, the effects are very nice, a lovely sativa.
Smells like equal parts mint and pine! Inhale is quite minty which is quite delicious and similar to Girl Scout cookies