


Likes
5
Share


@pzwags420
Follow
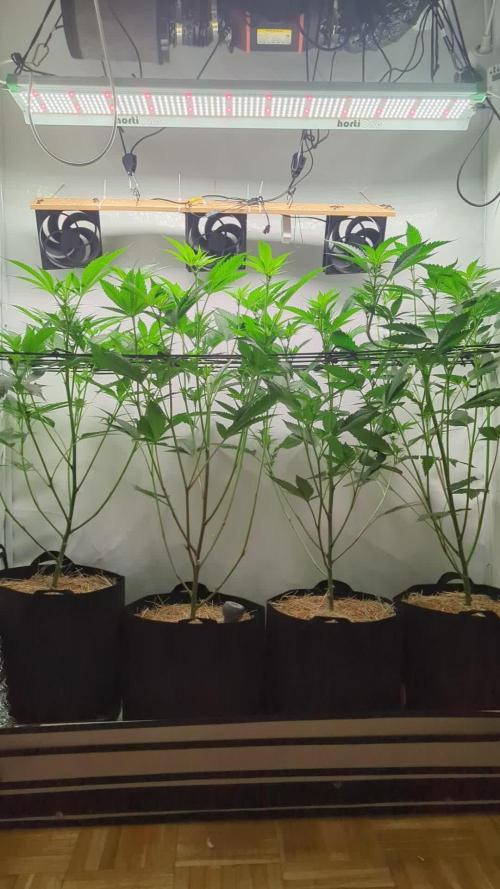
I had to top Cantaloupe haze and White widow as they were too close to the lights and I didn't want to loose any ppfd on my lowers. My GSC seems perfect for not topping. next time I would top those strains at least once. I have been flushing the CH and getting run off around 1200ppm which seems like the max she can take the others like it stronger so I have been flushing them every 2-3 days. CH is tough to keep happy but will continue to monitor. All plants are in week 4 of flower 12/12 from seed.


Likes
16
Share


@eldruida_lamota
Follow
Lo mismo que Haribo, tuve retrasos en el crecimiento ,carencias de nitrógeno, la humedad estaba relativamente alta las primeras semanas de floración … un desastre y aun así la calidad de las flores no defrauda.
Lastima lo del Foco a ver si conseguimos solucionarlo ya, porque así la producción es mínima.

Likes
6
Share

@gentlegiantgrows
Follow
Added a trellis for support this week, don't want them flopping around the tent in late flower.
Stretch is slowly coming to an end amd preflowers are formed. Impressed again by the rapid transition with only 8 mins of Far Red.
Gave them the luxury treatment with some mycorrhizae, bacteria, algae and melassis, they seem happy.
PPFD is currently at 600-750, going for 800-900 in bulk phase.


Processing
Likes
6
Share


@Jack_Greenstalk
Follow
3 Plants. 3 citrusy phenos!
#1 : First to sprout rapid rooter. TASTE: Pure Lemon front end into hashy cakey afghani. refer to this as the "lemon hashcake" phenom very dense, beautiful nug structure. Yielded 24.5 dry grams of primo smoke. Uplifting more cerebral sativa high with some punch in body as well. happy stress reliever for sure! has some "gassy" or fuel notes to it but very subtle
#2 Tangerine pheno: I orginally thought sour 76 was sour diesel x 76 Afghan til i read hso marks post on uk420 forums saying its cali sour d x 76 afghan. cali sour d is cali orange x sour d x mexican sativa. and it shows in this pheno which smell and taste pretty similar to tangie my friend grows which is cali orange x skunk 1 (mexican sativa x Colombian sativa x afghan indica) pretty similar genetics roots! Smell: Sweet tangerine 🍊
Taste: Just like tangerines 🍊
Medical Effects: Hybrid feeling effects felt both in body and mind. Stimulating mentally, relaxing in the body. Mild pain relief generally with amazing relief improving feeling in joints (reduced swelling or irritation in otherwise aching areas, loosened tension at joints)
Notes: After breaking up or grinding the sweet tangerine open jar/bud smells turns more sour tangerine with very subtle gas aroma. This one is scary strong! I am an all day regular smoker of the most potent buds I can find, and I never make it thru 1 bowl of this without long breaks after each hit. Starts off strong and creeps to EXTREME psychoactivity. Not for the faint of heart this one might not be best for "new smokers" 😎🔥🔥🔥 yielded 26.1 grams if id have taken clones this woulda been the keeper of the batch, but I got more to check out in future run :) and I got a cloner and veg chamber to start keepin the keepers now I know i like the strain!
#3 Lime Fuel pheno: Smell: Lime🍈 and gas ⛽
Taste: lime
Medical Effects: Cerebral uplift. Creeper. thought it was weakest on initial smoke but 10 minutes in it end up being strongest high of all 3. super wicked sativa, buzzy uplifting all similar to Cinderella 99 or strong jack herers this has almost a "scary high" first few times but once you get used to it or microdose, it is a super fun creative medicine. Helps my arthritis pains and gives me the clean up the house kind of high
Notes: Foxtailed, lowest yield of 3 sour 76's likely because its place directly under the light (perhaps didnt like too intense direct light) but is the most potent of the 3 as well. yielded 22.5 grams of dry
Likes
4
Share


@Dooskigrows
Follow
Everything is going great! Watering every fourth day. I’m spreading them out and trying to get a nice and even canopy. I also may add another small led later. Haven’t made up my mind on that yet.
Likes
3
Share


@The_Doctor_Green
Follow
Hola a todos mis amigos.
Este diario llego a su fin, pero pronto comenzare otro, de esta misma cepa, pero para exterior, quiero probar. Que tal se comportan afuera🙌🙌🤩🤩💪💪

Likes
233
Share


@Tropicannibis_Todd
Follow
🐶🐶🐶🐶🐶 👉Alrighty Then👈🐶🐶🐶🐶🐶🐶
We're 14 days in and we be moving along great 👍 I've now started some slight LST and began my nutrients plan 👈
We got some great growth right across the board on all plants 👈 All plants receiving at least a min of 600 PPFD
So we are back for another round 😛 But this grow is special because my big boy needs some love too , he's been getting on the old side of things and his hips have been giving him trouble so I've been buying CBD treats for him and it works great so 😉 👍
I've decided to grow this for my little buddy 🐶 so I can make him some Doggy 🐕 Treats and plus I've never tryed it myself and I really wanna give it a go👈 😊 so let's see what it's all about 👈
I will post the recipes at the end of harvest 👏
So Let's Do This
👉Soil Provided by ProMix.ca
👉Nutrients Provided by Agrogardens
👉Lighting Provided by MarsHydro.ca
👉Seeds Provided by Kannabia Seeds
Thanks my friends for the great support over the years 🙏 Happy Growing

Likes
8
Share


@Franz1234567
Follow
We will see, we hope...
littlest two different ladies in same strain.
Likes
1
Share

@JVKdopegrow
Follow
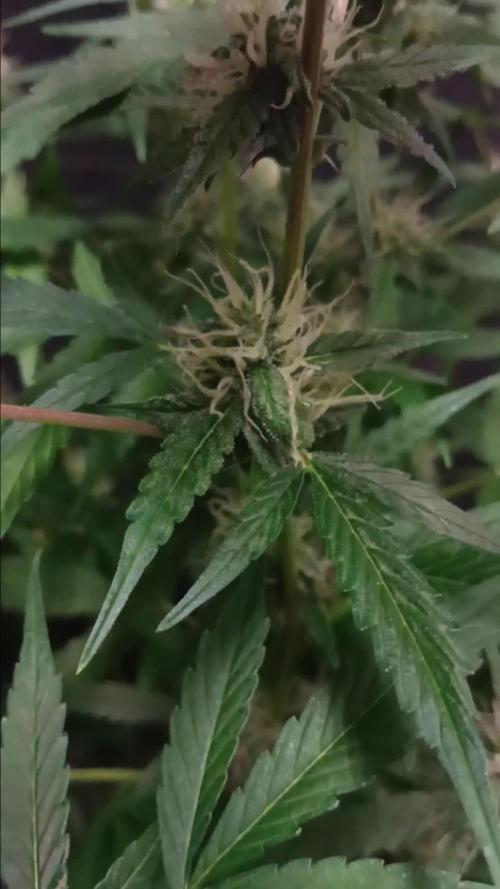
The stretch is over, all growth now focused on the flowers. The buds are beautiful and getting fat like a Peter Paul Ruben painting. Increased the bloom component of the nutes. Smells like candy.
Likes
10
Share


@Shefman93
Follow
Day 11 into flower, plant has transitioned quickly and didn’t stretch as much (thank God) as I thought it would heading into flower. It’s current size is 48 inches wide and 49 inches tall from the top of the soil.

Likes
10
Share


@barlobruz
Follow
08/04/2021
- I SEE PISTILLS!!! Really didn't think we'd make it this far 😅
08/08/2021
- Top dressed and watered w/ an AAEWCIF tea.
- Continuing to defol as necessary.
- Too lazy to date and re-organize all those photos through the phone.
- Photos taken from 08/02/2021-08/08/2021.

Likes
75
Share


@MisterZ
Follow
En une semaine, l'odeur est devenue puissante, un mélange de cannabis, de pin et de bonbons, c'est vrai. Elle est quasiment mûre au microscope. Je pense la laisser faisander encore quelques jours.
Bonjour les amis, pour rester poli,
Maintenant que j'ai compris comment fonctionnent les shorts 😀, je vais mettre l'essentiel au début. J'avais arrosé copieusement avant de m'absenter une semaine mais comme c'est une petite plante elle n'a pas tout bu ! Le sac est encore lourd. Je suis surpris du mûrissement très rapide😳, j'ai tardé pour le rinçage. Encore quelques jours de patience pour la récolte ! Les photos de cette semaine ressemblent beaucoup à la précédente avec un peu plus de résine.
A très bientôt, M.
Likes
167
Share


@DeepWaterGrower
Follow
⭐ TrolMaster tracking ⭐
I started to track my crop during week 15, when I got the Tent-X TCS-1 by TrolMaster. First impression was: this is too professional for me, I can't handle setting it up and using it well. Then I started reading some posts on Instagram, I visited their site and in 5 minutes my cultivation experience took a huge step forward with disarming simplicity, I couldn't believe it.
I have uploaded tracking videos from the TrolMaster app for each week from the 15th to the 19th, as well as the two weeks of drying stage.
⭐ Controller Chronicles ⭐
Day after day I appreciated the clarity and precision for data, access to all settings and instant readings by connecting a WIFI router to the controller's LAN port. I loved the possibility to dim my lamps remotely, or even automatically based on the temperature in the box!
🌱 GERMINATION (2 days)
Seeds in a glass of EC 0.4 tap water for 10 hours, then in root riots and under the lamp. They sprouted after 48 hours from dry seed.
🌿 GROWING STAGE (10 weeks and half)
I decided to give these plants a long vegetative growth and this allowed me to do a lot of training on both.
Starting from the 4th veg week I started with defoliation sessions every two weeks, for a total of four during the entire vegetative phase. The last defoliation was done a couple of days before the switch, in order to allow the lower parts of the plant to get as much light as possible.
Furthermore I did Topping on week 6, cutting the apical branch, then on week 8 I did Topping again on several sites, as well as SuperCropping on the highest branches to make the canopy uniform.
The light cycle I used is 18/6 and the last two veg weeks I lowered the light hours to 16/8 first and 14/10 then.
During the veg stage I made 4 DWC change, PH was always between 5.5 and 6, about EC I started with 0.6 and was 1.4 on the last veg week.
🌸 FLOWERING STAGE (9 weeks)
I started this phase after 36 hours of darkness, I then changed the DWCs solution (adding a flowering stimulator).
Then I mounted the ScrOG-net about 50 cm from the base of the plants and I wove the phenotype #1 through the net occupying at least 60% of the available space; the phenotype #2 stretched shortly after the switch and I used the net only to widen the central branches.
They showed the pre-flowers two weeks after the switch, then I made two defoliations on week 3 and 5 flo.
During the last four weeks of flowering (weeks 6-9) I simply paid attention to the PH-EC levels to provide the roots with optimal conditions. I then kept the TEMP-RH-VPD-PPFD values under control and this also thanks to the Tent-X controller by TrolMaster which allows me to provide optimal conditions also above.
I chopped them when trichomes were about 85% milky and 15% amber.
During the flowering stage PH was always between 5.8 and 6.2, about EC I started with 2 and was 2.3 on the last week before flush.
✅ HARVEST
- From dry seed to harvest: 140 days (2 days germination + 75 days veg + 63 days flo).
- Chopped after 4 days flush and 48 hours in dark;
- Wet trim, removed fan leaves.
✅ DRYING STAGE
- Time: 14 days;
- Average: 20° C - 50% RH.
- After that I made a dry trim, removed branches and sugar leaves.
⚖️ DRY WEIGHT
- Phenotype #1: 230 gr buds + 25 gr larf;
- Phenotype #2: 105 gr buds + 50 gr larf.
So, the overall dry weight is: 335 gr buds + 75 gr larf.
✅ CURING STAGE
- Curing is done after 30 days with Boveda 62%.

Likes
13
Share


@AAAAFarms
Follow
Thought id take pictures as video isnt the best
Removed a blue sherbert out as it had some issues, low yielder, top randomly died. Also on one of sundae punch the top died as i was moving
Found out my double Ds plant was a male moved her out for a week in a 24hr tent to slow its growth, back in 12 12 soon. End of week 5 photos. Harvest time expected to finish september 13th


Likes
85
Share

@Tropicannibis_Todd
Follow
Start of day 49 ...... Nov 27 Start of week 7 ........ 23 DAYS INTO FLOWERING
Check out the full grow video on latest weekly update
Super Exceptional Growth Daily
Still adjusting LST when needed and leaf tucking.......
Water Only when needed but its drinking more every otherday and adjusting lights when needed......
Rain Water Only .......
( DAY 54 AND IT SHOWS ZERO DEFICIENCIES ) IM ALSO DOING VERY LITTLE, SLIGHT DEFOLIATION
( DAY 49 AND RESIN PRODUCTION HAS STARTED )
( DAY 54 AND ALL IS GOOD , THERE FATTING UP )
I hope you enjoy my growlog...

Likes
1
Share


@Growedbypepper
Follow
Hasta ahora muy bien mis planta aunque muy resistente presenta unos cuantos acaro aunque ya no puedo aplicar preventivos en el punto de floración en el que se encuentra ya solo qued a mirar el desarrollo de la planta


Processing
Likes
11
Share


@Alexanderbeno
Follow
hello ,I started again and increased moisture to 60% and two seed are ready and its good,i use my airpot 🆒design,i happy know your respose me,thanks.

Likes
9
Share

@Tropicalsalt
Follow
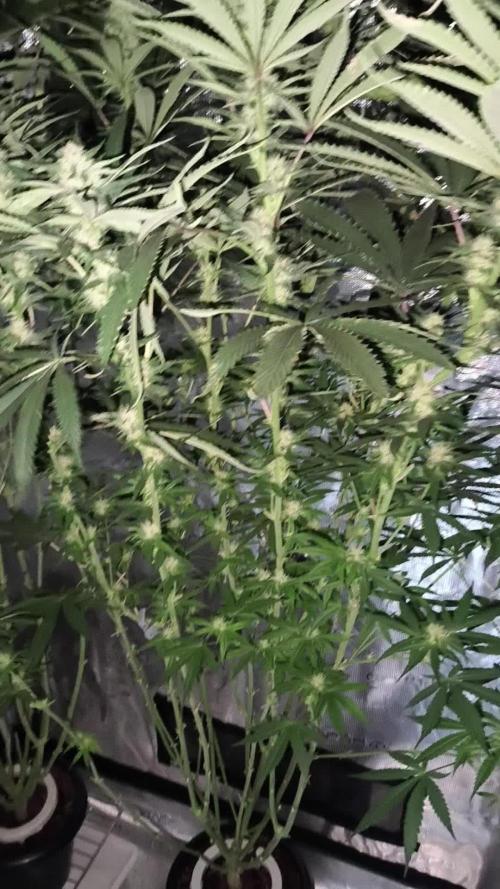
I finished the stretch phase with an EC of 12.8! And they didn't complain...maybe I can push further next time.
Now I will lower the EC, water more and give them minimal stress so they can start bulking and fattening.
#3 has a sweet funky fruity smell, #1 papaya and #2 still not much smell.
I'm bending all the tops because they are reaching the light lol I flipped them when they were like 30 cm tall, I never thought they would more than triple in size, my tent is 180 cm in height!