
Processing
Likes
Comments
Share


@Wicked_Stix
Follow
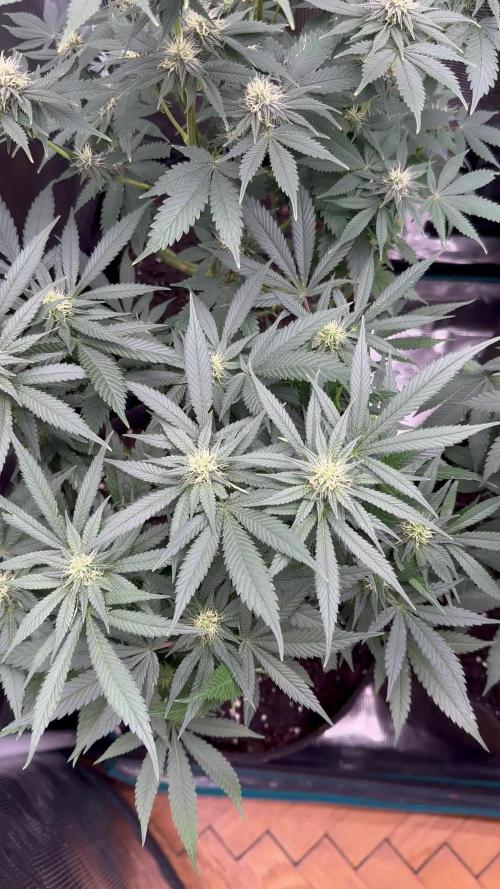
This auto ghost of is at day 21 and she has been growing like crazy since she broke the surface. She has the potential to be a real work of art if I can keep her happy. I upped the maxigro to .5 tsp per gallon and started them on a little armor si so they can build some strong branches. Still running them on 24 hour light and 24 hour irrigation. They are going to stay under the blurple lights for a few more weeks until I can get them in the big room under the quantum boards. I'm hoping they will flower around 4 weeks but my autos seem to enjoy staying in veg so we will see what happens.

Likes
1
Share


@kauilmayel1996
Follow
Decidí no hacer ningún corte
Tampoco ningun lst ni nada
Solo dejarlas ser por esta vez...

Processing
Likes
13
Share


@High_Grade_Dadli
Follow
She is doing very well pollination was a success the new stain she create should be off the chain patiently waiting.....wonder whats the name gonna be 🤔 do a lil more defoliation nxt week n that should be it till the end.....#happy growing til nxt week....
Ps.. pot is a 25gal but only used 1/3 of it

Likes
19
Share


@Wenz004
Follow
So aufgehts mit Fettarschfrau.
Gewählt Samen von Flo. Lasse nur eins von 3 erstmal keimen...also muss 100% Keimrate sitzen🤭...keine Selektion etc...und vor Allem ohne dieses Hopfenzeugs🤭
Kommen aber später sicher nicht in Living soil...obwohl ich Flo sympathisch finde, weiß ich mittlerweile, dass es einfach nur ein riesen Markt ist, mit dem man gut Geld verdienen kann. Mann muss lediglich den Gärtnern gut ins Gewissen reden und mit vielen Fachausdrucken wie "Bodennahrungsnetzwerk" etc. gut umgehen...aber es funktioniert. Wurde übrigens alles bei den Amerikanern abgekuckt...wie fast alles andere auch. Dort natürlich alles viel größer wie es z.B. Jeremy Silva macht (build a soil)...hab übrigens zwei seiner Rezepte ausprobiert...garnicht mal so schlecht aber trotzdem natürlich einfach nur Marketing damit die Kasse gut klingelt und die Gärtner sauberes Gewissen haben...einfach mal selber ausprobieren oder sich ein paar echte Wissenschaftler und Koryphäen anhören...wie den guten alten B.B...z.B. hier
https://youtu.be/qtXa_dAWKXc?si=nXuThrh_BhyvUSHH
Ab 6:14 eben dieses Thema...ansonsten happy growing😃
Kokos getränkt ec 0.7 (davon 60% dest. Wasser 40% Leitungswasser Ausgangs-ec 0.1) und mit Aptus:
All-in-one 1 ml/l
CalMag Boost 4 Tropfen /l
Startbooster 4 Tropfen /l
Regulator 3 Tropfen /l
Gegossen wird mit einer noch leichteren Lösung...geblubbertes Leitungswasser EC 0.4 + 4 Tropfen/l Startbooster
Also gleich der Keimling/Sämling wird beschossen🙆♂️...mal sehen...ist ein Experiment😉
Am Tag 3 die Lampe gewechselt...bin mal gespannt was die neue "CreScience FLUXshield Babo 450C (160W)" so kann☀️
Update!...der Lampenwechsel am Tag3 war schlechte Idee...veg mode von der babo450c ist schließlich auch völlig anderes Spektrum als bei der SF1000
Neustart läuft gut...2ter Samen von Flo ist auch super gekeimt...Bilder folgen bald
Licht ca. 200 mikromol auf den Deckel...drunter weniger
Versuch #2 läuft besser...coco zu scharf getränkt...sieht an der linken Blattspitze letztes Bild...insgesamt löuft die Sämlingsphase zu langsam ab...aber das lag wohl eher an mir
Likes
12
Share


@TheBudWhisperer
Follow
Off to the races after the first week of veg. And the girls are looking good. They had about 24-48 hours of transplant shock but have since turned over and look perky. They never fully transitioned and all of em look like they’re turning back around.
Definitely starting to see some pheno variation on one of the indicas (F6) - trademark from the Skywalker 100%. A light bluish/purpleish hue on the fan leaves. We’ll see what happens over the next week then probably just pick a day and flip. We don’t need em huge - just big enough to show off dem buds.
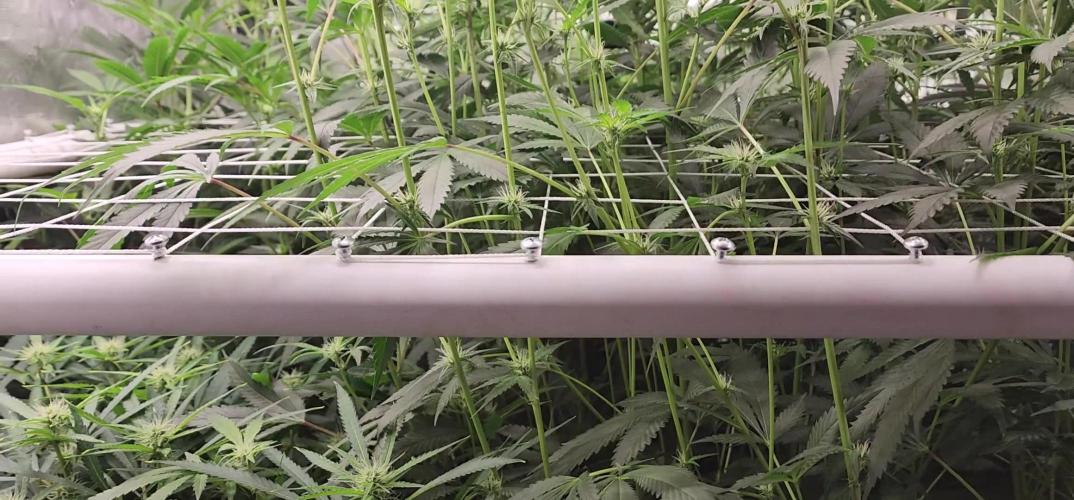
On the hardware side of this grow, the mods to the dutchy system look to be working well. It just makes plant management easier with a full trough drain as opposed to individual drainage holes. Really, the system isn’t a concern for the most part. It’s proven time and time again how manageable a recirc system can truly be. Scaling down to smaller pots and more plants has also been a revelation of sorts around here. We used to grow monsters and now the aim is strictly proportional yields across a wider array of genetics. Been a great trip so far🤟. Couple more boring weeks of veg. And as soon as the breeding tent is cleaned up and pollen free - it’s go for blast-off👍.
Background
This cycle of clones represents all the potential of this F1 line of WalkerBerry OG. Bred by myself over the last couple of years. This genetic shows excellent hybrid vigour, incredibly stable nutrition requirements to date and an eclectic mix of long and short internodal spacing bu specimen.
We know we have indica and sativa dominant traits spread evenly across the 6 available clones. Now it’s just a matter of seeing them run out under controlled and pollen free conditions.
We’ve labelled each plant and it’s resulting seed accordingly. Once we get to the F2 run, we’ll hopefully be able to isolate down to 2-3 phenos if the bud is any good. From there, who knows. It’d be great to get to a finished, stable generation that would be fem worthy but that could be a very long way off. For now - we’ll focus on this line and see where it goes🤞🤞.
Likes
29
Share


@gottagrowsometime
Follow
Welcome to my Slurircane Diary sponsored by MSNL & Spider-Farmer
Days 56-63 only got days 56-58 & 63.
Plant has moved from Pre Flower into fatthing on Day 58 r so. With the attempted Reveg. Pre flower was lost and any stretch. I now know when or how to stop a plant In its tracks.. during pre flower. Throw it into reveg (keeping dli within limits as if not, it'll continue to flower. So keeping in in the right DLI range is needed for reveg. I pult mine a just short of a week into it. And it was just a few days into pre flower and I stalled her at the height of 41cm. Another week maybe 2 of reveg would of got growth going again. But I decided to push ahead with fattening. She did put on a few cm finishing her pre flower but, nothing compared to what would of been if I hadn't of stalled and reveg. This can go bad. But, maybe I'll try again. As the colas, well, I've not had them like that. Not as this early stage. Look already how filled out they are. Will be short but mass should be good. Another 5-6 weeks of flower. High ppfd and 8-1300 co2.
Diet/Defoliation
Have moved her off Power Buds/Roots & moved to Green Sensation & PK 13/14. Done a hard defoliation and she has started putting on nice mass. Really happy with how she looks. Really healthy & Happy. She's a fast mover. Topped out a 41cm her tallest node. Most are 39.5 with an even canopy. I done 2 15% defoliations. Removing inside leafs around her nodes to allow air to move through the canopy. Premoting co2 exchange pushing newly made o2 out of the way on the stomata vent levels. As soon as plant hits ripening a lot should also be. So, I'll figure something out by then. Maybe an SF-1000 finish under low temps. As my main tent will be pushing 33-35c until end of the summer and beyond. This won't do for ripening. So, I've the perfect light for it. 900ppfd maybe I'll use at 80% and ripen her up nicely in 25-27c temp.
Thanks to my sponsors from MSNL & SPIDER-FARMER. Much appreciated for allowing me to test your products.
Also, to those who stop by. I thank you and look forward to seen your work.

Likes
151
Share


@BioBuds
Follow
Well what did we say at the start? A diamond in the rough? All that is gold does not glitter? This Xtrakush try-out by weedseeds.site is turning out to be quite the surprise and joy, I might add. Consider this:
- She had 2 weeks less of growing time
- Had a potmate, removed last week cause it was male, see the hole in the grow.
- This seed is 1,50 dollar, her roommates at 10 to 12 dollar a seed.
- See the flower growth in one week. It is stunning.
- She almost covered the hole of her roommate in a week.
No defoliation, nothing.
This soil and light combination rocks. I think Im proving at as we go here.
Totally enjoying this grow and its ups and downs.
Thanks again for reading up and all the likes guys!!
Likes
41
Share


@Hawkbo
Follow
They grew pretty well. Obviously 1 had alot more veg time and extra training where the other 2 had no training. Could have been better if I had both arms and didnt have the one bad feed where my meter was off and burnt the tips. Easy strain to grow I highly reccomend to any level grower.


Likes
30
Share


@Roberts
Follow
It updated. Finally. So a week ago this was a seed. She has sprouted and is getting acclimated. She looks good. I soaked the coco, and made sure ph is adjusted right. I then proceeded to add light feed of the plagron nutrition. Which will also help keep ph stable. So everything is looking good. Thank you plagron, Medic Grow, and Zamnesia seeds. 🤜🏻🤛🏻🌱🌱🌱
Thank you grow diaries community for the 👇likes👇, follows, comments, and subscriptions on my YouTube channel👇.
❄️🌱🍻 Happy Growing 🌱🌱🌱
https://youtube.com/channel/UCAhN7yRzWLpcaRHhMIQ7X4g

Likes
25
Share


@Jessemon1106
Follow
Day 141 from start and this will be the last week in flower. Buds have gotten so heavy they split the stem. So I had to repair her because of that. But it looks like i will have a great yield from this one. I have 3 clones off her doing good. I definitely am proud of her and can't wait to get her cured.
Thanks everyone and I'll update some after harvest then drying.

Likes
19
Share


@Naujas
Follow
I visited her today!!!! Day 147!!! when I came I saw one broken branch, yesterday there was quite a strong wind, I think it's his fault :) but everything else looks good, just found 1 small ring of rot :), which allows me to leave it to grow for another week :) very beautiful girl :) there will be a renewal, good luck!!!!

Likes
Comments
Share


Likes
4
Share


@pzwags420
Follow
On day 1 the reservoirs PH is 6.3. The rez is 483 ppm. The girls are looking good and nitrogen toxicity seems to have stopped.
On day 2 the reservoirs PH was adjusted from 6.1 to 6.3. The rez is 477 ppm. Trichomes seem to be 10% cloudy so I still have a bit to go i'm thinking 9 weeks should be a good bet!
On day 3 the reservoirs PH was adjusted from 6.4 to 6.1. The rez is 500 ppm.
On day 4 the reservoirs PH is 6.2. The rez is 503 ppm. I lowered the ppfd so my tallest received 900 ppfd and an average of 543 ppfd.
On day 5 the reservoirs PH is 6.2. The rez is 519 ppm. I removed some of the extra fan leaves blocking bud sites.
On day 6 I changed out the reservoir with only tap water and adjusted the PH from 6.7 to 6.1 with a ppm of 249. The trichomes are maturing and I plan on harvesting on week 8 day 4 of flower.
On day 7 the reservoirs PH was adjusted from 6.5 to 6.0. The rez ppm is 250.
Likes
2
Share

@Ensign420
Follow
|»» LOG DISCLAIMER: Not intended as a grow guide. Grow log entries are usually posted 3-4 weeks later and are for my learning reference. ««|
Introduction - Week 16 Summary -
Ensign's log, stardate 17717.2,
Another week in the garden..
In the main tent, nothing but general checkups for the most part. Chill Out OG seems to have stopped stretching by the end of the week and buds have already started to swell up. The rest of the phenos in the tent have been showing clear signs of flowering, but are also still stretching. Towards the end of the week, had to supper crop Heady OG.
As for the veg tent, been keeping up with solo cup waterings. Also re-amended the 7-gallon pots and reduced them down to 3-gallons. Also took more mother clone cuttings which were planted into Coco Coins and are now rooting in the propagation tray.
I usually try to keep everything in these logs strictly for growing, but I recently lost my Father... Peace and good memories Dad. The grow continues on in your memory and for your legacy.
Onwards to next week..
[START OF WEEK 16]
==========================================================
---------- [ 3x3 VEG TENT - GR3 ] ----------
Heady OG BX1 #1 - WEEK 08 - Full Veg
Dry Soil - WEEK 00 - EMPTY
Chill Out OG #3 - WEEK 05 - Full Veg
Chill Out OG #2 - WEEK 01 - Full Veg
---------- [ 4x4 MAIN TENT - GR30 ] ----------
Chill Out OG #2 - WEEK 16 - Full Bloom Wk2
TKO #2-2 - WEEK 10 - Full Bloom Wk2
Heady OG BX1 #1 - WEEK 12 - Full Bloom Wk2
02/16/26 → 02/22/26 [WEEK 16]
This Week's Estimated Goals
----------------------------------------------------------------------------------------------
DLI: ~16 mol/m²/d
PPFD: ~375 μmol/m²/s
VPD: ~1.2 kPa
This Week's Meter Readings & Averages
----------------------------------------------------------------------------------------------
Light On/Off: 16:00 - 10:00 | Wattage: ~386.3W [LV05]
Distance From Canopy: ~[21”, 3.5”, 9”]
Plant Height: ~[31”, 48.5”, 43”]
Max Plant Height: ~52” [Lamp-to-Soil Distance]
DLI: ~19.83 mol/m²/d
PPFD: ~459 μmol/m²/s
VPD: ~0.76 kPa
Soil %: ~[47.6, 49.3, 45.4, 51.4, 50.3, 60.9, 50.3, 60.0, 46.4, 68.6]
==========================================================
Day 01 - Monday - 02/16/26 - Total Days: 103
-----------------------------------
Daily Averages ~[+01:00]
- Temps: 79.5°F [26.4°C]
- Humidity: 76.7%
- VPD: 0.80 kPa
- Soil %: [48, 47, 43, 53, 50, 62, 49, 60, 42, 67]
-----------------------------------
- [21:05]: Night check on the 4x4 tent.
--- Garden is looking healthy and perky.
--- Buds are starting swell.
--- With the exception of Chill Out OG #2, vertical growth is still stretching.
--- Under canopy looks good.
- [21:09]: Checked on the BluMat soil moisture sensors:
------ Chill Out OG #2 » 40mbars
------ Heady OG BX1 #1 » 117mbars
------ TKO #2 » 51mbars
--------- Watering Range: [Too Wet] ~25mbars «| [Ideal Target] ~40-80mbars |» ~125mbars [Too Dry]
--------- BluMat Max Values: [10mbars «||» 750mbars]
--- Decided to make a slight adjustment to Heady OG’s watering carrot.
--- Using the provided allen key, increased the water moisture by turning the BluMat’s tension cap slightly counter-clockwise.
- [21:15]: Checked the Ecowitt soil moisture sensor data:
------------------ [ 3x3 VEG TENT – GR7 / GR3 ] ----------------
------ 52% - [CH01 » M1 » VBL – TKO #2]
------ 45% - [CH02 » M2 » VBR – Gorilla Goat #1]
------ 43% - [CH03 » M3 » VFL – Chill Out OG #3]
------ 53% - [CH04 » M4 » VFR – Chill Out OG #2]
----------------- [ 4x4 MAIN TENT – GR30 ] ---------------
------ 51% - [CH05 » P1 » FLT – Chill Out OG #2]
------ 62% - [CH06 » P1 » FLB – Chill Out OG #2]
------ 50% - [CH07 » P2 » BLT – TKO #2-2]
------ 60% - [CH08 » P2 » BLB – TKO #2-2]
------ 42% - [CH09 » P3 » FRT – Heady OG BX1 #1]
------ 67% - [CH10 » P3 » FRB – Heady OG BX1 #1]
--------- Veg: ~38%-45% | Flower: ~45%-55%
--------- General: ~30% [Dry] «| ~45-60% [Moist] |» ~70% [Wet]
- [21:22]: Checked the 3x3 veg tent.
--- Growth looks good with no issues.
--- No need to water the clones.
--- Propagation cutting also look good.
Day 02 - Tuesday - 02/17/26 - Total Days: 104
-----------------------------------
Daily Averages ~[+01:00]
- Temps: 79.1°F [26.2°C]
- Humidity: 76.9%
- VPD: 0.78 kPa
- Soil %: [48, 47, 43, 53, 50, 62, 49, 60, 39, 65]
-----------------------------------
- [21:08]: Night check on the 4x4 tent.
--- Garden is looking green and healthy.
--- Top growth is getting quite tall.
--- Under canopy is looking great.
- [21:15]: Checked the Ecowitt soil moisture sensor data:
------------------ [ 3x3 VEG TENT – GR7 / GR3 ] ----------------
------ 54% - [CH01 » M1 » VBL – TKO #2]
------ 48% - [CH02 » M2 » VBR – Gorilla Goat #1]
------ 43% - [CH03 » M3 » VFL – Chill Out OG #3]
------ 53% - [CH04 » M4 » VFR – Chill Out OG #2]
----------------- [ 4x4 MAIN TENT – GR30 ] ---------------
------ 51% - [CH05 » P1 » FLT – Chill Out OG #2]
------ 62% - [CH06 » P1 » FLB – Chill Out OG #2]
------ 49% - [CH07 » P2 » BLT – TKO #2-2]
------ 60% - [CH08 » P2 » BLB – TKO #2-2]
------ 38% - [CH09 » P3 » FRT – Heady OG BX1 #1]
------ 64% - [CH10 » P3 » FRB – Heady OG BX1 #1]
--------- Veg: ~38%-45% | Flower: ~45%-55%
--------- General: ~30% [Dry] «| ~45-60% [Moist] |» ~70% [Wet]
- [21:22]: Checked the 3x3 veg tent.
--- Veg garden looks healthy. No need to water.
--- Propagation cuttings also look good.
--- Misted the top growth with RO water.
- [21:46]: Checked the humidifiers.
--- Tanks are still full and no leaks found.
Day 03 - Wednesday - 02/18/26 - Total Days: 105
-----------------------------------
Daily Averages ~[+01:00]
- Temps: 79.3°F [26.3°C]
- Humidity: 74.6%
- VPD: 0.86 kPa
- Soil %: [46, 45, 43, 51, 51, 62, 50, 60, 49, 70]
-----------------------------------
- [16:20]: Evening check on the 3x3 veg tent.
--- Veg garden is looking healthy and green.
- [16:25]: Time to further reconfigure the veg tent to 3-gallon pots.
--- Cleared out the solo cups.
--- Going to also take Heady OG and TKO cuttings.
- [16:37]: Filled a measuring cup with 1.5 cups of RO water.
------ Added 1/8tsp of Horticultural Aloe
--- Mixed the solution and poured it straight into a clear solo cup.
--- Made sure each PVC tube on the rig had the correct names marked.
--- Placed the rig into the cup just above the aloe solution.
--- Okay! Time to take the cuttings!
--- Using a pair of clean trimmers,
- [17:00]: Cut several clonal cuttings from each mother plant.
--- Only need one cutting to root, but to ensure successful rooting, took multiple cuttings of each cultivar.
--- Made sure to trim most of the branches leaving a top node or two.
--- Did not cut any leaf fingers and made sure to cut the tip of the stalk (about 45-degree) before placing each cutting into the cup of aloe solution.
--- Set the cup aside.
- [17:12]: Culled both TKO #2 and Gorilla Goat OG#1
--- Chopped and mulched the trimmings in an empty 5-gallon bucket.
--- Okay! Time to mix up the top dress for the main tent!
--- Considering the plants are just at the end of the stretch phase, going to top dress for bloom.
- [17:16]: Took the 5-gallon bucket with the fresh veg trimmings and added:
------ 9 cups of BuildASoil Worm Castings
------ 2 cups of Craft Blend
------ 1 cup of Gnarly Barley [Freshly Milled From Whole]
------ 1/2 cup of:
--------- Ocean Blend [& Trace Minerals]
--------- Premium Insect Frass [Black Soldier Fly]
--------- Kashi Blend
--- Mixed the amendments and set the bucket aside for later.
- [17:42]: Time to re-amend both 7-gallon pots and reduce them down to 3-gallon pots.
--- Took a spare 20-gallon fabric pot along with a drip tray and set them on the floor.
--- Then one at a time, took each 7-gallon pot and removed the straw mulch along with Ecowitt soil sensor. Also removed the stump.
--- Mulched the straw and stump by mixing them to the 5-gallon mulch bucket.
- [18:24]: Dumped the soil into a spare 20-gallon fabric pot.
--- Once both pots were added,
- [19:00]: Mixed the soil evenly making sure to break up the large clumps.
--- Also removed the larger roots and mixed them to the 5-gallon mulch bucket.
- [19:37]: Wiped the veg tent's floor with RO water and paper towels.
--- Also re-arranged the 3-gallon pots in the tent.
- [19:39]: Adding six more 3-gallon pots to the veg tent so going to re-amending the soil.
--- Using similar amounts of amendments, but also adding in a bit of mustard.
------ 9 cups of BuildASoil Worm Castings
------ 2 cups of Craft Blend
------ 1 cup of Gnarly Barley [Freshly Milled From Whole]
------ 1/2 cup of:
--------- Ocean Blend [& Trace Minerals]
--------- Premium Insect Frass [Black Soldier Fly]
--------- Milled Mustard Seed Meal
--------- Kashi Blend
--- Mixed the amendments in evenly making sure to incorporate everything into the soil.
- [20:17]: One at a time,
--- Took a 3-gallon Grassroots Fabric Pot and filled it with the re-amended soil.
--- Did not fill the pot all the way. Tried to leave enough room for a solo cup or two of soil.
--- Since these pots are not going to be used yet, also not adding any straw mulch.
--- Placed the pot into the vet tent.
--- Repeated this process for the remaining pots.
- [22:36]: Done!
--- Also placed the solo clones back along with the mother cuttings (in aloe solution) into the veg tent.
--- Have the cups resting (on drip trays) on top of unused 3-gallon pots.
--- The Gorilla Goat #1 cuttings in the propagation tray look good.
--- Did not mist the top growth.
- [23:14]: Removed the remaining two Ecowitt WittFlow units.
--- Also checked the reservoirs and no leaks detected.
--- Plan to eventually install a PSI gauge to ensure that the gravity feed is within the 1-3 PSI requirement for running BluMats.
--- Anyways,
- [23:42]: Checked the 4x4 tent.
--- The garden is looking green and perky.
--- The mid canopy (between the two nettings) is getting full.
--- Glad the under canopy is still clean and airflow seems pretty good.
- [23:56]: Checked on the BluMat soil moisture sensors:
------ Chill Out OG #2 » 38mbars
------ Heady OG BX1 #1 » 33mbars
------ TKO #2 » 33mbars
--------- Watering Range: [Too Wet] ~25mbars «| [Ideal Target] ~40-80mbars |» ~125mbars [Too Dry]
--------- BluMat Max Values: [10mbars «||» 750mbars]
- [+00:05]: Checked the humidifiers.
--- Tanks are still full and no leaks found.
Day 04 - Thursday - 02/19/26 - Total Days: 106
-----------------------------------
Daily Averages ~[+01:00]
- Temps: 77.7°F [25.4°C]
- Humidity: 76.0%
- VPD: 0.77 kPa
- Soil %: [47, 53, 46, 51, 51, 61, 50, 60, 49, 71]
-----------------------------------
- [16:41]: Evening check on the 3x3 veg tent.
--- Veg garden is looking good and healthy.
- [16:44]: Swapped the aloe water out for the veg cuttings.
--- Filled a clear cup with fresh RO water (1.5cups).
--- Gently lifted the PVC rig out of the cup of aloe water and set it gently into the RO cup.
--- Will let these soak for another day before transplanting into Coco Coins for rooting.
--- Two clones also need watering.
- [16:56]: Here are the starting initial watering ranges:
------ TKO #2-1 » 290.7g → 340.5g
------ Gorilla Goat #1-1 » 287.0g → 325.2g
--------- General Weight Range: [Dry] ~275g «| [Dryback] ~300g |» ~325g-400g [Wet]
--- Both cups were last watered 8 days ago.
--- Took the starting weight of both clones before watering,
------ TKO #2-1 » 291.9g
------ Gorilla Goat #1-1 » 296.8g
--- While on a scale,
--- Evenly misted the top of both cups with RO water.
--- Did not spray the top growth.
--- Misted 10-20 sprays. Waited a moment, then misted again.
--- Repeated this process until both cups weighted at least 300g.
--- There was no runoff.
- [17:12]: Took the saturated weight of both cups after watering,
------ TKO #2-1 » 355.5g
------ Gorilla Goat #1-1 » 355.8g
--- Updated the wet weight and watering dates for both cups.
--- Placed both cups back into the tent.
--- Propagation tray cuttings are looking good. No need to spray the top growth.
- [18:44]: Checked the Ecowitt soil moisture sensor data:
------------------ [ 3x3 VEG TENT – GR3 ] ----------------
------ 50% - [CH01 » M1 » VBL – Heady OG BX1 #1]
------ 52% - [CH02 » M2 » VBR – Dry Soil]
------ 51% - [CH03 » M3 » VFL – Chill Out OG #3]
------ 50% - [CH04 » M4 » VFR – Chill Out OG #2]
----------------- [ 4x4 MAIN TENT – GR30 ] ---------------
------ 50% - [CH05 » P1 » FLT – Chill Out OG #2]
------ 61% - [CH06 » P1 » FLB – Chill Out OG #2]
------ 50% - [CH07 » P2 » BLT – TKO #2-2]
------ 60% - [CH08 » P2 » BLB – TKO #2-2]
------ 50% - [CH09 » P3 » FRT – Heady OG BX1 #1]
------ 71% - [CH10 » P3 » FRB – Heady OG BX1 #1]
--------- Veg: ~38%-45% | Flower: ~45%-55%
--------- General: ~30% [Dry] «| ~45-60% [Moist] |» ~70% [Wet]
--- Also updated the veg tent’s soil sensor names a bit.
- [19:10]: Checked the 4x4 tent.
--- Garden is looking good and growth is green.
--- The under canopy is looking nice and clean as well.
- [19:19]: Checked on the BluMat soil moisture sensors:
------ Chill Out OG #2 » 49mbars
------ Heady OG BX1 #1 » 37mbars
------ TKO #2 » 47mbars
--------- Watering Range: [Too Wet] ~25mbars «| [Ideal Target] ~40-80mbars |» ~125mbars [Too Dry]
--------- BluMat Max Values: [10mbars «||» 750mbars]
- [19:57]: Checked on the mulch bucket,
--- Hmm.
--- The mixture felt warmer than room temps (which was around 80-85°F).
--- Took the top dressing’s temperature using a digital thermometer.
------ Soil Temp: 124°F
--- Woah that’s hot! Just beyond mesophilic compost and was almost turning thermophilic.
--- While gloves, mixed the top dressing and could feel the warmth. Surprisingly the center was really warm in temperature.
--- Did not expect the top dressing to start warming up, but it makes sense since the bucket contains greens and browns (trimmings and straw) along with a compost (worm castings). The dry amendments also helped to activate the biology in the mixture.
--- Pretty cool!
--- Well. Was planning on top dressing, but going to wait for the top dressing to cool down which could be several days.
- [20:04]: Checked the humidifiers.
--- Tanks are still full and no leaks found.
Day 05 - Friday - 02/20/26 - Total Days: 107
-----------------------------------
Daily Averages ~[+01:00]
- Temps: 77.0°F [25.0°C]
- Humidity: 76.9%
- VPD: 0.72 kPa
- Soil %: [49, 52, 48, 50, 50, 60, 50, 60, 49, 69]
-----------------------------------
- [21:01]: Night check on the 4x4 tent.
--- Wow growth is looking great.
--- All phenos are still stretching and buds sites are forming nicely.
- [21:09]: Checked on the BluMat soil moisture sensors:
------ Chill Out OG #2 » 34mbars
------ Heady OG BX1 #1 » 40mbars
------ TKO #2 » 52mbars
--------- Watering Range: [Too Wet] ~25mbars «| [Ideal Target] ~40-80mbars |» ~125mbars [Too Dry]
--------- BluMat Max Values: [10mbars «||» 750mbars]
- [21:20]: Checked the Ecowitt soil moisture sensor data:
------------------ [ 3x3 VEG TENT – GR3 ] ----------------
------ 48% - [CH01 » M1 » VBL – Heady OG BX1 #1]
------ 51% - [CH02 » M2 » VBR – Dry Soil]
------ 48% - [CH03 » M3 » VFL – Chill Out OG #3]
------ 50% - [CH04 » M4 » VFR – Chill Out OG #2]
----------------- [ 4x4 MAIN TENT – GR30 ] ---------------
------ 52% - [CH05 » P1 » FLT – Chill Out OG #2]
------ 60% - [CH06 » P1 » FLB – Chill Out OG #2]
------ 50% - [CH07 » P2 » BLT – TKO #2-2]
------ 60% - [CH08 » P2 » BLB – TKO #2-2]
------ 49% - [CH09 » P3 » FRT – Heady OG BX1 #1]
------ 70% - [CH10 » P3 » FRB – Heady OG BX1 #1]
--------- Veg: ~38%-45% | Flower: ~45%-55%
--------- General: ~30% [Dry] «| ~45-60% [Moist] |» ~70% [Wet]
- [21:23]: Checked the 3x3 veg tent.
--- Veg garden looks good.
--- Two clones need watering.
- [21:37]: Here are the starting initial watering ranges:
------ Garlic Budder OG#1-1 » 299.1g → 340.6g
------ Garlic Budder OG#1-2 » 279.2g → 340.3g
--------- General Weight Range: [Dry] ~275g «| [Dryback] ~300g |» ~325g-400g [Wet]
--- Both cups were last watered 6-7 days ago.
--- Took the starting weight of both clones before watering,
------ Garlic Budder OG#1-1 » 294.3g
------ Garlic Budder OG#1-2 » 295.9g
--- While on a scale,
--- Evenly misted the top of both cups with RO water.
--- Did not spray the top growth.
--- Misted 10-20 sprays. Waited a moment, then misted again.
--- Repeated this process until both cups weighted at least 300g.
--- There was no runoff.
- [21:59]: Took the saturated weight of both cups after watering,
------ TKO #2-1 » 360.3g
------ Gorilla Goat #1-1 » 360.8g
--- Updated the wet weight and watering dates for both cups.
--- Placed both cups back into the tent.
- [22:08]: Time to transplant the Heady OG and TKO cuttings into Coco Coins for rooting.
--- Filled a measuring cup with 1.5 cups of RO water.
------ Added a pinch of Quillaja Saponaria Extract [60]
------ Added 1/64tsp of Horticultural Aloe
------ Added 1/32tsp of Mycrobe Complete
--- Mixed the solution thoroughly.
- [22:19]: Dropped 4 Coco Coins into the measuring cup.
--- The coins immediately started to expand.
------ [» ~5 MINUTES LATER «]
--- Placed each fully saturated Coco Coin into half-cut solo cups.
- [22:30]: Using a squeeze bottle filled with Clonex,
--- Gently filled each pre-made hole with Clonex rooting gel.
- [22:33]: Time to plant the cuttings.
--- Using a pair of clean trimmers, made a final 45° cut.
--- Also stripped and scrapped some of the stem’s outer membrane.
--- To help with planting, gave each Coco Coin a squeeze to loosen the coco.
--- Made sure to insert each stem straight and snug with the tip about a 1/4 inch from the bottom of the Coco Coin.
--- Also secured the stem by pinching and pressing in the top of the Coco Coin.
--- Once each cutting was planted,
- [22:54]: Placed each Coco Coin into the propagation dome’s tray.
--- Made sure to keep each cutting properly tagged.
--- Did not spray the top growth with any water.
--- As far as PPFD,
--- At the lowest light intensity (and raised ~14 above the tray), the PPFD is around 42 μmol/m²/s which gives a DLI of 2.72 mol/m²/d under an 18/6 light cycle
--- As for the extra cuttings, culled and mulched them.
- [23:02]: Checked the humidifiers.
--- Tanks are still full and no leaks found.
Day 06 - Saturday - 02/21/26 - Total Days: 108
-----------------------------------
Daily Averages ~[+01:00]
- Temps: 76.6°F [24.8°C]
- Humidity: 76.8%
- VPD: 0.72 kPa
- Soil %: [48, 51, 48, 51, 50, 60, 52, 60, 48, 69]
-----------------------------------
- [19:01]: Night check on the 4x4 tent.
--- Garden is looking healthy and green.
--- Chill Out OG #2 seems to have stopped stretching and is now focused on bud development.
--- In contrast, Heady OG BX1 #1 along with TKO#2 are still stretching tall.
--- Heady OG is getting too tall.
--- Gently super-cropped by pinching and bending the taller branches.
--- Only trained Heady OG and lowered the canopy a good 7-8 inches.
- [19:35]: Checked the Ecowitt soil moisture sensor data:
------------------ [ 3x3 VEG TENT – GR3 ] ----------------
------ 49% - [CH01 » M1 » VBL – Heady OG BX1 #1]
------ 50% - [CH02 » M2 » VBR – Dry Soil]
------ 49% - [CH03 » M3 » VFL – Chill Out OG #3]
------ 51% - [CH04 » M4 » VFR – Chill Out OG #2]
----------------- [ 4x4 MAIN TENT – GR30 ] ---------------
------ 50% - [CH05 » P1 » FLT – Chill Out OG #2]
------ 59% - [CH06 » P1 » FLB – Chill Out OG #2]
------ 52% - [CH07 » P2 » BLT – TKO #2-2]
------ 60% - [CH08 » P2 » BLB – TKO #2-2]
------ 50% - [CH09 » P3 » FRT – Heady OG BX1 #1]
------ 70% - [CH10 » P3 » FRB – Heady OG BX1 #1]
--------- Veg: ~38%-45% | Flower: ~45%-55%
--------- General: ~30% [Dry] «| ~45-60% [Moist] |» ~70% [Wet]
- [19:39]: Checked the 3x3 veg tent.
--- Veg garden is looking good and no need to water. Nice.
--- Propagation cuttings look good as well.
- [19:47]: Checked the humidifiers.
--- Tanks are still full and no leaks found.
- [20:03]: Time for another grow board wipe.
--- Wiped and reset the grow board for the next 5-weeks.
Day 07 - Sunday - 02/22/26 - Total Days: 109
-----------------------------------
Daily Averages ~[+01:00]
- Temps: 77.0°F [25.0°C]
- Humidity: 77.9%
- VPD: 0.69 kPa
- Soil %: [47, 50, 47, 51, 50, 59, 52, 60, 49, 69]
-----------------------------------
- [19:33]: Night check on the 4x4 tent.
--- Wow the garden looks healthy.
--- Canopy seems to have recovered and is still stretching upwards.
- [19:38]: Checked on the BluMat soil moisture sensors:
------ Chill Out OG #2 » 51mbars
------ Heady OG BX1 #1 » 39mbars
------ TKO #2 » 42mbars
--------- Watering Range: [Too Wet] ~25mbars «| [Ideal Target] ~40-80mbars |» ~125mbars [Too Dry]
--------- BluMat Max Values: [10mbars «||» 750mbars]
- [20:06]: Took the weekly general PPFD readings.
------ Chill Out OG #2 was around 459 μmol/m²/s which gives a DLI of 19.83 mol/m²/d under an 12/12 light cycle.
------ Heady OG BX1 #1 was around 1053 μmol/m²/s which gives a DLI of 45.49 mol/m²/d under an 12/2 light cycle.
------ TKO #2 was around 682 μmol/m²/s which gives a DLI of 29.46 mol/m²/d under an 12/12 light cycle.
--------- Grow Light Intensity: LV5 @ ~386.3W
- [20:11]: Took the weekly height and light distance measurements.
------ Chill Out OG #2 was about 21" away from the grow light.
------ Heady OG BX1 #1 was about 3.5" away from the grow light.
------ TKO #2 was about 9" away from the grow light.
--------- Max Plant Height: ~52" [Distance From Grow Light To Top Soil]
------ Chill Out OG #2 was about 31" tall.
------ Heady OG BX1 #1 was about 48.5" tall.
------ TKO #2 was about 43" tall.
- [20:13]: Hmm.
--- Over the past grows, the FC-6500’s LEDs have been burning out.
--- Currently lost the center bars, but growth is still looking good.
- [20:17]: Checked the Ecowitt soil moisture sensor data:
------------------ [ 3x3 VEG TENT – GR3 ] ----------------
------ 47% - [CH01 » M1 » VBL – Heady OG BX1 #1]
------ 50% - [CH02 » M2 » VBR – Dry Soil]
------ 48% - [CH03 » M3 » VFL – Chill Out OG #3]
------ 51% - [CH04 » M4 » VFR – Chill Out OG #2]
----------------- [ 4x4 MAIN TENT – GR30 ] ---------------
------ 50% - [CH05 » P1 » FLT – Chill Out OG #2]
------ 59% - [CH06 » P1 » FLB – Chill Out OG #2]
------ 52% - [CH07 » P2 » BLT – TKO #2-2]
------ 61% - [CH08 » P2 » BLB – TKO #2-2]
------ 50% - [CH09 » P3 » FRT – Heady OG BX1 #1]
------ 70% - [CH10 » P3 » FRB – Heady OG BX1 #1]
--------- Veg: ~38%-45% | Flower: ~45%-55%
--------- General: ~30% [Dry] «| ~45-60% [Moist] |» ~70% [Wet]
- [20:25]: Checked the 3x3 veg tent.
--- Veg garden is looking good.
--- A TKO clone need watering.
- [20:34]: Here is the starting initial watering range:
------ TKO #2-1 » 290.7g → 340.5g
--------- General Weight Range: [Dry] ~275g «| [Dryback] ~300g |» ~325g-400g [Wet]
--- Been 7 days since the last watering.
--- Took the starting weight before watering,
------ TKO #2-1 » 298.7g
--- While on a scale,
--- Evenly misted the top of the cup with RO water.
--- Did not spray the top growth.
--- Misted 10-20 sprays. Waited a moment, then misted again.
--- Repeated this process until the cup weighted at least 300g.
--- There was no runoff.
- [20:56]: Took the saturated weight after watering,
------ TKO #2-1 » 360.4g
--- Updated the wet weight and watering date.
--- Placed the cup back into the tent.
--- The propagation cuttings in the tray are looking good.
- [21:20]: Checked the humidifiers.
--- Tanks are still full and no leaks found.
--- Another grow week done.
--- Onwards to the next.
[END OF WEEK 16]

Likes
24
Share

@MadeInGermany
Follow
Flowering day 70
since time switch
to 12/12 h.
Hey guys :-)
Finally the time has come .
The lady was harvested and hung upside down in the dry tent 😍.
Before that, she stood in the drying tent in complete darkness for 2 days and the large leaves were removed.
The small leaves stay attached during the drying process so that they protect the buds and allow them to dry more slowly and evenly :-) .
In the dry tent, the temperature is 18-19.5 degrees and the humidity is 54-58% 👍.
In this environment they are now allowed to hang for 10-14 days before they are fine-tuned and trimmed clean by hand.
then after trimming they come to ferment for 6-12 weeks in dark jars with bobeda packs 62% to keep the perfect humidity.
After a few weeks, the Boveda packs 58% are used so that they can slowly dry out :-) .
Of course there is one last update after trimming.
Until then, I wish you a lot of fun with the update.
Stay healthy and let it grow 💚🙏🏻
👇🏼👇🏼👇🏼👇🏼👇🏼👇🏼👇🏼👇🏼👇🏼👇🏼👇🏼👇🏼
You can buy this Nutrients at :
https://greenbuzzliquids.com/en/shop/
With the discount code: Made_in_Germany you get a discount of 15% on all products from an order value of 100 euros.
👇🏼👇🏼👇🏼👇🏼👇🏼👇🏼👇🏼👇🏼👇🏼👇🏼👇🏼👇🏼
You can buy this strain at :
Clearwater Seeds
Water 💧 💧💧
Osmosis water mixed with normal water (24 hours stale that the chlorine evaporates) to 0.2 EC. Add Cal / Mag to 0.4 Ec Ph with Organic Ph - to 5.8 - 6.5
MadeInGermany
Likes
9
Share


@Black_Venom
Follow
Harvest in week 12. But I screwed up, I didn't have enough room to separate each variety, so I would put an average weight when everything was dry... I had done everything well, I had to mistake on the place of the drying bag
Last pictures, mixed buds

Likes
13
Share


@Mazgoth
Follow
Im starting to using organic blackstrap molasses with water and one time just ph water.So im doing that for a week and then last week im flushing with only water
Likes
35
Share


@SmokingTiki
Follow
I looked at the trichomes every 2 days this week. There are still some clear ones but they look cloudy overall. The OG Kush begins to have many amber ones.
I started to flush too soon and the plants are now struggling a bit. I will harvest everything next week!
The final grow area is around 1,1m x 1,1m.


Likes
21
Share


Likes
18
Share


@Cannibalgardens
Follow
Boy I wish I had gotten a better start in the begining with this lady she has hard as rock nuggets .The pot was too small and the thing cracked from the roots massing up together .. The cooler temps in the end hurt her a lot now I'm thinking she will get the chop soon I'm starting the flush on this lady today and can't wait to see her buds drying ... She won't be a big yielding girl...
