
Likes
Comments
Share


@ManxLife_420
Follow
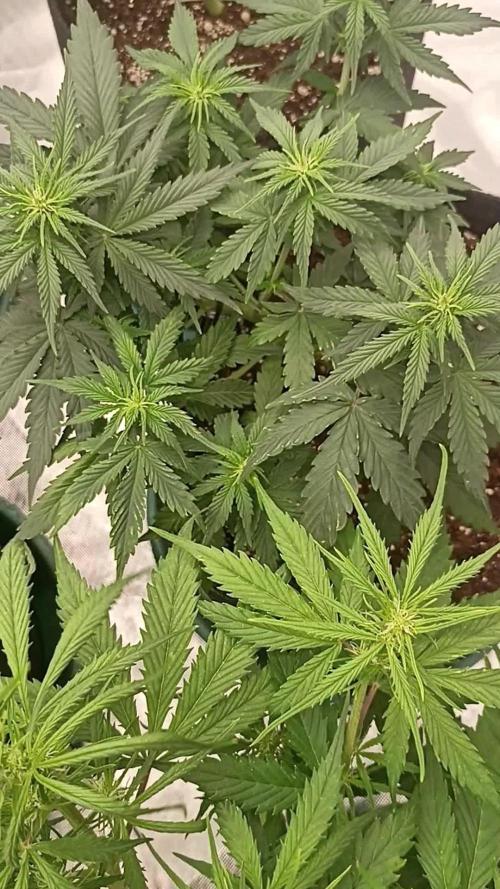
Starting to pick up a bit of bulk now. I'm reluctant to remove some of the fan leaves, because I maimed my first grow lol. So I'm using soft plant wire to hold the fan leaves aside. Allow as much light through to the new nodes

Likes
6
Share


@the_O
Follow
Ich bin der Meinung das Bilder mehr als 1000 Worte sagen.
Ich hab sie in den letzten Tagen ordentlich gespült und dann dunkel gestellt. Heute also am Ende der 12. Woche habe ich sie letztendlich geerntet. Die trichome waren alle milchig bis bärnstein Farbend. Ich lasse sie jetzt eine Woche mit eingeschalteter Abluft troknen.

Likes
1
Share
@Grow4ever
Follow
Die Pineapple Express hat so einen süßen Geruch.
Wirklich tolle Genetik.

Likes
74
Share


@Mr_Maes
Follow
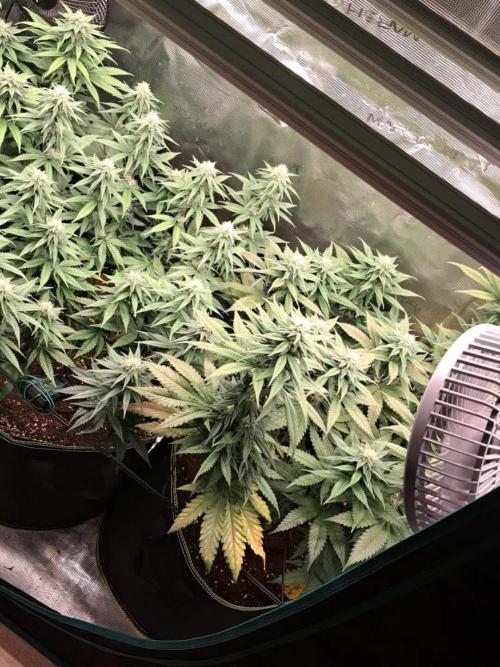
This week we should really see these colas blow up and start stacking really strong. The mixer of 7 hours of sun and 17 hours under my LEDs has really helped my girls grow strong. Nothing compares to good old Mother Nature.


Processing
Likes
27
Share


@Stigghiola
Follow
Questa settimana ho deciso di montare una lampada di supporto a LED per poter far arrivare a tutte le piante abbastanza luce, le piante continuano a crescere e i fiori sembra che stiano maturando per bene spero di raccogliere almeno 4/5 piante entro 2/3 settimane,perché alcune sono molto indietro rispetto ad altre.

Likes
27
Share


@MoneyMorris
Follow
I’ve been flushing the plants for a week now. The colas have definitely gotten fatter from last week. It’s looking like I’ll be harvesting in 1 more week. Pretty much all the trichomes are milky and I’m starting to get amber ones.

Likes
1
Share

@rommyu
Follow
Finally moving on to the next stage where i expect to keep the conditions more stable and plan on moving the vpd up slowly as well as move the temperature down to around 21 degrees by the last week of flower. The lighting schedule will start at 12 hours of dark and increase by half an hour weekly until we get down to 10 hrs light and 14 hours of dark for the last two weeks (last week plus flush).

Likes
15
Share


@Kurow
Follow
This week is dedicated to finalizing the pot and nutrients for the rest of the lifecycle, looks like it took to the nutrients very well not much new upwards growth but new leaf sites appeared!


Likes
1
Share


Likes
5
Share


@LittleBigTrees
Follow
Still in 1ltr pots due to space restrictions.
I have pulled a few fan leaves to allow light penetration and air flow increases.
From next week I will start adding green sensation 👌

Likes
10
Share


@Froggman
Follow
Thickening up nicely! Got some nutrient issues on the LSD, but not nearly as bad a previous grows.
Likes
1
Share


@0JuJu0
Follow
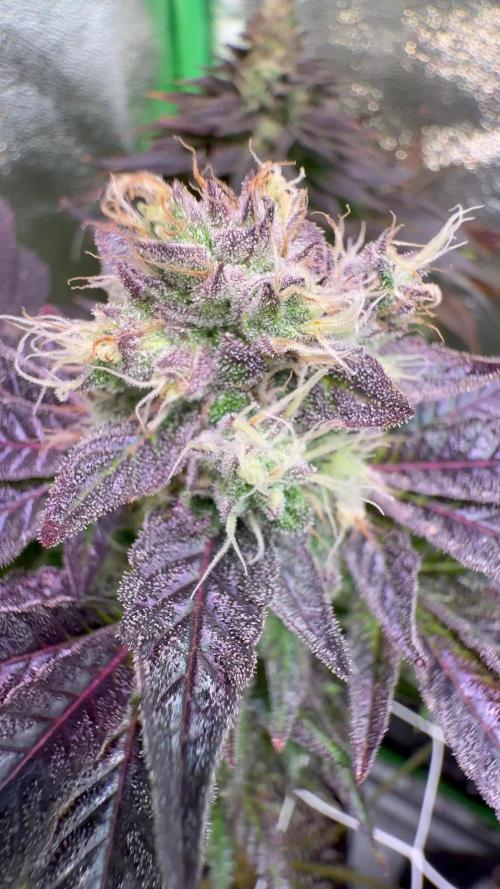
The leaves are a little bit dead but she will be potent. The buds looking great.
Likes
12
Share


@Mr_Haze_Chile
Follow
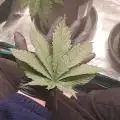
El color amarillo que se muestra en una de las calamity jane es debido a un mal riego ya qué pasó a llevar las hojas y por el efecto lupa 🔍 quedaron quemadas y de ese color


Processing
Likes
20
Share


@Elysian_gardens710
Follow
Hello again and welcome to week 5, the beginning of true flower! Ahsoka (her star wars name) is doing awesome with LST. Last week we tied down her main cola but this week her branches were long enough to Tie most of them down to. I will leaf tuck everyday to keep light on the budsites.
Ashoka has finally hardened off properly and I moved her to the big tent since she is also in flower. She is under The Optic 8+ we still haven't had to feed any nutrients yet 🤞 but are giving real growers recharge as a microbial. As you can see her roots have just exploded with growth. Love this opaque container deal!
The Optic 8+ is turned up full blast as well since we hardened her off by gradually bringing her into the tent
Stats:
Ohahu(not reccomended)4x4 tent
1gal water pitcher
Fox farms happy frog soil
Optic 8+ LED
Durabreeze carbon filter
4" inline fan

Likes
29
Share


@Prilyfe13
Follow
April 19, 2024 Day 64
We are coming up on the 10 week mark soon enough. I'm expecting both of these ladies to start swelling buds any day. So another 2 weeks before harvest. Probably 3 to 4 more weeks.
Tropicana Cookies is actually 31" tall while Tropicana C is 28" tall. However, due to the highest points being so tall, I have those tops as far on the outside of the light footprint as I can. I managed to get the DLI down to 50 mol/m²/d for each plant. While the rest of the canopy is happily at 45 mol/m²/d.
No watering today. Maybe tomorrow. The water intake has increased a bit over the past couple of days, so I may be topping off tomorrow or early morning the day after. I'm also getting some nutrient burn from what I believe is the Overdrive. I have it at full dose and honestly think it's too much. So I'm cutting it in half as well as Bud Candy. That's also at full dose and I don't think it's needed. So cutting that in half as well.
The light will be staying the same for the next 2 weeks now that the plants have hit their final height. I'm guessing that's how much longer it will be before flushing. I'll drop the light power at the same time as flush. The flush should be about a week.
The environment is giving me a hard time today. The temp is high at 78° with the humidity high as well at 56%. Not really sure what's causing it, but I'll turn my damn AC on if I have to. Anyway, I'm still having trouble keeping it at 50% humidity, so getting to 45% seems unrealistic. So I'll work with 50% and just make sure to check for any signs of mold or anything. I don't think I'll get anything like that, but you never know.
Grow System Environment:
Temp: 74.2°
RH: 53.3%
VPD: 1.31 kPa
April 20, 2024 Happy 420!!!
Not much going on today with these 2. They will both need watering tomorrow. So they are finally at a half gallon a day. The 2 other plants in the tent are also at a half gallon a day, but they are on the opposite schedule. It works for me. Gives me something to do everyday, but not sitting there for a half hour mixing nutrients. (I use 1 gallon jugs for each plant)
Tropicana Cookies looks great! Her buds are starting to swell and stack. They are just about ready to start swelling up. I can tell they will be super tight as well. There are a couple places where the pistils are orange and shriveled up. The bud is super dense. However, that could be seeds. I'm not too sure at this point. It's a high possibility.
Tropicana C also has a couple tops with the same type of super dense buds. Again, these two are identical in every way. I wouldn't be surprised if it was the same top doing the same thing. Anyway, looking super good. Buds from top to bottom. They aren't big and fat yet, but there still a good 2 to 3 weeks left. Hopefully less though. I have 4 more plants I have to start today for a contest. Unfortunately those plants will be stuck ina. 2x2 until these ones are out of the tent.
The lighting hasn't changed whatsoever and won't for the next 2 weeks.
The environment is looking great now. It's steadily climbing up from 68° last night and is at about 75° now and will definitely be at 76° in about an hour. The humidity is great at 51%. As I said yesterday, I don't think I'll be able to drop it down any further.
Grow System Environment:
Temp: 73.4°
RH: 52.3%
VPD: 1.30 kPa
April 21, 2024
Watering day. Both ladies got watered today. Not much else going on though.
Tropicana Cookies was nearly dry, but not quite. Unfortunately, Tropicana C was bone dry. I don't like it getting dry. The wick system gets messed up. But it did give me a chance to quickly wipe down the basin.
Both plants have nutrient burn from what I assume was the dose of Overdrive. So today I left it out. Just to allow the nutrients to even out. Next watering I'll be doing 4 ml of it. I also dropped the Bud Candy down to 4 ml. Just Incase it was partly that as well.
The lighting was, of course, not changed at all.
The power will be dropped in the next week or so.
This strain should have a 6 week flowering stage. 45 days is the estimate. So there's about 3 weeks left. Much longer than I was expecting. Honestly it's from the 5 week veg period. I find it strange that I didn't get any massive plants in 5 weeks. At the end of the grow, we will be hitting just under 12 weeks. No clue why I can't get my plants to grow at the suggested time frame. The earliest I have ever harvested was 11 weeks. Or maybe 12. Strange. I'll have to figure that out.
The environment is looking good today. The temp is leveled out at 75° and the humidity is happily at 49%. The VPD is a little low at 1.39 kPa, but it will fix soon enough.
Grow System Environment:
Temp: 73.4°
RH: 49.7%
VPD: 1.39 kPa
April 22, 2024
Definitely nothing going on today. Tropicana C had a couple leaves popped off today. Just a couple that were covering some bud sites and encroaching on other tops.
Tropicana Cookies looks great! I will say her buds aren't fat like I was expecting. They seem more like sativa buds. It's strange. They are thin and small and look super airy. I'm not sure if this is the deal, but both plants look like this. Only time will tell.
Tropicana C also looks quite good, with the same bud swelling issues, but we shall see as I said. She got 2 leaves removed. They were being crushed by the wall and in turn were overcrowding other bud sites.
The lighting is staying the same of course. I believe an a week or 2, I'll have to drop the intensity.
The environment is once again looking great! 75° and 50% humidity. The overnight temp is still at 68°. I'd much rather it be at 66°. Maybe I'll cool my room off earlier in the evening to allow the tent to cool faster at night, so the temp drops to the average of 66°. I'll start that next week.
Grow System Environment:
Temp: 73.8°
RH: 49.2%
VPD: 1.41 kPa
April 23, 2024
Nothing going on today. Just the daily inspection.
What I've discovered has me a bit confused. Both plants have tons of orange pistils with some being so shriveled up you can't see them. Those buds are super tight, but I have a feeling those couple tops like that are seeded. I'll find out soon enough. Honestly, I can't tell. Don't really know what I'm looking for.
The problem I'm confused about is the size of the buds. They're tiny, wispy and look underdeveloped. Maybe they are. Who knows. Maybe this strain gets early orange pistils. We shall see. I hope they swell up. Like a lot. As it stands now, it looks like an oz of smalls. Which of course is unacceptable. However, both plants are doing it, so it has to be the strain. Something I probably shouldn't be all that concerned with.
I'm leaving the light where it is for the next week or so. With the pistils already turning orange, I'm thinking I should prepare for the final stage of flower. I would expect it to be done in the next 2 to 3 weeks, but it may be less time. Anyway, I'll see what they are doing next week and work from there.
The environment is actually looking really good. I managed to get the temp up significantly earlier today by cranking my heat to 88°. It brought the tent temp up to 78° and the humidity just below 50%. Looking good. Now all I have to do is drop the temp a little bit to get to that perfect 75°. Also, my dehumidifier wasn't on. I must of have it off from the other day. So I should see lower humidity by the end of the day. Especially after I adjust the temp. Looking good.
Update: I've been thinking about how the buds are so small. I wonder if I took the Big Bud out too early and added the overdrive too soon. I can't go back to Big Bud, but that could be the cause. Still, another 2 to 3 weeks left. So we shall see. But an interesting thought.
Grow System Environment:
Temp: 73.7°
RH: 49.0%
VPD: 1.42 kPa
April 24, 2024
Both ladies got a reservoir refill today. Tropicana C was dried out. So I need to keep a better eye on the water levels. Tropicana Cookies wasn't dried out yet though, very close but not yet.
Tropicana Cookies looks great! Her buds are finally starting to swell and if there's another 2 weeks, I can expect them to get huge. We shall see.
Tropicana C has the same boost in bud production and has swelling buds now. Everything else looks good with her.
Speaking of swelling buds and production, both ladies are completely covered in trichomes. Not quite "frosty" yet, but getting there. I'll start with trichome pics next week. That way we have some good specimens to work with.
On another note, the aroma these two are putting off is intense now. I'll have to change the smell setting to STRONG next week. It's a sickly sweet smell, but crispy. Not too heavy, but definitely has a gassy undertone. Very nice.
I won't be moving the light at all for the rest of the grow. However, I may drop the power down to 80% next week and bring the DLI down to 40 mol/m²/d. But maybe not. I'm waiting for the flushing period. I'm not sure when that will be. Maybe 2 weeks? I can't tell with this strain. So many orange pistils and she looks like she is nearly done, but definitely not. They still have a good two weeks left. We shall see.
The environment is a bit off today. It's raining, so the humidity is hanging out around 52%. The temp is fine at around 75° to 76°. I'm not too worried about the environment today. Just thought I would note the difference.
Grow System Environment:
Temp: 74.6°
RH: 50.9%
VPD: 1.41 kPa
April 25, 2024
So today is the last day of week 9 and also going into the first day of late flower. Things will most likely be changing up in the next week. Nutrients, lighting and environment.
Not much to do today. No watering needed and no maintenance.
I checked out both plants and as I was saying yesterday, the trichomes are looking great and will start getting pics starting tomorrow. Everything looks good for both ladies.
The lighting of course wasn't messed with today. That will be changing at some point next week.
The environment is shaping up to be great for the start of late flower. I got the temp down to 65° last night and the humidity down to 48°.
Today I have had it around 76° with the humidity around 49%.
Grow System Environment:
Temp: 74.1°
RH: 49.3%
VPD: 1.43 kPa
Likes
5
Share

@Marijuanaut
Follow
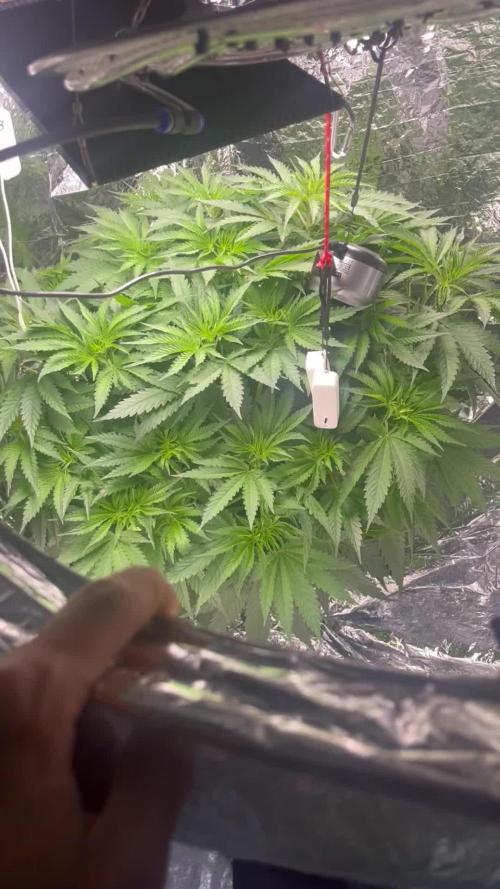
Tottaly forgot to take some pics from the dutch passion strains this week... all I got is a group photo and short video!
Could have been a bit more hands on with the training but seems a like a nice and even canopy it´s emerging 😍
Defoliated a bit and trimmed the lower branches.