


Likes
Comments
Share


@GreenHouseLab
Follow
Little clean up in the tent things got out of control. By removing lowers and inners that would possibly not produce much will definitely let those tops stack up nicely. These buds will without any doubts be rock solid, I can tell by how sturdy those stems already are. I transplanted this week was a nightmare root mass caught everywhere in the 3 Gal, now into 5’s.
👍✌️

Likes
5
Share


Likes
8
Share


@HappyGrowMore
Follow
Humidity this week has still been high, but luckily the dehumidifier was set up last night so hopefully within the next couple days it will be regulated.
I LST’d more this week to just try and contain the buds from getting burnt. Clearly I underestimated the size of the tent and should have went bigger. Also defoliated a few of the base leaves and buds as per member comment. They seemed to have taken the stress just fine.

Likes
4
Share


@QixxGrows
Follow
Day36, 37, 38: Seems to be growing a set of leaves per day now. Super growth! Stretching to the top.
Day39: I had a hiccup with the camera. For some reason it stopped responding at 04:30 in the morning. I only realized it much later. I still don't really know why, but reseating the data ribbon fixed the issue.
Day40: After fixing the camera, I decided to take this view again. The Lady is starting to show some nice growth and this view will show it best. If you look carefully, you'll see that her branches are not green, but rather reddish. Definitely related to genetics :) Everything else is within limits. Plus, the leaves look super healthy.
Day41: Here you can see the stem colour better.

Likes
8
Share


@Hiroots420
Follow
28/04/2021 (Day 43)
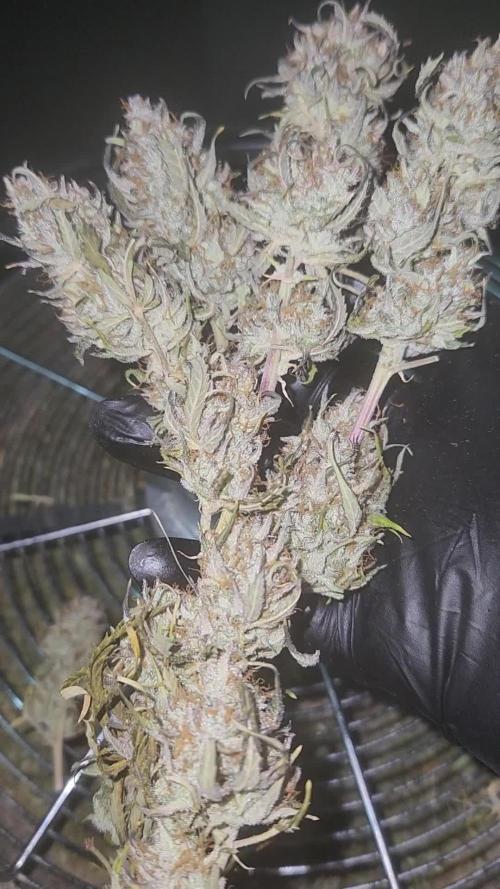
Se realizo un nuevo cambio de solución, las plantas ya están tirando pelos y los leds están al 80%, se observo un gran crecimiento radicular y las paredes del tallo son increíblemente gruesas y duras.
03/05/2021 (Day 48)
Las plantas vienen con un crecimiento optimo pero la flora se está tardando demasiado en hacerse presente, se estima que es debido al estrés que tuvo en semana 3 de vege produjo un retraso de algunos días.
Esta semana se incorpora Safe Roots al sistema con la finalidad de que deje la solución lo mas limpia posible.
También se realizaron bastantes defoliaciones ya que no existía penetracion de luz teniendo en cuenta el tamaño que están ocupando (85% del espacio de cultivo a 30/35 cm de altura)
05/05/2021 (Day 50)
Se realizo un nuevo cambio de solución, esta vez utilizando safe roots para limpiar todo el sistema hidroponico.
600w de Citizen a 30cm en 160x80 y la plantas parecieran que si les doy mas luz van a usarla, es increíble la tolerancia a la alta intensidad de ppfd que tienen, gracias a esto logramos subsanar esa semana de raíces marrones.
La temperatura bajo drásticamente y nos dejó el indoor en unos 22 grados, donde todo marcha perfecto.



Likes
14
Share


@wolvex
Follow
Green sensation made its effect and now we can see some resin dropped in the flowers. They have also gained some weight and size. The plants keeps looking good and healthy at the moment.

Likes
20
Share


@420DeepGrow
Follow
Así finaliza una increíble cosecha de Papaya Zoap de Sweet Seeds !
Desde el inicio, esta planta demostró ser robusta 💪 y fácil de cuidar, con un crecimiento rápido y resistente. Durante la floración, los aromas tropicales empezaron a destacar, anticipando lo que Sería una experiencia única. Los cogollos están densos, cubiertos de resina y con un aroma increíblemente dulce, con toques cítricos y exóticos. En cuanto al rendimiento, ha sido bastante satisfactoria, y la calidad de la hierba es de primera

Processing
Likes
68
Share


@Tazard
Follow
Beginning of the 10th week of flower. Shouldn’t be too much longer now. I will add some bud and trich pictures this week.

Likes
9
Share


@DeepRootsGrowTrees
Follow
KICKASS AUTO by KANNABIA
Week #9 May 28th- June 4th
Week #3 Flower
This week she is doing great no issues being outside she has a nice short center balance that has helped her be a strong 💪 young lady outside!! Trichomes coverage looking good and buds looking 👍!! Stay Growing!!

Likes
9
Share


@newenglandgrowers
Follow
Should probably start my 2 week flush at the end of this week but I want to harvest this plant and my other one(which is 2.5 weeks behind) at the same time so I'm probably going to try and push the feeding another 2 weeks until I start the final flush, trying to have this stay in flower for 10 weeks, the breeder says flowering period takes 8-10 weeks so I think I'll still be just fine. This week went well, the plants are slowly starting to fade and colors are starting to come out. Gonna follow through with my original plan and continue feeding lightly for the next week or two until I start the final flush. I also raised the lights a bit this week mainly to help and give more light to my second plant that stretched so much its main cola is hitting the grow light, and also to help prevent any foxtailing from occurring.

Likes
18
Share


@maneaura
Follow
I came back from vacay. Im harvesting the amensia haze next week!! i’m really excited! i wonder if the painkiller will make it tho. spider mites and thrips somehow got to the plant even though it was inside. and all the pests collectively decided to leave the amnesia alone? Also got new seeds! only paid for 3 lol
Likes
15
Share


@Venabr96
Follow
Estamos aqui começando mais uma semana, algumas folhas apareceram manchadinhas e com uns buraquinhos.
Pode ter sido por causa da queda da lampada ensima delas...
Folhas muitos grandes e desenvolvimento muito bom
A piquena esta crescendo bem,muito forte e linda com belas folhas. Ira crescer para cima reta sem nenhuma tecnica.


Likes
4
Share


@KannaGrowing
Follow
Estamos en la primera semana de vegetativo, ya que a la anterior se la conoce como semana de germinación.
Las plantas empiezan a mostrar las primeras hojas reales por encima de los cotiledones.
Cuidado con que la humedad relativa del aire, no sea demasiado baja, lo ideal sería alrededor de un 65%.
En esta etapa solo regamos suavemente con agua cada 5 días aprox.
Processing
Likes
17
Share


@Mr_Bacon
Follow
I'm making a little contest in my grow room
6 ladies + one which will go outside
2 types of nutrients
3 different strains for each nutrient type
2x gorilla glue by fast buds
2x BlackBerry by fast buds
2x white widow auto by RQS +1 outsider (in a month or smth.
It's my first grow ever, waiting for your comments and tips I Want to grow 1 type of each strain with use of green planet nutrients and one with nutrients from RQS just to see if the price of product really corresponds to its quality and is it really worth to pay more and lose so much time for preparing the right solution.
there is 3 days of difference between 3 first ladies (2x GG + BlackBerry) and both White widow's and another 1 day to second BlackBerry and another one day for the WW which will go outside. ;) It means the first ladies already had full 5 days of light before the last girl came to tent :)
Likes
12
Share


@CANNASIM
Follow
Hello, long time, no grow. I’m trilled to start on a new grow project, i’m away from growing a long time, but my love for ot was always present, i miss it a lot so i have got a few strains from Fastbuds to test and come back with a minimal setup.
I have got the Festberry, Bluedream, and the 1:20 cbd, they have sent in the Banana Purple punch
Ok, so what is a minimal setup? For this grow i have choose to grow in my balcony, it is fairly big and i gave good sunlight, we are in summer now, so temps are high, swinging a lot. It is raining often as well so I did not need to water much.
For the nutrients i will go organic i think, in my substrate i have about 30% warm castings, so i’m good for till mid grow length +-, i might add a bit of nutrients in 30 days mark.
The objective of this experiment is to use as little as possible, 360 degrees.
For the germination process i have used a mixed process method, that i have learned from Fastbuds and i have loved it, 24h in a glass of filtered water, paper towel for about 24h -48h and then the Floraflex gremination pellets, i have tested on the jiffy and worked fine as well. Cool about this method, if you are more on the anxious side or like to control more the process this is the way, you can follow the hole process and see the development in parts. I will add images later on, for this breakdown.
Well that is it, lets hope for a cool, safe journey for this girls.
Likes
9
Share


@Rizik86
Follow
Day 22 - Plant is 6 inches tall. Tons of roots sticking down into the water. Checked PPM 215. PAR/PPFD ranges from 200 to 270 at the height of the plant.
Day 25 - Plant is 9 inches tall and 12 inches wide. Water dropped a lot. PPM was 100. Added 2 gallons of RO. Added 10 mL of CalMag. Added 10 mL of the 3 base nutes Micro Grow and Bloom. Added 5 mL of each of the additives. PPM was 515.
Day 26 - Plant is 11 inches tall. Fast growth! Short and bushy. Roots are thick as spaghetti noodles and formed a thick rootball. Nearly a dozen budsites. Stem is thicker then a pencil.
Day 27 - PPM is 415 in am. Afternoon PPM is 370. Plant is 12 inches tall. PAR/PPFD is 400 to 450 near the top of the plant. DLI is 27 based on 20 hours on and 4 hours off. Late night checked PPM 375. Added 10 mL of Micro Grow and Bloom nutes. PPM is 810.
Day 28 - PPM is 775. The plant is getting huge. The stock is about as thick as a Bic lighter. Plant is 13 inches tall.
Likes
33
Share

@Purrple_Haze
Follow
Moon Rock Finale – Harvest Time! 🍃🔥
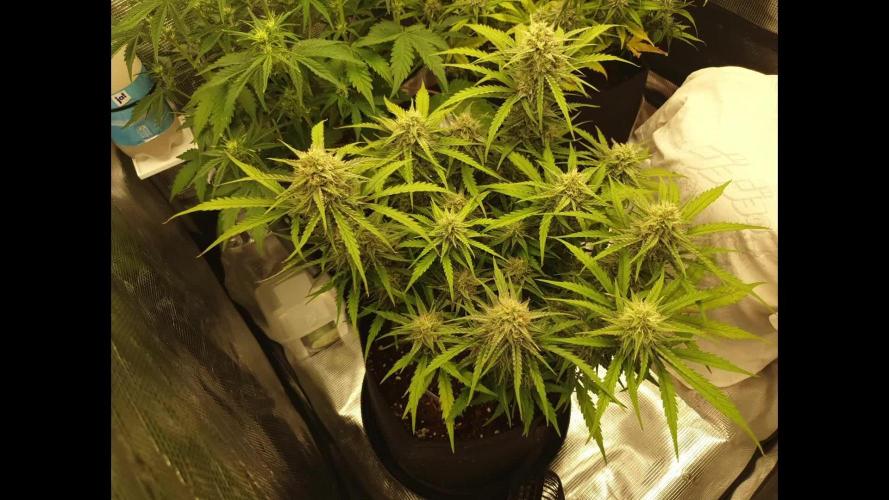
And so, the journey with my Auto Moon Rock by Divine Seeds comes to a close – and what a ride it has been! This week marked the final days before harvest, and she truly impressed me in every way.
The trichomes have matured beautifully, showing around 20–25% amber, while the rest remain milky and glistening. Exactly the balance I was hoping for! As you can see in the pictures, the buds developed a perfect structure – dense, frosty, and with that ideal balance of size and aesthetics that makes trimming (and later smoking) such a pleasure. 🌿💎
Unfortunately, I wasn’t able to take a wet weight, but the structure alone tells me this will be a very satisfying yield. The aroma is unbelievable – rich, layered, and unique. It’s hard to put into words, but Moon Rock has a terpene profile that I would happily grow again just for the smell alone.
This strain has exceeded my expectations and solidified my trust in Divine Seeds. They consistently deliver genetics that are not only vigorous and easy to handle, but also full of character and quality in the final product. 🌟
🌱 Feeding & Care (Final Week)
🔸 BioBizz Grow – 2 ml/L
🔸 BioBizz Bloom – 3 ml/L
🔸 BioBizz TopMax – 1 ml/L
🔸 CalMag – 0.5 ml/L
🔸 Dechlorinated tap water
🔸 EC: 2000
🔸 pH: 6.1
🔸 VPD: 1.0–1.4
Now it’s time for drying and curing – where the real magic begins. A full harvest report will follow once everything is properly dried and jarred. For now, I can only say I’m absolutely thrilled with how this Moon Rock turned out. 🌙✨🌸

Likes
51
Share


@Corwinism
Follow
HARVEST WEEK
-----------------------------------------------------------------------------------------------------------------------
06/20/2021 - Harvested Jelly Bananen
-----------------------------------------------------------------------------------------------------------------------
06/21/2021 - Last watering of final flush.
-----------------------------------------------------------------------------------------------------------------------
06/25/2021 - Harvested Glookies, American Pie #1, and American Pie #2
-----------------------------------------------------------------------------------------------------------------------
Harvest results coming soon!


Likes
80
Share


@Ganjagrandaddy
Follow
DAY 49 F: Hi all. Hope we are all sane and smiling still in the topsy turvy world we inhabit....
These girls have been showing off all week and getting excited for their photo/video stardom to arrive and here we are.....
The surrogates that got ousted to the other space are adding amazing , the gorllia cookie are a very productive pair of girls and really starting to look potent and close to finishing. They smell so candy sweet up close and are in perfect health besides the remnants of calmag issues and a few natural fading leaves in one or two places. Mutant #2 Northern Lights has also put a nice bit of bud weight on but nowhere near as much as her sister under the pocket rocket xs1500.
#1 Northern lights lady has gone from an innocent , pure white girl and heading into a colourful Jezebel to pull the pollen carriers in. She has a few orange hairs appearing now but is still in a full flush of her original set too. With about 2 weeks to go ans swelling daily , she could be a show stopper of an example of Fast buds genetics. Each long chunky main is beginning to smell so sweet when touched too. A very worthy strain to grow so far ...
My Grandaddys Mimosa is really kicking into high gear with her second pistil flush now. This is why I use the Shogun Dragon force and the mimosa is a perfect example of the benefit of it. She is possibly going to double her bud girth with the extra boost it can offer. She has some very tight feeling buds when pressed and even with the higher leaf ratio , should produce some good yield. There is a definite purpling to her inner bud which is not from the Male lemon mimosa and is a good clue to which female the seed came from during the raping !!! My best inspector Cluesoe skills will get to work to find her now. She must be a fruity strain from the secondary terps i am getting too. Her height is only about 1ft but her general potential wont be held back by this fact I dont think.
This next week should see the Mimosa ripen and swollen to her finish and the Northern lights still in mid swell hopefully. Fingers crossed it keeps on the positive vibe.
Be well growmies.